Adobe Camera 5.7/Lightroom 2.7 released

Adobe today announced the Lightroom 2.7, Photoshop Camera Raw 5.7 and DNG Converter 5.7 Release Candidates, available for immediate download on Adobe Labs. The updates add raw file support for: Canon EOS 550D (Digital Rebel T2i/ EOS Kiss X4 Digital), Kodak Z981, Leaf Aptus-II 8, Leaf Aptus-II 10R, Mamiya DM40, Olympus E-PL1, Panasonic G2, Panasonic G10, Sony A450.
Adobe encourages photographers to try out the newly added raw file support in this update and provide the product team with feedback on the Adobe User to User forum (http://forums.adobe.com).
In addition, photographers can also participate in the Lightroom 3 beta program and try out the new features in Lightroom 3 beta 2 for free. To learn more and download Lightroom 3 beta 2 visit: http://labs.adobe.com/technologies/lightroom3/.

High ISO Noise fix for Image Data Converter

SONY has released a new alogrithm for raw conversion (deBayer) which offers improve high ISO noise. IDC (Image Data Converter) is the program issued with all Sony DSLRs. Up to now, no maker has ever revised their ‘house’ converter to offer high ISO improvement as a specific feature. The new version can be downloaded free by existing users (download link is provided at end of story). We have direct download links now for Windows and Mac OSX versions.
Continue reading »

GGS Toughened Glass LCD Protectors for Alpha

Back in that first golden summer – well, it was late autumn going on winter, just the time to acquire a new DSLR when the days were short and the light awful – the Konica Minolta Dynax 7D arrived with a plastic screen protector in the box. A week later the first one had, after several recaptures, successfully jumped ship leaving the decks bare.
Two more 7D screen protectors later I finally sold the 7D, but only after it had spent three years in the studio where the worst that could happen was a soft landing on the carpet. My Alpha 100 never got a protector but never seemed to get scratches on the LCD. Then the Alpha 700 arrived, and with its lovely hard coated screen I got the same sense of durability you get from glass.
Wrong again! After six months, my Alpha 700 screen was covered in a fine patina of scratches with one slightly visible one. The coating was suffering and I bought a clip-on Sony hard plastic protector. Unlike the 7D model, this one stayed put, but over the next two years of use became a rather scruffy impediment to screen reviewing.
From then on, I decided to put screen protectors on all our Alphas. The Alpha 200 got a thin layer design for mobile phones. It did the job perfectly. The Alpha 350 got a much thicker plastic which felt almost rigid when it was applied, and left we wondering whether it would come off cleanly. The Alpha 900 got a slightly more flexible feeling sheet with a similar not too glossy, slightly uneven surface.
The Alpha 380 was given a Fujifilm LCD protector from the local shop (packs of three, with a cleaning cloth, suitable for all screens around 2.7 to 3 inches). It was still on it in perfect condition when sold. The same pack of foils provided instant cover for the Alpha 550 although its screen and surround really demanded a slightly larger protector.
Then, in February, two things happened. I order some kit from Poland and the on-line store (Foto-Tip) also had GGS toughened optical glass screen protectors. I’ve seen these labelled as Giottos Schott glass protectors and various other makes, generally at around £20 each in the UK, and had my doubts about the idea of fitting adhesive glass to my camera. Also, Alpha fit types were not all that visible in the UK. But Foto-Tip had Alpha fit glass protectors for the A700, A900, A350 and even the A550 – all the Alphas we are currently using.

They were well under £10 each including postage – cheaper than plastic clip-on protectors, a bit more than most peel off films (which also tend to come in packs of two to three, though this is rarely made clear when advertised). So I ordered the entire set. You can see them above.
2018 update: You can find new GGS Larmor screen protectors on Amazon UK or WEX Photo Visual as well on eBay. B&H have plenty of other brands and types but not this.
Before trying anything, I examined the screens and checked their reputation on-line. It seems that they consist of much the same laminated glass and polymer film sandwich which forms the hardened glass for professional Canon LCDs, and that the adhesive is an elastic optically clear gel made by 3M and very similar to that now being used for the intermediate layers in LCD assembly.
In other words, adding this would add a layer – but to the same standards as normal glass-faced LCD, without the superior coating found in a camera like the Canon EOS 7D.
Which camera to treat first came about when the second thing happened – the plastic protector foil on the Alpha 550 must have come loose on a corner, stuck to my jacket and pulled off. I returned from shooting outdoors to find the screen no longer protected, and the camera had been swinging around with zips, straps, other cameras and all kinds of scratch hazards. It was still perfect, fortunately.
Fitting the GGS to the Alpha 550
Using a microfibre cloth, I cleaned the 550 screen very carefully and followed the simple instructions. I left the top plastic protector in place, but they recommend you remove this before fitting as it makes alignment easier. Every GGS protector has a neat black printed edge frame with the camera name. This helps with handling, as if you do get a tiny edge of finger touching the adhesive gel, any resulting mark is hidden behind the black surround.

The Alpha 550 screen surface is slightly recessed. This helped greatly with the exact alignment of the very large cover glass, which goes beyond the image area of the screen and covers all the original plastic face of the panel. There is a shaped edge to match the indent in the rectangle, and a hole in the black frame for the activity light to show.

Alignment was very easy indeed with the rigid screen – far more so than with flexible foils. The adhesion was instant, and perfect, without a single bubble. Unlike a foil, this optically plane sheet doesn’t trap air and even if you did get a dust speck in the sandwich, the gel glue surrounds it without an air pocket.
The thickness of the glass leaves the screen now slightly raised, not slighly sunk, but the edge is beautifully ground and polished so that there is no question of a sharp encounter with your nose or hands. The old foil protector had never reallty been totally clear and was always visible; the GGS protector, though lacking a multilayer coating, improves visibility in daylight compared to a plastic protector.

The perfect flatness of the glass and perfect fit to the camera make a very rewarding finished job. Does it void the warranty? Will it ever be removable? Will the 3M glue layer go yellow with age, or harden and lose contact? Will the screen crack if hit – or will the extra layer stiffen the overall assembly and reduce the risk of damage?
It’s such a permanent-looking and feeling job that I may never find out. GGS say the screen may need to be gently heated, and eased off using a scalpel blade.
2018 update: the latest GGS, Afunta, Vello and similar glass protectors use a silicon adhesive which is even better for fixing, but allows removal with just a fingernail to lift a screen corner.
The other Alphas
The Alpha 700 had a patinated LCD – six months of unprotected use. Careful cleaning minimised this. The GGS glass screen fits neatly, with its whole thickness adding to the screen which starts flush with the camera. The edge, again, does not feel likely to cut or injure but it becomes the ‘hardest’ edge on the camera. Surprisingly, the adhesive gel seems to remove any the visible blotchiness of the hard coating along with the fine scratches. The single most visible small mark on the screen remains just visible.
While the added glass layer can not improve reflections or viewing conditions, it beats the clip-on plastic shield through which everything was diffused before. The Sony name at the bottom of the screen is now hidden, but can be glimpsed refracted through the clear edge of the protector which sits proud of the surface.
Much the same applies to the Alpha 900, but the screen is slightly recessed (more like the A550) to start with and is changed to having a slightly proud edge once the glass is fitted. It is a bit neater than the A700. It’s recessed just enough to hide the Sony name at the bottom of the screen fully, it can’t be spotted through the side of the glass thickness.
Finally, the Alpha 350 has a thick plastic LCD protector as its outer layer and this stands well proud of the surround. My thought, which I still don’t dismiss entirely, is that this sheet looks as if it could be removed and replaced with the GGS glass. But I was not going to attack my Alpha 350 with a scalpel to find out. If you had a 350 with a cracked cover sheet, it could be worth trying.
With the GGS glass added, the 350 has a pretty ‘high build’ screen – the glass increases the thickness of it by about 50%. It is already pushed into your face compared to the A550, or any other Alpha, with the viewfinder eyepiece too far forward. The extra 0.3mm or whatever it is (I have not measured it) is just a little more ergonomic negativeness. But the edge still feels safe not sharp, the screen assembly appears to be given added rigidity, and I’m happy that this is a good permanent protection for an exposed and vulnerable LCD cover surface.
Update: two months after this post was written the NEX mirrorless range was launched, and I visited Croatia to be one of the first journalists to use the system – reported here. We transcribed the launch presentation too. But after less than a year, the rear LCD screens of NEX models were showing signs of serious deterioration. I decided to risk my camera after studying how the screen was made, and removed the top layer. The GGS (actually a JYY branded version) screen protector turned out to be able to replace the worn original plastic top layer easily and I wrote about this in April 2011, sparking off hundreds of YouTubers and bloggers to follow our lead.
And…
At the same time, I was fitting my Nikon D5000 with a Delkin Silicon Skin. I just fancied giving my ‘car camera’ a bit of extra protection, and maybe some damping for better video sound. The silicon skin comes with a couple of screen protector foils.
Despite the LCD of this camera being kept face-to-camera (concealed) all the time, and rarely used except for video shooting, my careful cleaning and dusting did not prevent several dust spots and bubbles with the first protector foil. So I removed it, cleaned again, and fitted the second. Still one bubble – and it won’t go away!
That is one very big benefit of these GGS glass protectors. They don’t get bubbles, they are easily fitted with perfect straight alignment, and after a day’s use and handling I have found a quick polish restores a perfect surface. Hopefully, they will resist scratching for years not months, and never need to be prised off their host bodies.
2018 update: you can read my post about the 5th generation GGS Larmor product here.
– David Kilpatrick

The tortoise and the hares?

SONY has shown itself to be lagging behind the competition as we reach the third bend on the second lap of the development of HD-video capable DSLRs. At PMA 2010, nothing ‘real’ was shown and the closest they came to further launches in the Alpha range was an advanced pre-production prototype of a 24mm f/2 Carl Zeiss T* ZA SSM.
But Sony may prove yet to be the tortoise – or perhaps to be Brer Rabbit. They could make the finishing line, the goal of a truly useful video DSLR, before Nikon/Canon/Pentax/OlySamPanny get there.
Continue reading »

Alpha 550: sky noise, exposure and Auto ISO

My review of the Alpha 550 has caused controversy because of the blue sky noise. I might as well say that over the last week, I’ve used the 550 in a wide range of conditions – some very bad conditions included – and its failure to match ISO 100 finesse would not worry me at all. The performance at higher ISO settings is so much improved it’s worth putting up with the minimum of ISO 200, and a touch more noise than the best ISO 100 results from the Sony CCD sensors.
Even so, something was clearly happening during the period of sunnier weather used for my earlier A550 tests. I used Auto ISO initially, because I had not realised how readily the camera will select settings right up to 1600. Auto ISO has thrown up some surprises. Here’s something to consider:
autoISO0-200variations
Please note that although ‘process’ symbols are shown with these Adobe Bridge/ACR images, the defaults were restored and then each picture was set back to defaults. They are all shown relative to each other in density, the image preview built by ACR. There is no question of DRO or any other tonal setting interfering with the apparent exposure – DRO does not affect the .ARW file, ACR discards any DRO generated embedded preview in my setup prefs, and DRO was not being used anyway.
It has already been noted by other reviewers that the A550 has considerably more headroom without clipping, even compared to the A350 which was already a top-ranking camera for dynamic range. This is what I meant when I compared its default images to Canon with Highlight Tone Preservation switched on, or KM/Sony older models using the Hi200 setting. This can mean that the A550 is really ISO 100 at its lowest on-sensor gain setting, but the exposure system is programmed to underexpose by a stop and the post-processing (BIONZ) is set up to boost the gain.
Why would Sony do this? Perhaps they read the many posts referring to the Alpha 900 and 700 ISO settings. The on-sensor gain controls the main ISO steps, but a rather cleaner post-process gain adds the 1/3rd step intervals. Experienced Alpha 900 users set ISO 320 manually because the sensor is at its optimum at roughly ISO 160 (DxO tests bear this out). The standard ISO 200 setting can produce more noise than ISO 320 because two different digital stages are used to produce the gain.
In search of superior high ISOs, they may have realised that the early gain stage (on the chip assembly) is inferior to the later BIONZ processor, and you can indeed get better high ISO by underexposing a lower ISO setting, then processing it with clipped blacks. That’s a Nikon technique, which has served them well. It’s also a technique used by experienced DSLR owners.
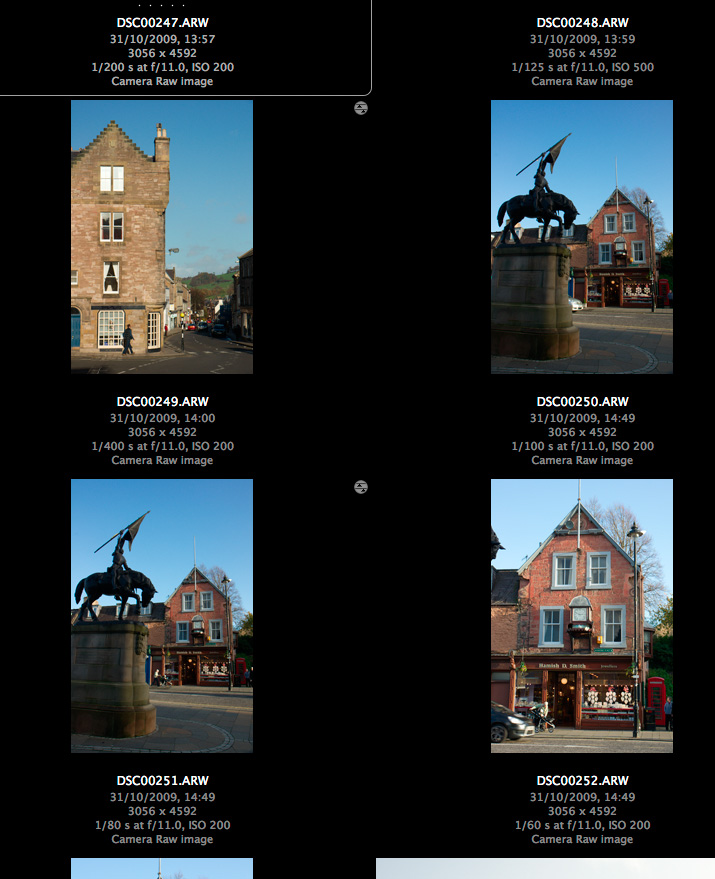
Now consider the four shots above. They are all taken at ‘ISO 200’ but the camera was set to auto ISO. Other shots in the same set show ISO 250, 500 etc confirming the auto ISO was in operation. They are taken in the afternoon in Scotland, so it is fairly near to the end of the day for sunshine by 14:49hrs, around an hour away. But the two locations at 50 minutes apart, 14:00hrs and 14:49hrs, should not have the extreme variation in exposure shown here.
Just what is going on for an exposure of 1/400th at f/11 to look correct at ISO 200, with the dark sandstone buildings of Jedburgh at the end of October? 1/400th at f/11 is the ISO 200 exposure for full sunshine in midsummer (aka f/16 light). You hardly ever find f/16 light in Britain unless you are on the beach, surrounded by pale concrete, in a field of golden corn or out on a lake.
50 minutes later, exposures range from 1/60th at f/11 to 1/100th at f/11 – that is, more or less, from two to three stops more. In fact these exposures are in line with what I would expect, it’s the 1/400th at f/11 which is the odd one out. I have no evidence to suggest that my CZ 16-80mm has an aperture which fails to stop down consistently.
Now look at some sky samples:
Here is an in-camera JPEG version which shows less noise – the in-camera process is equal to using much stronger NR in raw conversion than I would normally choose for ISO 200:
incameraJPEG-iso200clip
Now for the same processed from raw – notice that despite the noise, it is slightly more detailed or sharper:
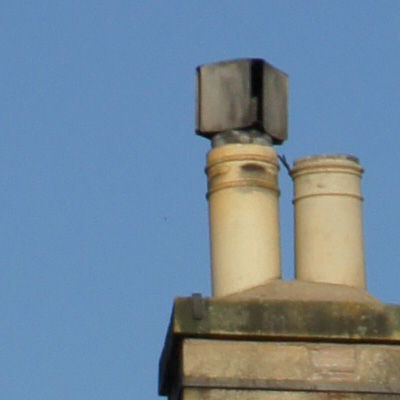
skyiso200-400th-f11-acr5p6-default
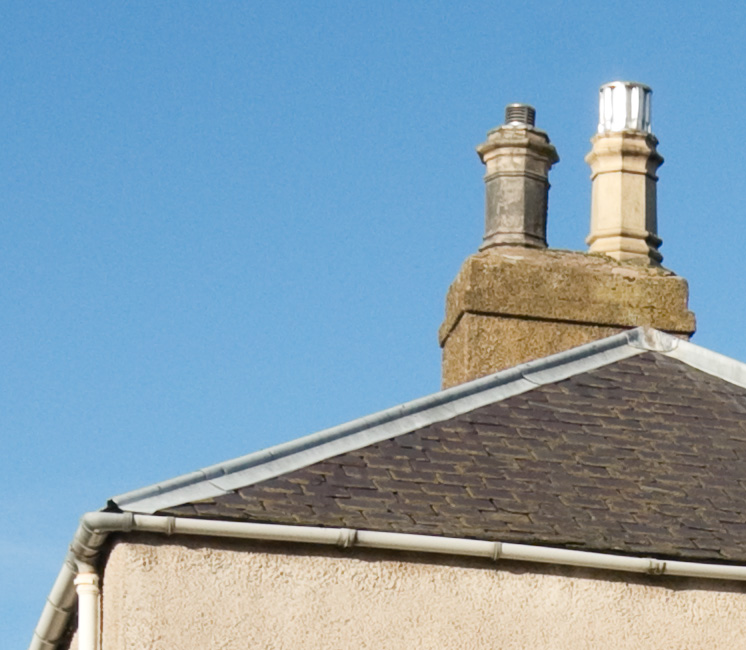
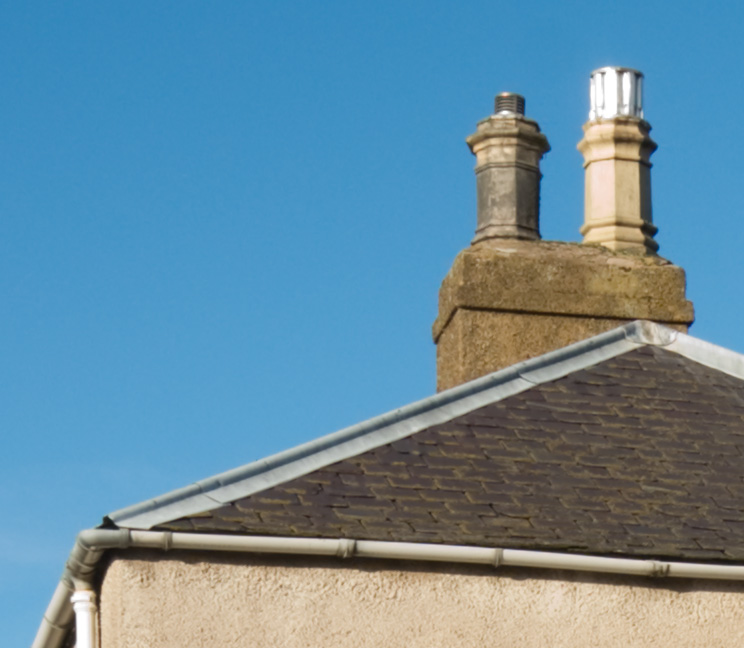
This is a reprocessed second version of the original noisy sky instance. Here, I have used Adobe Camera Raw 5.6r1 defaults, which include some basic sharpening and also 25 on the chroma NR scale. No exposure adjustment is made at all. This view, by the way, looks more or less due north and it is not a case of a brighter sky underexposed; also, the stone and the chimney pots look normally exposed.
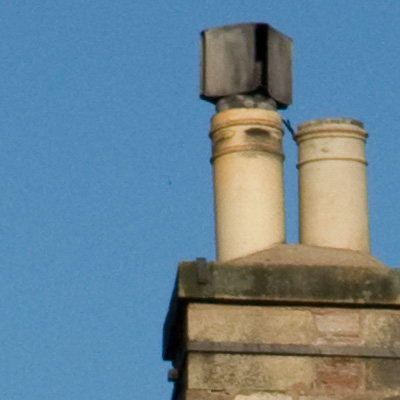
skyiso200-100th-f11-acr5p6-default
This is the 1/100th at f/11 shot, processed exactly the same way. It’s interesting in that I expected to see much lower noise, but in fact it’s much the same. The sky density is similar as well. The view is slightly more towards the east. While my Alpha 380, 200, 100 and even 700 shots are capable of showing blue sky noise at ISO 100 and as much as this as 200 it’s not as obtrusive.
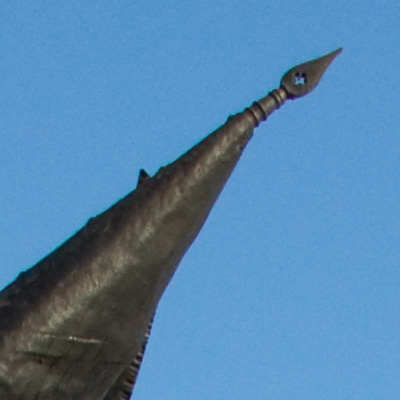
skyiso200-60th-f11-acr5p6-minus1evcorr
Finally, this is the 1/60th exposure – perhaps more what would be expected at ISO 100 in this light with f/11. Here, I have set -1 EV exposure reduction in Adobe Camera Raw to get much the same final sky tone density. The noise is lower.
Checking other images I’ve taken since, I am now suspicious about the Auto ISO function in the Alpha 550, and whether it reports the gain applied to each shot accurately. It’s hard to reconcile the same ISO 200 setting shown in EXIF with the range of exposures encountered, and the actual exposure of the raw file. Yet ISO 250 was also selected for this shot taken a few minutes before the chimney shot:

This is also included in the main report (click image to view full size on pBase). If I darken the sky as much as the other examples, I get noise similar to the 1/60th ISO 200 clip, or better.
Since making these tests, I’ve started using the Alpha 550 only on fixed ISO settings, with some misgivings as intermediate gain like ISO 250 or 320 might possibly be yielding better results. I just feel something is happening in the BIONZ stage, perhaps involving analysis of the Auto ISO images and compensation for deviations from the reported EXIF Auto ISO setting. This is just a hunch. Fixed settings seem to be equal to the worst case from Auto ISO. Here’s a textbook example, 1/125th at f/16 for a blue sky on November 3rd, facing due north, at 14:19hrs, ISO 200 fixed setting, ACR 5.6 defaults as above:
iso200fixed-125th-f15-acr5p6default
The answer seems to be to overexpose your manual ISO 200 shots by not simply one stop, but as much as two stops when shooting raw. At least if Adobe Camera Raw is used, recovery of normal tones (not burned out highlights) will fully restore the exposure from 1 or 2 stops over depending on the subject.
Here is an overexposed image, taken at 1/80th at f/10, ISO 200, in mid-day sunshine:
1p7stopsover
Below is what the sky looks like in a normally exposed image (1/250th at f/10), processed using Adobe Camera Raw defaults (including sharpening at 25/1/25/0 and NR at 0/25), looks like:
iso200-normalexp-250th-f10-acr5p6defaults
And here, finally, is what an adjusted ACR process from the overexposed image looks like with sharpening turned off, NR set to 25/50, exposure and brightness determined by the simple process of using Auto (which can be set as a default in ACR if you want to consistently make generous – over – exposures ‘to the right’):
plus1p7exposure-iso200-80th-f10-acr5p6adjust-nosharp-NR2550
This is much more how I expect to see a sky looking from the base ISO of a 2009 DSLR release, viewed at 100 per cent. From this stage, different types of sharpening can be applied to suit resized versions for different purposes.
Results with other raw converters, as more become available for the Alpha 550, may be finer in noise structure than ACR or may offer less scope for overexposing – ACR is well known for its ability to recover highlights. I do not intend to go much further into this with tests of converters, but I hope I have shown how the ‘true ISO’ of the A550 is difficult to pin down especially in Auto ISO mode, and how it is possible to benefit from the great high ISO performance of the camera (just use it!) and at the same time secure good low ISO results for travel and landscape shots where a clean blue sky is important.
It’s important to note that in-camera JPEGs will not necessarily show similar noise levels. If they do it’s not so easy to fix without using NR software. I prefer to shoot raw for many reasons.
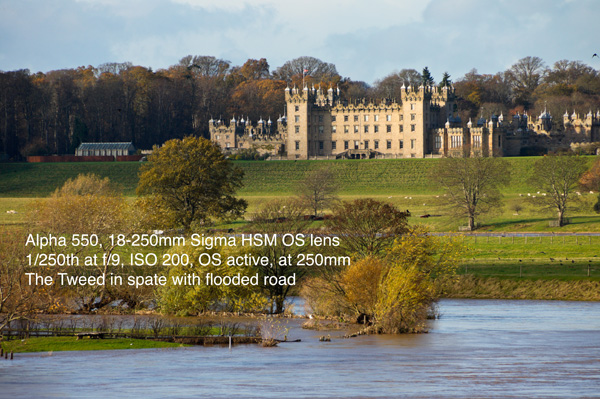
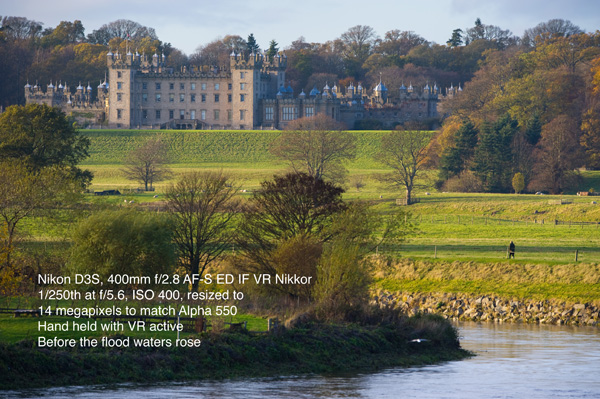
So, why not be very happy with the Alpha 550 as a choice? Here are two pictures. You can view the full size Alpha image, and the Nikon D3S image resized to match 14 megapixels, by clicking on the smaller size here. Of course the Nikon image is better, though 1/250th at f/5.6 and ISO 400 is more of a step away from 1/250th at f/9 and ISO 200, and I’m not sure the light was SO different on the two occasions:
Alpha 550-250Sigma-iso200-web
Nikon D3S-400mmf2p8Nikkor-iso400-web
– DK

Sony Alpha 550 Review: highs and lows

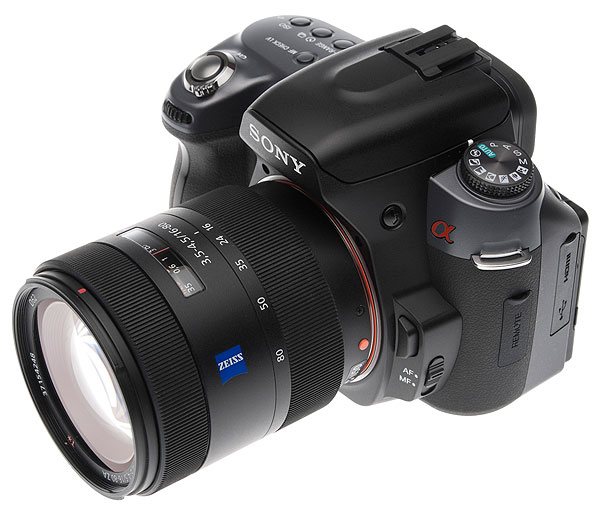
My review of the Sony Alpha 550 was supposed to appear at the end of November, allowing one week abroad in good weather with plenty of subject-matter, in Tenerife. Sadly that trip had to be cancelled, and the Nikon D3S arrived for review on the day we were meant to have travelled. So, with far too much work to do on the D3S, I’m “going to press” here with my initial thoughts based on a fairly short time using the Alpha 550.
There are 11 pages in this review, please use the Next Page navigation at the end of each page to continue reading. A sponsor link appears before the end of each page – “Get camera lenses at Shopping.com’s affordable deals.” Our thanks to Shopping.com for spotting and sponsoring this review!
This review has been updated August 2010 – see the second to last page for new Adobe Camera Raw Process 2010 results, a massive improvement with Alpha 550 files.
sonyalpha550-2
Continue reading »

New Photoworld edition on-line

The Autumn 2009 (No 4 2009) issue of Photoworld mails out to subscribers on Monday November 2nd.
You can also read the edition on-line at YUDU – we have now changed the price for each individual edition to £2.50 (from £3.00) so that if you buy single edition access, a year costs exactly the same as a normal yearly digital subscription of £10. All YUDU subscriptions and sales support the Photoclubalpha website and forum. The price including the printed edition is £25 per year (worldwide).

Click to launch the full edition in a new window.
Each issue now has six sample pages viewable without purchase.

Sony invent 3D movie HDTV camera

Sony Corporation today announced the development of a single lens 3D camera technology capable of recording natural and smooth 3D images of even fast-moving subject matter such as sports, at 240fps (frames per second).  This technology combines a newly developed optical system for single lens 3D camera which captures the left and right images simultaneously, together with existing high frame rate (HFR) recording technology to realize 240fps 3D filming.  Sony will demonstrate a prototype model incorporating this technology at “CEATEC JAPAN 2009”, to be held at Makuhari Messe convention center in Chiba city, Japan, from October 6th.
High Frame Rate Single Lens 3D Camera Technology(prototype)
Continue reading »

1 14 15 16 17 18 26