
BEFORE we publish a fuller assessment of the Sony Alpha 700, here is a taster of just one improved function, the Dynamic Range Optimisation (DRO) system built into the camera. For social, wedding, sports, music, theatre, news and event photographers DRO Advanced Manual settings are a real magic bullet zapping the bugbears of excess contrast, poor lighting, and inadequate flash penetration.
DRO Advanced is based around Apical’s IRIDIX image processing engine, a chip which lives alongside the BIONZ processor of the Sony Alpha 700. Apical is a London-based company which develops embedded enhancement software for digital cameras. The difference between a simple gamma curve application (DRO Basic) and intelligent analysis of the entire image after the raw data is buffered, and before the JPEG is created, is substantial. DRO Advanced looks at plains, gulches, peaks and plateaux of image brightness. If the plain is a desert of bare sand in terms of frequency and amplitude of detail, it leaves well alone. If the plain is populated with plenty of detail, which the eye will want to see, DRO Advanced will both enhance the contrast ot this detail and normalise the overall brightness.
However, this is not the whole story. To be able to work on the raw image data, DRO must ensure the picture is not overexposed. It will therefore automatically give shorter exposure times or smaller apertures – it will deliberately underexpose the raw image, then extract analysed and optimised tonal values from this to create your in-camera JPEG. So where you might normally shoot at ISO 800, you can set ISO 400 with DRO Advanced. Why? Because you are going to get ISO 800 exposure settings.
What about using over-ride? Concerts and similar shots often need -1 setting. Surely DRO Advanced will be doing this already? Yes but no. You will see a result on the Alpha’s wonderful if slightly piss-coloured 920,000 pixel review screen which is not your raw image, but the DRO processed JPEG. Even the embedded HDTV JPEG, Thumbnail JPEG and Preview JPEG – all three of which are in there merrily bloating the size of your raw .ARW file – show the DRO processed data, not the unprocessed exposure.
So, if you shoot a scene which would need -1, but give it normal exposure, DRO Advanced may well make it look too weak or bright on screen. So you judge this, and you set -1 as normal. The screen looks just right. Here is a real world example. I shot this picture using DRO Advanced +4 (there are five levels) to get better detail in the shady valley of the Tyne as it flows in front of Newcastle’s old castle and under the swing bridge:
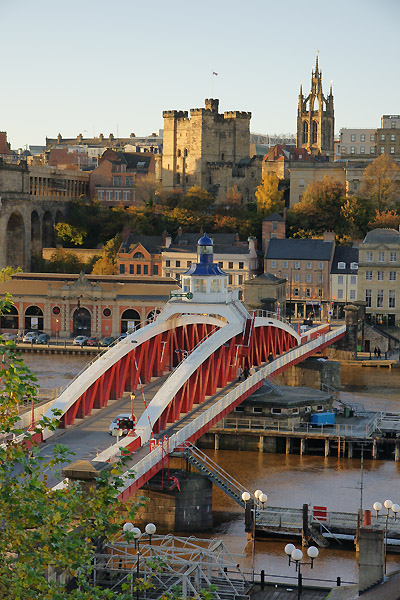
It’s a lovely soft rendering of the evening light as seen from the terrace of the NewcastleGateshead Hilton Hotel, a place which I can thoroughly recommend for its photographic potential and closeness to this historic quayside and old city area. But here is the .ARW file, carefully processed to avoid any auto adjustments:
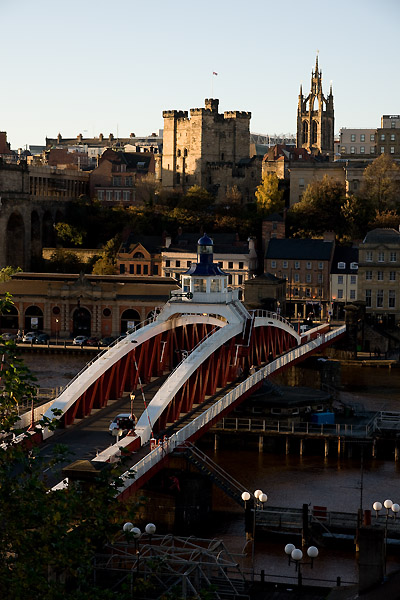
Now we need to be straight on this – this is a -1 over-ride exposure. And it is correct. Any more exposure, and the sky tones and castle wall highlights would be destroyed. The white street lamps catching the sun at the bottom of the shot would be burned out. But you can see just how dark those tones are, which DRO Advanced has turned into pictorially far more attractive (and visually realistic) shades.
What happens if you forget all about exposure over-ride? Maybe in a situation where too much light and white persuades the metering to get it wrong? DRO Advanced is always going to adjust the exposure for you to ensure the brightest highlight is not lost. So, I walked back from the terrace into the hotel foyer to shoot a wide-angle of the mainly white marble interior:
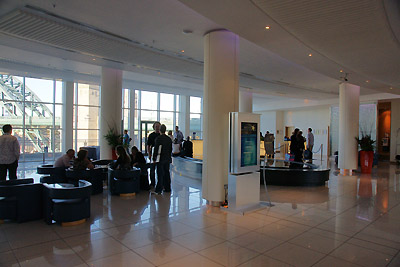
No flash is used, and it’s still a bit dark, but overall it is a realistic presentation of the conditions with the bright evening sun outside. Now take a look at the raw file which DRO Advanced worked on, and weep:
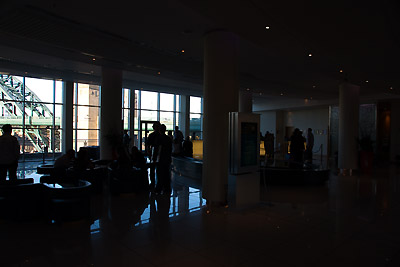
Ever had a picture like that? Yes, it happens. It would not be so dark with DRO disabled, but it would not be like the DRO processed version. By now you are probably beginning to see what DRO Advanced can do. As long as you do not overexpose (which loses data for ever) DRO Advanced on Level 3 to 5 is acting like a safety net. You can have a desperately underexposed image, which would produce a picture you could not print or show, and DRO Advanced will have rescued it in-camera to the extent you are unaware of the problem.
This is both good and bad. You don’t really want seriously underexposed raw files. It is better to shoot the image perfectly using the right exposure, fill lights, whatever is required. Quality will be higher. But let’s say you are covering a wedding in a typical cavernous hotel interior with people milling around, trying to use direct or bounce flash as the ceiling and conditions permit, or maybe using a LightSphere or similar device. Perhaps you shoot some frames where the flash has not recycled fully, or you get one of those reflections in the shot which zaps the exposure. The Alpha 700 is much less prone to such problems.
I was shooting an evening reception for the 2007 British Professional Photography Awards in the hotel later on:
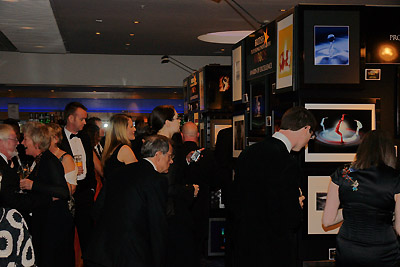
This is not a shot I used in my coverage, I had better ones, and it’s pretty dark. But the flash was either not fully charged, or something else like that small distant direct reflection hit the exposure in addition to DRO Advanced, which was active:
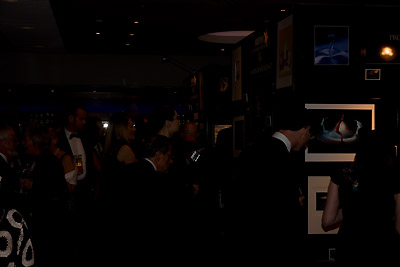
Anyone who has done flash jobs in uncontrollable conditions knows this kind of shot. If it’s an important one, you are in trouble. In fact, the raw has enough detail to recover a usable image (if it did not, DRO Advanced could not do it anyway). With DRO Advanced, the card from the camera could be put straight in the Sony printer – and there was indeed a Sony dye sub printer there, reeling off hundreds of shots of the presentations later on. You could proof it on a TV direct from the camera, or show it on the camera screen.
Later on, Lonnie Donegan’s son Peter was doing the after-dinner cabaret with his band. Peter covers all of Lonnie’s classic rock and roll and skiffle numbers and puts on a great act, on this occasion with Lindisfarne’s Ray Laidlaw guesting on drums. Using ISO 800, there was plenty of light for the Alpha 700 with CZ 16-80mm to get good sharp pix of Peter in action:
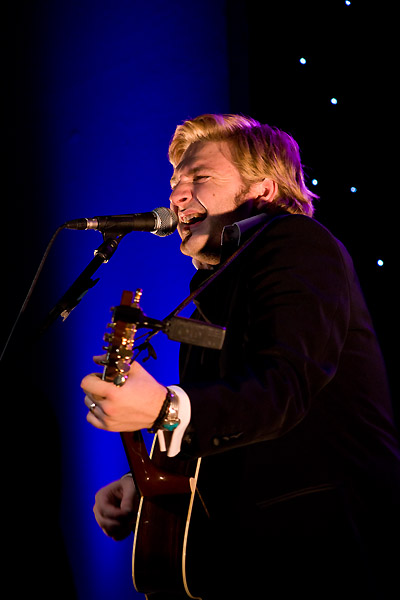
Now that is a raw shot normally processed. Great colours from the Alpha 700 on tungsten WB as well. Have a look at the DRO Advanced +4 level JPEG:
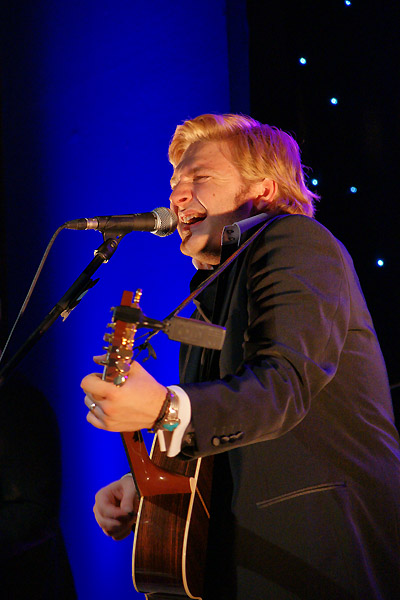
You will see that DRO Advanced can tell the jacket, with its detail and tones, and distingish it from the dark background which has featureless shadow. And it processes the colour to leave the saturation intact, which most gamma and highlight/shadow processing can not do. And look, too, at the way DRO renders the guitar wood so there is even detail present on the back of the instrument.
Now translate this performance to a wedding or a news picture. You might not want DRO +4 level – DRO+ Auto is much less forced in how it treats tones.
DRO is less suitable for traditional landscape subjects, though I’ve had some interesting results working in woodlands or where light and shade fall on water. Without putting up countless examples, I hope you can get some idea from this set above why DRO is especially useful when you are tackling interiors and working by flash. Here is one final instance. Direct flash just can’t handle long, deep rooms where some of the subjects are thirty feet away and others are ten feet away. This is what happens even when there is plenty of white floor and ceiling to reflect the flash into the far parts of the shot (at 16mm):
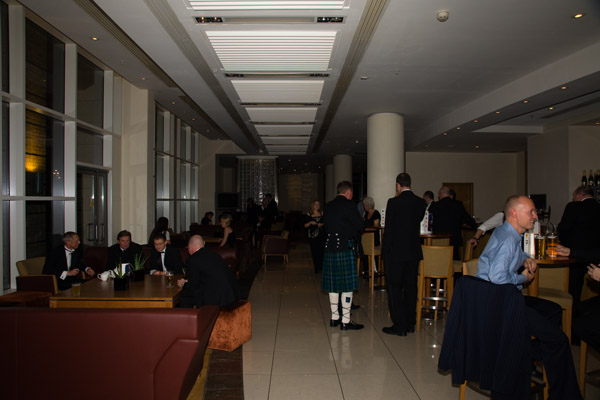
Now see the DRO Advanced +5 manual setting result:
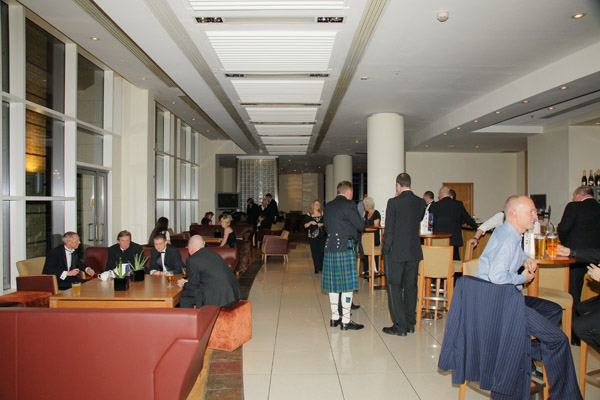
And, by the way, for all those who make comments about the 16-80mm CZ lens having severe barrel distortion at 16mm, please look at the verticals and the alignment in this shot. This is an in-camera JPEG to which no correction of any kind has been applied, at 16mm, on the CZ. Really it does not have barrel distortion unless you are test-report writer working in ignorance of the relationship between focused distance and distortion. A lens focused on a 1 x 1.5m test chart at 16mm focal length on APS-C may well appear to have strong distortion. Wide-angles should always be assessed at infinity or architectural distances. Since you can’t get test charts that big, you have to use pillars, doors, windows, and walls. If the lens renders them parallel to the frame edges, and straight, it passes the test.
As does DRO Advanced, when used with flash (the unit used here was the Minolta 5600 HS (D) throughout) for recording events.
– David Kilpatrick
Leave a Reply
You must be logged in to post a comment.