ACR 6.2 2010 Process – huge improvement

Before the launch of the NEX models, the last camera we reviewed here was the Alpha 550. The final review pages dealt with the high ISO performance.
Following the release of Adobe Camera Raw 6.1 and 6.2, the new ’2010 Process’ has replaced the ’2003 Process’ in conversions (you can select either option). The 2010 Process used with manual adjustment of the Noise Reduction controls can produce really exceptional ISO 6400 results.
This changes any previous conclusions about the usefulness of Alpha 550 high ISO settings, and indeed brings them into line with the results we have seen from NEX – which of course defaults to the 2010 process, and can not be processed using earlier Adobe Camera Raw versions.
Here is the old process, top, seen at a reduced scale of a 100% view at ISO 6400:

Click the Process 2003 image above to open the original 100% size screen shot.
Below is the new 2010 process, which is more than just a minor tweak – it’s an entirely different way of getting the data out of the raw file.

Click this image to see the Adobe Process 2010 result full size. All the settings were identical for these two conversions. The improvement is on such a level that ANY test reports on the Alpha 550 produced in 2009 using CS4 and Adobe Camera Raw 5.x are invalid.
The NR can be moderated to produce more detail on the 2010 process midtones at the expense of more visible grain (but it’s nothing like the 2003 pattern – it remains mainly a fine luminance pattern). I have used a setting which produced a clear comparison. Entirely different NR settings are actually better, with the two processes, but no matter how you adjust the ‘2003’ version it never looks anything like as fine as the 2010 one.
Should dPreview and others update their RAW sample images because the old process was so badly matched to the .ARW format? Nothing like the same difference is made for example to Nikon raw files, 2010 is better, but 2003 didn’t mess up the higher ISOs in the way it always did for Minolta/Sony raws.
Please note that if you don’t want to get CS5, you can still get the benefit of this new conversion with Adobe Photoshop Elements 8.
– David Kilpatrick

CZ 16-80mm Adobe Profile

Continuing to make profiles when time permits, here is a reasonably detailed profile for the Sony DT 16-80mm f/3.5-4.5 ZA Carl Zeiss zoom (2007) created using the Sony Alpha 550 14.2 megapixel camera using Manual Focus Check Live View at 14X to set the lens focus and ensure the chart is positioned to use 100% of the frame.
http://www.photoclubalpha.com/DSLR-A550 (DT 16-80mm F3.5-4.5 ZA) – RAW.lcp
Right click to download this 56Kb file which should be placed in the Lens Profiles/1.0/Sony folder of the directory on your computer which holds Adobe Lens Profiles.
This profile has been created at full aperture and f/8-f/11 depending on focal length, at 16mm, 24mm, 35mm, 50mm and 80mm focal lengths and involved 90 raw captures.
It is possible in ACR/Lightroom to use profiles which are not created on your own camera type. This profile can be applied to any APS-C Sony or Minolta camera using the 16-80mm lens; because the A550 is currently the highest resolution body, the CA data gathered is more accurate than would be possible using a lower resolution body but may need a saved adjustment in defaults. Individual lenses differ slightly and may also need adjustments.
I have checked the operation of the profile on files from A100, A700, A200, A380, A350 and A550 and it’s very effective in removing CA. Illumination is much improved at 80mm (notably). You may prefer to turn the geometric correction down to zero (off) when the angle of view matters more than perfect straight lines – and also, where people are in the shot near the edges at 16mm. The distortion of the lens is optimised to lessen ‘stretched faces’ at the ends and corners of the shot, applying the profile removes this slight barrel distortion and does not improve groups. It’s most useful for horizons, rooms, seascapes, and subjects where a good straight rendering is critical.
It has been suggest I should add a donation button for these profiles. By all means see our subscription page, there’s a downloadable PDF of the latest Photoworld magazine for $3. I could easily have zipped profiles and sold them in the same manner, but that is not why photoclubalpha is here; Adobe provide the software to do this free (OK, I know what the rest of their stuff cost me…) and profiles should be made public domain by creators.
– David Kilpatrick

ACR/LR Profile for A900+MinRS 24-85mm

Although it’s far from a perfect lens, this small 1999 Minolta RS optic is my favourite for general travel and everyday use on the Alpha 900. It is a convenient size and weight, performs well when stopped down a little, and has exactly the range and minimum focus I need.

Mouseover image to see effect of this profile used on a shot taken at 70mm focal length.
The profile created for ACR6/LR3 is at four focal lengths – 24, 35, 55, 85 – and two apertures, wide open and f/9. The chart distance ranges from about 120cm to about 4m.
To download:
http://www.photoclubalpha.com/DSLR-A900 (24-85mm F3.5-4.5) – RAW.lcp
Right click and save. Correction of CA and distortion is pretty good, and this profile identifies itself correctly as a Minolta lens. It should be placed in the Sony directory of Adobe Application Support>Camera Raw>Lens Profiles.
– David Kilpatrick


Adobe Lens Profile for 16mm f/2.8 NEX

I have made a simple (f/2.8 and f/8 chart set) Adobe Lens Profile for the 16mm f/2.8 NEX E-series pancake lens. It seems to work well for closer distances, because that’s how it had to be made; CA is reasonably well corrected, vignetting is eliminated, and distortion of closer lines – maybe if you are looking through a door frame, etc – is very accurate. The profile was created using NEX-5 and 16mm.
You can get this profile here:
http://www.photoclubalpha.com/Sony NEX-5 (Sony E 16mm F2.8) – RAW.lcp
Right click to download/save the target file, and install this in:
Library>Application Support>Adobe>Camera Raw>Lens Profiles>Sony

Uncorrected 16mm shot

Using Adobe Camera Raw 6.2 RC with the profile active at default settings
JPEG profile added (17/08/10)
I have now added a JPEG profile from the same set of images as the raw – this is lucky, I didn’t think people would need a JPEG profile but happened to have the camera set to RAW+JPEG when the test shots were made, and this has been requested for those using HDR or other JPEG-only modes.
http://www.photoclubalpha.com/NEX-5 16mm JPEG.lcp

Above: HDR three-shot with 16mm, straight JPEG

HDR shot opened in Camera Raw without adjustments, but with the Profile enabled
Using the profiles
A full Adobe Profile is undertaken at several focus distances, apertures and zoom settings (or for prime lenses, just at a range of distances and apertures). The largest chart I can print is A2+ using the Epson 3800, and with a 24mm equivalent lens, this means having the camera surprisingly close to the target. The profile is therefore only 100% correct for subjects at 115cm from the camera, which corresponds to the 4X minimum focus distance suggested by Adobe.
I have found from using the 16mm that its optimum aperture for central sharpness is probably f/5.6, and that chromatic aberration and vignetting do not improve at stops smaller than f/8. There is a slight improvement in detail sharpness in the extreme corners at f/11 and f/16, but this is due to extra depth of field helping to cover a curved focus field. I therefore made test sets at f/2.8 and f/8 for this profile.
The geometric distortion is most visible with closer subjects such as the subject above (The Slave Girl, a bronze c. 1870 by John Bell, at Cragside House in Northumberland). This is a hand-held exposure of 1/4 at f/8, and is perfectly sharp despite the lack of stabilisation; every word of the interpretation can be read at 100%. I have found most shots are perfectly sharp with the 16mm given reasonable care, as you would take with a Leica, to breathe correctly and make a shake-free exposure. This is not the case with SLRs where the mirror action nearly always causes shake.
For more distant subjects, the 100% default setting of the ACR/LR Lens Correction panel can be reduced and where there are few straight lens removed entirely to secure the maximum field of view. Similarly, the vignetting correction can be reduced or removed entirely as the natural darkening towards the corners with this lens is attractive.
Although this profile is named to match perfectly the naming convention used by Adobe for the 18-55mm, I find that ACR 6.2 can not be relied on to use it for Auto as a default (if you work with more than one lens, Adobe Lens Correction soon proves unpredictable in this anyway). If you select Auto, then select Sony, the lens profile will be selected but the Auto button changes to Custom. If you then save new Lens Correction Defaults, or Camera Raw Defaults, ACR will attempt to force this profile on the 18-55mm and the reverse will also happen. So it’s necessary to check which profile is selected. Using ‘Previous Conversion’ for shots taken on the same lens is a quick way to get there.
The additional Manual Controls can be used on top of the profile (the second tab of the interface). The most useful are the geometric distortion (camera angle) corrections. The Chromatic Aberration/Colour Fringe controls can be fine tuned as the correction for CA while very effective relates only to the tested focus distance. CA may change with focus but my particular lens doesn’t seem to suffer from this. All that is necessary is to enable Defringe All edges as a default, and this will remove any hint of colour remaining. As a tip, setting Colour Noise Reduction to a high value can help remove CA and purple fringes in many shots processed through ACR/LR. The colour NR detects 1-2 pixel fringes just the same way it detects individual pixels, and neutralises much as it does noise.
– David Kilpatrick


ACR 6.2 and LR 3.2 RC released – for NEX

Adobe has announced the Lightroom 3.2 and Camera Raw 6.2 Release Candidates, available for immediate download on Adobe Labs. The updates extend raw file support to 12 new popular camera models including the Sony NEX-3 and NEX-5, Alpha 290 and 390; improve on several of the lens correction profiles introduced as part of the Lightroom 3 and Camera Raw 6.1 releases; and add over 50 new lens profiles to help photographers automatically correct for undesirable distortion and aberration effects.
But they let Sony down in a big way by only including the 18-55mm OSS lens for NEX, omitting the 16mm which must be very simple to profile (after all folks, there are only TWO officially available lenses for NEX right now – you found time to profile no fewer than 15 lenses for the Pentax AF645, for the benefit of all two dozen worldwide users of this outstandingly popular digital option…)
For ACR 3.2 Release Candidate download – http://labs.adobe.com/wiki/index.php/Camera_Raw_6.2
For LR 3.2 Release Candidate download – http://labs.adobe.com/wiki/index.php/Lightroom_3.2
In addition, the Lightroom 3.2 Release Candidate now allows Lightroom 3 customers the ability to publish their photos directly to Facebook from within the application, and addresses issues reported by customers on the Lightroom 3.0 release. Adobe continues to encourage the community to provide feedback on the updates so it can ensure the highest quality experience for customers working on a variety of hardware and software configurations.
Pricing and Availability
The Lightroom 3.2 Release Candidate is available as a free download for Lightroom 3 customers, and the Photoshop Camera Raw 6.2 Release Candidate is available as a free download for Photoshop CS5 customers. For more information and to test out the updates visit http://labs.adobe.com. Feedback can be provided on the Adobe User to User forum at http://forums.adobe.com.
*Please visit the Lightroom Journal for more information on these Release Candidates and a full list of the improved and newly added lens profiles: http://blogs.adobe.com/lightroomjournal
Newly Supported Camera Models
Panasonic DMC-FZ100, Panasonic DMC-FZ40 (FZ45), Panasonic DMC-LX5, Pentax 645D, Samsung NX10, Samsung TL500 (EX1), Sony A290, Sony A390, Sony Alpha NEX-3, Sony Alpha NEX-5
Also, this update improves the colour and noise profiles for the following cameras that utilise the DNG raw file format already supported in previous versions of Lightroom and Camera Raw: Casio EXILIM EX-FH100 (DNG) and Leica S2 (DNG).

Adobe Camera 5.7/Lightroom 2.7 released

Adobe today announced the Lightroom 2.7, Photoshop Camera Raw 5.7 and DNG Converter 5.7 Release Candidates, available for immediate download on Adobe Labs. The updates add raw file support for: Canon EOS 550D (Digital Rebel T2i/ EOS Kiss X4 Digital), Kodak Z981, Leaf Aptus-II 8, Leaf Aptus-II 10R, Mamiya DM40, Olympus E-PL1, Panasonic G2, Panasonic G10, Sony A450.
Adobe encourages photographers to try out the newly added raw file support in this update and provide the product team with feedback on the Adobe User to User forum (http://forums.adobe.com).
In addition, photographers can also participate in the Lightroom 3 beta program and try out the new features in Lightroom 3 beta 2 for free. To learn more and download Lightroom 3 beta 2 visit: http://labs.adobe.com/technologies/lightroom3/.

High ISO Noise fix for Image Data Converter

SONY has released a new alogrithm for raw conversion (deBayer) which offers improve high ISO noise. IDC (Image Data Converter) is the program issued with all Sony DSLRs. Up to now, no maker has ever revised their ‘house’ converter to offer high ISO improvement as a specific feature. The new version can be downloaded free by existing users (download link is provided at end of story). We have direct download links now for Windows and Mac OSX versions.
Continue reading »

Adobe Photoshop Lightroom Beta 3 version 2

Adobe today released an update to its Photoshop Lightroom 3 beta software, available immediately through Adobe Labs. Building on the success of the first Lightroom 3 beta, which was downloaded by more than 350,000 photographers, Lightroom 3 beta 2 incorporates feedback from the first iteration of the beta while offering users several new features and greatly improved performance throughout the application.
New features in this release include tethered shooting support for select Nikon and Canon cameras, the ability to import and manage video files from DSLR cameras for a streamlined workflow and additional behind-the-scenes architecture enhancements for faster importing and loading of images. The addition of luminance noise reduction to the color noise reduction options already available in the beta helps photographers achieve overall exceptional image quality from high ISO images. The import experience and watermarking functionality have also been modified to reflect feedback received from the Lightroom community during the first beta period.
The input from the photography community has been extremely valuable and Adobe would like to thank everyone who has participated in the beta program. Adobe encourages photographers to test this new selection of features and provide the product team with feedback so they can produce the highest quality final product.
Adobe Photoshop Lightroom
Adobe Lightroom is the essential digital photography workflow solution, helping serious amateur and professional photographers quickly import, manage, perfect and showcase all their images in one intuitive application.
Pricing and Availability
Adobe Photoshop Lightroom 3 beta 2 is available as a free download to anyone on a Macintosh or Windows platform and is available in 12 languages. Visit http://labs.adobe.com/technologies/lightroom3/ to learn more and download the second beta. Feedback can be submitted on the Lightroom forums: http://forums.adobe.com/community/labs/lightroom3/.
Reach out to us on the Lightroom Facebook Page at www.facebook.com/lightroom or on Twitter www.twitter.com/lightroom.

DxO for Mac and Alpha 230-380 – plus discount deal

December 2, 2009 – DxO Labs is pleased to announce the immediate availability of DxO Optics Pro v5.3.6 for Mac bringing full compatibility with Apple’s latest operating system Mac OS 10.6 Snow Leopard, and adding RAW support for 15 new cameras:

Canon EOS 7D and PowerShot G11;
Nikon D300s and D3000;
Olympus E3 (Elite edition only), E-30, E-410, E-420, E-450, E-510, E-520 and E-620;
Sony A230, A330 and A380.
This new version for Mac also offers support for 255 new DxO Optics Modules, covering 46 cameras.
Availability and holiday season price
DxO Optics Pro v5.3.6 for Mac, both Standard and Elite editions, are immediately available from both DxO Labs’ e-store and selected resellers at an exceptional 30% discount until December 31, 2009:
Standard edition: £ 69 instead of £ 99 (or a savings of £ 30)
Elite edition: £ 139 instead of £ 199 (or a savings of £ 60)
DxO Optics Pro 6 for Mac is scheduled for release during the first quarter of 2010 and will be available as a free upgrade to customers who purchased version 5 after June 1, 2009.
www.dxo.com

Alpha 550: sky noise, exposure and Auto ISO

My review of the Alpha 550 has caused controversy because of the blue sky noise. I might as well say that over the last week, I’ve used the 550 in a wide range of conditions – some very bad conditions included – and its failure to match ISO 100 finesse would not worry me at all. The performance at higher ISO settings is so much improved it’s worth putting up with the minimum of ISO 200, and a touch more noise than the best ISO 100 results from the Sony CCD sensors.
Even so, something was clearly happening during the period of sunnier weather used for my earlier A550 tests. I used Auto ISO initially, because I had not realised how readily the camera will select settings right up to 1600. Auto ISO has thrown up some surprises. Here’s something to consider:
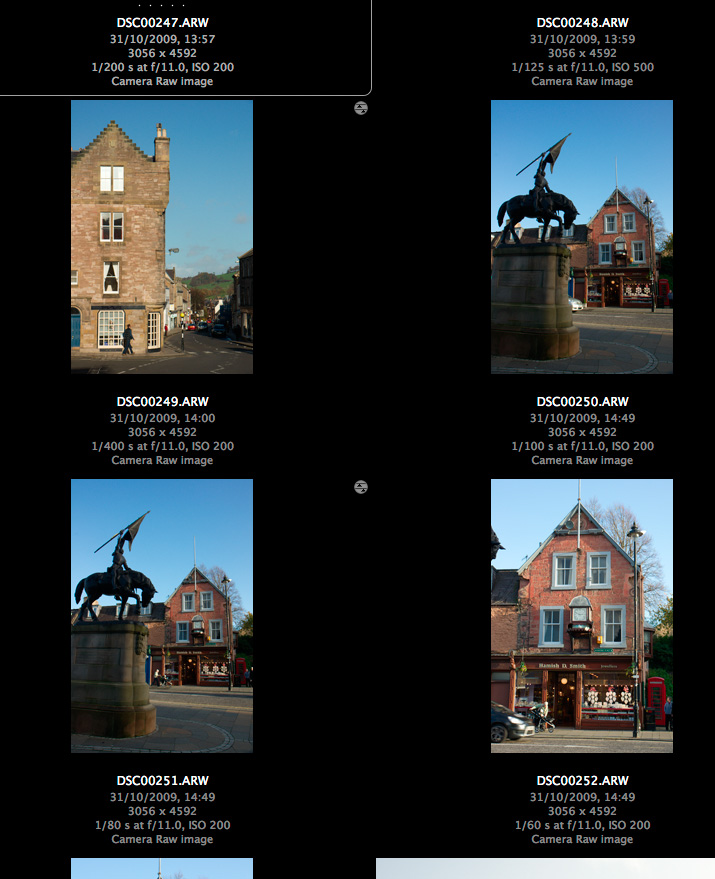
autoISO0-200variations
Please note that although ‘process’ symbols are shown with these Adobe Bridge/ACR images, the defaults were restored and then each picture was set back to defaults. They are all shown relative to each other in density, the image preview built by ACR. There is no question of DRO or any other tonal setting interfering with the apparent exposure – DRO does not affect the .ARW file, ACR discards any DRO generated embedded preview in my setup prefs, and DRO was not being used anyway.
It has already been noted by other reviewers that the A550 has considerably more headroom without clipping, even compared to the A350 which was already a top-ranking camera for dynamic range. This is what I meant when I compared its default images to Canon with Highlight Tone Preservation switched on, or KM/Sony older models using the Hi200 setting. This can mean that the A550 is really ISO 100 at its lowest on-sensor gain setting, but the exposure system is programmed to underexpose by a stop and the post-processing (BIONZ) is set up to boost the gain.
Why would Sony do this? Perhaps they read the many posts referring to the Alpha 900 and 700 ISO settings. The on-sensor gain controls the main ISO steps, but a rather cleaner post-process gain adds the 1/3rd step intervals. Experienced Alpha 900 users set ISO 320 manually because the sensor is at its optimum at roughly ISO 160 (DxO tests bear this out). The standard ISO 200 setting can produce more noise than ISO 320 because two different digital stages are used to produce the gain.
In search of superior high ISOs, they may have realised that the early gain stage (on the chip assembly) is inferior to the later BIONZ processor, and you can indeed get better high ISO by underexposing a lower ISO setting, then processing it with clipped blacks. That’s a Nikon technique, which has served them well. It’s also a technique used by experienced DSLR owners.
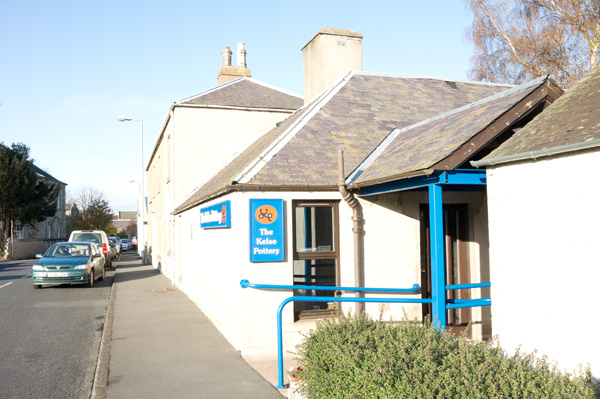
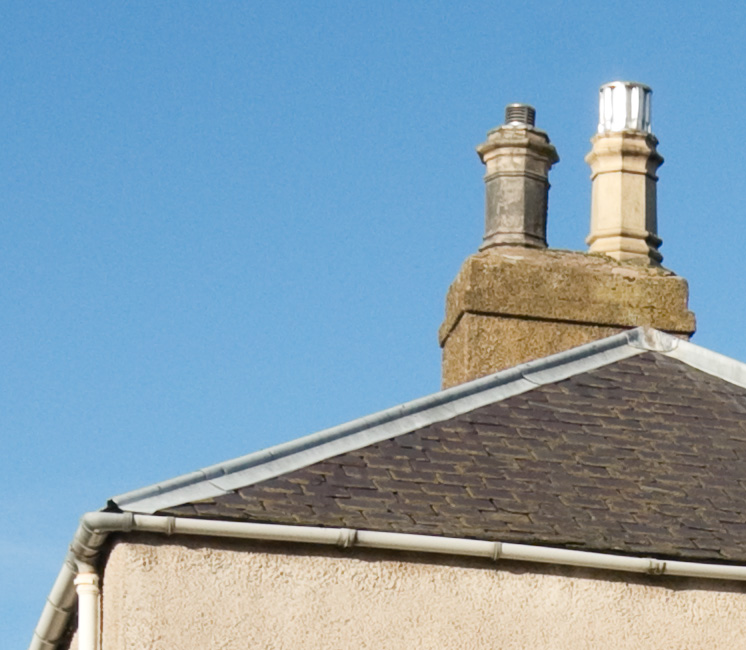
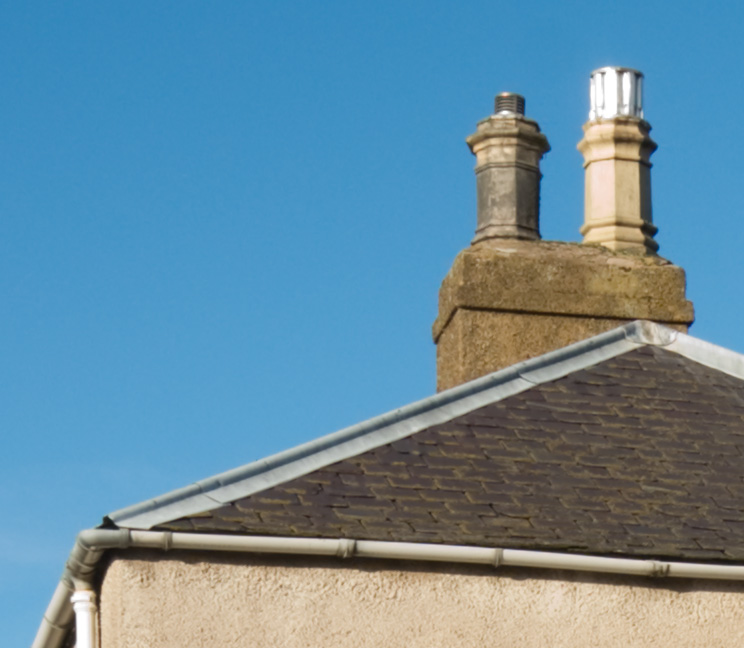
Now consider the four shots above. They are all taken at ‘ISO 200’ but the camera was set to auto ISO. Other shots in the same set show ISO 250, 500 etc confirming the auto ISO was in operation. They are taken in the afternoon in Scotland, so it is fairly near to the end of the day for sunshine by 14:49hrs, around an hour away. But the two locations at 50 minutes apart, 14:00hrs and 14:49hrs, should not have the extreme variation in exposure shown here.
Just what is going on for an exposure of 1/400th at f/11 to look correct at ISO 200, with the dark sandstone buildings of Jedburgh at the end of October? 1/400th at f/11 is the ISO 200 exposure for full sunshine in midsummer (aka f/16 light). You hardly ever find f/16 light in Britain unless you are on the beach, surrounded by pale concrete, in a field of golden corn or out on a lake.
50 minutes later, exposures range from 1/60th at f/11 to 1/100th at f/11 – that is, more or less, from two to three stops more. In fact these exposures are in line with what I would expect, it’s the 1/400th at f/11 which is the odd one out. I have no evidence to suggest that my CZ 16-80mm has an aperture which fails to stop down consistently.
Now look at some sky samples:
Here is an in-camera JPEG version which shows less noise – the in-camera process is equal to using much stronger NR in raw conversion than I would normally choose for ISO 200:
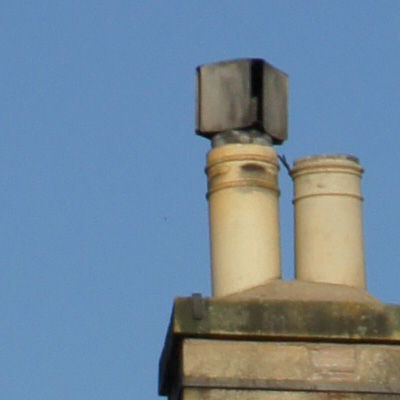
incameraJPEG-iso200clip
Now for the same processed from raw – notice that despite the noise, it is slightly more detailed or sharper:
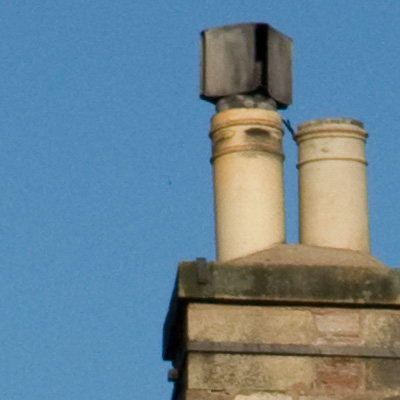
skyiso200-400th-f11-acr5p6-default
This is a reprocessed second version of the original noisy sky instance. Here, I have used Adobe Camera Raw 5.6r1 defaults, which include some basic sharpening and also 25 on the chroma NR scale. No exposure adjustment is made at all. This view, by the way, looks more or less due north and it is not a case of a brighter sky underexposed; also, the stone and the chimney pots look normally exposed.
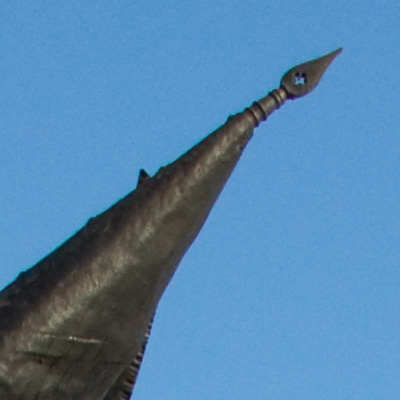
skyiso200-100th-f11-acr5p6-default
This is the 1/100th at f/11 shot, processed exactly the same way. It’s interesting in that I expected to see much lower noise, but in fact it’s much the same. The sky density is similar as well. The view is slightly more towards the east. While my Alpha 380, 200, 100 and even 700 shots are capable of showing blue sky noise at ISO 100 and as much as this as 200 it’s not as obtrusive.
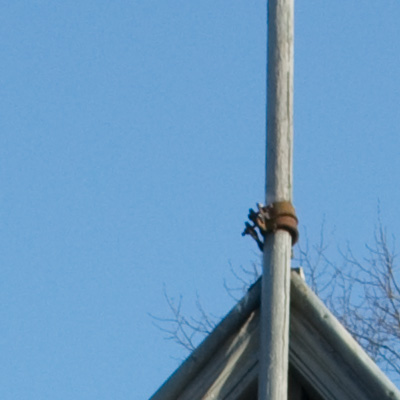
skyiso200-60th-f11-acr5p6-minus1evcorr
Finally, this is the 1/60th exposure – perhaps more what would be expected at ISO 100 in this light with f/11. Here, I have set -1 EV exposure reduction in Adobe Camera Raw to get much the same final sky tone density. The noise is lower.
Checking other images I’ve taken since, I am now suspicious about the Auto ISO function in the Alpha 550, and whether it reports the gain applied to each shot accurately. It’s hard to reconcile the same ISO 200 setting shown in EXIF with the range of exposures encountered, and the actual exposure of the raw file. Yet ISO 250 was also selected for this shot taken a few minutes before the chimney shot:
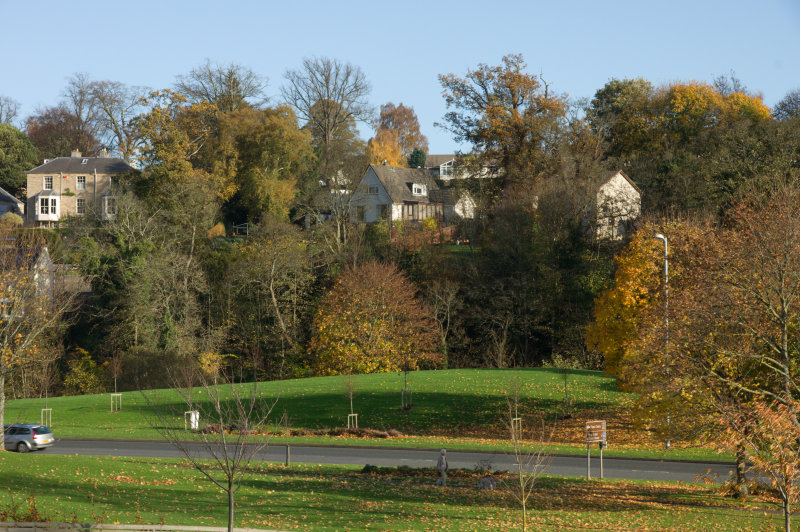
This is also included in the main report (click image to view full size on pBase). If I darken the sky as much as the other examples, I get noise similar to the 1/60th ISO 200 clip, or better.
Since making these tests, I’ve started using the Alpha 550 only on fixed ISO settings, with some misgivings as intermediate gain like ISO 250 or 320 might possibly be yielding better results. I just feel something is happening in the BIONZ stage, perhaps involving analysis of the Auto ISO images and compensation for deviations from the reported EXIF Auto ISO setting. This is just a hunch. Fixed settings seem to be equal to the worst case from Auto ISO. Here’s a textbook example, 1/125th at f/16 for a blue sky on November 3rd, facing due north, at 14:19hrs, ISO 200 fixed setting, ACR 5.6 defaults as above:
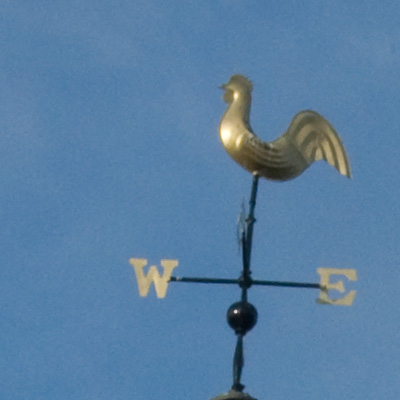
iso200fixed-125th-f15-acr5p6default
The answer seems to be to overexpose your manual ISO 200 shots by not simply one stop, but as much as two stops when shooting raw. At least if Adobe Camera Raw is used, recovery of normal tones (not burned out highlights) will fully restore the exposure from 1 or 2 stops over depending on the subject.
Here is an overexposed image, taken at 1/80th at f/10, ISO 200, in mid-day sunshine:
1p7stopsover
Below is what the sky looks like in a normally exposed image (1/250th at f/10), processed using Adobe Camera Raw defaults (including sharpening at 25/1/25/0 and NR at 0/25), looks like:
iso200-normalexp-250th-f10-acr5p6defaults
And here, finally, is what an adjusted ACR process from the overexposed image looks like with sharpening turned off, NR set to 25/50, exposure and brightness determined by the simple process of using Auto (which can be set as a default in ACR if you want to consistently make generous – over – exposures ‘to the right’):
plus1p7exposure-iso200-80th-f10-acr5p6adjust-nosharp-NR2550
This is much more how I expect to see a sky looking from the base ISO of a 2009 DSLR release, viewed at 100 per cent. From this stage, different types of sharpening can be applied to suit resized versions for different purposes.
Results with other raw converters, as more become available for the Alpha 550, may be finer in noise structure than ACR or may offer less scope for overexposing – ACR is well known for its ability to recover highlights. I do not intend to go much further into this with tests of converters, but I hope I have shown how the ‘true ISO’ of the A550 is difficult to pin down especially in Auto ISO mode, and how it is possible to benefit from the great high ISO performance of the camera (just use it!) and at the same time secure good low ISO results for travel and landscape shots where a clean blue sky is important.
It’s important to note that in-camera JPEGs will not necessarily show similar noise levels. If they do it’s not so easy to fix without using NR software. I prefer to shoot raw for many reasons.
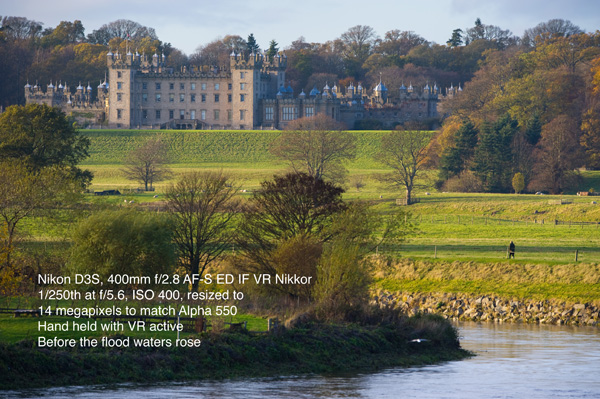
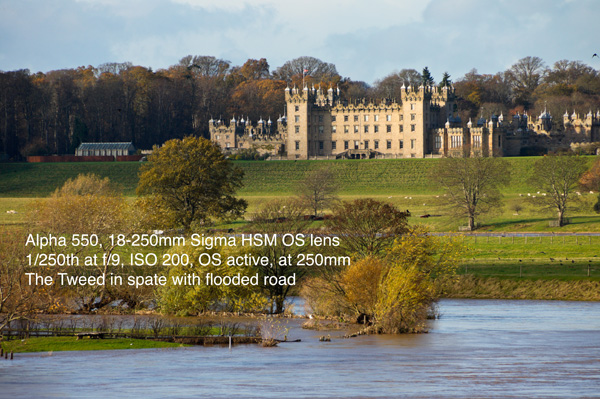
So, why not be very happy with the Alpha 550 as a choice? Here are two pictures. You can view the full size Alpha image, and the Nikon D3S image resized to match 14 megapixels, by clicking on the smaller size here. Of course the Nikon image is better, though 1/250th at f/5.6 and ISO 400 is more of a step away from 1/250th at f/9 and ISO 200, and I’m not sure the light was SO different on the two occasions:
Alpha 550-250Sigma-iso200-web
Nikon D3S-400mmf2p8Nikkor-iso400-web
– DK

1 2 3 4 5 7