
AI cuts reflections in glasses
This is a follow-up to our last post about PortraitPro. Using a self-portrait taken for the purpose with bad reflections in uncoated reading specs, I went through the options of the reflection removal process. Mid-May a 15% discount was authorised for code CC524 at www.anthropics.com which applies to all 50% discounted program downloads.
It was taken on the Sony A7IV with 85mm f/1.8, tripod, ISO 400, lens at to f/8 and control through iPhone 15 Pro Max using Sony Creators’ App remote viewing and control. The screen on the A7IV was vertical and facing me, so I could also look at the camera and see the reflections move as I changed my head angle. Setting this up showed me some problems with the A7IV articulated screen design I had not realised – it can only face the self-portrait subject when folded out at the left-hand end of the camera, which with a Arca-Swiss L-plate means hanging down… obscured by the tripod head! So no L-plate but standard Arca small plate, and camera upside down compared to normal hand holding.

This is the result using PortraitPro V24. Read on to learn more, and don’t forget if you decide to get this program use Cameracraft’s additional 10% discount code, CCV245.
PortraitPro has come a long way in a few years. At the top end, the Studio Max version is a £308 program which costs £154 with the 50% download discount that Anthropics have offered ever since the days of CDs in packaging. Since no-one now buys a CD, the real price is £154 (with 10% off for Cameracraft’s code, CV245 in the latest May/June issue).
You may not need Studio Max with its 48-bit file capability, workflow from raw to exported finals, multiple image batch processing intended to auto retouch complete portrait sessions, handling of wedding groups and granular control fine-tuning its effects. The basic V24 includes this function and costs £99 less 50% download only less our 10% – so £44.55.
It is now very fast indeed on Apple Silicon and integrates with Adobe’s photo programs. Under the hood it uses some of Adobe’s functions, without venturing into Generative Fill AI to change a digital capture beyond the scope of many competitions. It uses AI, but does not rely on on stolen images or ones licensed for almost nothing in bulk from the big picture libraries. Anthropics built their platform on measurements of the human face and body, research into what people like or dislike, and many years of coding. When it uses image-based AI it draws that from your photo and its bank of facial features modelling data.
The Reflections in Glasses problem
Recently we came across a question in a professional photo organisation Facebook group asking how it was possible to remove reflections from glasses. It’s very difficult, and when it happens in a set of pictures where the photographer is unable to prevent it, it can ruin groups and presentation shots. Many battery studio-location flash heads now have very low power modelling and it’s all too easy to light your subject and fail to spot that your octa-box is reflecting in specs.
PortraitPro’s specimen example might just be good luck, so I decided to test Version 24. My studio room has shutters when blackout is needed. Two pure white plain blinds 110 x 220cm cover the tall south facing windows to prevent furniture, fabrics, art and photographs fading or warping in direct heat. They make a wonderful giant dual light source in daytime sun even in midwinter but reflect in glasses when the camera angle is not just right.
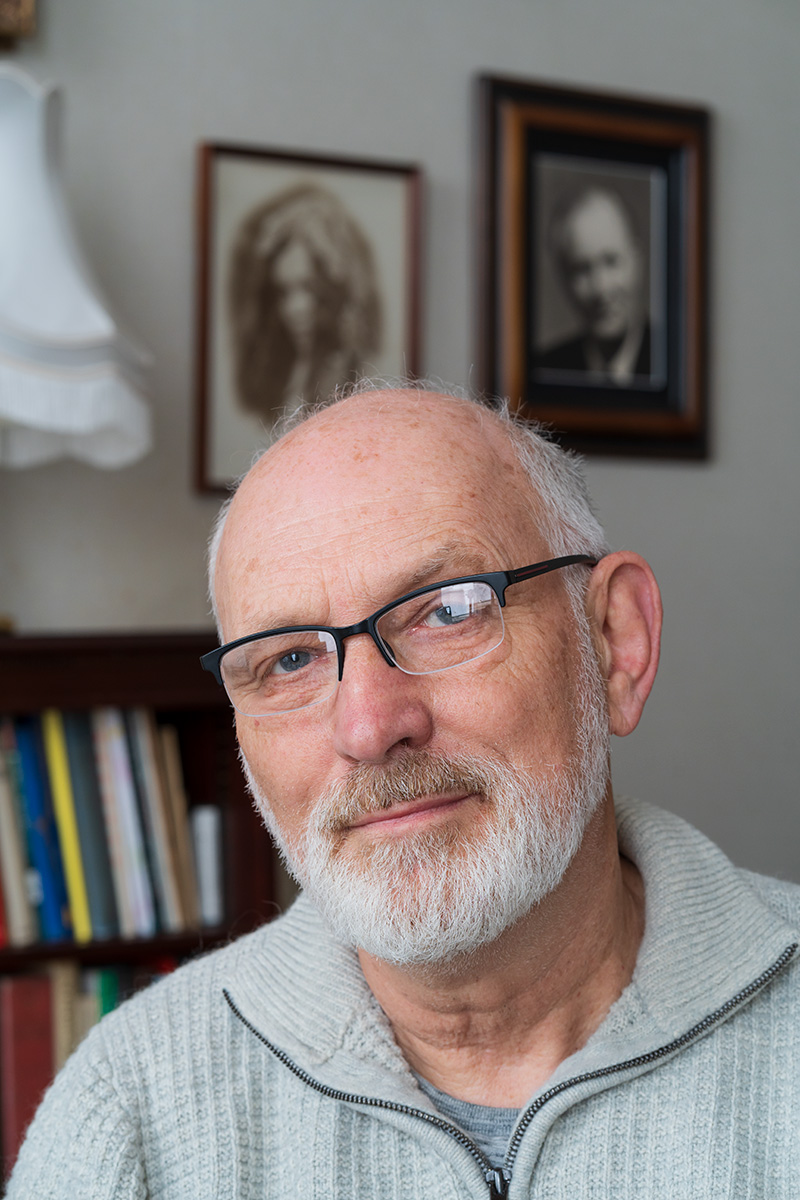
Removing reflections from specs does not come under the Eye menu – it’s under the “Inpainting menu” along with Mouth & Teeth and Remove Stray Hairs.

This is a crop from the original file.
The Reduce Reflections in Glasses view above shows other retouching functions too (notice some reductions in skin blemishes and wrinkles) but has the reflections reduction set to Off. When you select Remove Reflections in Glasses, you see choices for Off (the start position) then Options 1 to 5. Each is a different AI generated restructuring of what should be visible through the reduced reflection. My eyes are old enough to be slightly difficult and it was interesting to see the five choices.
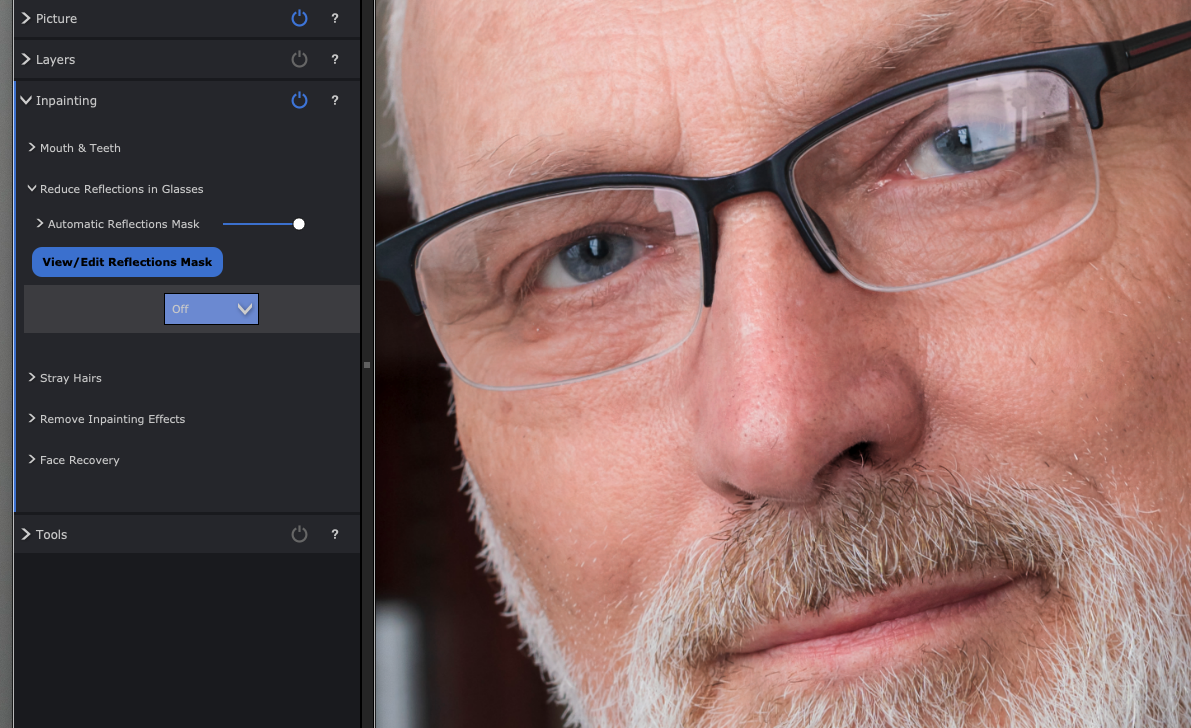
Option 1
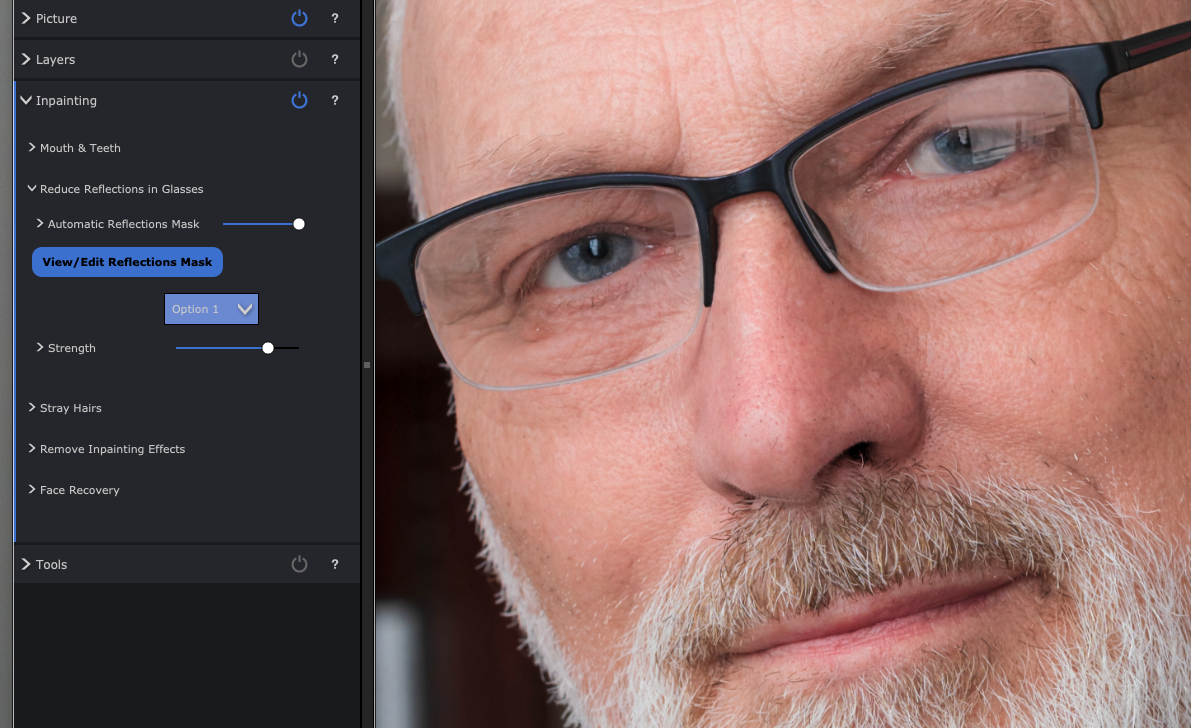
Option 2 (note the left eye eyelid in all these and how it changes).

Option 3 which I felt got the eye almost right, though further retouching would be needed for a portrait. It would be good enough for a PR or informal shot.

Option 4 rather odd mismatched detail.

Option 5 eyelid droop…
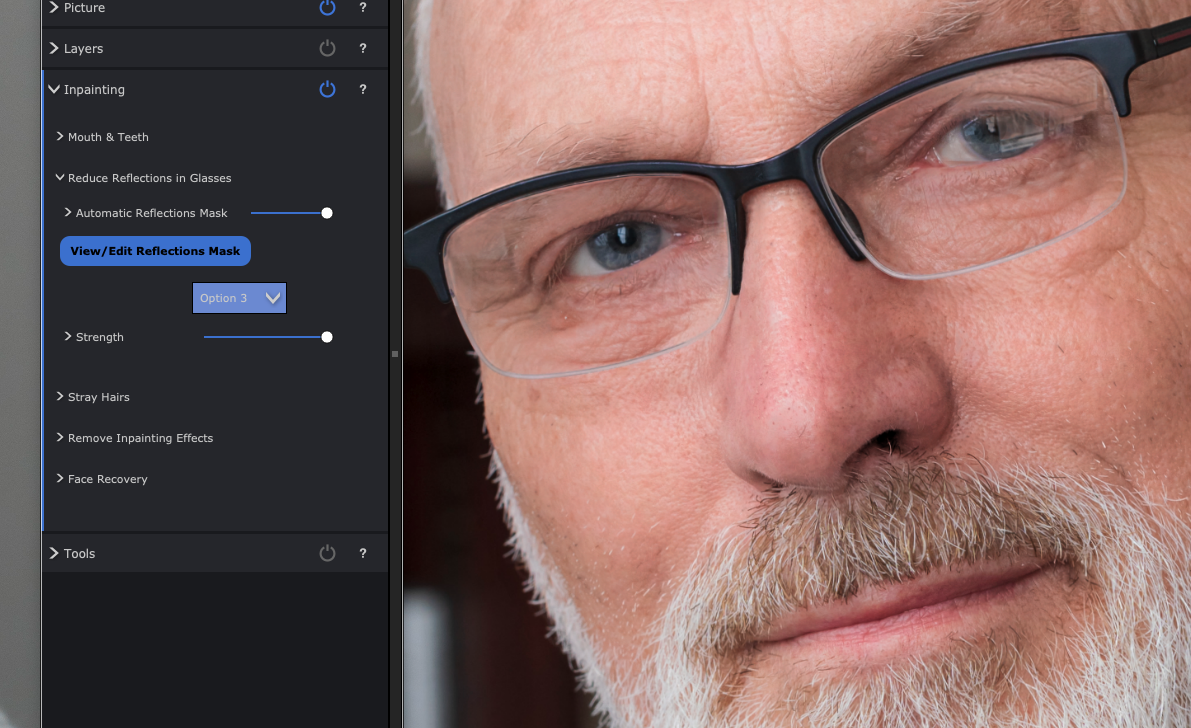
Option 3 got the upper eyelid almost perfect (not quite but acceptable) and the Strength slider did allow the reflection to be eliminated to the degree shown above. However, it looked better with 85% effect or even the 50% of the earlier example, a faint reflection remaining without obscuring the eye.
The time taken on my Mac M2 Studio Max was next to nothing, I didn’t bother to time it as everything happens in real time include the export from the starting 33MP JPEG to a same size with all PortraitPro’s very subtle modification of the portrait. The defaults were just right but I increased fine wrinkle reduction out of vanity!
After saving a copy of processed result I also saved a .ppx file (the Project) which is a bit like an Adobe .XML sidecar file, and re-opens your original with all the edits at the point you saved this snapshot, reversible and adjustable as needed.
A tougher test

Here’s a worse example than anything you should end up with, so I set maximum strength on this. Option 4 worked best, and despite my eyes being almost entirely obscured by double reflections in my computer reading specs, it was not a bad fix at all. My ‘proper’ specs are coated of course and don’t reflect as badly.

I’m sure I could ask Adobe AI to do something the Generative Fill after masking the reflection area, but in the time it would take me to brush a mask in place, the entire PortraitPro glasses reflection removal would be done and dusted. Is it worth £139 (after our code CCV245 discount)? That depends on what your time is valued at and whether you ever encounter an error in shooting which leaves reflections ruining a shot.
– David Kilpatrick
To see Anthropics PortraitPro Studio Max, and the other versions which start from £49.95 (right now there’s a 15% CC524 discount, update May 23rd 2024) – all include this reflection removal function alongside stacks of other tools – go to https://www.anthropics.com/portraitpro/


