Author: David Kilpatrick

  • Sony NEX-7: the high-end hybrid

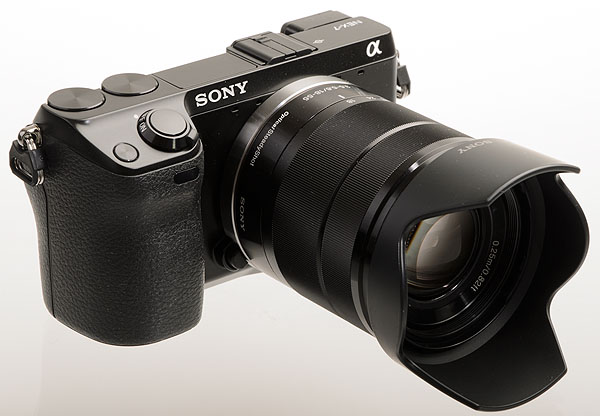
    The Sony NEX-7 is not a NEX at heart. It’s part of the rest of the Alpha system in every respect except its lens mount, and even that can be converted with a choice of two adaptors. A NEX-7 with an LA-EA2 phase detection autofocus adaptor is little different from an Alpha 65.

    The NEX-7 does not accept any of the smart accessory terminal add-ons common to the NEX-3 and NEX-5 models, because it lacks the accessory slot. That means it does not use the same flash models, or the same microphones. Instead the NEX-7 has the iISO Minolta flash shoe, accepts all the flash accessories from the Alpha range and is capable of wireless remote flash operation.

    Its external microphone, if required, is also from the Alpha system or any suitable 3.5mm stereo jack connected model mounted on a bracket or an accessory shoe adaptor.

    Packaging sequence

    Click this for an enlarged view of the opened box, which was full of white bits. Though sealed and brand new, the NEX-7 purchased needed a good dusting and blowing before removing its front cap and fitting the lens.

    You can’t see here, but when the cap was removed from the body there were specks of the same white packaging filler on the matt black baffle between the lens mount and the sensor. But, once blown clean, the NEX-7 proved remarkably free from dust-on-sensor problems. It’s one of the least dust-prone cameras I have ever used, despite the exposed position of the sensor which is not even covered when lenses are changed or when the camera is turned off.
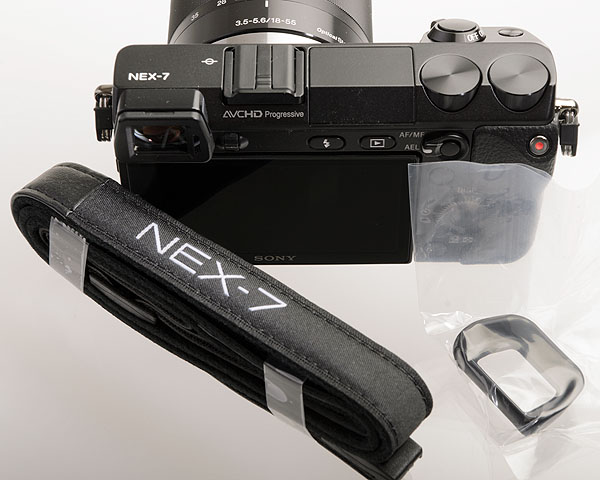
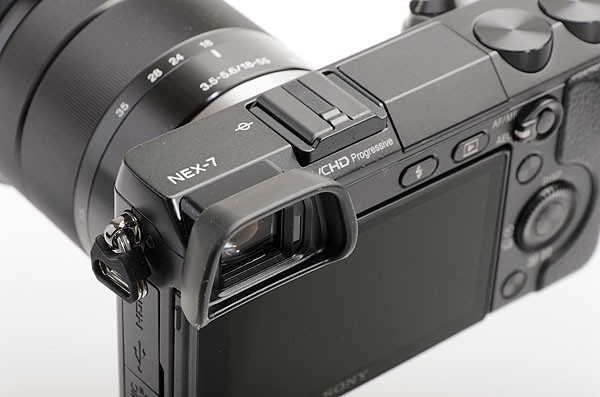
    The dust on the camera may also be seen here. The eyepiece surround is supplied separately packed and sealed. It is not soft rubber, and makes pretty sharp contract with my brow, almost demanding to be shoved into my eye like an eyecup, with specs removed. I found the finder good to use but started removing my glasses permanently when working with the 7 outdoors.

    Battery and stamina

    Given the relatively short battery life of any camera using an EVF as sophisticated as the Sony OLED device, I feel it’s a pity they did not go the whole distance and have a larger right-hand grip housing the 500-series lith-ion used by the 77, 900, 700, 5xx and other larger more ‘professional’ camera bodies. The little 1050mAh 50-series cell shared with the lesser Alpha 55, 33 and all NEX models is stretched to the limit by a 24 megapixel EVF camera. Third party 1300mAh versions don’t actually seem to last any longer.

    What’s interesting is that losing the flapping mirror and mechanical focus and aperture operation, found in the earlier Alphas, has not doubled battery life. You would imagine all this heavy mechanical stuff would drain power fast, but in fact the electronic alternative of live view, with the sensor active all the time feeding a digital viewfinder, proves far less efficient.

    Because the NEX-7 uses an external power option with a dummy battery (a Canon approach I have never much liked, always preferring dedicated DC input) it would be possible to design an add-on base with a better power source. But as with other NEX models, the SD card slot lives in the battery compartment and such a ‘power grip’ would either need to be removed to change cards, or incorporate more adaptation to provide a relayed memory slot.

    Despite its odd position between the Alpha and NEX ‘systems’ and the clear drawbacks of some aspects of its design, the NEX-7 is a compelling camera. It’s got some of the handling qualities of a classic screw-thread Leica, from the left-hand eye position to its overall dimensions and a reassuringly solid feel. It does not surprise me that so many owners enjoy fitting Leica lenses of all eras; they look correctly proportioned, and in the case of late designs for the CL/CLE they were designed to fit a body which may even have inspired the 7.

     Missing the point

    The hammering taken by the little battery probably accounts for why no GPS was built in to the 7. This must have caused many buyers and owners much frustration, especially if their previous camera or other camera happens to be an Alpha 55, 65 or 77. The NEX-7 can make these redundant for travel and landscape work, but those are exactly the times you want GPS. The NEX-7 is not so much use in the studio, or for action sports, or domestic shots… the times when you do not need GPS!

    This is the one mismatch in the specifications which has caused me problems in making decisions about what to use when, and when gear to keep for the future. It has left me unable to part with other cameras despite the fact that I don’t really need them; and it leaves me obliged to take my A55 or A77, instead of the NEX-7, on expeditions where the NEX-7 might be more convenient. In the end it is what has persuaded me to part with the NEX-7; I have ended up using the Alpha 77 all the time instead.

    The other omission in the NEX-7 is in-body stabilisation, not just sensor-movement but the pixel-tracking electronic variant used only for video in the A65/77. This prevents the 7 from being a true alternative to the larger DSLR/SLT models even when the LA-EA2 adaptor is fitted, unless you are very lucky and can find a compatible Sigma OS lens from the period before Sigma decided to drop optical stabilisation from Alpha mount products. It also limits its use with many manual classic lenses.

    What you do get is a bigger sensor area used for HD video than on the 77 or 65. It’s interesting that this was possible, as video readout can demand a limited choice of source pixel dimensions for best quality. With a bigger source frame, perhaps the NEX produces better video, but it’s not a difference I can detect.

    It would be wonderful if it turned out that the processor and firmware of the NEX-7 allowed Sony to issue an upgrade to add pixel-tracking electronic stabilisation (even with the inevitable crop of video to 1.87X factor). Is there any reason why pixel-tracking can not be used instead of sensor shift for stills? Others are using it. It certainly can work for viewfinder stabilisation with an EVF, as it does with the A77.

    Great features of the NEX-7 – that ‘real’ hot shoe, the pop-up flash, the twin control drums, and the EVF – are let down by lack of GPS and video stabilisation for manual lenses, both offered by Alpha SLT models.

    Cynics will believe that Sony could have implemented all this, but preferred to limit the NEX-7 and avoid cannibalising Alpha SLT sales. I think they simply didn’t think it through, or realise how the NEX-7 would change the profile of the whole NEX system to the point where some photographers could consider using nothing else. And they may have needed to use the processor power in other ways.

    The killer button

    While the first reaction to NEX-7 design tends to be delight at the provision of two unmarked, identical control wheels on the top right rear edge the new owner quickly discovers there is one tiny button which changes the reliability and usefulness of the camera beyond all else.

    Seen here with the pop-up flash raised, showing also the infra-red remote front facing sensor and the on-off switch surrounding the shutter release, is that very important small unlabelled flat button.

    That is the flat black button to the right of the shutter release, unlabelled. You could assume that its ability to invoke a series of the most useful screen menus, to change key settings in a manner close to Sony’s Alpha 700 QuickNavi, would be most praised.

    But no. It is the ability of this button to LOCK the camera setting controls – to disable operation of the TriNavi control wheels (rear multi-way optional, and two top as a minimum). Just hold the button down for two seconds, and a message appears saying the settings are locked. That means that if you have set Aperture Priority, f/9, ISO 200, no exposure over-ride then the camera will stay that way until you unlock it and change things. That just needs another two-second pressure, something you are not likely to do by mistake.

    The handy tips are not optional (more detailed ones are). The rear screen is bright and very sharp. I fitted a GGS-type glass screen surface shortly after the product shots were taken. That movie record button is a bit of an issue, see later comments.

    You do get continued access to the exposure over-ride and ISO change even when the controls are locked, but only with enough deliberate action to prevent your clothing or your camera bag from doing what it does so well on the NEX-5n – setting several stops of underexposure. It rarely goes the other way for me. I’ve had this happen between two shots without apparently touching the camera! The rear controller which handles this function is so light in its action, and indeed the dials of the NEX-7 are equally free.

    This single point about the NEX-7 puts it ahead of the NEX-5n and all earlier NEX models for me, despite the fact that NEX-5n images are often better in low light, and all previous NEX sensors seem to produce rather smoother sky noise at minimum ISO.

    What it does not lock is the other killer button – the movie shoot red button, placed to catch your thumb or the camera strap or anything else passing. It is ridiculously easy to start shooting video accidentally; it happens often enough on all NEX models, but the 7 takes it to a new extreme. It needs to be included in the LOCK function with the next firmware update, or its operation changed to a two-press action; first press changes to movie mode and crops the finder view, second press starts filming; half pressure on shutter release when in pre-shoot mode returns immediately to stills mode.

    It’s surprisingly difficult to hit the movie the button with the camera at your eye when you want to. For a button which is so easy to hit by mistake, it scores top marks for being hard to find when you need it.

    The AVCHD-2 file structure makes the situation worse, by putting the camera into video directory mode if you accidentally record a second or two of video. If you don’t immediately hit the delete button and remove this, but instead start shooting stills, it is a bit tedious to get back into the video playback mode and delete the unwanted clip. The fastest way to get there is to shoot another brief instant of video, then playback and delete this and your previous accidental clip; menu diving to change between still and movie playback takes much longer.

    Hitting the movie button to shoot short clips, like these taking using the 18-55mm OSS lens and high quality 1080p, is not always easy as you must move your secure firm thumb-position on the grip to press it.

    This is a failing of the dual directory structure, which maintains an entirely separate ‘database’ for AVCHD movies, preventing you ever playing back mixed stills and video or accessing both at the same time for file management (delete!) purposes.

    While the Lock/Unlock function does improve the handling of the camera, it has mysterious lapses. I’m still trying to work out exactly when and how my ISO setting is changed on a locked camera, nearly always to something unreasonably high. It doesn’t happen often but when it does, it frequently manages to be the next frame after one shot I have taken normally, and done nothing more than drop the camera from my eye and lift it again.

    The sensor dilemma

    ISO 1600, natural light, handheld – no noise reduction at all when processed from raw using Adobe Camera Raw. A full size version can be downloaded by photoclubalpha subscribers.

    The same with 25/50 noise reduction for both luminance and colour settings in ACR. A full size version of this is also available to members.

    This brings me to the question of the 24 megapixel sensor. As with the Alpha 77, it only provides true advantages when used at or close to its lowest ISO setting. On the NEX-7 this is 100 not 50, and the overall performance of the NEX is ahead of the SLT design through the range of ISO up to 16,000 maximum. It’s not a doubling of speed for the same noise level, more a matter of getting slightly better images at the same setting. However, using the Alpha 77 ISO 50 setting puts it ahead of the NEX in practice.

    The strength of any AA filter is determined by two factors, its diffracting or diffusing power, and the gap between the filter and the sensor. If you increase the gap, the strength of the filter must be reduced; put it very close to the sensor surface, and a strong filter is needed.

    Today’s designers prefer a weaker filter and a larger gap, as this reduces the effect of dust on the filter, a major cause of user dissatisfaction. Anyone who has used a camera such as the Canon 5D MkII which has a very weak AA filter very close to the silicon will know the problem, but that camera takes the effect so far you can often see moiré patterns too. The AA filter is too weak, and video makers often get the camera customised expensively, replacing the front glasses over the sensor with a stronger low-pass.

    A second effect of a filter closer to the sensor is that at the corners, the stronger diffraction structure may be further strengthened by the angle of the rays passing through. The distance from filter to sensel is greater with rays at an acute angle than those passing through on axis.

    The strength and distance of the filter are also linked to the density of the sensels on the sensor (pixel pitch). The 16 megapixel of the NEX-5n and 24 megapixel sensors of the NEX-7 have subtly different AA filter assemblies. This leads to some lenses performing better on the 5n, some on the 7. Whatever the complex mix of underlying reasons, there are many who would love to see the robust and versatile 16 megapixel sensor find its way into a NEX-7 body because they want to use third-party manual lenses such as the Voigtlander 12mm or 15mm Leica mount designs.

    From my point of view, I like the 7. It seems to have a weaker filter and maybe a greater gap between glass and silicon, if the dust-on-sensor results are anything to judge by. I have not noticed any serious colour shift with, for example, the 16mm pancake lens but my experience with the lens is so different from many others. I rate it as one of the better f/2.8 85° angle lenses around, not the “it sucks” offering often implied.

    Even after downsizing and crunching for the web, the moiré on the flyscreen of this diner on the run up to the Mojave desert can be seen. If you are a photoworld member you can access a full size, level 12, AdobeRGB version without sharpening or NR and see just how well the 16mm has performed at f/10, a sensible working aperture.

    NEX or Alpha?

    Apart from issues of stabilisation and GPS, the choice between NEX-7 and the similarly priced Alpha 77 involves a few other considerations.

    First of all, there’s weatherproofing or ruggedness. The 77 is a very tough, splash or rainproof camera with a ‘skinned’ body, externally finished to be fairly resistant to minor scuffs. The NEX is a bare metal body without any special attention to dust or moisture proofing.

    Then, there’s the duty cycle. The NEX has the familiar basic 1/4000th shutter, admittedly with the electronic front curtain option that doubles its expected life if you use it all the time. The 77 has exactly the same option but based on the 1/8000th shutter only found in top-end Alphas 700, 850 and 900. That gives it probably the longest expectation of shutter life yet in any Alpha, time will tell.

    There are a not many functions on the 77 not found on the NEX, but there’s one big physical difference – the rear screen.

    Inarticulate viewing

    The NEX-7, a major redesign compared to the 3 and 5 series, sticks to exactly the same rear screen frame and hinge setup as those with a minor adjustment to angles and a slightly tougher construction. This is not one of the best design decisions made by Sony, and has drawn some users to other makes.

    The articulated screen of the Alpha 77 is not just good for viewing portrait compositions at waist-level or aiming ahead to see yourself when doing a self-timer group or making a video ‘to camera’. It is good for not using at all! Nearly all the time, when not wanted for a specific purpose, the screen of my Alpha 77 stays reversed to the camera. It feels more comfortable, it never lights up when working indoors or draws attention because of its glow, it does not get marked by my hands or face. Same goes for my older 55.

    The NEX-7 screen, in contrast, is permanently exposed and also limited in its movement. It is not good for vertical compositions, and it can’t be used for viewing from the front. It also can not be protected by facing towards the camera.
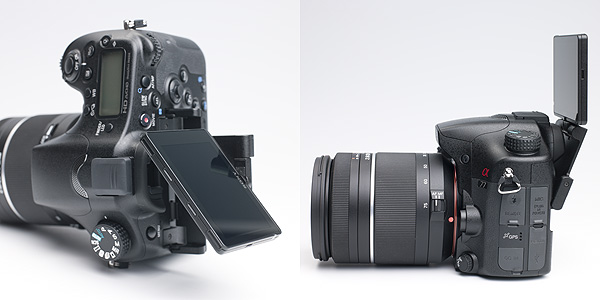
    How different the 7 would be, had the screen been designed like the Alpha 77! It would have felt like a pure rangefinder camera with the screen reversed and I’ve considered getting or making some kind of cover just to hide it away. The surface of the NEX-7 screen is very easily marked, and I picked up a single visible scratch line on it within a week. A month later I finally obtained a GGS MkII type glass screen protector (the model labelled NEX-5C is correct) and felt able to use the NEX freely in the real world, instead of treating it as a fragile object.

    I use the angled screen occasionally on the NEX-7 or 5n, but don’t use the angled viewfinder of the NEX-5n with accessory EVF. Most times I need an angled screen, it’s because I want to hold the camera overhead, at ground level or at waist level. Not up to my eye.

    There is one button press which doesn’t exist on the NEX series, but exists on all the SLT models – switch between EVF and rear screen. With auto switching set, the EVF takes over when you raise the camera to your eye, but the rear screen continues to operate after the camera is returned to strap-hung position. The only way to prevent it from continuing to operate is to use the power save delay setting, and reduce this to the minimum ten seconds.

    You can go into the menus, and switch the camera to use either the EVF only, or the LCD only. But there’s no over-ride if you do so. Set it EVF only, and the EVF is the only way to see the menus needed to get back to using the LCD. Set it to use LCD only and there is no quick way to use the EVF, you’ve got to menu dive.

    There is not even an option which enables the LCD to cycle, through its display modes, to OFF. The closest I have got is to set the LCD for information display only and turn the brightness down to minimum manual. What I’d like to see is an EVF/LCD button, just as on the A77, because the NEX-7 is basically the same kind of camera. I don’t have to use that button on the A77 as I just reverse the screen, and flip it round when it’s needed.

    Though there are many custom functions you can assign to buttons, EVF/LCD switch is not one of them. This may seem like nitpicking, but it is an omission that wastes battery power. Using the ten seconds power save timing still leaves the sensor and the display/s operating far too long. There is no state, unless you use the EVF only option, where the camera shuts off as soon as you take it away from your eye and take your finger off the shutter button.

    I  find it significant that without taking a single picture, while writing this section of the article only, checking the operation and changing menu settings the battery in my 7 has dropped from 33% to 17% power. The EVF uses more power than the LCD.

    Shooting speed

    Though the NEX-7 has a minimal shutter lag (20 milliseconds, or 1/50th) between pressing the shutter and achieving image capture, this figure is deceptive. The camera may not be ready to have the shutter pressed, indeed you may not even be able to see and compose your quickly-observed action shot before it is too late.

    This may be why Sony has made the LCD/EVF aspect so restricting, and why the default settings use Auto switching and leave power on for 20 seconds before sleep. If you use these settings, the response of the EVF is much faster than it is when the EVF only is selected. The camera is already operating, feeding an image to the rear screen, and switches this image rapidly.

    If you are already framing and viewing, shutter timing can be very precise. Indeed, with many subjects I’m so used to SLR-type delays I missed the moment by firing too soon – with the electronic first curtain, the camera sound happens AFTER the shot is taken, which is deceptive. But if you lift a sleeping 7 to the eye and expect to grab a street shot, you’ll be frustrated. It can take two, three seconds or more to get it alive, viewing, exposure set and focus happening. Bike and board action show at Knott’s Berry Farm, Tamron 18-200mm.

    The slowest setup is to use the EVF only and set the image review to any time (it does not matter whether it’s for the minimum 2 seconds or longer). If you enable image review, you’ll be locked out for a second or so from taking another image in fast succession, and you’ll also see the image in the finder. This is a case where the functions of the EVF and the LCD need to be separated. The image review needs to be able appear on the LCD and never block the viewfinder or the shooting pipeline.

    For fast shooting, disable image review entirely and leave the EVF/LCD set to auto with the power save mode set to longer than the gap between any two shots. I don’t think you should ever need longer than the 5 minute setting and for me one minute is enough. You can set up to an hour but I don’t see much point in this, unless you were waiting and watching unpredictable wildlife with the camera on a tripod.

    Though the evidence is nothing more than observation, setting focus peaking may also very slightly delay shooting response, and using a single central focus spot actually seems slower than selecting the 25-point multi area AF (but that so often picks a foreground zone and misses your target).

    When you get the NEX-7 set up correctly for maximum fast response and minimum possible interruption or delay, it’s a fast enough camera to use. Much also depends on the lens; the 16mm f/2.8 is almost instant in response, the 18-55mm OSS is hesitant, and the 18-200mm Tamron likes to wake up, stretch, yawn and then focus. Apparently the Sony 18-200mm behaves much the same way.

    And then, what counts

    OK, I’ve spent a lot of time looking at why a camera which could be nearly perfect falls just short, partly through small details of interface programming and default settings. Most reviews don’t even go into this stuff, apart from describing what can be found in the manual (which you don’t get in a physical form, only as a PDF on the supplied CD).

    In practice, the NEX-7 produces stunningly good pictures at ISO settings under 400 and is definitely at its best with either 100 or 200 set. It is after all a high resolution camera, and in old-fashioned terms it is the Kodachrome 25 or the Pan F of the digital world.
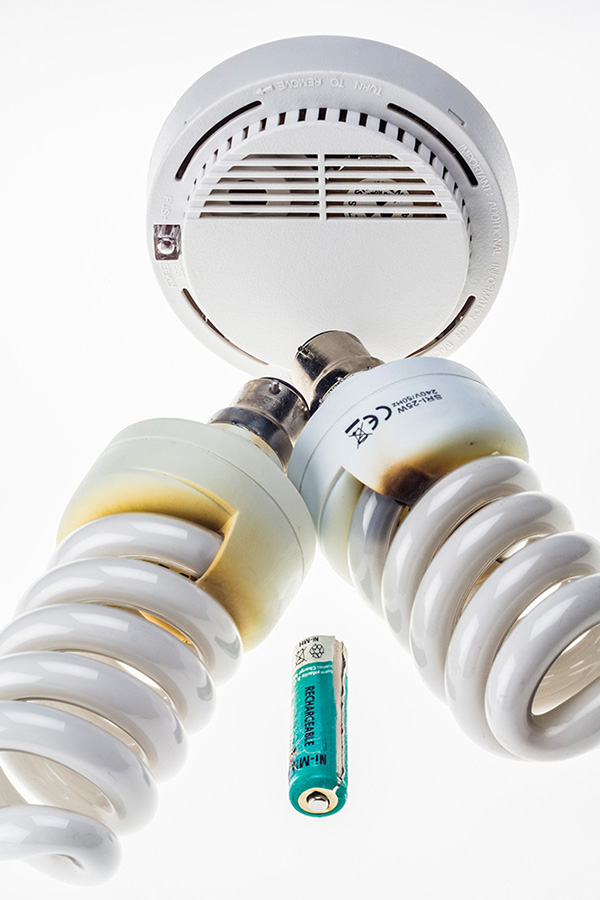
    A studio shot to show the hazards of electrical fires, with smoke detector. These are not contrived subjects, both ‘energy saving’ bulbs fizzled out this way (one hanging down vertically, the other upright in a large lamp) and the NiMH cell got hot enough to burn its covering and split it, in a charger. The NEX-7 at ISO 100, with a 50mm f/2 Russian tilt-lens, reveals a level of detail well beyond most full-frame DSLRs.

    As we have found out repeatedly with DSLRs, there is little point in having expensive lenses and high resolution if the image is not correctly focused. The great strength of contrast-detect AF, and magnified assisted manual focus, is that both offer near-perfect focus regardless of aperture related shifts. You can check directly through the viewfinder by setting AF to DMF, which will automatically magnify the image if you touch the manual focus control of the lens after AF is confirmed.

    The 24 megapixel sensor does not reward apertures smaller than f/11; I normally set f/8 or f/9 with the 16mm f/2.8 or 18-55mm, and use f/11 with the Tamron 18-200mm because the reduction in unsharpness towards the edges outweighs any loss of ultimate resolution.

    The EVF serves perfectly well if you stick to the kind of subjects the NEX-7 is ideal for. While it has some great functions like Face Recognition including registering up to eight ‘known’ people, that sort of function is mainly for people who buy the 7 because it’s the best and looks the part. It is not really a great people camera despite the Smile Shutter and the convenient built-in flash. The NEX-5N is better because people tend to hang around in low light, indoors as well as out, in the evening as well as the day. The 5n has a near two-stop advantage in real terms for effortless high ISO quality.

    Mono Lake, windy summer day; the NEX-7 is great for subjects like this at ISO 100. But so was the Box Brownie… and so is almost every camera made today.

    Nor is any NEX model the ideal choice for pets, kids, school sports or the usual domestic stuff. It’s actually a better camera for creative still life, macro, architecture, landscape, fine art found studies, formal portraiture and of course top grade 1080/50-60p video. Unlike DSLRs (even SLTs) the 7 can focus very smoothly during video if the subject changes distance. No camera can be quieter in focusing or stabilisation.

    If you do decide to stretch the NEX-7 to the limit, I’ve found that as an example the 70-400mm SSM G when fitted using the LA-EA1 contrast detect focus adaptor works well. Focus is achieved surprisingly quickly and far more accurately than on DSLR bodies without Micro AF adjustment. Still, the lens is almost useless. Beyond 200mm, an unstabilised hand-held tele looks worse through an EVF than I can ever remember with optical finders. You really notice the jerky image and if you use the AF-A DMF function with focus peaking for a magnified manual fine tuning at 400mm, it’s like trying to hand hold a 5000mm lens. If you want to play with this, you need a tripod, and a good steady one at that.

    There is no point in having a the best focus or lens quality if the image quality lets you down. I like to use Auto ISO, and find that the NEX-5n for example holds its quality acceptably right up to the high 3200 setting which you can’t limit; it would be so much better if you could stop it going over 1600, too. The NEX-7 also has an Auto range which you can’t customise. It will run from 100 to 1600, and for whatever reason I find it tends to be at the extremes of the range. Far too many images are at 1600, and 1600 simply loses too much detail. With a little care, raw conversion and reduction in image size to under 10 megapixels equivalent can yield an impressive result. But I don’t buy a 24 megapixel camera in order to get 10 megapixels.
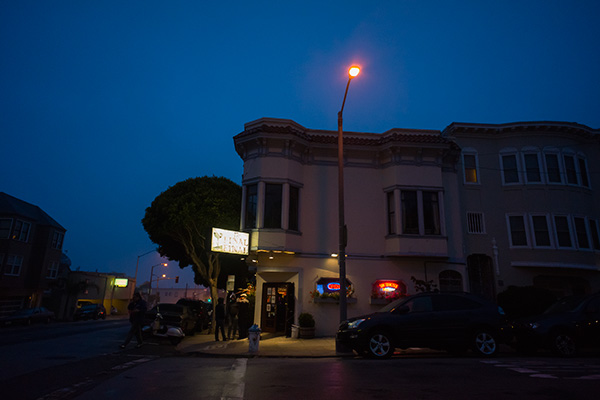
    I find I use the NEX cameras a lot in the evening or at night, when I don’t want a full sized SLR style camera on me. That makes low light, high ISO performance important. Here’s a shot in San Francisco at dusk, just enough light to hand-hold the 16mm at f/4 and ISO1600. By reducing the  image size to 10 megapixels after processing from raw, I get a very acceptable noise-grain structure and excellent sharpness (below).

    The greatest contrast is with a camera like the Canon 5D MkIII. I was using this alongside the NEX-7 for a while, and maybe that colours my view. At 1600, 3200 or 6400 the 5D MkIII is still useful for quality images. The NEX-5n does well up to 1600 and is better than the 7’s 1600, at 3200. I was also using the Nikon D4, and various other cameras. Even the Nikon D800 for a while with its 36 megapixels. The NEX-7 needed to be locked down to ISO 800 or under to make use of the full 24 megapixel native size. I would have liked to have limited its Auto ISO range to 100-400, or 200-800.

    Why 200? The camera does not have in-body stabilisation. This has been another issue for me, with all NEX bodies. The rest of the world goes mad for legacy rangefinder lenses, legacy manual vintage SLR lenses and similar stuff. I don’t. I bought a couple to try at the longer end and realise from the magnified focusing view that if you fit a 200mm, you will need to use 1/1000th shutter speed or even shorter to get any kind of sharpness.

    The Alpha 77 has control over auto ISO range, and has SS, and has in-sensor video stabilisation which by using pixel tracking can cope with any lens you fit even if not identified to the processor. Pixel tracking would have been invaluable in the NEX.

    This shot may look superficially OK, but it was hand-held at 0.6s (2/3rds) with the 16mm. I could almost guarantee that with two frames taken, I would get a sharp one doing the same with the Alpha 77 and 8-16mm Sigma. With the NEX and no anti-shake at all, this was the better of two frames taken with careful support though hand-held. Below, 100% clip from the centre. I very rarely ever have to reject images for this reason. The most serious NEX competition, Olympus’s OM-D system, has sensor stabilisation which works with any lens – just the advantage Alpha users have always claimed. Knotts Berry Farm, museum.

    Ultimately, the NEX-7 demands both stabilisation in the lens used (which the 24mm f/1.8 CZ and Sigma 19mm and 30mm lack) and constant attention to manual setting of ISO to secure the optimum settings for image quality. You can not even set a slowest shutter speed for Auto ISO.

    When you get it right, it’s hard to beat. Turn the viewfinder ‘show effect’ off, so you get Auto Gain in the EVF, set the camera to ISO 100, set a manual exposure for the brightest shot you are likely to encounter and just shoot raw. Push process anything underexposed.

    The Tamron 18-200mm lens

    The NEX-7 with black Tamron 18-200mm, and Alpha shoe fitting HVL-F20AM flashgun mounted.

    I tried two different Tamron 18-200mm lens on Tamron’s stand at Focus on Imaging, one black and one chrome, on my NEX-7. There seemed to be a marginal difference in which side of the image was not quite as sharp, between the lenses, but VC stabilisation could account for this and it was only visible wide open at 200mm.

    I bought one shortly afterwards at the show – apparently the last one there – and the performance was much as expected – as good at 18mm as the 18-55mm kit lens, as good at 200mm as the Sigma 18-250mm OS we use on the Alpha 77. It is as good at 200mm as the 55-210mm SEL lens I tried during the NEX launch event in 2011. When occasional shots show unsharpness towards one side for no obvious reason, I’m pretty sure that this is a result of stabilisation decentering a group. Nearly all stabilised camera and lens combos give me occasionally ‘soft on the right’ results, maybe it’s down to my personal camera shake tendencies.

    The lens was so useful that I stopped bothering to use the 18-55mm at all, and ultimately sold that. If you are going to have an unpocketable camera, it might as well be a little bigger and have the range of lens you need. I did have to carry my HVL-F20AM flashgun to use on the 7 with this lens, as the pop-up flash is barely able to avoid shadows from the 18-55mm (lens hood removal obligatory). The Tamron 18-200mm – and Sony 18-200mm to an even greater degree – will cast a huge shadow from the pop-up.

    This is not just a minor shadow. Lens shade on at 18mm, you have a mound of shadow occupying a third of the frame to the left. You get a shadow in shot right up to just before 200mm with the hood on, and up to around 40mm with it removed. In practice, you can’t use the pop-up safely at settings below 50mm and you can’t use the lens hood if you do.

    The HVL-F20AM gives no shadow at all even at 18mm with the Tamron with the hood fitted, and having separate batteries it does not further exhaust the hard-worked NEX-7. Folded down to the off position, it sits neatly above the Tamron lens body. So the recommendation has be Tamron or Sony plus this accessory flash, if you want to go the 18-200mm route.

    The Tamron may have an acceptable close-up ability when set to 200mm, but at 18mm it lags behind the 18-55mm and way behind the 16mm pancake. If you are used to the 16mm’s ability to focus on subjects barely a hand away from the front rim, the 18-200mm’s inability to be used for this kind of wide-angle close-up will frustrate you. I would never consider leaving the 16mm behind – or its ultrawide and fisheye converters.

    If you set the camera to use auto correction for vignetting, distortion and CA it appears to recognise the Tamron and to apply appropriate adjustments. I don’t know if this is because the Tamron is an authorised SEL lens, and Sony have data embedded in the camera firmware, or because Tamron is used the same identity as the (very different) Sony lens and it’s pure chance that corrections are similar.

    I saw several children running towards this scene, but these were the last two. I’ve retouched a badly positioned child and a notice board out of the shot. The NEX-7 with 18-200mm Tamron was only just fast enough in operation to enable this shot. Anything much more spontaneous was rarely caught on time.

    Whatever the case, if you want fast viewing and focusing and only shoot raw like me, disable lens corrections in firmware. It is difficult to judge or measure exactly what happens, but I find the 18-200mm tends to have a seek and find action when focused to start with which makes it slow, and that a further ‘wobble’ is created by the corrections as they are applied to the live image. It’s almost like a small auto zooming effect, depending on focal length, and if you zoom the processor may apply a new correction.

    The slowest overall combination involves using ‘Effect On’ in the live image, AF, Face Regnition, Object Tracking, Auto ISO, and auto exposure setting like A or P, stabilisation on, and lens correction. This is not specific to the Tamron, but it tends to show the slowing-down effect most.

    The NEX-7 will work fastest if you turn all this off and work manually, with manual ISO, manual focus. But of course you can’t really do that in practice. And, if you have used any EVF Sony camera, you’ll know well enough that startup times in tests are irrelevant. You are just as likely to have a second wasted as the viewfinder switches from burn-out blank to normal exposure as you are to have an AF lens do its yawn and stretch routine before finally ambling down the stairs to get breakfast.

    Having recently used the Canon G12, G1X and Fujifilm X10, I can confirm that there are substantial benefits to optical finder operation as long as the camera is genuinely able to autofocus during a hasty shutter press. Sony has yet to achieve this, and it does not surprise me that the useful 16mm optical finder designed to pair up with the pancake lens does not fit the NEX-7, which lacks the smart accessory connector. So you don’t have that option with it as you do with the 3 and 5 series. The 16mm optical finder could also be used, reasonably well, with the 18-200mm locked at 18mm (the Tamron lens has a lock).

    The comparison in size between the 70-400mm Sony G lens and the 18-200mm Tamron, the Alpha being shown fitted to the 7 via an LA-EA1 adaptor (which does enable it to focus, very accurately and not too slowly).

    Comparing A77 use to NEX-7 use, a superzoom on the A77 focuses in the time it takes to press the shutter, with phase detection AF, but the A77 finder is every bit as slow as the 7 thanks to the 24 megapixel sensor and the way it provides your live view. I’d have to rate the NEX-7 plus 18-200mm as the slowest combination I have ever used, and if this camera had been provided to me for review in the guise of a compact with a built-in zoom of this range, I would have dismissed it as unusable from the start.

    Such is the appeal of the camera with 18-200mm that I never felt that way. There are a few other ‘likes’ to help, like the Tamron’s filter thread of 62mm matching my Alpha 77’s CZ16-80mm so it can share one polariser.

    Finally, like the Sony 18-200mm the Tamron has its OSS and focusing both optimised for video. The slow and occasionally odd behaviour of AF for stills may be due to the smooth, damped AF during video which hardly ever hunts off-target and always transitions between planes without jumping or overshoot. The OSS during video is amazingly stable, and both functions are so close to being silent they make other systems seem crude. This did not prevent focus from eventually drifting for no apparent reason during some long clips.

    This video was shot at a photo trade show using the NEX-7 and 18-200mm, hand-held and walking while shooting. The refocusing and stabilistion can both be judged from it.

    There is none of the noisy IS you can find in a Canon lens, and when comparing the sound picked up that system’s new 5D MkIII with a 70-200mm IS L lens against other options, the NEX-7 with Tamron 18-200mm emerged as the quietest of all possibilities. It was almost matched by the A77 with an SSM lens, but the sudden and fast focus responses given by the PD-AF systen during video both caused loss of focus with sudden changes, and more audible operation.

    NEX-7 with Tamron 18-200mm and Rode Pro Videomic with ‘dead cat’ wind baffle.

    The NEX-7 with this lens is uniquely good as an HD camcorder. Even if you bought the lens and never used it for still work, it would be the lens which completes the camera as a decent spec video rig. The same applies to Sony’s own 18-200mm. This isn’t to say you will not encounter some unusual effects if you choose to shoot freehand, to pan with subjects or zoom with AF and OSS active. Occasional distortions or apparent jumps in position of the subject can happen. It’s unfair to criticise any system for this, as the solution is to disable stabilisation and AF, mount the camera on a fluid head tripod, lock in manual exposure settings and shoot like a pro.

    Tamron updated my lens under warranty to solve a definite problem with shooting panoramas (the original batch of lenses simply didn’t work – areas of blur and bad stitching). The service is handled in Germany not the UK. It eliminated the problem.

    Parting with the NEX-7

    Despite everything, after my final two-week trip using the NEX-7 and Alpha 77 side by side (or for different situations) in California I made the decision to sell the 7 and Tamron. I had not been able to afford the camera and the zoom to start with, especially so soon after investing in the Alpha 77. Based only on the three months spent with the NEX, it didn’t make many exposures; a mere 1500 or so. That’s because of the way I use NEX cameras generally. They are my pocket notebook, my out-shopping, business travel or evening out camera.

    With the Tamron, or indeed the 18-55mm which I’d sold almost immediately in order to finance the Tamron, the 7 is not a pocket camera or even an under-jacket camera. Whenever I was in an unknown location – a stop on the road, a wildnerness view, a beach with no sign – I used the Alpha 77 and waited for a GPS lock before shooting. I wear an old Lowepro Sideline Shooter belt-pack bag which leaves hands free and places no strain on neck or shoulders, and having first packed it with NEX-7, filter, batteries, cards, 18-200mm, flash, two converter lenses and 16mm I found it was just as happy with A77 and 16-80mm, 8-16mm and 70-300m Sigmas and accessories. It weighs more but proved just as convenient.

    Both the NEX and the A77 went through twice as many batteries as Shirley’s Alpha 580 despite not taking as many shots, per camera. EVF cameras are power-hungry. Both definitely lost me shots I wanted to grab and would have secured with a conventional DSLR or a faster compact. Having a shutter response time of 0.02 (1/50th) second means little if you have an aperture-focus-exposure cycle taking seconds when the camera is raised to the eye and first pressure is taken on the shutter.

    Both A77 and NEX-7 also went through my stock of 16GB memory cards, shooting raw only, rather too quickly. For the A77 I’ve now bought a 32GB. You do not need to do much shooting to fill up cards with a 24 megapixel camera.

    Having packed up the 7 and sent it to its new owner, I very nearly bought another. It’s a camera like that. When you consider that extremely fast response – so fast that unless you retrain yourself, you will anticipate action too early – and the amazing low light AF ability, high resolution, controls and handling, video quality, high grade shutter, near-silent operation… there’s nothing else like it. Then you remember that the A77 and A65 match nearly all aspects that matter except the ‘pure’ mirrorless design and compatibility with all kinds of optics.

    I had already owned a NEX-5n with accessory EVF and other kit, and despite liking the quality delivered, decided that this was not the pocketable solution either. For a while I had both together. I’m reverting to a first generation NEX-3 taken in part payment for the NEX-7, which will be happy with my 16mm; I’ve checked some of my 2010 14 megapixel files, and find the Adobe Camera Raw 2012 process and new lens profile handling improve them significantly. I guess my argument is that I had considered a Canon G-1X, but remembered that it’s only 14 megapixels, its noise performance is no better than a first generation NEX, it doesn’t do close focusing the same way, doesn’t have wide and fisheye converters, and if anything it’s bigger.

    Reverting to a ‘traditional’ old NEX without the flash shoe and auto-gain live preview means I can’t use it with studio flash. But I never wanted to use the NEX-7 with studio flash (AC main strobe) except for the purposes of testing that function. I have an Alpha 900 and an Alpha 77!

    So what advice?

    Here’s my view. If you do not own an Alpha SLT 24 megapixel camera, or a compact of high quality, the NEX-7 is a star buy. You just have to be aware that this is absolutely NOT the camera for birds in flight, dogs running, kiddies scooting round the living room, sports, candids or street shooting. All are possible and owners have good examples.

    It’s a really great buy if you have some vintage short focal length Leica, Contax or similar glass and want to make good use it without spending twice as much on a Fujifilm X-Pro1 or a Leica.

    It’s the only camera of its type that can do smooth refocusing during video, silently, maybe 75% of the time. Unfortunately, the 25% when it wanders off focus completely for no apparent reason makes life with AF video not much better than it is with every other unsatisfactory solution. If you shoot video, you’ll get some of the best ever quality 1080p from the 7, but you’ll end up using a tripod with manual focus and exposure for anything beyond casual clips.

    The NEX is a cat, so don’t expect it to do dog tricks. Or obey!

    Reasons why I am wrong include the 50mm f/1.8 OSS lens which I don’t have. If I had the cash to hand I might have bought one, and who knows? It might have been a compelling reason to stick with the NEX-7. But I’ve got a great 50mm f/1.4 Sony for the Alpha 77. The adaptor LA-EA2, which puts an Alpha 65-style AF module and SLT mirror on to the body to work with Alpha mount lenses, could also have tipped me in favour. But once it’s all assembled, it’s approaching Alpha 77 size without the ergonomics or bigger battery.

    You buy a NEX to do the things a compact system cameras does well, like being small and portable, unobtrusive and precise in feel. It happens, uniquely, to beat most DSLRs in two or three aspects – image resolution and quality including dynamic range, versatile lens compatibility, and focusing accuracy whether AF or manual (based on the near-perfect precision of contrast detection or magnified visual with peaking indication).

    If you DO own an Alpha 77 or 65, and thus have access to almost the entire feature set of the NEX-7 already, I suggest that your money – the better part of $2000 or £1400 with a zoom like the Tamron – is better spent on reinforcing your Alpha system if necessary, and acquiring a large sensor compact of the new 1X generation. For my outlay I could, admittedly six months after my NEX-7 purchase, have a spare Alpha 65 body and an RX100.

    Here are some parting thoughts:

    1) Battery Compatibility – the NEX models share a battery size with the Alpha 55, 37 and similar bodies. If you own a 55 without too much investment in lenses, moving to NEX-7 could be neat. I enjoyed travelling with my A55 and NEX-5 plus a pocketful of small batteries charged up!

    2) Electronics Break Down! If I really wanted to go with NEX, I’d be better off buying two NEX bodies, an LA-EA2, having one battery type but also a coherent backup. If I really want to major on Alpha a-mount SLTs, my first backup investment should be a second Alpha body. I have that (A55 and A77) but guess what, I risked two weeks travel and shooting with A77 and NEX and never thought to sling the A55 in the case.

    3) EVFs suck. They are wonderful, but if all you have is EVF, you miss half your potential. We are keeping our Alpha 580 and even our 700 and 900 for the moment. See also – Electronics Break Down!

    4) 24 megapixels is a dozen too many. Most of the time you only need 6 megapixels, sometimes you need 10 or more. Very rarely does anyone need 24, except if they are shooting sports and wildlife, or something where a crop helps. Guess what the NEX-7 is not so good at. When you do need 24 (or even more) you don’t often need a pocketable camera. Note to Sony: RX100 – 20 is probably too many, too.

    – David Kilpatrick

    See NEX-7 at B&H (if you use this link or our B&H sidebar adverts, or Amazon ads, we do make something – not a great deal, and it does not cost you anything, but it can add up to help pay site costs).

  • 50,000 megapixel camera

    DURHAM, N.C. — By synchronizing 98 tiny cameras in a single device, electrical engineers from Duke University and the University of Arizona have developed a prototype camera that can create images with unprecedented detail.

    The camera’s resolution is five times better than 20/20 human vision over a 120 degree horizontal field.

    The new camera has the potential to capture up to 50 gigapixels of data, which is 50,000 megapixels. By comparison, most consumer cameras are capable of taking photographs with sizes ranging from 8 to 40 megapixels. Pixels are individual “dots” of data – the higher the number of pixels, the better resolution of the image.

    The researchers believe that within five years, as the electronic components of the cameras become miniaturized and more efficient, the next generation of gigapixel cameras should be available to the general public.

    Details of the new camera were published online in the journal Nature. The team’s research was supported by the Defense Advanced Research Projects Agency (DARPA).

    The camera was developed by a team led by David Brady, Michael J. Fitzpatrick Professor of Electric Engineering at Duke’s Pratt School of Engineering, along with scientists from the University of Arizona, the University of California – San Diego, and Distant Focus Corp.

    “Each one of the microcameras captures information from a specific area of the field of view,” Brady said. “A computer processor essentially stitches all this information into a single highly detailed image. In many instances, the camera can capture images of things that photographers cannot see themselves but can then detect when the image is viewed later.”

    “The development of high-performance and low-cost microcamera optics and components has been the main challenge in our efforts to develop gigapixel cameras,” Brady said. “While novel multiscale lens designs are essential, the primary barrier to ubiquitous high-pixel imaging turns out to be lower power and more compact integrated circuits, not the optics.”

    The software that combines the input from the microcameras was developed by an Arizona team led by Michael Gehm, assistant professor of electrical and computer engineering at the University of Arizona.

    “Traditionally, one way of making better optics has been to add more glass elements, which increases complexity,” Gehm said. “This isn’t a problem just for imaging experts. Supercomputers face the same problem, with their ever more complicated processors, but at some point the complexity just saturates, and becomes cost-prohibitive.”

    “Our current approach, instead of making increasingly complex optics, is to come up with a massively parallel array of electronic elements,” Gehm said. “A shared objective lens gathers light and routes it to the microcameras that surround it, just like a network computer hands out pieces to the individual work stations. Each gets a different view and works on their little piece of the problem. We arrange for some overlap, so we don’t miss anything.”

    The prototype camera itself is two-and-half feet square and 20 inches deep. Interestingly, only about three percent of the camera is made of the optical elements, while the rest is made of the electronics and processors needed to assemble all the information gathered. Obviously, the researchers said, this is the area where additional work to miniaturize the electronics and increase their processing ability will make the camera more practical for everyday photographers.

    “The camera is so large now because of the electronic control boards and the need to add components to keep it from overheating,” Brady said, “As more efficient and compact electronics are developed, the age of hand-held gigapixel photography should follow.”

    Co-authors of the Nature report with Brady and Gehm include Steve Feller, Daniel Marks, and David Kittle from Duke; Dathon Golish and Estabon Vera from Arizona; and Ron Stack from Distance Focus.

  • Mixed up market – specced up compacts, dumbed down DSLRs

    Canon has pulled off another change in the direction of DSLR development with the EOS 650D, but in the process seem to have accepted a blurring of the boundaries between consumer cameras and enthusiast gear. Sony has finally bowed to pressure and put raw image processing back into a compact, using a larger than normal sensor, doing the same in reverse.

    To explain, neither of these cameras belong within Photoclubalpha – we don’t usually report on Sony Cyber-shot compacts, equally rarely on Canon’s latest competitor to the A57. But these two cameras are waymarkers. They show us where two strands of development are heading, and how they are converging.

    Canon EOS 650D

    650D with new 18-135mm STM lens, required stepper-motor technology for off-sensor video auto focus

    The new points about the 650D (also known as the EOS Rebel T4i for that least rebellious of areas, the USA) are simple enough. It’s yet another 18 megapixel APS-C model in the series 500/550/600 rather than the more professional 50/60/7 body form. Maximum frame rate is 5fps. It has full 1080p HD, but only at 30fps maximum (720/60p) with a 5.5MB/sec data rate. Unlike previous models, this one can focus during video shooting, and may well do it better than a NEX.

    It has a conventional 9-cross point phase detect AF module much improved over earlier versions, included a central double-cross f/2.8 sensitive point. When shooting video, hybrid AF combines normal wide area contrast-detection with a similar centrally located phase-detect pixel arrangement that offers much faster locking on before the CD takes over to fine tune and track moving subjects or faces.

    No visible signs on the CMOS – but that sensor had a phase-detect central zone

    So there are two AF systems, one of which remains live for video. To work properly it needs a new type of lens motor, called STM. This stepping motor appears to be not unlike the NEX system lenses, offering the necessary control for AF during video with silent action. Just two lenses initially have it, a pancake EF 40mm f/2.8 STM and a general purpose stabilised EF-S 18-135mm f/3.5-5.6 IS STM. If you know your Canon system terminology, you’ll spot that the 40mm is compatible with full frame DSLRs it’s not just an odd 64mm equivalent for the APS-C models.

    With other lenses, the implication from Canon is that AF during movie shooting will not work. That includes the cheapest kit option, the 18-55mm. No matter what type of USM or micromotor AF drive. If you want video with AF, you need the new STM lenses.

    The Canon phase-detect on sensor is purely a central patch, not an overall function like Nikon’s 1 system 71-point PD. But, like consumer cameras, Canon adds touch screen functions to the 650D. This is a response to consumer demand. You can still operate the camera with the rear screen completely reversed. I have to admit that the first thing I did with the NEX-5n was to disable the touch screen function, and never use it.

    For a Canon, the 650D has a surprisingly limited battery range, as low as 180 shots per charge if live view, flash and image review functions are used in their worst-case scenario.

    The Sony Cyber-shot RX100

    A neat metal bodied almost Samsung-like compact, the RX100 has an 8.8 x 13.2mm sensor, the 1/1 or one-inch ‘1’ format already used by Nikon. It offers a stabilised Carl Zeiss 28-100mm equivalent lens which is very fast (f/1.8 at the wide end, f/4.9 tele) and may be of enthusiast-pro quality, and a 3″ rear screen where daylight viewing brightness is enhanced using white pixels as well as RGB.

    The RX100 offers full HD movies at 28M bitrate – 1080/60p equal to NEX and Alpha. It also seems to get reasonable life from a small battery, 330 shots or 165 minutes of movie, and to have a decent 2.5fps conventional fps plus the popular Sony 10fps speed piority mode.

    For most of us, the really big news is that for the first time since classic bridge camera models like the F-828 Sony has decided to provide raw image capture in a pocketable compact. No doubt the success of the Fuji X10, Canon G1X and others has been observed. It is fair to say that Sony could have put raw capture into far more compacts – they all have it hidden away away, an ability carefully locked out by firmware.

    To date, we have felt that Sony wanted to protect the NEX and Alpha markets at any cost by omitting raw even from the best Cyber-shot models. The RX100 changes this perception. It leaves the expensive semi-pro hybrid video and still camera, the NEX VG-10, looking a bit sad with its JPEG-only still capture. After all, if compact owners do indeed want raw, surely VG-10 owners would be expected to want no less?

    And that sensor is 20 megapixels. It’s twice the pixel count of the Nikon 1. There was a time something like happened in the past. Nikon made a camera called the D1 (then D1X) which had a 5-megapixel sensor, and then a sort of firmware and processing fix to make it halfway like a 10 megapixel sensor. It was revealed that the ‘rectangular pixels’ of the D1 were actually two pixels in a strip. When a different RGB topping and readout was applied to the same exact silicon, it became the Sony 10 megapixel sensor we saw in the Alpha 100 (and the Nikon D200). Nothing like that could possibly have happened with a Sony 20 megapixel sensor to make a Nikon 10 megapixel sensor, even though they both share the same unusual 8.8 x 13.2mm size.

    And even though Nikon uses a whole stack of pixels on that sensor to perform phase-detection AF without any apparent loss of those pixels to the image – spread out over 71 points across the entire frame too. There’s no way, is there, they could ever have based that 10 megapixel PD-AF capable sensor on a Sony 20 megapixel original.

    – David Kilpatrick

  • Go wider than wide with Photomerge

    In the latest incarnation of Photoshop, CS6, the Photomerge function is faster than ever before and leverages all the context-aware, pixel matching math of the previous versions enhanced to a degree you’ll find hard to believe.

    Sony NEX and Alpha cameras have the same technology built-in for their sweep panorama mode, but anyone who’s used this frequently will know that failures happen, like stepped sea horizons and double imaged or squished-flat people.

    Photoshop has the menu item Photomerge under ‘Automate’ in the File Menu. It is a panoramic stitching function, but it does not need you to shoot with a tripod or even shoot with care. You can stick a wide angle lens on your camera, take two pictures with radically different vanishing points, and still end up with a neatly stitched perspective.

    What you need to know is how to NAME your images or what order to shoot them in. Contrary to what you might expect, Photomerge inherits its geometry from the LAST image in your sequence. So, if you have these three images:

    This is the order you need to name them. I shot these with the bottom one first, of course – my level horizon straight-on shot. Then I aimed up, and then up again, overlapping three shots. If I then select these for Photomerge, Photoshop will correctly realise I want a vertical panorama stitch but it will not use the straight-on shot to set the image angle and geometry. It always picks the LAST shot, so I must rename my JPEG conversions 1, 2 and 3 as they appear above.

    If your open tabs, or the stacked order of open windows, does not place the target perspective LAST you’ll get the wrong result. Here is what happens if the first shot (the bottom one above) is placed as the first tab in a multi-tab PS window, or the top window in a stack of separate windows, before adding OPEN FILES to the Photomerge window:

    I used the NEX-7 with the 16mm f/2.8 SEL wide angle for these three shots. The composite, before cropping, measures a substantial 130MB. This technique enables you to use almost any wide-angle lens to create impossible wide views.

    Here is the result when you stack the shots in the right order, so the program takes its perspective cues from the vertically-correct frame (the last one shown at the top):

    You have no manual control over the perspective rendering. It’s all down to feeding Photomerge the right images, in the right order. Here is the fine tuned and cropped result:

    This is an unretouched merge of the three frames. I’ve been trying this on various subjects, some rather silly, and Photoshop CS6 simply nails the merging even with focus, exposure or tilted camera errors. There are much lower cost programs which stitch images and do it well, but this takes a matter of a few seconds to create a final image equal to 40 or more megapixels. Not bad for a tiny 16mm lens!

    Tip: instead of adding Open Images, browse and add one at a time, making sure the perspective-key shot is the last one added.

    If you shoot architectural or landscape images, this function’s enhanced performance allows you to leave behind your 8mm. Except, of course, you don’t have one. If you do have an 8mm, welcome to the world of 5mm…

    Added example – the next day…

    I returned to the building (the other end of it) the day after posting this article because I wanted to add something far more complex, still shot by hand, using the NEX-7 and 16mm, showing just how amazing Photomerge has become. I wanted foreground and background elements, complex geometry and a matrix of shots not just a row of them.

    Here is my matrix of shots – every one of these is an 85° diagonal view, 16mm on APS-C:

    Here is the result of the Photomerge window before final adjustment and cropping:

    This is a 400MB+ Photoshop document and over 200MB in flattened data size. Below is the final crop, with a small rotation and correction of vertical perspective:

    This is a 119MB JPEG 6919 x 6013 pixels in size, no retouching has been used and the raw conversions are default with the 16mm E lens profile. Some fringes remain visible, the image could be downsized and corrected further. Remember.. this is the often-criticised 16mm which I find to be an excellent little lens. You can download the full size sRGB JPEG saved to Level 10 quality (14MB file) from the link below if you are Photoclubalpha subscriber. It will not appear if you are not a subscriber.

    [private]

    Subscriber Link

    [/private]

    – David Kilpatrick

  • Nikon D4 and Canon 5D MkIII video test clip

    These short clips are not intended to test all aspects of the cameras, of course. They are taken from a number of tests made with the cameras, and show some reasonable comparisons of quality.

  • David and Goliath? Nikon D4 dwarfs NEX-7!

    Side by side on my light table (which collapses with a ‘pop’ when sixteen tons of Nikon is placed on it), and the NEX-7 is given the foreground role to avoid any accusations of using perspective to make it look tiddly.

    I’m writing some reviews of the Nikon and other new professional DSLRs for the British Journal, so I won’t say anything about the Nikon’s rather wonderful 16 megapixel full frame sensor or its stunning low light performance. I hope when Nikon read my reports they’ll decide to send me to photograph in the Arctic Circle in December – there would be plenty of light for this beast.

    This picture won’t be going to the BJP. I like it because these are equivalents. The Nikon’s 28-300mm VR is admittedly f/5.6 at the long end (and a vast amount better than any Sigma or Tamron 28-300mm or 18-200mm yet made). But otherwise, these are zooms with the same range of angle, both stabilised, both very quiet in both focusing and IS action, both very well-made.

    And the cameras are both a real pleasure to use and produce 100% professional results. The difference is that if I stick the NEX-7 combo under my coat, I do not look like a shoplifter or terrorist with a concealed weapon of mass-perturbation.

    Watch out for our NEX-7 review soon. I’m not hurrying and it may be a month or more.

    – David Kilpatrick

  • Minolta 70-210mm f4 versus Canon 70-200mm f4 L IS

    The Canon 5D MkIII arrived, but I will not be reporting on that here – it is with me for a British Journal review, and that will take a little time and will also be exclusive to the BJP in print and on iPad App. So no sneak preview anywhere else!

    However, with the camera came a 70-200mm f4 Canon L IS lens. This month I picked up a very cheap 70-210mm f4 Minolta AF – the ‘beercan’ original from 1985 which has a broken lens hood, the wrong lens cap (why the hood got broken) and a slightly rough focusing travel that tends to get locked into a near or far range without having a limiter.

    So, since the loaner 70-200mm from Canon was in an equally well-used state, and the question keeps being asked whether the old Minolta is a match for it, I thought I would A-B the two lenses with the Canon on the new 5D MkIII and the beercan on the Alpha 900.

    I call this comparison ‘can o’beer versus a yard of L’ for reasons the product size comparison should make clear:

    Of course a lot of this is the Canon lens hood (anyone with a flair for geometry will spot that the narrower, shorter Minolta hood is nearly as effective, just draw a diagonal from front left to rear right of the hood to see why). And the Canon has IS built in, as well as a focus range limiter. During operation the Canon was rather noisy, making a constant whispering sound from the IS even though the USM focusing was silent. The Minolta of course zips and clunks into focus, but is otherwise silent, and the A900 in-body stabilisation did not make anything like the same level of operating noise as the in-lens IS.

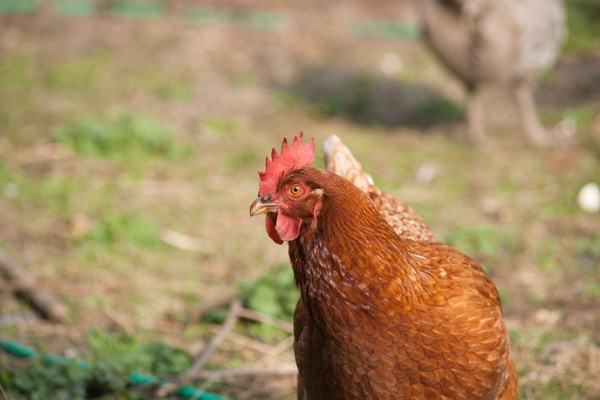
    Although there is no doubt the Minolta lens is less sensitive to AF commands (if that’s the best way to put it) actual targeting a new focus point and locking on seems every bit as fast. It’s nowhere near as good as the Canon at continuous AF subject tracking, but the Canon was nowhere near as good as the Minolta/Alpha combo at user-targeted aim and focus operations. The Canon spent a lot of time being out of focus and then rapidly refocusing, with my moving targets (backyard hens, if you have them you’ll know what perfect focus test subjects they provide). The Minolta spent time staying focused and not responding much.

    Reviewing the results, I can only say the Alpha/beercan combo had a better success rate. Nearly all the shots were critically sharp where a good few Canon shots either didn’t get enough IS to combat shake, or maybe the IS was actually taking the edge off sharpness. This applied particularly at closer distances, where the Minolta (210mm, front group focus  and 1.1m focus distance) seemed much better than the Canon (200mm, internal focus and 1.2m minimum).

    For this article, I have made 2000 pixel wide reductions from my test images. These are within the 2MB limit at high quality for images within the site. Subscribers to photoclubalpha can also access hi-res full sized images (over 70MB in total, so beware) through an additional page link provided at the end of this report.

    The tree and twigs test

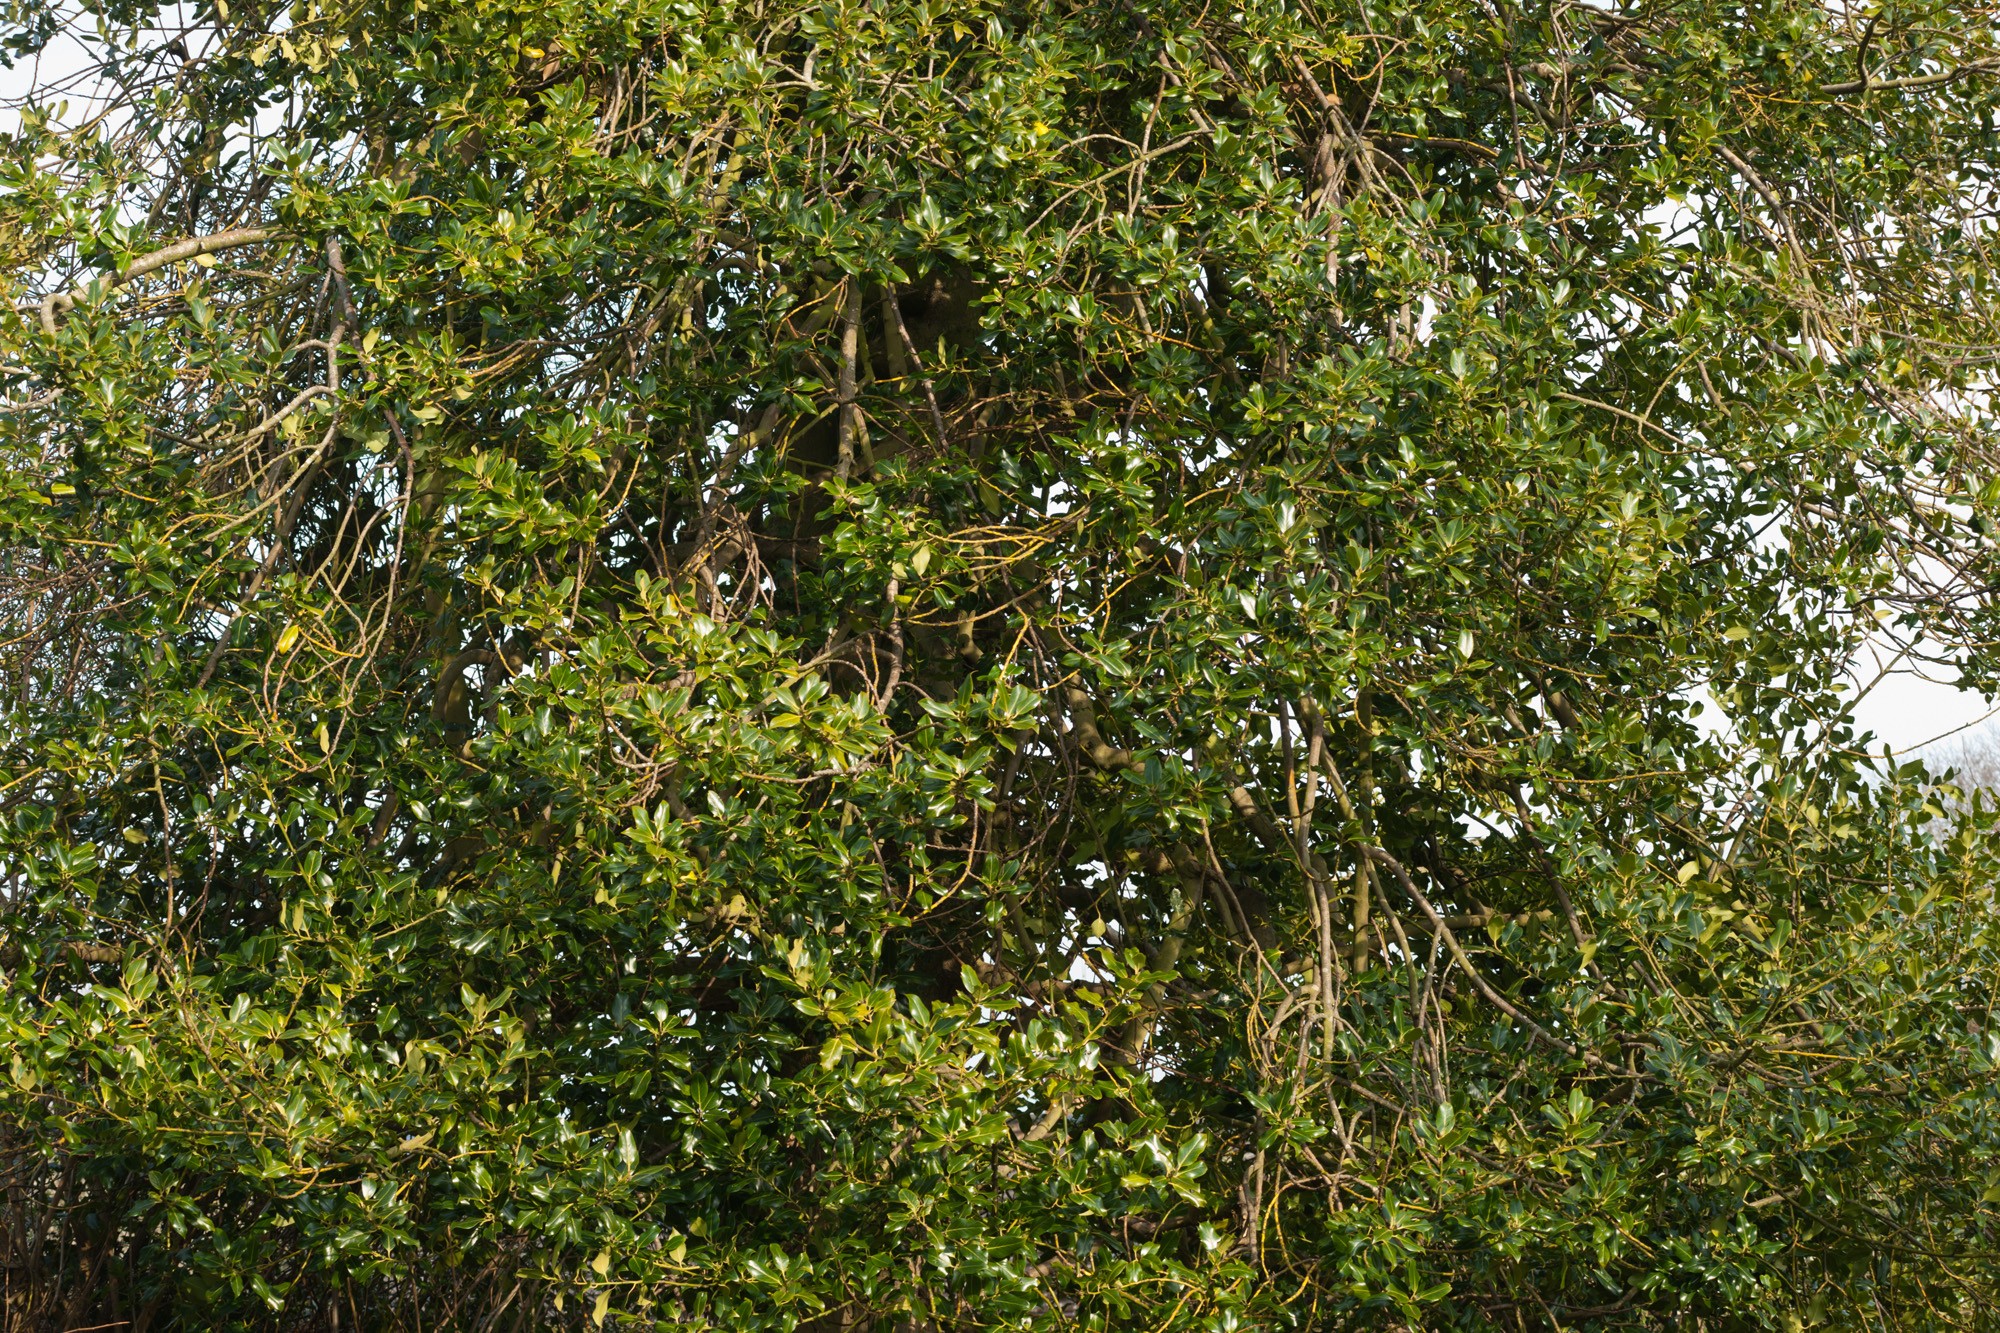
    Our big old holly tree provides a suitably evil subject for any lens with chromatic fringe or purple fringe issues. I shot everything raw; no lens profiles were used, the conversion was done using Adobe Camera Raw 6.7Beta. Like Lightroom 4, this offers automatic analysis of CA even without requiring lens profiles. In fact, adjustable CA is entirely disabled – gone. I can tell you it works amazingly well. Lenses which have been very difficult to clean up are fixed. It isn’t even one-click – just set ‘Remove CA’ as a default, and that is it, for all lenses, for ever.

    I used the tree for hand-held (with stabilisation) ISO 100 tests at f/4, f/5.6 and f/8.

    I thought the beercan would be bad for fringes and CA. On the Alpha 900, it simply wasn’t. The full aperture image was surprisingly clean. The Canon lens on the MkIII actually showed more colour fringing. Both cleaned up in ACR 6.7b. As for sharpness, it seemed to me to be a draw. I picked a 3D target to avoid slight front of back focus differences influencing the result.

    Above – Canon at 70mm and f/4 – click image to open 2000 pixel wide version

    Above – Minolta at 70mm and f/4 (same applies, to all these example)

    Above – Canon at f/5.6

    Above – Minolta at f/5.6

    Above – Canon at f/8 (for the f/8 images, the ACR conversion was cut by -0.30 EV exposure, as I felt both cameras had predictably overexposed a little, but the wider apertures were left this way as it emphasises any CA – since f/8 is an optimum aperture with cameras of this resolution, I aimed for the best straight conversions)

    Above – Minolta at f/8.

    Long end tests, moving and static, medium to close

    A range of different subjects ended up being shot on both cameras in the garden. I was, at the same time, shooting various tests on Fuji X10 and Pentax Optio WG-2. If that Pentax could shoot raw files it would be a real winner because the lens is lovely! When you start poking small cameras one or two cm away from small flowers, you realise how limiting the larger format and longer lenses can be.

    But the small cameras could not catch a single decent snap of hens scratching around as I worked. They move too fast and just the focus lag along, let alone the shutter lag, stops even the best compact or pocket digitals from being useful.

    Here’s a Canon shot. I took half a dozen similar shots with both cameras, slightly varying in distance and with two different hens, at f/5.6 and also some at f/8, all at maximum focal length. It would be hard to say the Canon was better as the success rate was lower. It seemed to focus faster but not as accurately, with both cameras set just to use the centre sensor (as the overall frame compositions tell you).

    This is 50% of original pixel scale. Click the image for a 1200 pixel square, 100% clip view.

    Here’s an Alpha 900 shot with the  Minolta at the same settings, ISO 320 RAW, exactly the same ACR 6.7b parameters used (25, 0.5, 25, 0 Sharpening; 20, 25, 0, 25, 50 L and C NR; strong contrast curve; black point 0; Adobe Standard colour calibration; CA Correction enabled with Defringe Highlights but no Lens Profile; both with exposure dropped by -0.3EV, no other change to defaults).

    Again, if you click this 50% view you get a 1200 pixel square clip. Remember, no web or print sharpening is applied. The red hen is a little lower in contrast but so is the Minolta lens, I think, and so is the Alpha 900 default rendering – the 5D MkIII either has less dynamic range, or processes with a steeper curve to the raw. Or Adobe simply applies more contrast to the Canon raw ‘under the hood’.

    These pictures are at 1/320th for the Canon, 1/200th for the Alpha – anything less than 1/200th and hens move their heads so fast you don’t stand a chance of a sharp image. Aperture priority auto.

    Close-up ability

    I find the small difference between 1.1m and 210mm, and 1.2m and 200mm, significant. This is a recurring theme for me. Around 1m, differences of 10 or 20cm either way in minimum focus distance are critical. They can make the difference between working at arm’s length, within reach, or out of reach. My perfect close-up situation allows me to reach a hand out and adjust a subject, so I really like lenses which focus down to 60cm or so. I also like to be able to place my lens against glass, or right up to wires, to get shots through windows and barriers. A classic example would be a small animal in a wire zoo cage. If your lens won’t focus closer than say 1.5m, often you can’t place it up to the wire and therefore you can’t get the shot and blur the wire out. But if the lens focuses down to say 0.9m you can. So for me, any gain at all in minimum focus distance is good. I’m not keen on the way Sony’s SAM versions of once-screw-drive lenses generally lose a bit of close focus range.

    Here are the results of the Canon and the Minolta at their closest focus-confirmed setting. I used ISO 320, and f/11, hand-held with stabilisation.

    Again, if you click this image you will get a 2000 pixels high version. The Canon colour – or maybe the Auto White Balance – is better than the Alpha shot which follows. It may be down to lens colour transmission, as the 1985 Minolta glass is yellower than the Canon. I measured the transmission using a Kenko Color Meter (the new version of the classic Minolta Colormeter IIIF). The Minolta is roughly 5Y+5G and would need a 5B+5M filter pack to match the Canon lens transmission.

    Here’s the Minolta lens shot, closer because of the 1.1m focus and 210mm focal length:

    Again, clicking on the image will get you to a 2000 pixel high size.

    These close-ups had me really thinking. I had to go back and check the settings. I can assure you the pix really are from a distance of 10cm apart – I did not move, I just squatted back a bit with the Canon; the lenses were at 200mm and 210mm; the apertures were both f/11, both cameras were at ISO 320, both gave the same 1/160th exposure. Yet just study the bokeh (differential focus) of the Minolta images. Look at the thickness of the blurred dry plant stem crossing upper right in the background. Look at the green leaf behind the hyacinth. Study the larger version for the focus point in each case (it’s comparable). The beercan just seems so much better able to separate out the subject from the background, without losing depth of field within the flower. Yet if you look through the two lenses from the back element end, wide open, the Canon appears to have a huge aperture by comparison – a really wide exit pupil.

    Does it all prove anything?

    So, what do I conclude? Well, I know from many years of using the 70-210mm that it can benefit from an even deeper hood, maybe on the scale of the Canon. It’s not a contrasty lens, and it can get some serious internal reflection – big flare patches, even veiling the entire frame. And on some earlier cameras even APS-C size, my earlier examples of this lens had been prone to very strong purple fringes. But I have never had an unsharp example and some of our best, sharpest digital shots have come from the classic 70-210mm beercan.

    I’ve already been finding just what a transformation Adobe’s Camera Raw 6.7 beta (release candidate) makes with its auto analysis of the image to apply CA removal. Distortion and vignetting just aren’t significant issues with tele zooms of this type, so full lens profiles are hardly needed (and they are very difficult to make, you need a working distance most studios or homes do not contain).

    Using this rather beaten-up example makes me think that it would be good, again, to find a mint condition little used one. It is a lens with interesting properties; it is a true zoom, and a constant aperture, which means that if you lock the focus down and shoot video you can zoom without losing sharpness (many modern ‘zooms’ are varifocal not parfocal, and shift focus as you zoom) and without any aperture jumps (only constant aperture lenses offer you this).

    Most of all, comparing this lens with the relatively expensive and much larger Canon it’s clear that the performance is either equal, or better. Take into account advances in coatings, and the effects of age on any lens, and I would have to think a new version of exactly this same Minolta lens would be stunningly sharp and ideal within the Alpha system. It would be a perfect companion for the 16-50mm, or 24-70mm, on APS-C or full frame.

    Full size images for subscribers only

    If you are a registered subscriber to photoclubalpha, you can go to our download page for this article, and get the full size (JPEG quality 10, sRGB) images for all the shots here except the chicken pix which are already available clipped as 100% views. It is very interesting to study the twigs at the extremes of the 70mm shots from both lenses, look at the level of colour-fringe induced tinting to out of focus details, and affirm that the legendary status of the ‘beercan’ may indeed be deserved.

    And, as a final point, though I am sure the Canon will win me over in low light situations and many other ways, these tests certainly proved that the Alpha 900 has not been made obsolete by almost four years of progress.

    – David Kilpatrick


  • The EVF future

    At photokina 2010, Paul Genge from Sony pretty much told me that Sony’s future lay in the EVF (translucent mirror or otherwise, Electronic View Finder) models. He was not able to say anything firm. Since then, I’ve spoken to him on several occasions and he has repeated that Sony left all options open but the EVF design was likely to be the way ahead. What he has not said directly to me is that conventional SLR design – Optical View Finder – was off the roadmap.

    EVF does away with the need for the finder to be positioned anywhere near the optical axis. Noses can safely hit thin air not a rear screen. Unless you are left eyed. NEX-7 with ocular surround fitted.

    Although Sony did not attend Focus on Imaging 2012, the UK website TechRadar secured an interview statement during Focus week, in which Paul appears to have confirmed without ambiguity that the future was EVF-only, and that the forthcoming full frame successor to the Alpha 900 would be an SLT-EVF design. At the same time, we learn that the 70-200mm SSM G and 70–400mm SSM G lens are to be revised for 2013.

    We know, from several sources, that Sony is not currently making all its lenses – even the high end ones – in one facility, or in its own workshops. I believe the 70-400mm SSM G is a contracted-out design and that the 70-300mm SSM G has always been made by a third party lensmaker. This is nothing new; the Minolta 100-400mm APO was patented by Tokina and sold to Minolta as an exclusive (no-one else got the lens) and the same company made some if not all the 100-300mm APO lenses. Using different sources means that various types of coating are appearing; traditional Minolta style – the multi achromatic coating, Carl Zeiss T*, Tamron’s BBAR-derived coatings, some Sony multicoatings of unknown pedigree on Chinese SAM lenses, and a new water and oil resistant coating due to be used for the revised 70-200mm and 70-400mm.

    This coating is nearly always combined with weather or splash proof design, and companies which have the ability to apply it include Hoya (Tokina, Kenko, Marumi, Pentax), Olympus, Canon, Nikon, and Sigma. Sigma is very significant as they have installed new coating lines recently and they are going through a bit of a subcontracting boom. Their facilities are all in Japan, they are on high ground and were slightly affected by the earthquake but not by the tsunami. They have a long history of building lenses and cameras for Leica, Carl Zeiss, Panasonic, Olympus, Canon/Kodak and interchangeable lenses for nearly all the major names.

    If the high end tele zooms are to be revised, weatherproofing and the new coating will certainly arrive along with a synchronisation of lens appearance and finish. But I’m willing to bet something else is involved. The SSM focus system is only partially suitable for contrast-detect operation. It works, on static subjects, but unless some major advance is made in CD-AF it’s lacking the refinement and speed of the AF found in SEL (native Sony NEX) lenses. I’ve tested the 70-400mm on the LA-EA1 with NEX-7, I can work with the lens comfortably on most subjects and the camera is very good at refusing to take the shot until focus is 100% locked.

    All that just to get 2X the magnification – NEX-7 with LA-EA1 and 70-400mm SSM G (an operational kit, if not fast) compared to Tamron 18-200mm NEX lens with the correct type of contrast-detection friendly focus motor and protocols.

    What Sony must surely want to do is dispose of the SLT (‘translucent’) pellicle mirror and the Phase Detection AF module. It makes most sense to focus, meter, view and expose from one single sensor. In order to do so, lens focus motors need a slightly different control protocol. SSM lenses are already CD-AF compatible, as are SAM onboard focus motor lenses, but they don’t match the NEX system SEL lenses. Sigma HSM and Tamron USD Alpha mount lenses are not CD-AF compatible and do not work correctly on the LA-EA1 adaptor. Upgrading matters most with tele lenses, and they are also most likely to be used in adverse weather for wildlife, news or sports. So my guess is that the upgrade to these lenses will be comprehensive and that it will look forward to possible Sony Alpha bodies with either no SLT mirror, or a movable SLT mirror and choice between PD-AF and CD-AF.

    As for the EVF itself, it’s one stage away from being better than a very good optical finder on balance of qualities. Unlike optical finders, the EVF is not susceptible to user eyesight error (incorrect dioptre correction, combined with eye focusing accommodation) and presents the user with a low resolution but otherwise very accurate view of the image focused on the sensor. It can do this at light levels where optical finders become difficult to use, while also presenting a review of the captured image if desired – ‘shot success’ confirmation.

    Differences between the ‘identical’ EVF of the NEX-5n accessory finder FDA-EV1S and the NEX-7 fixed built-in version are mostly down to the difference between the 16 megapixel generation 2 sensor, and the 24 megapixel. Response speed, low light noise, quality of colour and contrast are all influenced more by the two very different sensors. User observations that one is better or worse than the other will nearly always be down to this, and variations in settings between the two cameras compared.

    There are things you can do on an EVF, such as magnifying a focus point well away from the centre, which simply can’t be done at all with an optical finder and may not always be convenient to do on a rear screen. The fact that EVFs permit eye-level video shooting, and that video is now a permanent feature of the Alpha class of camera from entry to semiprofessional, makes the EVF design change more inevitable.

    Paul Genge had a short exchange of information with me when I was considering selling my Alpha 900 and all my frame Alpha lenses (after starting to use the A77). He said I’d regret selling my good full frame lenses when I replaced my Alpha 900 with a full frame model I would just not believe. His message was ‘you wait – you’ll not regret it’. So, I sold my old Minolta-era full frame lenses and bought myself a brand new 28-75mm f/2.8 SAM, Sony 50mm f/1.4 (replacing Minolta vintage), a 24mm f/2 Carl Zeiss SSM, and a 70-400mm SSM G. I kept the Alpha 900  and a few lenses I like which are unique in their function, such as the Samyang 85mm f/1.4 manual, the Sigma 70mm f/2.8 Macro, the Sigma 12-24mm and an old 16mm f/2.8 full frame fisheye. Instead of getting out of full frame, I re-invested in it.

    I’m expecting the Alpha 900 replacement to be either an SLT design like a scaled-up A77 with 36 megapixels, or a second generation hybrid SLT design with a mirror you can raise to use CD-AF or manual live focusing. I’m hoping that it will appear with a new 28-75mm, 24-70mm or better midrange f/2.8 with improved SSM, weatherproofing and new coatings like the 16-50mm f/2.8 DT.

    – David Kilpatrick

  • Creep no more! The LensBand.

    Though their website shows a very different way of using this theme park wristband repurposed – the LensBand anti zoom creep device – it just happens to fit many Sony zooms perfectly without stretching it into position to lock barrel to collar.

    By fitting the LensBand exactly over the joint between the zoom ring and static lens barrel, you can create a much smoother damped zoom action and prevent the zoom from tromboning when carried, or creeping during long exposures when the camera is angled up or down. This issue is not tackled by stabilisation and very small amounts of zoom creep can affect exposures as short as 1/30th without your realising. You don’t get why the zoom appears to be not so sharp – that’s because you do not realise you, or gravity, have caused a tiny shift in focal length during the exposure.

    These silicone rubber bands are not expensive, and they can also be used to provide extra grip on zoom or focusing rings. We chose two colours as the best for Sony Alpha – orange and black! At the end of this article you’ll find a link to our associates at The Photostore (Adrian, for a decade the manager of the Minolta Club) who have both these wonderful rubbery colours in stock.

    Here’s Mr Orange fitted to a very first batch 16-80mm CZ zoom which has become slack enough to extend itself when strapdangled. By positioning the band centrally over the seam, leaving the focal lengths just visible and the focusing window clear, the lens is transformed. The zoom action becomes super-smooth and the lens does not shift at all. The elasticity of the LensBand is 100% perfect for this zoom. You can yank it over the back of the zoom ring closer to the camera, at one side, to increase the lock effect but in practice this position works full time. It locks, and prevents creep, and also radically improves the feel of the lens zoom.

    As you can see, it also looks pretty funky and matches the orange lens not-a-seal-just-a-decoration bit on the Alpha 55 mount.

    But for a Sigma 70-300mm Apo Macro – one of our favourite lenses despite past histories of stripped gears, since no other lens does the same thing in terms of focus range and pure sharpness – the black band looked better. This time, the fit is a little tighter but the band forms a cone shape gripping between zoomring and barrel. It prevents the rather slack zoom of a brand new 70-300mm Siggy from causing havoc. Between 150 and 250mm, this zoom will tend to self-extend if aimed downward (or collapse back when tracking those same old BIFs and airshow targets beloved of dPreview boringphoto posters!).

    You can see that this new band collected dust and skinbits instantly – it really doesn’t matter if you have just spent 15 minutes in a bath, the human body sheds a couple of million sensor dust specks every hour and your fingers are a magnet for silicone rubber. Black always looks worse – the orange band stands up to our macro lens photography a bit better.

    The band bridges a fatter zoom ring to a narrow diameter lens barrel. This still works. By moving the band just 1mm either way, the tension or damping effect on the zoom can be controlled precisely. This particular lens was improved 200% in feel by fitting the band. It was also made usable on a tripod when aimed down or up.

    Well, there it is. Could not really be a simpler concept (we’ve done it with fat rubber bands – one Photoclubalpha member reports using a band found holding together a bunch of broccoli). But these robust, one-size-fits-all-except-tiny-microfourthirds LensBand alternatives are clearly a better choice.

    No, they don’t fit the 70-400mm SSM G. For that you need the inner tube of a hobbit bicycle tyre, or perhaps a couple of sand eels knotted together. Or one big one in the fashion of the Worm Orobouros. One day, we’ll tackle that; at the moment, our 70-400mm SSM G is solid enough not to slip. Another really rocksolid lens seems to the 16-105mm Sony SAL zoom, lovely firm action; and the Tamron 18-200mm E for NEX feels like it won’t get loose for years.

    You find the LensBand for sale all over the place, but in UK, for orange and black, visit:

    www.photostore-uk.com

    Adrian Paul also has loads of small accessories and he can get almost ANY Sony Alpha part or product to order – faster than most retailers. He is an authorised Sony Alpha supplier and has 25 years plus in-depth knowledge of the system.

    For worldwide orders, B&H in the USA stocks all the colours, even the ugly ones which look nice on Canon lenses!


  • Sony DT 16-50mm f/2.8 SSM

    I’m about to offend myself. I own this lens, and I know how upset owners of brand new lenses get when someone says it’s not perfect. Well, the 16-50mm SSM is far from perfect and if you know how to check out lenses, you’ll agree should you be lucky enough to own one. It’s a compromise. But I love it.

    Here’s the problem; this lens has such soft corners and complex distortion at 16mm and f/2.8 that it makes the NEX’s legendarily reviled* 16mm pancake look like a Super Angulon in disguise. It’s got a curved field at 50mm and stopping down does not always bring distant scenes into perfect focus across the frame. It suffers from rampant chromatic aberration which just becomes a dead-sharp fringe on stopping down. *Not by me!

    This shot was taken on a preproduction A77 and 16-50mm. I was not supposed ever to show it. But I know there is no fault with the shot, the pre-release gear was just fine. And I really like the minimum focus, at 50mm, at f/2.8!

    Yet it also has exceptionally high central sharpness, great colour and contrast, and a lovely quality to its differential focus. That’s the old traditional English-language term for the context in which people over-use the term ‘bokeh’, and deserves to be revived. With f/2.8 to play with across the entire zoom range, you can use differential focus creatively. At medium settings, 24-35mm, the distortion disappears and the sharpness extends corner to corner wide open. You have to set it to 50mm to lose the edge.

    More than this, the 16-50mm SSM is a video-tuned lens. Its natural host camera, the Alpha 77, crops the frame considerably when shooting HD video. The soft corners and even most of the distortion don’t get a look in, they are outside the video area. The standard and 3D pan modes of the A77 also crop out the problems. The focus action and silent supersonic motor of the 16-50mm are ideal for A77 video shooting with active AF (if you want it) during takes. The f/2.8 aperture allows the lens to be stopped down to the optimum f/3.5 used for movies and also for high speed (12fps) mode, and have no issues with aperture shifts if the focal length is changed.

    The Carl Zeiss 16-80mm, left, is smaller than the Sony 16-50mm SSM.

    After testing the lens, I decided to keep my 16-80mm CZ which is now five years old. It’s not just the different quality of image produced by the CZ coatings and design, or the very slighter better close-up ability (you can’t get quite as close but at 80mm the subject scale is a touch bigger on the CZ – the 16-50mm wins at 16mm, where getting two and half inches closer to the subject makes a real difference). The CZ is lighter, takes 62mm filters rather than 72mm, and is considerably smaller with lens hood size adding to the difference. Working in the field, it is a lens which can easily be held in the hand with fingers free to operate the lens-mount release button, hold a rear cap, or even another lens – the usual juggling of two lenses which photographers get used to.

    With lens hoods fitted, the overall relative sizes become more obvious. The SSM lens has an attractive metal front ring, a new trademark of higher-end Sony lenses, shared with the 70-400mm G.

    The 16-50mm is at the limit of diameter, shape, balance and weight to be safely gripped with another lens in the same hand, even briefly during the process of swapping over. That’s not to say it is cumbersome, just that the 16-80mm is faster and more secure to work with because it’s that little bit smaller and lighter.

    Once on the camera, I have to say I like the overall balance created by the 16-50mm. It tends to help the A77 hang lens-down, a position I prefer with the camera under my left arm and the strap over my shoulder. The zoom action is super-smooth and well damped, and also has a lock which operates at 16mm to prevent gravity-fed creep, and keep the action firm in future.

    No creepy zooming – thanks to Royal Mail, and their neat Sony-coloured rubber bands which are a perfect fit to go on the CZ 16-80 and make the zoom action super-smooth and stay put!

    My CZ is now well used and over-free in action. A rubber band to go over the front end of the zoom ring is the cure! You can get proper broad Alpha-ish orange silicone rubber ones from Lens Band as well as the free orangey-red ones used in the UK to hold our postal deliveries together. My way of using a rubber band is not quite the same as Lens Band’s method, it goes over the flush seam between zoom ring and lens barrel on the 16-80mm and it doesn’t just hold the zoom, it smooths the zoom action.

    The zoom lock on the 16-50mm was missed from the 16-80mm… missed by all owners, that is. The 16-50mm has a type of raised  moulded marking. Durable? Maybe not. The similar raised ‘P’ on my A77 mode dial is now a ‘D’ having lost its stalk.

    The best shots I’ve got from the 16-50mm are as good as the best from the 16-80mm, but I can trust the CZ more in the 35-80mm range. From 35-50mm the SSM becomes increasingly soft and sharpness towards the edges of the frame can be poor. At first I thought this was only at full aperture, but shots at apertures like f/5 and f/7.1 were affected. I compared my own lens with two pre-production Sony samples I had used months earlier; we were told not to release images taken with these. The degree and type of sharpness loss was identical, enough for me to conclude this is a characteristic of the lens and not a coincidental case of rogue lenses.

    Major plus points for the 16-50mm include focus accuracy, which is much better than the 16-80mm on most Alpha bodies. The f/2.8 aperture activates higher accuracy sensors, such as the Alpha 700’s central point and the extended range of the 11 cross sensors of the Alpha 77. When used on the Alpha 580 for live view pre-shot AF, or on the NEX models with the original LA-EA1 contrast-detect AF adaptor, both focus speed and accuracy are optimum.

    The SSM lens has an AF/MF switch but no on-lens button control. Direct Manual Focus is supported and unlike SAM (conventional in-lens motor) lenses, the supersonic drive is not damaged by moving the focus ring without engaging MF.

    Despite the large area of glass, the 16-50mm is no more prone to flare than the 16-80mm. The new Sony coatings used for this lens (water and oil/dirt resistant, very hard, similar to Nikon’s NanoCrystal) do a great job. And, of course, they are part of the final reason I am keeping this objective. It’s weatherproofed to some degree, as is the Alpha 77 body. Reports vary between dowsing with a bucket of water without harm, to reluctant use in slight drizzle. I think I’ll get myself a Sigma EX DG filter for my lens, as these have the same coating now and they are about the best slim-mount UV filters made for optical quality without paying Hoya Pro1 Digital prices.

    Also, with the 72mm filter thread, there seems to be less need for a super-slim filter. The CZ lens suffers from very strong mechanical vignetting at both ends of the scale, producing dark corners at 16mm or 80mm alike. At 16mm, depending on the position of the SSS/AS sensor-based stabilisation, a dark corner can be well enough defined to need cloning out or the image cropping. The 16-50mm SSM has no such issues. Not only is optical vignetting well-controlled, the mount does not create any dark corners.

    These dark corners are created by adding vignetting and grads in raw processing. The 16-50mm, at 24mm, turns in great shadow to highlight detail without a hint of flare; 1/50th at f/9, ISO 100, hand-held with SSS – mid-January in the Scottish Borders. When I pulled up to shoot this, a car with two camouflage-kitted big Nikon and Canon multi lens ‘serious enthusiast’ shooters pulled in alongside. They were still struggling with tripods, a kissing-gate, a stone wall, lenses and car by the time I’d got the sunray shot (which disappeared in seconds) and left. I just carry my Alpha 77 – but then, I’m not a ‘serious enthusiast’ and my ideal camera would be invisible and with me all the time. I’m a panda – sees shoots and leaves.

    Though Sony owners may be reluctant to admit it, the SSS mechanism can decentre the sensor and if the lens coverage is so tight it barely covers the corners of the frame (16-80mm and 16-105mm both guilty) you can get the occasional asymmetric dark corner. I’ve never seen this yet from the 16-50mm. But when I check the 16-80mm against the 16-50mm using the Alpha 900 full frame finder to examine the image circles, if anything the 16-80mm has more apparent clearance round the extremes of APS-C, with a softer gradation. The 16-50mm has a tight exact circle.

    I have also checked the way the 16-80mm and 16-50mm focus as you zoom. Though the CZ is not perfectly parfocal. That term describes a zoom which retains exactly the same focus point, as you zoom. Video and TV camera lenses are parfocal, otherwise, the focus might ‘go off’ during a zoom. The CZ is nearly parfocal, just a touch varifocal. That’s the opposite term, and means a zoom which changes the focus as you change focal length. At one time, varifocal lenses were not actually called zooms; they date back to the 1920s, and J H Dallmeyer’s adjustable telephoto lenses. Konica made a famous 35-100mm f/2.8 Varifocal in the 1970s.

    Silent focus, silent A77 camera (almost), 16mm and ISO 800 at f/3.2 – with ACR profile correction. Café society, Hawick.

    The 16-50mm is either a perfect parfocal zoom, or so close you will never know. It is possible to focus at 16mm, and zoom in to the subject. This can only happen with very accurate focus, and a parfocal zoom. Try it with the 16-80mm CZ and you will see the image go out of focus, not to mention clicks and jumps in brightness changing as the aperture adjusts (that’s because the CZ is a variable maximum aperture lens, f/3.5-4.5). The 16-50mm can zoom during video, in or out, without losing the original focus point and without any brightness change or aperture adjustment.

    Now you may understand why I want to keep this lens even though – unlike some enthusiastic new owners – I find that its sharpness across the field is not actually as consistent as the CZ. It is a far better overall match to the Alpha 77 especially for video work. But in January, I chose the CZ in preference for a week abroad, and I would most likely do so again.

    The Alpha 77 (and 65) include built-in correction profiles for this lens. They are so effective that when I first saw JPEGs from it, I thought the geometry was perfect. If you intend to use the lens for JPEG and movie shooting, any criticisms can be moderated. The correction profile can not improve sharpness, and it does change the effective focal length slightly so than you don’t get a true 16mm.

    This is a straight-on shot of the Adobe chart used (not this way, shot nine times per full frame) for profile creation and it shows how very bendy the 16mm f/2.8 setting is at this range, the target is A2 size. Click image to see full size.

    This is the same, but JPEG with the in-camera correction enabled.

    This is the same, with the Adobe Lens Profile I have created and sent to Adobe, applied in raw conversion of the first example. Please note that the Adobe profile applies to shots taken at three times this distance or more – these profiles, like the in-camera profile, are never much good at rigorous correction of geometric targets shot a couple of feet from the lens.

    For Adobe Camera Raw, I have made a profile for the lens which covers three apertures (f/2.8, f/5.6, f/11) and three focal length settings (16mm, 24mm, 50mm) between all of which ACR will interpolate correction values. Because the extreme corners of the image go so much out of focus when shooting the target (refocusing ruins the profiling process) I don’t think this profile handles chromatic aberration as well as it could. The profiling program needs a sharp image of the RGB colour channels to work out their relative scale, which is how CA is corrected. Applying 150% CA correction, instead of the default 100%, seems to improve the conversion.

    Here is an uncorrected real-life shot on the 16-50 and 16mm, 1/125th at f/9, ISO 200 (click image for full size 24 megapixel view, and note the chromatic aberration at the left end of the shot especially).

    This is the same raw file processed using the Adobe Lens Profile I have produced for the lens.

    You can dowload from here the 16-50mmA77rawAdobeLensProfile, hopefully it will also become available from Adobe’s user-created download area. Unzip the file to extract the .lcp file, and place this in your Application Support/Adobe/CameraRaw/LensProfiles/1.0/Sony directory. You require Photoshop CS5 to use the profile.

    So what is my conclusion? I do not agree with some of the over-the-top reviews including one to be found on the Sony store USA site claiming it’s the best zoom of this range and aperture for any system. It is not, you get more than you pay for (much less than a lens of this specification might cost from others) but not an optical miracle. You get a very well designed optical compromise housed in a particularly good mechanical design. I would compare it favourably with Olympus’s waterproof ‘Top Pro’ range fast lenses for 4/3rds. I think it can claim to match Canon’s 17-55mm f/2.8 and Nikon’s similar lens, I’ve used both and the Sony is rather neater. It’s probably a little better than the Pentax/Tokina 16-50mm f/2.8, which it most resembles but definitely is not related to.

    It’s different from the CZ 16-80mm, not better or worse; it has a different mix of good qualities and failings. The obvious competitors are Sigma’s 17-50mm f/2.8 OS and the Tamron 17-50mm f/2.8. The Sigma offers Optical Stabilisation. The Tamron is now an older design, replaced by a new VC stabilised version for other mounts, but still issued without stabilisation at about 60% of the price of their VC versions, for Alpha. It is the lowest-cost option in this range.

    The Sony Alpha SSM 16-50mm f/2.8 DT lens is supplied with rear cap, 72mm lens cap, and bayonet petal hood. It does not come with a case or pouch. My lens was purchased ‘white boxed’ – that is, split off from an Alpha 77+16-50mm kit by a dealer and priced accordingly. The lens is only available with the A77, or as a separate item; it is not currently offered as a kit option with the Alpha 65 or other models.

    – David Kilpatrick

    Check the current price from B&H Photo Video – remember, B&H ship worldwide and for the UK buyers, offer a UK service.

    Technical Data (Sony information) amended to remove nonsense

    • Lens Type : Standard Zoom
    • Focal Length 16-50mm (35mm equivalent 24-75mm)
    • Lens Mount Type : Sony A-mount, SSM in-lens supersonic motor focusing, electronic coupling
    • Aperture (Max.) : f/2.8
    • Aperture (Min.) : f/22
    • Filter Diameter : 72mm
    • Lens Groups-Elements : 13 groups, 16 elements
    • Minimum Focus Distance : 12″ (30cm)
    • Distance Encoder : Yes
    • Distance Scale: Yes
    • Angle of View: 83°-32°
    • Non-rotating Filter Thread : Yes
    • Aperture : 7 blades (Circular aperture)
    • Lens Weight : 20.4 oz (577g)
    • Maximum Magnification : 0.2x
    • Dimensions (Approx.) : 3-1/4 x 3-1/2” (81 x 88mm)

    Compare the 16-80mm Carl Zeiss technical data:

    • Lens Type : Standard Zoom
    • Focal Length 16-80mm (35mm equivalent 24 – 120mm)
    • Lens Mount Type: Sony A-mount, in-body motor focusing via mechanical drive coupling
    • Aperture (Max.) : f/3.5 – 4.5
    • Aperture (Min.) : f/22 – 29
    • Filter Diameter : 62mm
    • Lens Groups-Elements : 10 groups, 14 elements
    • Minimum Focus Distance : 14.4” (36cm)
    • Aspheric Elements : 2 aspheric
    • Distance Encoder : Yes
    • Distance Scale : Yes
    • Angle of View: 83°-20°
    • Non-rotating Filter Thread : Yes
    • Aperture : 7 blades (Circular aperture)
    • Lens Weight : 15.7 oz (445g)
    • Magnification : x 0.24
    • Dimensions (Approx.) : 2 7/8 x 3 3/8” (72 x 83mm)