Category: Opinion

Opinion pieces from our editors and contributors

  • Sony launches A99II at photokina

    a99-ii_wsal2470z2_right-web

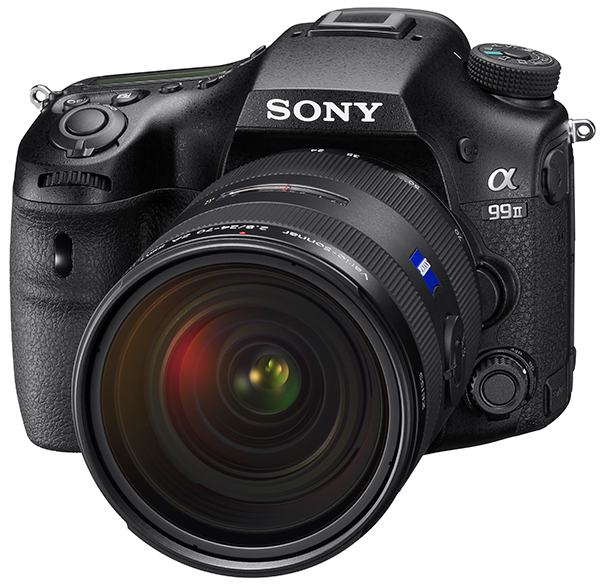
    Sony has today released the details of the updated A99II, using a 42MP sensor and 5-axis stabilisation to match the A7RII. It does not appear to have retained GPS and the paragraph highlighted in red later on indicates a weasel-worded possible get out for this – it may not embed GPS in the image files, but instead store a mobile phone location data track on the camera’s memory card. We may guess that this choice could be partly down to cutting out fees payable to incorporate a GPS module. Not the same, guys, not the same:

    From Sony’s site, the ambiguous word is highlighted here:

    Use Location Information Link to make the most of your camera anywhere you go together. After the camera has been paired to the PlayMemories Mobile app installed on a compatible mobile phone or tablet device, it can acquire location data from the mobile device and record that data with still images. The acquired location data can also be used to correct the camera’s date/time and location settings. The PlayMemories Home application can then be utilised on a personal computer to organise still images imported into the computer on a map.

    Edit: note that Sony’s later announcement for A6500 uses specific wording which says that its GPS Blueooth app embeds location data in the images as they are shot. This wording has not been used for A99II. We have not, though the A9II has now been released and bought by some users, been able to confirm how it works yet.

    In the Sony release (used almost complete, slightly edited, to form this post) they appear to imply that dual SD card slots are new, which of course they are not, the original A99 has this already. No UHS-II, no USB 3 Not only that, the dual slots are apparently exactly the same spec as the original unless someone at Sony Towers has forgotten to edit their website:

    Memory Stick PRO Duo, Memory Stick PRO-HG Duo, Memory Stick Micro (M2), SD memory card, SDHC memory card (UHS-I compliant), SDXC memory card (UHS-I compliant), Micro SD memory card, Micro SDHC memory card, Micro SDXC memory card

    Some of the hidden, clever features of the A99 remain like the buttons which are coded to touch with concave or convex tops or a small raised dot, making it easy once you have learned their feel to find them by fingertip. In fact the entire interface remains constant (in the way that Canon did throughout the EOS 1D series) meaning you can pick this up and shoot immediately, coming fom the A99. Only the Silent Controller is significantly improved, and the badly placed Movie button remains exactly where it was.

    • Full-frame 4D Focus: Innovative Hybrid Phase Detection AF system with accurate 79 hybrid cross AF points[i] enabled by 79-point dedicated and 399-point focal-plane AF sensors and continuous shooting at up to 12fps[ii]
      There is no AF Illuminator, but please note that -4 EV is quoted with an f/2.8 lens at ISO 100. In the past, AF low limits were always quoted with an f/1.4 lens (although the sensor only works at f/2.8). This is very good.
    • 42.4 effective MP 35mm Full-frame Exmor R™ CMOS sensor so it’s essentially an A7RII
    • Newly developed optical 5-axis in-body image stabilisation system
    • Outstanding operability and reliability in newly designed downsized body
    • Internal 4K movie recording in XAVC-S format[iii] with host of pro-orientated movie features
      IMPORTANT: this appears to be a Super-35 4K mode if you want no pixel binning and the highest overall quality but near-full-frame is offered with the usual partial readout.We would add a few extras – this camera has the much-needed (almost essential) Copyright Info function, minimum shutter speed when using Auto ISO, 10/5/2 sec self-timer, Hi+ in addition to Hi, Med and Lo motordrive shooting (not just shifting three settings over a faster range but giving 12, 8, 6 or 4 fps); built-in WiFi wireless including WiFi remote control and NFC (but not, apparently, apps); there are new Highlight and Average metering modes, and for each metering mode, you can calibrate the standard exposure if you prefer your shots slightly lighter or darker than the camera’s default.The A99II can capture 54 uncompressed RAW+JPEG images at 12fps (Hi+) before the buffer is full. There’s no great advantage in capturing RAW only, or JPEG only, and even with Fine JPEG at Hi speed (8fps) the limit is still 71, not ‘until card full’.

      Omissions include no Multi Shot Noise reduction, no GPS, and the external DC power supply is no longer via a dedicated socket, instead it uses the dummy battery approach. The camera is still not officially recommended for use in temperatures below freezing or over 40°C/104°F, both of which can easily be achieved in Scotland in a single sunny winter day (even without the benefit of your car parcel shelf oven).

    a99-ii_rear-web

    The upgraded autofocus

    The newly developed Phase Detection AF System is capable of ‘full-time AF’ and is the first implementation of 4D FOCUS in the full-frame ɑ series, bringing a supreme new level of AF performance to ɑ99 II users. The Hybrid Phase Detection AF System is enabled by combining a precision 79-point[iv] dedicated phase detection AF sensor with 399 focal plane phase detection AF points to produce a 79 hybrid cross AF point[v] array. These cross points deliver incredibly precise autofocus performance and advanced subject tracking of any moving objects right across the image, at high speed. In addition, as there is no moving mirror, TMT enables continuous AF operation and the finder image remains unaffected during any type of shooting, including live view and movie recording.

    Low light conditions present no problem to the ɑ99 II. The precision AF system will function properly down to EV-4[vi] brightness levels where most other cameras struggle. Editor’s note: the A99 is poor in this respect and often can’t focus modest aperture lenses at all in low light.

    Data flow through the ɑ99 II has been redesigned to allow for high resolution and continuous shooting at high frame rates. A new front-end LSI works with the image sensor and BIONZ X image processing engine, as well as a newly designed shutter unit, to enable continuous shooting at up to 12fps with AF/AE tracking[vii], all whilst harnessing the sensor’s 42.4MP capabilities. The result is an ultra-fast camera that will deliver incredibly detailed shots, even with fast moving objects in challenging light conditions. Thanks to a large buffer and sophisticated data processing, these shots can be viewed immediately after shooting even when in high speed continuous shooting mode and if shots are being taken indoors under artificial lighting, flicker is automatically detected and the shutter is timed to minimise its effect on the end image[viii].

    Improvements to the EVF display algorithm now deliver continuous live-view shooting at up to 8 fps[ix] with AF/AE tracking with minimal display lag so that the viewing experience is essentially no different from that of an optical viewfinder. Exposure, white balance and other camera settings are displayed in real time in the viewfinder and continuous live view shooting can be set in 3 stages to match a variety of subjects: 8 fps, 6 fps and 4 fps.

    Pixel Power

    The back-illuminated full-frame 42.4MP[x] Exmor R CMOS sensor benefits from a gapless-on-chip design and allows for fast readout of large volumes of data as well as being extremely efficient in its light gathering ability. The net result is very high sensitivity with low noise, wide dynamic range and 42.4MP resolution across an ISO range of 100-25600, expandable to ISO 50 – 102,400[xi]. The ɑ99 II has been designed without an optical low-pass filter to allow the finest natural details and textures to be captured with unprecedented depth and realism and the photographer can select compressed or uncompressed RAW files, as required.

    5-axis SteadyShot™ INSIDE Image Stabilisation

    Having proved to be incredibly popular in the ɑ7 II series of cameras, Sony has designed a new in-body 5 axis image stabilisation system for A-mount cameras which debuts for the first time in the ɑ99 II. In addition to movement in the pitch and yaw axes that tend to occur at longer focal lengths, this system effectively detects and compensates for shift blur that can occur on the X and Y axes when shooting close-up, and roll blur that is often apparent in still images and movies that are shot at night. Newly implemented precision gyro sensors are capable of precisely detecting even tiny camera movements that can cause blurring, providing a 4.5 step[xii] shutter speed advantage that can help realise the full potential of the 42.4MP sensor, in both stills and movies. The effect of image stabilisation can be monitored in the viewfinder or on the LCD screen during live view when the shutter button is half pressed or the Focus Magnifier functions are used. This allows framing and focus to be accurately checked via live view when shooting at telephoto focal lengths or macro distances.

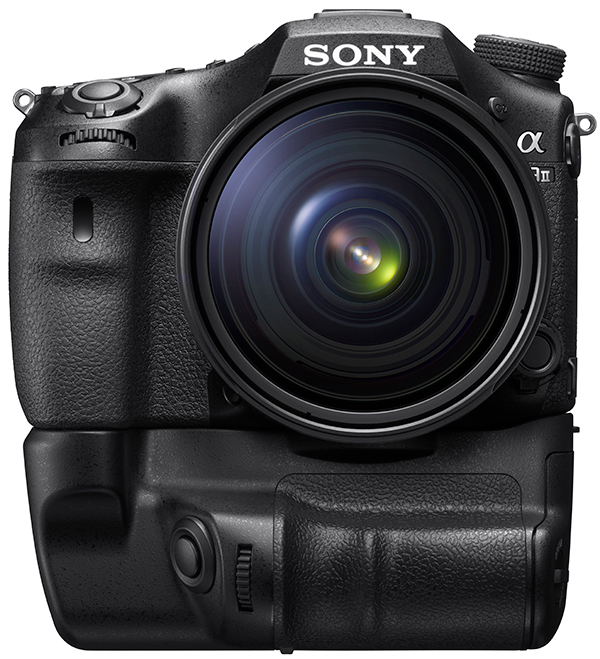
    Improved design and operability

    The design of the new ɑ99 II has noticeably evolved compared to its predecessor, based upon feedback from professional users. The new model is 8% smaller than the original ɑ99 and has a newly designed grip, magnesium alloy body, dual SD[xiii] card slot and other upgrades that improve both hold and operation. All major buttons and dials are provided with seals and the media jack cover and enclosure edges feature tongue and groove – the result is a body that is both dust and moisture resistant[xiv] and can be used in the toughest and most challenging shooting conditions.

    In addition to being designed for faster response, the new shutter unit is also more durable and has passed endurance tests in excess of 300,000 shutter operations[xv].

    a99-ii_top-web

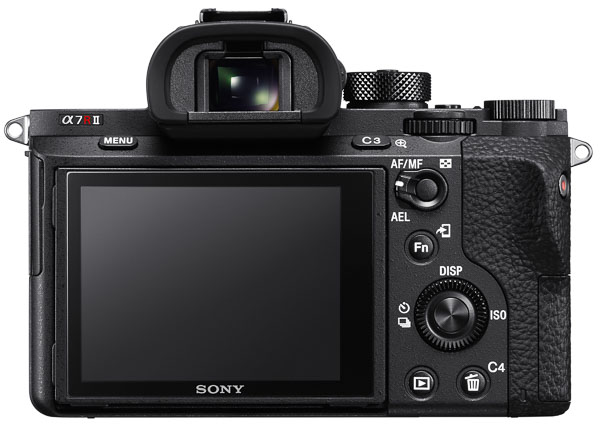
    The XGA OLED Tru-finder has a ZEISS® T* Coating and has a 4 element lens group that includes a double sided aspherical element whilst offering a powerful 0.78x magnification, delivering outstanding clarity from corner to corner. It also has a fluorine coating on the outer lens to prevent fingerprints, dust, water, oil and dirt from sticking, thus ensuring a clear view. Editor’s note: the ocular of the original A99 is a weak point, and in the A7RII Sony finally produced a really good non-squiffy eyepiece optical train which shows a clear view with some leeway to move your eye. So this is a major upgrade as much of the experience of using the SLT models comes down to finder quality.

    The silent Multi Controller introduced in the original ɑ99 has been improved so that in addition to allowing control of aperture, shutter speed, ISO, exposure compensation, AF area, AF mode and other settings, it now features a click-stop ON/OFF switch. When ON, the preferred setting for still image shooting, the control clicks, providing a tactile indication of the length of rotation. When OFF, the control turns smoothly and quietly, ideal for movie shooting. Location data acquisition has also been made possible via Bluetooth[xvi] connection to a compatible mobile device and it is now possible to select whether the storage location should just be on a tethered computer or also on camera for easy review without leaving the shooting position. Based upon feedback from a number of ɑ users, the menu structure of the ɑ99 II has also been updated to deliver a smoother navigational experience.

    Internal 4K movie at 100 Mpbs

    The ɑ99 II enables internal 4K movie recording[xvii] featuring full pixel readout, without pixel binning[xviii], for ultimate high resolution video in the pro friendly XAVC S format. It is capable of recording high quality footage at 100Mbps for 4K recording. A new ‘Slow and Quick’ mode[xix] (S&Q) supports both slow motion and quick motion. Frame rates from 1 fps to 120 fps (100 fps) can be selected in 8 steps for up to 60x (50x) quick motion and 5x (4x) slow motion recording.[xx] A number of features designed for a professional movie production workflow are included such as picture profiles, time code and HDMI clear output and the new ɑ99 II now also offers gamma assist for real time S-Log monitoring and a zebra mode for easier exposure adjustment. S-Log3 and S-Log2 gamma are now included, making wide dynamic range shooting possible with(out) – our edit, the press release says with! blown highlights or blocked shadows making the ɑ99 II easily integratable into a fully professional movie production workflow.

    Editor’s note: there’s a problem with the A99II for movies, which also applies to the LA-EA4 and SSM/SAM or other A-mount lenses on the E-mount bodies – the lenses really don’t work well at all. Sony had pictures of this camera with the 24mm f/2 SSM, still a current lens. I sold mine because it could not handle the same AF and exposure control functions as the 25mm f/2 Batis or the 28mm f/2 Sony (which I use) during video shooting. The A-mount was never built for movies, the E-mount has been from the start. However, both are fine using purely manual focus, manual aperture ciné lenses which many professionals prefer.

    a99-ii_sal2470z2_wvg-c77am_front-web

    The new ɑ99 II will start shipping in November, priced at approximately €3600 and full technical details can be seen here.

    Editing: David Kilpatrick

    Further information can be found on the Sony Camera Channel: www.youtube.com/c/ImagingbySony/ and the

    Sony Photo Gallery: www.sony.net/Product/di_photo_gallery/

    Our Affiliate links, supporting photoclubalpha:

    Check Amazon.co.uk for availability and price

    Check B&H stock (pre-order live)

    Check WEX (UK)

    [i]The number of usable AF points may depend on the lens and shooting mode. Up to 323 focus points are selectable. Not available for movie recording

    [ii]Continuous shooting mode set to ‘Hi+’

    [iii] Class 10 or higher SDHC/SDXC memory card required for XAVC S format movie recording. UHS-I (U3) SDHC/SDXC card required for 100Mbps recording

    [iv]The number of usable AF points may depend on the lens and shooting mode

    [v]Hybrid Phase Detection AF active. The dedicated phase detection AF sensor or focal-plane phase detection AF sensor may be used independently in certain photographic situations.

    [vi]Central focus point

    [vii]The supported focus area will depend on the shooting mode and lens used. Furthermore, when“Continuous Shooting: Hi+” is selected, focus will be fixed at the first frame shot when Hybrid Phase Detection AF is active at aperture settings of F9 or higher, or when Hybrid Phase Detection AF is not active at aperture settings of F4 or higher

    [viii]When Anti-flicker Shoot. is ON. Flicker detection at 100 Hz or 120 Hz only. Continuous shooting speed may decrease. Does not function during bulb exposure or movie recording

    [ix]Continuous shooting mode set to ‘Hi’

    [x] Approximate effective megapixels

    [xi]Still images only

    [xii]CIPA standards. Pitch/yaw shake only. SAL135F18Z lens. Long exposure NR off.

    [xiii]One slot can hold an SD card or a Memory Stick.

    [xiv]Not guaranteed to be 100% dust and moisture proof

    [xv]Electronic front curtain shutter activated

    [xvi]Requires pairing with compatible mobile devices running the PlayMemories Mobile app. Supported devices are Android smartphones running Android 5.0 or later and compatible with Bluetooth 4.0 or later. iPhone/iPad: iPhone 4S or later/iPad 3rd generation or later

    [xvii]SDHC/SDXC memory card of Class 10 or higher is required for movie recording in XAVC S format. UHS-I (U3) SDHC/SDXC card is required for 100Mbps recording

    [xviii] In Super 35mm recording mode

    [xix]Sound cannot be recorded. SDHC/SDXC memory card of Class 10 or higher is required

    [xx]In NTSC (PAL) system

  • Is retouching acceptable?

    There’s been a controversy surrounding Steve McCurry, a photographer I have listened to on the edge of a conversation a couple of times courtesy of Kodak who were always great sponsors and put his ‘Afghan Girl’ on display at photokina 2012 where McCurry’s work was celebrated.

    Here’s the story – he’s been changing, or allowing his retouchers and agents to change, the material content of some shots. This has included the removal of people, changes to their clothing, tidying up messy objects and distractions. First, this is not something new and great photojournalists never saw harm in burning in or dodging back areas of a print to make something disappear into a shadow or burn out to white. It was OK to use bleach on prints if needed to remove blemishes, including things which damaged the shot. It was even OK to use tints or pencil to enhance outlines so that newspaper reproduction didn’t lose the subject in a grey mush.

    http://petapixel.com/2016/06/07/eyes-afghan-girl-critical-take-steve-mccurry-scandal/

    That’s the current controversy.

    Well, here are some examples from my archives. One dates from 1969 and back when the first prints were made from this, with publication in The Guardian and various magazines, I used pencil and bleach to try to ensure the faces at the centre of the group were properly defined from the wall behind them. This was a very mild treatment and not very successful.

    Here’s a not-totally straight print. Some detailed dodging and burning was done in the darkroom to try to get the definition needed between the blonde girl’s face and the wall. It was this lack of definition which meant it was never a real winner, though it did well enough in competitions. It was also taken on outdated Perutz film using a very cheap manual Hanimex lens – I was only 17 and could not afford anything more!

    Vintage 1969 black and white print scan secondary school pupils crowd round a little black girl who has fallen and is crying at Maltby Grammar School sports day. Note the black child was one of twins from the only coloured family in this Yorkshire mining town and at this time there was no discrimination just a lot of attention.

    Once scanned, the print could be retouched digitally, Photoshop giving much more accurate control of burning-in the tone of the wall behind the girls. This is the result – it’s not a huge change. and I do not think anyone would suggest it falsifies the image.

    Vintage 1969 black and white print scan secondary school pupils crowd round a little black girl who has fallen and is crying at Maltby Grammar School sports day. Note the black child was one of twins from the only coloured family in this Yorkshire mining town and at this time there was no discrimination just a lot of attention.

    Moving on, here’s another group of children – three kids in the timed-burst water play fountain at Alnwick Castle Garden. It’s a picture I was very pleased to catch, the best of three frames with the children at the best critical moment for action and composition. But in the darkroom I would certainly have burned in the people in the background to reduce their distracting highlights.

    Children run into a fountain released by build up of a head of water visible in a tube popular water feature in Alnwick Garden Northumberland UK

    One of the principles of making a picture which works is to reduce it to a simple form. Extra faces always distract (we are drawn to look at faces regardless of composition). So, for this image, I retouched our the entire background scene. This would not be allowed by many competition, awards and some news or general media.

    Children run into a fountain released by build up of a head of water visible in a tube popular water feature in Alnwick Garden Northumberland UK

    Since I offer both images as licensable stock, with the retouched version clearly identified as retouched, I don’t feel there is any wrongdoing here.

    The next example is less controversial because it has no people at all. Wires interfere with the view of Hollows Tower, the old stronghold of the reiver Johnny Armstrong in the debateable lands as you pass from Scotland into England.

    Hollows, the tower house of the Armstrong clan lairds of Gilnockie on the border between England and Scotland. Unretouched see also version with power lines removed from shot.

    It’s not a massive task to remove the pole and wire mess. It falsifies the state of the scene, but only from a viewpoint which is not typical – most tourists see the tower as they drive past, from many angles.

    Hollows, the tower house of the Armstrong clan lairds of Gilnockie on the border between England and Scotland. Retouched image with power lines removed.

    I have not removed all the poles!

    Finally, another example of where the infrastructure spoils the scene. In Holetown, Barbados, local ladies tend to dress up well to do the shopping and tend to stop to chat in the street. Even so, it’s a matter of framing and shooting quickly to catch a neat moment before they move on or something else gets in the way. And the wiring on the wall really does spoil the shot.

    Barbados Holetown St Thomas parish west coast two Bajan ladies typically dressed chat on a street corner

    The retouching here was more complex. Is it a crime, or a routine part of modern photography?

    Barbados Holetown St Thomas parish west coast two Bajan ladies typically dressed chat on a street corner retouched version

    My work is generally used by travel guides, or in articles and books relating to people and places, travel and everyday life. The meter on the wall clearly documents the real place. The retouched image is an imaginary place. However it’s not been removed because it was an ugly meter. It’s removed because it spoiled a shot which I liked.

    You can make your own judgments on Steve McCurry or his retouchers. Did they alter the pictures because they were really spoiled by the way they were? I feel I would have been happy with the unretouched image in most cases or used less obvious major changes.

    – David Kilpatrick


  • Bad science and dissing the Sony A7 FE concept

    No doubt everyone’s seen the article on Petapixel which can best be described as successful clickbait – by Sator, essentially claiming that the whole idea of mirrorless full frame is flawed. Well, the good news is that this article is more flawed than the flaws it’s claiming to point out.

    First of, let’s simply dismiss the groundless myth that a shorter mount to focal plane register (body thickness) cause any problems with lens design. It simply doesn’t. Nor does an empty space without any body at all. The only aspect of register which can ever cause problems is additional body thickness, as found on single-lens reflex (SLR and DSLR) designs. In the early days of SLRs, it caused so much trouble for the design of very wide-angle lenses that SLR mirrors had to be locked ‘up’ and a lens fitted with a rear assembly almost touching the shutter, sticking right back into the darkchamber.

    The quote from Zeiss in the article about the ‘short flange distance’ being an engineering challenge for wide-angle lenses may well be a result of mistranslation as it’s hard to imagine any Zeiss engineer actually saying that and meaning it. This is the company which effectively built the Hasselblad SWC, not to mention the aerial and stereoscopic models based on the 38mm f/4.5 Biogon. And they made the Hologon camera. Flange distance? What flange distance?

    Take a look at the optical design of one of the best Zeiss/Sony collaborations, the RX1 series with its 35mm fixed f/2 lens, and you’ll see that Tatsuo Kureishi, Sony product planner, was probably right to say this: “We eventually realised that only a camera with a non-interchangeable lens could significantly increase image quality, since it would allow us to optimise performance between the lens and image sensor.” And what did he mean? That by not even having a focal plane shutter, by having an even slimmer body than the E-mount, a lens which almost touched the sensor, they could engineer something better. And they could align it to perfection. The ghosted product view below says it all. As far as I have been able to work out, the actual body register of the RX1 would be around 12mm, or like the FE mount’s 18mm but with the lens sticking into the body even more than the 5mm depth of the E-mount bayonet.

    Now if there’s any reason the A7 series can’t have the same 35mm f/2 as the RX1, it’s down to the shutter assembly and the filter/coverglass pack of the sensors used in A7 bodies. But it’s not to do with the mount, and as this lens proves perfectly, claims that you ‘can not get lens performance without size and weight’ are also made on a weak foundation.

    Now the throat diameter can indeed cause problems. Sator quotes a set of throat diameters:

    Minolta/Sony A: 49.7mm
    Sony E: 46.1mm
    Fuji X: 44mm
    Canon EF: 54mm
    Pentax K: 44mm
    Nikon F: 44mm

    However, all these are meaningless without reference to the register. Back on 2012, in Issue No 1 of Cameracraft (the quarterly I produced with the co-editing help of Gary Friedman for three years) I printed the register distances then applicable to a range of new and legacy systems:

    Pentax Q: 9.2mm    Nikon 1: 12.29mm     C-mount: 17.52mm     Fujifilm X-Pro: 17.7mm
    Canon EF-M: 18mm     Sony NEX: 18mm      MicroFourThirds: 19.25mm      Samsung NX: 25.50mm
    Pentax 110: 27mm     Leica M: 27.8mm     Robot: 28.1mm     M39 Leica Screw: 28.8mm
    Contax G: 29mm     Olympus Pen F: 28.95mm     Contax/Kiev: 34.85mm     FourThirds: 38.67mm
    Konica AutoReflex: 40.7mm     Miranda: 41.5mm     Canon FL/FD: 42mm     Minolta SR/MD: 43.5mm
    Canon EF: 44mm     Praktica B: 44.4mm     Minolta/Alpha: 44.5mm     Rollei SL35: 44.6mm
    Pentax K: 45.46mm     M39 Zenith Screw: 45.46mm     M42 Pentax Screw: 45.46mm
    Contax/Yashica: 45.5mm     Olympus OM: 46mm     Nikon F: 46.5mm     Leica R: 47mm

    A 46.1mm throat placed 18mm from a 43mm diagonal image sensor clearly isn’t ideal, but it’s for ever better than Fuji’s 44mm throat at the same 18mm. Or is it? Measure the actual mount, and the 46.1mm turns out to be a generous figure including the bayonet recesses. The real circular size is only 43mm and the internal diameter once any mount is fitted is only 42mm. The electronic contact array removes a further 4mm but fortunately not in a bad place. On the Fuji X mount, the contacts are placed to prevent any real chance of a full frame body (the same applies to Canon’s EF-M mount).

    sonyjune1526

    Sony got in by the skin of their teeth, and it is this mount diameter which actually starts to impose design contraints on lenses and makes some of them larger. A good example is the 85mm f/1.4 GM. That, in its purest form, would be a lens normally positioned >85mm from the sensor with an aperture diameter 0f 60mm. However, many of image-forming rays from this would be obstructed by the E-mount. A complex telephoto construction is therefore needed which reduces the virtual size of the lens aperture as seen from the focal plane and simultaneously moves its apparent location closer (placing the rear nodal point of the lens somewhere between 18mm and 85mm). Most lenses longer and/or faster than 50mm f/1.2 will need some increased complexity of design to condense the exit pupil.

    Telecentric design

    But against this, there’s a fortuitous benefit. Digital sensors, with their optically active filter/low-cut/IR glass packs, don’t respond well to very oblique angles of ray incidence. If you can make a telecentric lens – one which produces an almost parallel bundle of image-forming rays from a greater register distance – you’ve overcome this issue. That is what Olympus did with the original FourThirds format, which if scaled up to full frame size would have had a 77mm register – and they made their lenses telecentric, which means they produce a relatively parallel ray bundle, with a long back focus. Although FourThirds is now almost obsolete, it did have this odd advantage (also a real challenge which Olympus overcame in the creation of a fully retrofocus 7-14mm zoom with a 38mm register).

    The point I’m making is that large size, complexity and weight are not as so many state ‘laws of physics’ relating to making good lenses. They may simply be the most expedient solution. Remove all constraints – as Sony did with the RX1, Minolta did with the TC-1, and Ricoh did with the original film GR – and exceptional lenses can be made to be very compact, almost as compact as the theoretical physics will allow. Indeed it surprised many users to find large glass elements almost touching the film plane in some cameras.

    Sorry to be so wordy but it needs explaining. Does it matter? Yes, if you still believe in a Sony A7/FE system which can be as compact as a Leica kit used to be. In fact the E-mount makes it possible to design slightly smaller medium to long zooms and very much smaller wide-angles, and normal sized standard lenses. To adjust your perception, it’s important to take Sator’s camera size comparison images and align the focal plane index marks, not the front or back of the camera body. It’s surprising how much of an A7RII is behind the sensor plane.

    sony-wrongcomparison

    The screen grab above is from Sator’s article. It purports to compare two 85mms. There’s just one small problem – it doesn’t. The lens shown fitted to the A99 on the right is the 24mm f/2 CZ SSM A-mount, not the 85mm CZ. The 85mm is 1mm shorter but 3mm fatter with a generally chunkier look, and if you align the focal plane index marks, its front would come almost exactly level with the GM lens. It’s still smaller than the GM but if comparisons are to be made this way, they really should be correct, not wrong.

    Why other big lenses?

    Blame Canon and Nikon. Both have had SLR mirror paths which are very generous, and there are some lenses you can adapt to Canon which will give you a damaged mirror and lens in return (those lenses can’t be adapted to Nikon at all). Makers like Sigma and Tamron have to design all their lenses to clear the Canon full-frame (EF) mirror swing, and if that means adding 5mm to the back focus and then adding even more in glass to the overall assembly to make this work, so be it.

    sigma-20mmf1p4

    Therefore, when a nice fast 20mm f/1.4 Sigma appears designed for a retrofocus with a 42mm physical clearance, it’s going to be the same size when remounted (if they ever do) for a skinny 18mm register. Actually, the same size plus 24mm of deadspace extension.

    If you think that a fast superwide is bound to be huge, try a Voigtlander 21mm f/1.8 Ultron in Leica M fit. It’s not f/1.4, but it’s also the size of your palm not your forearm – and no doubt an autofocus lens could be made much the same. In fact you can buy an E-mount to Leica M autofocus adaptor and turn it into one. My point is that where Sony’s own lenses may sometimes be fairly large in order to deliver the best results from the existing sensors and the mount constraints, DSLR system lenses can be even larger. Where there is potential for Sony native lenses to be small, there’s very limited potential for this with DSLRs. I use a couple of rare examples, the 20mm f/3.5 Voigtlander Nikon fit wide and the Canon 40mm f/2.8 STM pancake. They are exceptions. Within the range from 28mm to 90mm, there have always been excellent and fairly compact lenses for all types of system – Contax G, Canon, Nikon, Pentax, Leica, Minolta CLE. Sony should look to these for inspiration for a core set of lenses, and seem to have done so with the 28mm, 35mm, 50mm, and 55mm. A neat 85mm f/2.8 next in line then?

    Adaptors and focus calibration

    The general comment that adaptors introduce error is very true, but Sator doesn’t explain why the E-mount is so prone to such errors. Let me do so. It was designed, from the ground up, to be self calibrating and not to require much precision. When the original 16mm f/2.8 pancake was launched with the NEX-3 and NEX-5, that lens had so much focus travel it could go well beyond infinity. Just 0.1mm makes a huge difference with a 16mm lens at f/2.8 – and the actual flange to sensor register of those first bodies was not even accurate to 0.1mm. Sony just made the lenses able to cover the manufacturing tolerance, because the on-sensor contrast detect focusing always got it right. You would never know if a body had 0.1mm or 0.2mm variation from spec, as the lens had more than this leeway.

    SONY DSC
    Why the A7 system still wins – though now old, a Voigtlander Leica screw original 12mm f/5.6 ultrawide works well using a $10 simple adaptor. A very much more expensive adaptor – $300 – turned out to have incorrect infinity focus.

    Then along came awkward early buyers of adaptors and lenses like the Voigtlander 12mm, or for example the 40mm f/1.4 which was the lens that really alerted me to the problem. These lenses are calibrated to Leica focus register with the aim of a hard infinity stop. They are supposed to hit infinity just as the stars in your night sky snap into perfect focus. We found that whether this happened depended on the individual Sony body and also on any adaptors. Manual focus lenses were not self-calibrating! That’s why the Fotodiox Tough-E mount arrived, why Sony tightened up generally on tolerances after the A7 and A7R, and also why makers like Samyang wisely allow a generous over-run past infinity for manual focus lenses (their 12mm f/2 for E-mount is an example, with plenty of tolerance to handle different bodies).

    Now all of Sony’s E and FE mount autofocus lenses have continued to be self-calibrating. They do not have hard infinity stops and many don’t form an image properly at all unless powered up (the power moves groups and elements into position, centres any stabilisation group, and finally performs AF). The start-up routines can also involve opening the lens aperture and closing it, often every time the shutter release is touched for first pressure. This is why expert users often prefer to AF using an assigned custom button, not the shutter release. It can save a wasted quarter-second and greatly speed your response time for action and grab shots. It’s also why manual lenses are popular, as these always shave the response time of the camera body down to an absolute minimum.

    The mistake some make is to assume the Sony E-mount needs to be as precise and accurate as a 35mm SLR or DSLR. It does not. It may feel like a precision instrument but in fact it’s not. Where an SLR design requires micron precision in alignment of the lens mount and the focus plane, the principal mirror and the secondary AF mirror, the AF module, and the focusing screen – all at once – the E-mount mirrorless requires only two conditions to be met. The axis of the lens should be centred on the sensor, and should be perpendicular to the sensor (and any focus mechanism used should retain this). If this is achieved, all other degrees of precision can be covered by tolerance. Obviously the IBIS, 5-axis moving sensor, does require considerable engineering excellence to do what it does and keep everything right. But unlike the old DSLRs, it will never need you to adjust hidden screws just to get the focus working properly.

    The IBIS question

    Sator suggests that with such a small throat aperture, the 24 x 36mm stabilised sensor really can’t do its job. We all saw the first demonstrations of AS, or SSS, or SSI or whatever we call it – the sensor apparently gyrating over many millimetres. Those who bought the original Sony A100 and 16-80mm CZ lens also found that sometimes the sensor would be a little more off-centre for the shot and one corner would be sharply vignetted. Well, you might expect that from the A7RII with certain lenses but in fact I’ve never observed it.

    The IBIS never allows the sensor to sit off-axis. It will constantly correct for your wavering hold, but always return to a centred position. It’s not trying to dive 5mm past the shadow of the lens throat or outside your lens image circle, even if it can do so in theory. The real stabilisation corrections made are within a millimetre or two, and even that is a considerable blur when there are over 200 pixels in one millimetre of travel! Consider what a 200 to 400 pixel blur looks like. What IBIS is doing often corrects shake producing blur in the region of 2 to 20 pixels.

    So, the reply to the apparently valid point that the whole sensor size, stabilisation movement, lens throat size, and lens image circle combine to make Steady Shot Inside a guaranteed failure can only be this: it works. It’s like a bicycle – look at it, think about it, and it’s not promising… but in practice it works very well. It also works, however its firmware interfaces with lenses, to use OSS optically stabilised Sony lenses very successfully.

    Conclusion

    The Leica screw system was probably designed with its 39mm lens thread much smaller than the diagonal of the film gate because it was originally made for an 18 x 24mm ‘single frame’ (later called half-frame) format. When a fixed lens was replaced with the screw mount, the inherent problem of having this smaller than the film diagonal was missed. That gave later generations the vignetting Leica Visoflex and the limited range and performance of all lenses over 135mm focal length!

    To some extent Sony has done the same thing and simple large aperture long lenses might in theory vignette. In practice they don’t. The limitations are nothing like the Leica or Contax rangefinder mounts were in the past. The argument against full frame mirrorless, or the specific design of the Sony FE/A7 series, ignores many things including simple points like volumetric heft (looks very different from overhead views of the camera footprint) and multi-body kits. I use A7RII, A7 and A6000 and all three bodies together barely take up the baggage space of a single pro DSLR.

    So, just relax. The Petapixel article was not a very carefully constructed one or a balanced argument. You’re going to find many different form factors of digital camera in future. The Sony full frame mirrorless system is just one. Because Fujifilm, Olympus, Panasonic, Nikon, Pentax, Samsung and Canon have all made design decisions for their mirrorless offerings which rule out full frame it’s not going to have ‘competition’ right now, and all users of other systems will find reasons why it doesn’t work for them – or take the plunge.

    David Kilpatrick

    Subscribe to f2 Cameracraft our bi-monthly magazine – worldwide subscriptions by fast airmail, premium ultra-heavy print quality and the best of British printing technology (it even smells good).

  • Voigtländer FE 10mm f/5.6 and 15mm f/4.5 III

    cameraswithVSMVFEwides-web
    I got to try out the first new Voigtländer Sony FE mount lenses with electronic aperture setting and manual focus control with a quick overnight test during the UK Photography Show at the Birmingham National Exhibition Centre, on March 19th 2016. The pre-production 10mm f/5.6 Hyper-Wide-Heliar and 15mm f/4.5 Super-Wide-Heliar are two of a trio reaching the market in Spring 2016 – the third is a new version of the 12mm f/5.6 Ultra Wide-Heliar. We also tried the 10mm in Leica M mount; the test cameras were the Sony A7R II and Leica M 240.

    First of all, no other Voigtländer lenses yet have the Sony E-mount with electronic connections, similar to the Zeiss Loxia models. Cosina, the manufacturer of Voigtländer lenses, also makes some Zeiss lenses and the operation of these designs is probably identical to Loxia 21mm, 35mm and 50mm models. The electronics could allow in-body control of the lens aperture but for these lenses, the aperture is mechanically set on the lens itself with a 1/3rd stop clicked ring that can be de-clicked by pushing back, turning through 180° and putting an alternative index mark in place. The focus distance set is transmitted to the camera, along with the focal length. This allows a digitalogue display in the finder, a marker moving on a bar from close to infinity.

    15mm-Emountrear-web

    For the E-mount, the close focus of the 10mm and 15mm is impressive and identical at 30cm. This contrasts with the M-mount minimum focus of just 50cm. The mechanical focus is very smooth indeed and the whole metal-bodied barrel and mount feels solid and precise. Depth of field markings are conventional (that is, based on pre-digital circles of confusion, or a typical A4 print rather than a 100% view on a 27 inch monitor screen). The optical design for the Leica M mount is clearly identical but the mount is very different with no electronics, and indeed no way of telling the Leica body the focal length or aperture in use. The EXIF data from Sony E-mount files is precise, with Leica it depends on the user manually entering the focal length, and a clever algorithm that uses the camera metering to work out the f-stop being used.

    15mmvoigt-twomounts-web

    Here are 10mm Hyper-Wide-Heliars in E-mount and M-mount.

    10and10-web

    The lenses have fixed petal type lens hoods and come with well-fitting front caps. The use of filter systems will depend on adaptors like those already found for the 15mm MkIII Leica M, but probably custom designed for the 10mm.

    Here, as a final product shot, is the original 1990s 12mm f/5.6 Ultra-Wide-Heliar Leica screw mount, with its detachable hood removed, next to the new 10mm. The new 12mm is similar in size to the 10mm, reflecting an optical design intended to be more compatible with digital sensors with improved vignetting control and freedom from colour shifts. It’s fair to say, though, that with the Sony A7R II I have been using the old 12mm with very good results. I can also tell you the new lenses are much sharper especially towards the corners.

    old12and10web

    It’s this sharpness which comes as a really welcome surprise with the 15mm f/4.5 design. It can be used wide open with confidence. Because the lenses have mechanical apertures, they don’t open up for focusing like purely electronic E-mount types – you focus at the working aperture, or for extra accuracy open the lens up, focus, then close down. When you touch the focus ring and move it, the magnified focusing of the Sony body is automatically activated, returning to a full view when you take first pressure on the shutter release. In practice this is a very fast and accurate manual focus method needing no button presses on the camera body.

    The geometric distortion of the lenses is minimal – they are almost perfectly orthographic but far from isometric! Objects near the ends and corners of the image can appear extremely distorted simply because they are projected with such rigorously rectilinear drawing. This is not really distortion, but it certainly looks like it when a face or figure ends up placed at an extreme. The 15mm must be used with care, and the 10mm needs an advanced understanding of weirdness.

    These lenses convey a built-in profile to the Sony bodies, and also to Adobe Lightroom or Camera Raw for processing (or so the dialog reports). What you see through the electronic viewfinder, and on opening a raw file, may not represent the optical truth. Studying the 10mm I found it hard to understand how any light reaches the corner of the sensor at all. I can’t measure the true fall off but I would guess it’s in the order of five or six stops. With the profile applied in-camera or by the raw converter, it’s moderated especially when stopped down a bit. This looks natural. Correct the vignetting fully, and some of the natural appeal of the image is lost.

    We must wait to review what may be primary choice for many users, the 12mm.

    The 10mm Hyper-Wide-Heliar f/5.6

    This lens displays an exceptionally straight geometry, even when used on the Leica M 240 body which has no added firmware correction function. Whatever profile is being passed to the Sony bodies probably only concerns vignetting (our Leica test indicated it may not really need a lens profile). It has 13 elements in 10 groups and covers the widest angle ever achieved with a true wide-angle on the 35mm format, 130°.

    Of course, I took a few tests inside the NEC but the first subject which really lent itself to the extreme angle was the giant illuminated sign. I was about a metre away from this, but a standing adult is about half the height of the letters. All the pictures used in this article can be clicked-through and will take you to the pBase Gallery which allows access to the ‘Original’ A7RII (level 10 JPEGs, full size) along with all the essential metadata. Please note these pictures are all copyright and if you wish to share them, please link to the pBase Gallery. You may download and examine them for your own research but they may not be reproduced.

    Outside the exhibition centre there’s an open land drain (Pendigo Lake) which stops the entire place from flooding. It’s about seven feet deep and fed by drains from below all the exhibition halls. With the 10mm fitted, I found a suitable supporting post. You’ll see that the beach gravel shows some softening and elongation towards the corners, almost inevitable regardless of the sensor cover glass specifications sometimes blamed for this. The lens geometry forces the elongation. This shot at f/8 has no added correction at all for vignetting.

    But with a lens like this, simple extreme wide views can be disappointing or pointless. You need to exploit its potential to do what other lenses can not do. The Sony A7R II can also go where other cameras might not – such as nested into the gravel, using the rear screen folded out for viewing the composition.

    This is stopped down to f/22, and in fairness the diffraction softening means nothing is really as sharp as it can be. The diaphragm stars from the lights are neat. Depth of field doesn’t get much deeper than this.

    This picture is from the next morning, walking back past the lake. ‘Not often you get to photograph Father Christmas fishing’, my friend here joked. He told me the history of the ‘lake’. Seven friends had gathered, for a fishing competition – pick their spot, set up, three hours to fish, winner with the biggest catch by weight. I’d been using a tripod so Steady Shot was turned off, and this hand-held shot at 1/6th was just OK. I found that because of the magnified scale of detail towards the outer field, if you do get shake it can be almost invisible in the centre but really blur the corners. I’m still trying to work out exactly why sensor based stabilisation manages to handle this change of scale caused by lens projection, but it does. Shots with SS on were generally perfect, those without could be surprisingly poor considering the very short focal length. I’ve processed this picture a little to suit the subject, but it shows the potential of the 10mm for environmental portraiture and editorial work. Because a shift of just inches in the lens position changes the shot so much with the 10mm, a tripod would have been impossibe here (I was leaning forward almost vertically above his foot for this).

    Here’s a funky use of the 10mm extreme angle and scalar distortion. It’s a quick grabbed shot on leaving the exhibition hall, and it’s not even vaguely sharp, except rather oddly in the view through the coach windows. The LED lighting has strobed some detail at the left hand side.

    I liked the effect with the bus so much I tried a few trucks through the car window in the morning. However, they lacked shape and form. This passing car and trailer was about the best. The progressive shutter captures a very strange effect from the wheels.

    Here’s a more conventional use of the 10mm. The weather was pretty dull and actually, night scenes were better. Stopping right down, again, takes the edge off sharpness. The 10mm seems about at its best around f/8 or f/11 (which is exactly where I use the old 12mm at the moment).

    Before moving on to the 15mm, a change of location. Next to the ‘lake’ there’s a new Resorts World hotel, casino and outlet mall complex with restaurants. Brightly lit at night, it was a far better subject for these wide lenses than anything else! Even in the daylight, it was interesting.

    You’ll also find a vertical version of this in the pBase gallery. It’s hand held, and the detail throughout really says everything you need to know about the 10mm and its practical uses. Although I believe the 15mm is substantially better optically – simply not as ‘stretched’ – I placed my order for a 10mm after doing this test. It is, after all, about the same price as Sony’s supremely boring but widely praised CZ 55mm f/1.8 – and you’re getting something with a unique commercial and creative edge instead of exactly the same old standard lens we’ve had around for ninety years, slightly improved…

    The 15mm Super-Wide-Heliar f/4.5

    With only 11 elements in 9 groups, this 110° lens is version III of a popular favourite. Optically identical to the M mount version, the big attraction is not just the lens, but the E-mount functionality. However, having used various 15mms before version III, I have to say this lens is just outstanding optically. It resolved such fine detail that on the interior view at night of the Resorts World mall, moiré patterns are thrown up by the pattern of pegboard type holes in the architectural ceiling surface. Please note that’s not vignetting at the top, below, it’s the lighting in the mall.

    Even if you don’t bother to click through and examine the full sized images for the other shots, please do take a look at this. It’s also handheld with SS, and not at the very slowest ISO. The resolution at f/8 is extreme and other shots taken, including those at f/4.5 maximum aperture, show the same quality. I’ve been testing lenses for over 40 years now and this is simply one of the best lenses I have used. This particular interior is almost like a 3D test target for lenses, too!

    The 15mm causes me a problem. I already own a Sony CZ 16-35mm f/4 and it simply isn’t this sharp.  It can’t do the same thing on a 42 megapixel sensor, it is acceptable and all very good, but not on this level. The 15mm is better than the 10mm and in many ways a more generally useful focal length. But… I’ve got my 16mm covered. 10mm is a better partner. If I dd not have my 16-35mm, I’d team up the Voigtländer 15mm with a 24-70mm. Only even the new 24-70mm Sony f/2.8 probably won’t match this (I have taken a few shots on a pre-production sample, but remember, this Voigtländer is also pre-production).

    The 15mm is a great angle for shots like this and it resists flare well. This is not a tripod shot, it used the fishing platform at some risk of an expensive camera and lens taking a dive.

    Here’s a hand-held, stabilised, very high ISO shot stopped down enough to keep the topiary fairly sharp. It’s much easier to get the horizon level with the display function available in the Sony A7R II and the brightness of the EVF for night shots. Otherwise, this would be much harder. I found it almost easy to take pictures like this casually using the 15mm (it’s harder with the 10mm which needs that little bit more care in levelling up).

    The 10mm on Leica

    Just to prove that the straight-line geometry and reasonable vignetting are not entirely down to any kind of electronic profile, a couple of Leica 240 shots start here with one using no adjustments in raw conversion to correct illumination or geometry.

    Here’s a slightly more creative use of the lens. Getting the camera in position was not easy and the A7R II would have been quicker to set up, but we wanted to check out the Leica version too.

    Conclusion

    If you have not purchased any wide-angles shorter than 20mm, it’s worth buying both the 15mm and the 10mm – or maybe just the 12mm on its own. The prices in the UK should be around £839 including VAT for the E-mount 10mm and £724 inc VAT for the 15mm – or less. At The Photography Show, these lenses were being ordered in some quantity especially on the professional days. A surprising number of mainstream professionals now use Sony A7R II and it seemed that almost all my pro magazine readers who came for a chat at the Master Photographers Association stand either had Sony or Fujifilm X. Those handling commercial assignments generally had the A7R II and most were using their Sony kit alongside Nikon or Canon. You can get pretty good (if huge) 15mm lenses for these DSLRs but you simply can’t get a 10mm. The closest is Canon’s 11-24mm EF zoom; at 11mm this does not even begin to approach the image quality of the Hyper-Wide-Heliar. You could also buy an A7R II with this lens for less than this zoom alone (definitely so at the show prices where £700 was slashed off the A7R II body).

    For those who own 16-35mm or similar lenses, the 10mm is a logical buy. It’s especially useful with the A7R II rather than the A7 II or A7S models, because the 42 megapixel sensor allows sensible cropping away of geometric extremes. One photographer I talked placed an order just to dispense with his bulky Canon 17mm tilt shift and DSLR – a crop from the 10mm angle of view is all he reckons he’ll need in future.

    Our thanks for Hardy Haase of UK distributors Flaghead for the overnight loan of the lenses, and thanks to the NEC and Resorts World environmental landscaping completed this year for creating some half-decent subject matter. Flaghead is also the owner of Robert White, the famous UK professional dealership in Poole, Dorset, whose founder is no longer with us. They took over the premises and shop before Robert’s death, and continue his name and reputation. This is their own direct outlet for the Voigtländer lenses

    – report and all example photographs by David Kilpatrick, publisher and editor of f2 Cameracraft and Master Photography magazines. Product photographs by Richard Kilpatrick. To subscribe to our premium quality bi-monthly magazines, visit www.iconpublications.com

    See: Flaghead – www.flaghead.co.uk; Robert White – www.robertwhite.co.uk; US distributor, CameraQuest – Cameraquest.com; B&H for US orders, 10mm lens E-mount link, B&H product listing.


  • Capturing Autumn colour better

    nopolariser-vs-polariserandprofile-web

    Upper: unprofiled (Standard) raw conversion. Lower: using a tunsgten-light generated custom camera profile, combined with a polarising filter, gives a more vivid impression.

    Most Alpha system users know that some – not all – cameras have a special JPEG mode for Autumn Colours. They’ll also know that if you shoot raw, with no JPEG in camera, only Sony software replicates this. The choice of picture looks or camera profiles in Lightroom and other programs ranges from none (one default) to good (a full basic range similar to Canon settings). However, you can go way beyond the default look your camera will produce from the Autumn colours we are seeing right now (UK) if you profile your camera using the X-Rite Color Checker Passport and the free downloadable software which goes with it. You can also use this software with any standard MacBeth Color Checker card.

    You still need to create a .dng file from your original raw, as you also do for Adobe’s free camera profile generator. The X-Rite software creates much smaller profile files but they are no less effective.

    Here’s my tip – normally, you calibrate by daylight and the Adobe Camera Profile (.dcp) includes automatic adjustment for tungsten. You can also take two test shots, one under each lighting condition. Experimenting with the X-Rite software, I found that if you only use tungsten to create your profile, all the daylight ‘landscape’ colours (especially green foliage and the sky) really pop out. The greatest change is in the sky blue, which can be very disappointing if you use Adobe Standard as your camera profile for raw conversion.

    A7RIIprofiles

    The zip file you can download from above contains some .dcp profiles for the A7R II which I’ve produced (the names are more or less self-explanatory). They should be unzipped and placed in the CameraProfiles folder of Camera Raw in Application Support>Adobe. You can find the software, instructions for PC and Mac, at:

    http://xritephoto.com/ph_product_overview.aspx?ID=1257&Action=Support&SoftwareID=986

    Using the stock Lightroom/ACR A7RII camera profiles you’ll find that the Landscape flavour tends, if anything, to make sky blue lighter. My tungsten-generated profile has most of the overall ‘snap’ of Landscape plus very much richer sky tones.

    The second tip with Autumn/Fall colours is, of course, to use a polariser. I’d say this makes the single greatest difference to all Autumn colours even if you can’t see it clearly when composing. The individual leaves reflect light, and the polariser cuts through this to reveal the full colour. Because it also darkens the sky, the often fairly dark colours of Autumn trees come to life better. You don’t need to study the trees, just set the polariser for the best results with the sky. The leaves are at such random angles all positions tend to work equally well. It can however be worth trying a few different rotated positions of the polariser especially if there is also water in the shot. What deepens the sky may also reduce the strength of reflections in water. Experiment!

    – David Kilpatrick

    If you are considering buying a Color Checker, Color Checker Passport on Amazon can benefit this site.


  • A7R II – universal solution, lens challenge

    I’m under pressure to take endless pictures with the A7R II which arrived from WEX (Warehouse Express) on Thursday superbly packed. I am also finishing off f2 Freelance Photographer magazine to go to print over the weekend and have many hours of work to do – and despite having the camera, I won’t be removing some other article to rush a scoop into print.

    It’s actually pointless to attempt to review any camera until you have used it for a few days at the minimum, with deliberate testing in mind, or several weeks with normal unplanned uses to confront it. Nothing tests a camera (and photographer) quite like real world pictures which are not hunted down as test subjects.

    But of course I have gone out and taken a few shots during a brief period of sunshine which has returned after days of rain, and replicated a set-up I shot few weeks ago on the A7R, also to test a new type of combined LED and flash lighting head (Bowens IC12).

    First of all, the £2695 UK price has to be compared against the A7S, A7II, or A7R with due accounting for its useful bonus – this camera body comes with the usual USB charger block and a battery, and then a further Sony external battery charger (remember them?) and a second battery. At Sony RRP this is £76 (battery) and unavailable (charger) but surprisingly expensive when it was. It’s definitely £100-worth of extras. There is also a screw in, not clip in, screw clamp grip twin USB/HDMI tethering lock device which could also securely grip mic and headphone leads.

    Unboxing should hold no surprises now, but firing up the A7R II was a familiar experience as so many of setting customisations turned out to be factory preset to my own preferences. It still needed the image size and filetype setting up, AdobeRGB, Date Form folders and a few other things I used. And then, at last, the entry of copyright and byline information to be embedded into every image!

    The A7R II takes the same GGS screen protector as the A7II and the RX100 series, not the same as the A7. First job was to stick a temporary protector on, and order one of these. All my cameras have GGS glass on them from day 1.

    kelsotownhousejul30-16-web

    I used the CZ 16-35mm f/4 lens for a few outdoor shots and also for a test or two I will not release (too many tripods, cat trays and empty boxes in shot!) indoors at up to ISO 6400. Basically… you can use Auto 100 to 6400 and as long as you set Luminance NR to 25 from 400 up and increase it gradually to 50 at 6400 (LR/ACR) the images will be smooth and noise free as well as sharp. I also enter NR 10 even at 100, because it helps keep sky blues smooth.

    You can view or download and examine, as you wish, a full size 120 megapixel from this from my pBase library – http://www.pbase.com/davidkilpatrick/image/160888201

    You can view at ‘large’ which is really small… select ‘Original’ to see the original, of course. Or a tiny corner of it! If you think the 16-35mm is at the edge of its performance at f/9 in this shot, you are right. Anything wider and the corners and ends of the shot become visibly soft at 16mm. This test shows me that where f/9 was fine for 24 megapixels, I’m probably going to go for f/11 or even f/13 as a standard setting with the A7R II.

    driedflowers-A7RII-web

    This is not a fair test even yet, but it says a few things. It’s taken on a late 1960s Asahi Pentax SMC Macro Takumar 50mm lens (I enter 75mm in the App data on the camera to ensure correct SSS) set to f/11, which is actually around f/14 at this working distance/extension. The camera is hand-held, with a Sony mini flashgun on top bounced to trigger two Bowens IC12 heads set to flash mode, after first doing the lighting and subject adjustments in LED Video mode. With these unique heads, the flash and the video modes are 100% identical in terms of how they cast shadows. The flash was set to 1/1 power at 1/1000th for a bare fresnel spot on the left, and 1/2 power at 1/1000th in a small Apollo softbox above and to the right. Focusing was done using the magnify function by moving the camera (or head and hands, in effect) over the subject.

    Again, you can view a 100% 120 megapixel version of this: http://www.pbase.com/davidkilpatrick/image/160888192

    Because this is very low power LED burst flash I need to set the ISO to 800, which would never be chosen for detail. NR is at Luminance 25 in Adobe Camera Raw (adjusting only that top slider). There is a full dynamic range with deep shadows and brightly caught surfaces. No adjustments have been made to the raw file in conversion for contrast, colour or exposure. I think it represents a very highly quality for ISO 800 and to see the level of microcontrast and detail, you need to examine the lowest contrast surfaces – the rounded bodies of the poppy heads. Throughout the image you will find areas of sharp focus and softer focus and it’s easy to tell the maximum sharpness zones. I also made an exposure at f/16 and this is significant softened by diffraction as you would expect. At f/8 this macro lens is likely to be sharper but with a file size like this, depth of field rules go out of the window. You need to use the same technique as would be employed when planning to make a 20 x 30″ print from a 35mm negative!

    I will have more images soon enough. My initial impression is that the A7II really fixed the ergonomics of this camera type, the A7R II is identical; its functions cover all the functions found on every different A7 series body sufficiently well to make it one camera for all purposes.

    – David Kilpatrick

    The link to Warehouse Express is an affiliate link and purchases made through this link benefit the publisher


  • Victorian Photography in Edinburgh

    victorianphotosmodel1-web

    Today I visited the press preview of Photography: A Victorian Sensation at the National Museum of Scotland in Edinburgh.  It’s a major exhibition which actually goes beyond the wonderful huge collection of mint condition Daguerreotypes and other early examples, ending with a Nikon D5500 as an example of today’s tech.

    You can visit this entirely free if you are member of National Museums of Scotland. For non-members, it’s £10 (adults) £8 (concession), or £6.50 (children 12-15) and free for under 12s, until November 22nd. The museum itself is free entry, and if only one person in your family wants to see this (Exhibition Gallery 1, Level 3) there’s plenty for others to see and do.

    lonleyd5500

    I wanted to see the Nikon – I had helped the curator with this, putting her directly in touch with the right individual at Nikon, after a mutual friend in Edinburgh asked for assistance. Why not Sony? Well, the museum acquires representative technology for the permanent collection, and specifically wanted a DSLR not a DSLT or mirrorless – and the Nikon fitted well with a 1990 first generation digital camera displayed close to it, another Nikon. No doubt at some future date, mirrorless will be so much the flavour of the era that they acquire a Sony.

    exploringtheexhibit

    It’s a superb show, with wall-high prints blown up from unexpectedly early originals. Although it is not a huge exhibition area, I would recommend sparing half an hour for the casually disinterested family member, an hour to two hours for this who actually look at the exhibits, and half a day for anyone who wants to access the touch screens, study the work and really learn something. The good thing about the museum is that if you DO have family members who want to do something else, there’s plenty to see and much of it is rather fun, whether Dolly the Sheep or the kids’ painting and crafts corner. It also has a café which is not overpriced and Edinburgh’s Old Town tourist attractions are a five minute walk from the door. Parking cost me £2.60 for one hour on a nearby meter, paid by mobile phone, and there are cheaper options.

    zoomingindaguerreotype

    One of the best bits must be the use of touch screens (above) which replicate a cabinet (as below) of small original works. Tap the corresponding thumbnail, and it fills the screen. Do an ‘expand’ gesture with two fingers (or hands) and the super-high-res copy of the Victorian work – often only a few centimetres wide – expands to show microscopic resolution. Daguerreotypes, in particular, are almost grain-free and reveal as much detail as Sony A7R II… who needs 42 megapixels when you have countless megamolecules?

    daguerreotypecabinet

    The exhibition includes National Museums Scotland’s extensive early photographic collections, including Hill and Adamson’s images of Victorian Edinburgh, and the Howarth-Loomes collection, much of which has never been publicly displayed. The cartes-de-visite and cabinet photographs below emphasise the huge volume of these portraits produced 150 years ago.

    cartesandcabinets

    Highlights include an early daguerreotype camera once owned by William Henry Fox Talbot; an 1869 photograph of Alfred, Lord Tennyson by Julia Margaret Cameron; a carte-de-visite depicting Queen Victoria and Prince Albert as a middle-class couple and an early daguerreotype of the Niagara Falls. There’s a special niche for Eastman and his Kodak.

    eastmanshow

    You are also be able to visit a ‘stylised recreation of a Victorian photographer’s studio’ – er, not exactly a re-creation, as stylised is certainly the word! Victorian props and costume details can be used, and you can take a photograph, which will be displayed in a photomontage at the end of the exhibition. The lighting, however, appears to be Godox Witstro or a similar battery flash mounted into a big Elinchrom Octa.

    At the press day, model Bronwyn Mackay was dressed in Victorian costume. My photo of her (top), not in the studio setting but holding a stereoscope with part of the display behind her, was taken using my Sony A6000 with 16-50mm OSS lens. Bronwyn is lit by the new ICE Light 2, which I’m holding in my left hand. The camera is at ISO 3200 and the lens at f/5.6, but it’s still a marginal 1/13th exposure, as the lights are low in the room and the ICE light is at minimum power to balance the shot and prevent distress to the model.

    I am told there is a book and a smaller catalogue (neither available when I visited) and we’ll be looking at the book, for certain, in Cameracraft magazine.

    For further information on the exhibition please visit www.nms.ac.ukphotography

    – David Kilpatrick


  • Sony A7R II, RX10 II, RX100 IV – making everything else obsolete

    (Updated June 15th after press conference)

    sonyjune1528

    The new Sony A7R II is the camera I’ve been waiting for, which everyone has predicted, and which seems to tick every box without having a huge price label on its own. I find the $3,200 (UK coinfirmed £2,600) matches its stated specifications well. Others may disagree, but they’re probably influenced by the price collapse of the original A7R, now occasionally found for under £1k.

    sonyjune1526

    Even so, at $3,200 the A7R II commands a $1,500 premium over the A7 II and much of that must be what you pay the new sensor – which does not seem to be licensed or sold to any other brand. Not even to Nikon, yet. The A7S remains the most expensive model despite the minimal 12 megapixel capture and lack of in-body stabilisation (SS in Sony terms, or IBIS generically).

    On Monday June 15th I flew to London to have a look at the A7R II and the new RX10 II (£1,200) and RX100 IV (£850). This was a bit like a motoring journalist going to a car launch and being told, you can sit in the seat, waggle the gearstick but don’t start the engine as no photography was allowed with any of the demonstraton cameras. I was surprised to find it was a European conference, as this normally means journalists from across the Channel have a facility trip to be present, and that seems very extravagant just to look at cameras which can not be tried out. I wish I lived in France not Scotland – it might not have cost me almost £300 to be there, eight miles from Heathrow (but an eight miles which might as well be a fifty Scots miles!).

    Don’t expect to get one on June 17th, as B&H’s information and too many bloggers have repeated. We are told by B&H it won’t arrive until August even though pre-orders open on June 17th in the USA. It may be later arriving in some regions. Demand is going to be so high that if you want one, you’ll need to crash into that queue…

    But you can snag a Canon EOS 5DS – 50 megapixels – for only $3,699 right now

    A7R II – or A7 II R?

    In brief, the A7R II consists of an A7 II body with a new 42.4 megapixel backside-illuminated CMOS sensor, same Bionz X processor allowing 5fps at full resolution, new 399-point Phase Detection AF on the sensor covering most of the field (up from 117 points), a similar EVF with improved eyepiece giving a genuinely impressive 0.78X instead of 0.71X virtual magnification, the same rearRGBW bright LCD, plus silent shutter and HD 4K movie functions improving on the offering of the A7S. The new shutter mechanism is claimed to have a 500,000 actuation life expectancy which puts it ahead of almost every pro DSLR yet made. The back of the camera body is magnesium, where it’s solid composite plastic in the A7II. And it has, unlike the A7R, five-axis sensor stabilisation which talks to Sony OSS lenses for the best blend of anti-shake methods ever devised.

    kelsokelpiesgirl12mm-evf78

    The new EVF size, to the eye – compared with the old (A7II, A7R, A7) 0.71X view below (A7R, Sigma 12-24mm at 12mm, Canon EF fit, on Commlite EF-FE adaptor).

    kelsokelpiesgirl12mm-evf71

    You will read in the specifications and promo blurb that it has a new LCD double the brightness, new tough body and strengthened mount, new shutter release and controls but all these ‘improvements’ are listed by Sony over the A7R and already existed in the A7 II. Instead of making comparisons with the A7 II – which this is really a development from – Sony has listed many advances made relative to the A7R. It is not an A7R II. It’s really an A7 II R.

    sonyjune1527

    The eyepiece surround is much improved, wider and softer still than the A7II which in turn is softer on specs then the earlier models. Eyepoint and position flexibility both improve and there are no unsharp zones at all even if you shift your eye around.

    It’s important to understand that many of the improvements already exist in the A7 II partly as a result of criticisms of the original A7R made by objective reviewers, not Sony artisans or staff or sponsored bloggers. You don’t owe this camera to the success of its predecessors or the daily Facebook sermons of awestruck evangelists – you owe its features to corrections made to the shortcomings of the models so far. And to those who have had no vested interest (other than ownership) persuading them to weaken critical appraisal. The further improvements in the A7R II are either extremely technical – serious core improvements in the sensor and focusing – or minor refinements and carries-over from the A7II.

    42.4 versus 36 point anything

    If you really think 42.4 megapixels is going to take you to realms far beyond your 36 megapixel sensor, think again. It is the same step up as from 18 megapixels to 21 megapixels, a move Canon made without absolutely transforming the images created, or about the same as from 10mp to 12mp. There’s one big difference – it does not make the jump to any larger common print or repro size. Remember going from 6 to 8? That was from sub-full-page to a decent full page resolution, for US or A-size documents at a touch under 300dpi. 24 megapixels took us to a really sharp A2, 36 megapixels takes us to a acceptable A1, and all that 42 does is to make a slightly better A1 but not 300dpi.

    icelight-cherries-36mpsize

    icelight-cherries-42mpsize

    Above you can see the actual, real size difference (in proportion) between a 36 megapixel shot and a 42 megapixel shot. If you click on the bigger version, it will take you to my pBase page with a full A7R II sized version of this A7R shot. Zeiss? No – a 45 year old Asahi Pentax Super-Multi-Coated Macro Takumar 50mm f/4, used at f/11, and a 30 second exposure at ISO 50 lit using the ICE Light 2 moved round the subject in horseshoe shaped path for 15 seconds, laid flat, and then moved under the perspex for the remaining 15.

    In practical terms, it’s 7980 x 5320 pixels (or very close – Sony has been extremely coy about releasing full specifications, even at the conference I could not find this out) versus 7360 x 4912 for the A7R. In perspective, make a big print from the A7R and it’s 24.5 inches long at optimum resolution; use the A7R II and you get one inch extra each end on the long side, 2/3rds of a inch extra top and bottom. The A7R makes a 16.3 x 24.5 inch print to perfection; the A7R II makes a 17.7 x 26.6 inch print.

    Anything smaller than A4 printed, it’s got no great advantage over the 12 megapixel A7S – but you are getting close to enabling a 2X crop (one quarter of the frame) to look as good as the A7S full frame. Sony showed A3 prints. They could, honestly, all have been shot on the Sony A100 from 2006 and no-one would have been any the wiser. One enlarged section was the only real test of the camera. I’m sure the model’s dermatologist loves it.

    a7RII-prints

    Where it does count most is when using crop frame mode. In APS-C crop mode, the A7R II file is large enough for a 300dpi double page fine art magazine spread, just under 18 megapixels. I’d say that where 42.4mp is not a critical size, 18mp actually is. You can get away with 16, and for Nikon, Panasonic, and Olympus this had been an important baseline. Cropped frame FF from Sony now rises above that baseline instead of sitting just below it.

    portlandgardens-showerroom1-11mm

    What I’d like to see would be 1:1, 4:3, 5:4 ratios implemented with the EVF and LCD screens cropped to match – and ideally the raw files reduced in size the same way. A square 1:1 would be 28 megapixels and that crop allows so many APS-C lenses (like the Zeiss Touit 12mm) to be used without vignetting or limits of coverage distortion issues. The example above is from the A7R and it’s a square crop 24 x 24mm from a frame taken with the 10-18mm f/4 Sony OSS, at 11mm; the lens would have allowed a 4:5 crop equally well.

    Important edit: just read another ‘Sony artisan’ blog post asking the (redundant) question as to whether Sony lenses will be up to this new resolution. Anyone who owns an A6000, NEX-7, or A77 is already shooting at well above this resolution (full frame will need to match the Canon 5DS 50 megapixels to beat them). The resolution of the A7R II is slightly lower than that of the base level entry A3000. Don’t panic. Plenty of old legacy lenses will match it well, let alone any new Sony FE and A-mount designs.

    I checked out the 20mm f/2.8 SEL lens with the new version 2 wide and fisheye black converters on full frame at the Sony event. Really, this lens comes so close to doing a good full frame and the converters even leave much of the area intact for a much bigger crop than APS-C.

    20mm-on-FF  20mm-wide-FF  20mm-fisheye-FF

    And that’s all without removing rear baffles or doctoring the built-in lens hoods of the converters!

    Detailed points

    When we get a chance to use the camera, the following points will be of interest:

    Has the mount been upgraded again? It still has only four attachment screws, compared to Fujfilm X system’s six screws (and the A-mount uses six too). My two camera bodies and two changes of mount on the A7R, to Tough E mount and then 2nd generation Tough E mount, all produce unpredictable degrees of slop, smoothness or jam-on tightness from various adaptors showing that no matter what, tolerances are broad. Comment: can’t tell from changing lenses at the event, it feels much the same as the A7 II.

    Has the Memory position, 1 and 2 on the mode dial, been improved to remember MORE of the important settings – notable, Setting Effect ON and OFF, for saving a studio flash preset mode with the EVF/LCD setting effect disabled? Answer: No.

    Is the hot shoe part of the Multi Function Accessory Shoe hampered by paint, or tolerances in fit, or does it readily accept all standard ISO hot shoe simple flash devices and triggers? Looks clear.

    Canon 85mm f/1.8 USM on Focus EF-FE adaptor (also works perfectly with Commlite) on A7R. The 40mm f/2.8, and Sigma 12-24mm in EF mount work well on my A7R with these two sub-Metabones price adaptors. At the press event we found the 85mm just didn’t focus at all with any adaptor on any of the pre-production A7R II bodies, but the 40mm was fine.

    Will the promised ability to use PD-on-sensor AF with Canon and other lenses rely on Metabones as the only adaptor, or is it generic? The microlenses on a backside illuminated sensor have a large effective aperture than traditional design, and this means the PD-lenses (a special variant of the microlenses used on sensel pairs) will be similarly improved. This may make some difference, but it’s actually the focus motor control via lens to body data communication which will enable fast and sure operation with Sony SSM on LA-EA3, Canon USM on EF-adaptor, and so on. Remember, this does not make screw drive or SAM, or micromotor Canon AF pre-USM lenses, function any better. It will only apply to ultrasonic, piezo, linear motor and similar finely controllable AF mechanisms with close to zero play and accurate (8 contacts, not 5) distance and ‘state’ reporting. Note, too, that Sony’s revised lenses (SSM II) are not just optical and weatherproofing reworks – the new SSM is designed to work with contrast detection, as found on the A7R, much better.

    Comment: we found that the Canon 85mm f/1.8 USMdidn’t work on any adaptor on the A7R II, while the 40mm f/2.8 activated the PDAF points and focused very rapidly, and a 24mm f/2.8 USMf/2.8 focused fast – and that various different demo A7R II bodies responded differently and one malfunctioned a lot of the time even with Metabones. Sony said this was known and the final retail stock should at least work OK with Metabones IV and probable firmware updates, but other cheaper adaptors will not be tested.

    The new camera’s mode dial has a central lock button, and a slightly lighter click action without risk of being turned by mistake. We’d had liked to have seen a lock on the +/- EV compensation dial too, but this just has slightly strengthened clicks.

    Wish list

    The same small battery has been used yet again despite the II body design having what looks like enough room for a full sized Alpha battery (see below – carefully positioned batteries with A7 II body). Let’s hope for upgraded batteries from Sony.

    Please, Sony, you provided a GPS pinout in the new shoe – you have never rolled out a GPS module or firmware. It’s three years now and no news. Hell, I nearly bought a brand new boxed A99 at Dixons Heathrow Terminal 2 shop for £1075 inc VAT maanger’s special, I miss GPS so much!

    Please let the Lens Data entered into the menu for SS of manual lenses, without data communication, be embedded into EXIF so if I enter 50mm, my files say so. And ideally, please make it possible to enter the focused distance (this would improve stabilisation) and the aperture in use (just to complete the EXIF data).

    Sony pointed out that the latest version of the lens correction App will record the focal length and aperture as you enter them, in EXIF. It has its own SS on/off setting and automatically recognises whatever focal length you have entered. You can name and recall each different lens, and if for example you normally use your 24mm f/3.5 Samyang shift lens at f/16 for architecture, you can enter f/16 as the lens’s aperture and that will be corrected embedded in your EXIF. But to get this you must run the app, not just shoot with a manually set focal length for SS.

    Please change the Memory 1 and 2 registers to save and recall ALL the camera settings and not just those in the first bank of the menu system (but see the vital point above about Setting Effect On/Off). Until I test the camera, no more to say – but Sony does not usually keep quiet about changes, and has not mentioned this aspect.

    The existing rear screen – the II design, left, improves on the original A7R but this is still a basic, amateur level screen to be working with and a fully articulated design would be better.

    Though you’ve missed the boat with this camera, the crudely hinged and angled rear screen needs to be replaced with a fully articulated screen that can be reversed to the camera for protection and to prevent distracting light when working in the dark.

    Out of the loop

    I’ve been out of reviewing new Sony gear for some time, as it has not proved possible to get hold of it early enough or for long enough to give any meaningful assessment which Joe Photographer anywhere in the world couldn’t appear to do themselves. For six or seven years I have bought and sold new Alpha gear to fill the gaps between the occasional availability of review kit, but recently that has become so expensive it exceeds any margins available from the three magazines I publish, or any fees I can obtain from other media. Like politicians, people who write about gear either need an independent mind or independent means – without one of these, you’re always in someone’s corporate pocket or feeding from crumbs under the main table.

    The result, as we see all the time, is that many early users or reviewers of Sony kit are no longer all that independent and much of the first wave of information now comes through the channel of ‘artisans’ (as it does with ‘ambassadors’ for all makes). And we see plenty of others who are clearly of independent means, whose main purpose in life is to be the first to post pictures taken with new item X regardless of the cost.

    So maybe I don’t need to push to get hold of an A7R II for the too-short two week period of any review loan, after a six month wait while other consumer-orientated magazines and blogs take priority – or indeed rush to buy one.

    But… like the RX10 which I use all the time… like the A6000 kit which is co affordable and compact it’s essential… like the RX100 MkIII which goes where even the RX10 is not welcome… like my A7 II with stabilisation which has transformed a box of assorted lenses into a solid outfit… this one’s possibly something to buy because I actually need it and will use it.

    I may not even cosy anything as it will make both the A7R and A7II redundant, because it does both jobs and also covers the A7S I did manage to borrow but never bought. And it does more.

    So, thinking whether or not to bother with this upgrade is a bit irrelevant. Even if it was still ‘just’ 36mp the other improvements would mean it still replaced the need for a handful of A7 models, all in one.

    sonyjune1534

    Small miracles

    My one doubt is that the A7R II may be beaten in practical terms by the RX10 II. Please note that so many incorrect snippets of info have gone around about the ‘stacked’ sensor design, I thought it referred to RGB stacking. It does not, the sensor is a conventional Bayer pattern, and what is stacked is the electronic substructure. This does not affect the top side of the sensor and the performance in image quality should be similar to the existing models. What it does is greatly speed data transfer and enables over 1000 (lower resolution) frames per second to be clocked through from photon received to movie frame recorded.

    The RX10 and 100 new versions offer ridiculous levels of high speed slow motion capture, clean 4K video and other technical benefits which come with a very small chance of dust on sensor, unlike the A7R II which is almost guaranteed to be a dust devil. Why do I say that? Because a backside illuminated sensor renders dust on its cover glass even more sharply than a conventional one! We know the RX models are not dustproof and if you are unlucky enough to get a spot on the sensor it’s a service visit to get it removed, but in my experience with five or them so far I have never had a single dust spot.

    sonyjune1531

    So what? Just retouch? Not when making movies! Admittedly most movie makers will open up the lenses to max or only a stop down on these 1″ sensor cameras, and would open up lenses just the same on the A7R II and never see dust even if it was there. But what about the time you want that ‘American take’ – f/22 at 20mm? Traditionally they were taken in dusty settings for the spaghetti westerns!

    All I can say is that the RX10 has come very close indeed to removing the need for any other camera and it’s been a pleasure to work with the raw files. The RX10 MkII might be so much better that I forget about DSLRs or mirrorless systems and just get on with capturing great images. Or then again…

    – David Kilpatrick

  • Sharp vintage glass – and subject

    In 1996 I was operating one of the first full service digital photo studios in the world. I had already published, back in 1986, the world’s first desktop published commercial periodicals and our company won the UK Printing Industries Research Association inaugural DTP Awards for this in 1987. We’d bought the first Apple laser printer in provincial Britain and when Letraset’s ReadySetGo layout package failed to produce usable output for our first such magazine, Aldus stepped in and provide a pre-release beta of PageMaker. In 48 hours, I had to re-create the entire magazine – and it worked.

    From then on we progressed, through having the first separation-capable film imagesetting in Scotland to reproducing the first magazine cover from Kodak Photo-CD and soon after that the first full colour page from a Kodak DCS camera. By the beginning of 1995 we had Photon, the first major photo-mag style website, in by the end of that year we had a Leaf Lumina based studio with Scandles lighting. There’s an article about this in our repository of past articles, https://cameracraft.online/2007/08/06/the-leaf-lumina-scanning-camera-1995/

    That year, Shirley had planted an entire bed of flowers specifically for drying. They make good photographic subjects. The (now relocated) university college of St Margaret’s in Edinburgh asked me to give a lecture about the new technology – and so the Leaf Lumina (a scanner on a tripod with a  Micro Nikkor up front, and an Apple Mac Powerbook on the end of a SCSI-2 cable) went along with the fluorescent studio light heads and a tray of the dried flowers. We also took our Kodak dye-sub printer, which had made hundreds of prints alongside other printers during that year, when Shirley completed her M.Sc.Colour Science and created pre-ICC colour tables to reproduce fabric colours accurately. With this carload of gear, we were able to shoot and produce a print on the spot.

    The picture remained on file – a 25MB TIFF, roughly 8 megapixels, but equal to 8 megapixels in the Sigma Foveon sense as every pixel was true RGB with no Bayer filter involved. The exposures took over a minute, limiting it to still life, but the quality was not exceeded until 12 megapixel Bayer cameras like the Sony A700 appeared. And a few months later, we were producing Paterson’s catalogues and price lists and needed a cover. One list covered black and white and colour chemicals, the former mostly from Paterson and the latter from Photo Technology. Photoshop offered an easy way to take the image, and divide it accordingly. So that’s what we proposed, and what was used for the cover.

    Paterson1996-web

    It was intended to show the gamut from plain monochrome through toning to colour and it did look very good in print, because relatively low overall contrast combined with high detail contrast is easily handled by litho.

    Now, forward two decades, and I’m looking for subjects to test out the latest Elinchrom ELB400 portable li-ion powered two head flash kit. This has LED modelling lights over twice as bright as its predecessor and they now really show how the light is falling even when using light shapers. I wanted to show texture using my optical Mini Spot attachment, which works very well with these new heads and their cool-running LEDs.

    On top of a wardrobe, in a basket, were the dried flowers. They are called everlasting and apart from gathering loads of dust, they are. The most difficult job was holding each flower against the nozzle of a handheld vacuum cleaner to remove 19 years of dust.

    The first shot I took was with the Sony A7II, 24 megapixels, using my Pentax SMC Macro Takumar 50mm f/4. Like the flowers, this is also everlasting. It’s not yet 50 years old even though the lens design, a simple Tessar-type corrected for magnifications from 1:2 (50%) to 1:10, is well over 100 years old. It’s also a tolerable lens for general scenes, though the extreme resolution it achieves centrally only covers the full frame when you focus close. With Pentax’s original multicoating in every way a match for the latest Zeiss T* as found on new Sony Zeiss lenses, and a deeply recessed very small optical unit, it has a contrast and colour saturation you just don’t find from lenses using hybrid or moulded aspherics or many more air to glass surfaces.

    This picture appears, fairly small, in my review of the ELB40 in f2 Freelance Photographer magazine July/August 2015. When editing it, I was struck by the extreme resolution. Within the planes of sharp focus, it was exceptional.

    So, I decided I’d shoot a new shot, and improve on the use of the spotlight attachment on the Quadra head to cast the shadows and create a sunlight-like effect – and this time, use the A7R with its 36 megapixel resolution. Although the A7R has no AA filter and is sharper in theory, the larger pixel count calls for a smaller aperture to secure a little more depth of field for the larger viewing scale, and this when using any macro lens always risks diffraction limits on fine detail contrast. For example, at half life size a setting of f/12.5 (between f/11 and f/16) which I found desirable for best sharpness distribution gives an actual f-stop of c.f/19 and this does cause some sharpness loss. If the lens was extended on a tube to give 1:1, a setting of f/16 as nearly always needed for depth of field is really a true f/32 for diffraction calculations and light readings alike.

    Fortunately, our brains are sensitive to perceived scale, and we ‘see’ close ups as sharper than distant subjects even when they are not. The A7R and the Pentax macro lens also combine to produce an extreme level of textural detail, the information our eyes and brains use to see 3D solidness, shape and form in a flat photograph. So in practice you can shoot macro and use whatever aperture the subject depth demands, without resorting to focus stacking techniques.

    And here, anyway, is the result. You can click on this image and it will take you to a pBase hosted full size, JPEG compression level 12 version (this is over 24MB of image data, and it is not compressed like Facebook or indeed a WordPress image – though it’s still not ‘virgin’ data).

    driedflowermacro-cleaned-srgb-web600

    In a couple of days, I have another SMC Takumar of the same era arriving. It’s a 35mm f/3.5, which was the cheapest of the line back in 1970 when Shirley bought me my very first brand new, marque brand lens for Christmas! We were both only 18 and that represented an entire month of her basic salary working behind the counter at Dixons in Sheffield… helped by a staff discount. It was my first Super-Multi-Coated lens and I can remember still how the high contrast and bright colours could even be seen through the viewfinder – and how amazing the first box of slides looked, midwinter close-ups of fallen leaves rimmed by frost and frozen puddles.

    These lenses have never lost the edge they had, if they have been looked after, but the truth is we never knew how good they really were. We can now focus them within a fraction of a millimetre. I’ll probably never compare the 50mm f/4 SMC Macro Takumar with the 55mm f/1.8 CZ (I’ve used it, but only for low light high ISO tests on the A7S) or the 35mm f/3.5 with the CZ 35mm f/2.8 because it’s unlikely I’ll ever buy the new lenses with their inflated prices and reliance, however marginal, on software correction to be ‘good’.

    I know I have not written much about the A7R, or the A7II I’m using, or about any of the new lenses I can not manage to borrow from Sony and can’t afford to buy. I have an amazing set of lenses from 12mm to 500mm for full frame, including tilt-shift, wide aperture and mirror but just one single Sony FE lens for convenience (the 28-70mm FE kit lens). In contrast, my A6000 kit is all Sony plus the Samyang 12mm f/2 because it is just so good it had to have a place.

    So, please do take a look at the full size file. The critical plane for focus crosses the smooth surfaces of the two poppy seed heads and it’s in this relatively low contrast zone that the quality of the lens shows up. Elsewhere in the image the defocused quality is very pleasant (there was no CA to correct and there’s no bad colour bokeh) and the plane of sharpness passes through a few other more interesting flower details.

    Finally, a word for A7II users. If you use a manual macro lens, as I do, remember that when you program in the focal length for Steady Shot you should only enter the actual focal length for distant views. For my 1:2 macro Pentax, most often used in the range from quarter to half life size, I program in 70mm as the focal length because this represents the view angle. Using a macro at 1:1, you should enter double the focal length to get the correct Steady Shot compensation. Sony and Minolta macro lenses with the D chip (eight contacts) convey accurate extension information, so the auto Steady Shot works perfectly with them. But manual, or Canon lenses on adaptors which may or may or not pass the right information through, are best used with the Steady Shot focal length entered via the menu screen and adjusted to allow for the actual lens extension.

    – David Kilpatrick

    Check out B&H prices for all full frame lenses for the Sony FE (A7) system here

    Check out B&H Secondhand Department for all ‘film camera’ manual and vintage lenses

    Check out B&H Secondhand for Sony E-mount adaptors to allow you to fit your vintage/legacy lenses

    Check out the huge list of new adaptors for almost every lens ever made!

  • The Fotodiox Tough E-Mount

    Machined from brass and chrome-plated, in the tradition of lens mounts from 50 years ago and not necessarily the best solution for precision or lifetime wear, Fotodiox’s TOUGH E-mount is a replacement body mount bayonet which you can fit to your existing A7R, A7, NEX-7, A6000 or any other metal-mount E-mount body in a few minutes. You need a clean well lit work table, a small engineer’s or large jeweller’s crosshead screwdriver, and a similar flathead screwdriver or old credit card.

    The NEX/A bodies are fitted with a three-part lens mount. Here’s what a bonded, single piece, original Alpha lens mount looks like when removed from an old Minolta 7000 –

    originalminoltaamount

    This mount is stainless steel, which would be prohibitively expensive for a small shop engineering replacement on the E-mount. It’s in two parts, a front surface and the inside with a bonded bayonet spring pressure action, a thin shim with bent ‘arms’ forming three pressure points to hold the lens tight to the mount.

    From Fotodiox comes this neat box taking 10 days to the UK from USA –

    fotodioxpackage

    Since I also ordered a focusing Leica M to E adaptor, my overall value was marked as $80 and I had an £8 admin charge and a little over £7 in VAT to pay.

    Inside, the TOUGH E-Mount is boxed and bagged without instructions. For these, you visit the Fotodiox site and watch a video:

    http://www.fotodioxpro.com/tough-emount-from-fotodiox-pro-replacement-lens-mount-for-sony-nex-emount-camera.html

    Here’s the rear face of the Fotodiox mount, which does not have any second layer of spring metal to grip the lens:

    toughemount

    However, as we will see, this component (fixed to the mount for the A-mount design) is a separate loose item which sits in the camera body mount recess on the E-mount, and performs exactly the same function. You could probably remove it and bond it to the new mount.

    So, why replace the E-mount on a £1200+ camera body like the A7R, which has a magnesium body casting into which the lens mount is anchored by four screws? The reason given by Fotodiox is that an intermediate plastic moulding is used behind a simple unprofiled mount face, so two parts make up the overall thickness. The tensioning ring sits behind the plastic ring, forming a three-part sandwich to make up the mount. The front mount is a relatively soft, crudely CNC lathed alloy.

    oneyearemount

    Here’s my camera after 10 months of use. This camera has shown signs of light leaks, and has not been sent back for a fix. The mount flange is a completely flat item, relatively thin, and the leaks may be partly down to slight distortion of the front plane face, as shown by uneven wear from lens mounting.

    emountwear-closeup

    Here’s a detail. You can see the lathe circles on the mount face, and you can see where the metal has abraded and either collected plastic from a plastic lens mount (most likely my MEIKE extension tubes) or paint from a cheap adaptor (my Novoflex and Fotodiox adaptors don’t use paint, they are anodised).

    The mount is very simple indeed. It can be removed from all the cameras without disturbing the electronic contacts or the lens release mechanism.

    removingmount

    Fotodiox video shows the camera on its back and warns about dropped screws etc. I just prefer to unscrew each screw in turn with the camera held vertically on my table, so that if the screw drops it won’t go inside the camera. Care is taken not to allow the spring loaded lens changing pin to disassemble itself, but that’s really very easy.

    toughtversusoriginal

    One removed, you can compare the Sony ‘washer’ (which is really more or less is!) with the Fotodiox mount – a much thicker unit, stepped to fit the recess on the camera body. A point worth noting is that the original mount has no recesses at all to fit over the four threaded posts on the camera body. Its position is maintained by two pins (at 9 and 3 o’clock) which engage in two holes on the otherwise plain flat rear face of the mount. The Fotodiox mount not only engages with these pins, as it replaces the plastic secondary mount shown below, but also has holes into which the threaded posts fit. It is better proofed against rotation.

    plasticnbayonet

    You now see the plastic middle part of the sandwich. This is secured by a very thin double-sided tape in places. A flat blade screwdriver or a suitable cut piece of old credit card (or indeed a guitar pick!) pushed gently under the plastic at various point all round will free it. It lifts out easily. Unless you are amazingly clumsy you are not going to go anywhere near the sensor but if you have a clean 40.5mm filter or lens cap around, you can pop it in to cover the sensor safely. I used a 62mm filter to place over the whole mount when checking instructions and looking at the parts, as I don’t want to risk hairs and dust covering the upturned unit.

    plasticremoved

    Underneath the plastic component you’ll find the third part of the mount, the thin flexible stainless steel tensioning ring which acts to pull the lens tight against the front face of the mount. You may note that if your lenses ever begin to seem slack, it would be easy to re-tension this ring by a gentle bend to the three arms. The four screw holes are in metal posts mounted directly into the magnesium body. The plastic ring can be argued to have no effect on precision, as the original mount rests on these posts, leaving the plastic and the stainless tension ring more as a ‘lubricated’ assembly with a little ‘give’, affecting only the tightness of the lens to the body. The plastic has no sacrificial role, as it does in many lenses (Sigma, Tamron, Nikon, and Canon all use plastic to create weak points where the lens will break on hard impact rather than having it shear the body mount off the camera – not sure about Sony).

    fittingnewmount

    The final step is to place the new mount, aligned with its white dot and cut-outs and screw holes, in the only position it will fit. Please note that the TOUGH wording goes inside and is not shown on the camera front! Again, I don’t place the camera on its back, and prefer the control given by holding both the camera and the screwdriver (which if properly chosen will support the screw). No pressure is needed to locate the screws for a few turns. I rotated the camera so that the screw hole being worked on was always below the sensor. Finally, when tightening up each screw in turn to a firm fit, the camera was laid on its back and my 62mm filter was placed to cover the mount opening, held firmly. You can also just place a finger against the screwdriver on the ‘inside’ while tightening up, so that if for any reason it slips, you block it from entering camera.

    mountfitted

    Once fitted, there’s little more to say. It looks a touch classier than the cheaply machined soft metal Sony original, it is a snug and perfect fit, and lens mounting has a slightly more solid feel without resistance or any scraping sensation. Fotodiox may be taking the mickey by suggeting you give the old mount to the cat to play with, of course you should keep it carefully. While doing this I discovered that the original old Minolta SR bayonet shares the screwhole locations and almost perfectly matches the overall size of the E-mount. I could actually take a Minolta SR bayonet off the front of some old extension tubes and fit an E-mount in place. This would serve no purpose but it’s a fascinating hint at the pedigree of the new system – it has a three-flange bayonet so similar to the SR mount, introduced 52 years after Minolta’s SLR debut!

    Everything worked perfectly as expected once fitted (see notes below). Cost – $39.95 plus shipping. I consider it a good upgrade.

    Notes on infinity focus, fit, and light leak issues

    While Sony native E mount lenses seem fine, some of my third party adaptors are not fitting well, and very short focal length lenses show that the infinity focus may be affected. If you use lenses 12mm to 20mm on adaptors, proceed with caution. I am not able to get the Kipon tilt shift adaptor to mount without a forceful twist, though a similar age Kipon shift-only adaptor is happy enough (just no longer able to hit infinity with my chosen 20mm lens).

    Infinity collimation after tests and measurements – I’ve now checked infinity focus using stars. I’m just OK on all but one lens and adaptor combination, and all Sony E or FE lenses are fine, as they have loads of spare adjustment (no hard infinity stop – they will all focus way beyond infinity and can handle big differences in camera assembly accuracy). Same with LA-EA3 and LA-EA4 adaptors and Min/Sony A lenses, the worst case lenses hit infinity at exactly infinity, most focus just past.

    Kipon Nikon Tilt-Shift – extremely tight fit, so tight it has to pulled off the camera physically. Here I’m thinking that some very gently polishing or ultra fine emery (the sort I use for polishing guitar frets) might ease the adaptor.

    Novoflex Leica M adaptor – will not bayonet-lock with the new mount, can’t work out if the flanges are obstructing the full turn or the locking pin hole is slightly off position. Fotodiox helical M adaptor locks perfectly. All other adaptors fit and lock comfortably.

    Checked my Kipon shift adaptor for Canon and it’s 21.34mm from rear to front flange, and the lens won’t focus on infinity. My plain cheap Canon FD adaptor is 21.16mm and the lens will hit infinity perfectly. On the original mount, the shift adaptor was just OK to infinity – not for stars, but for landscape. So maybe 0.1mm actual difference in front face register to sensor on the Fotodiox Tough mount, compared to the Sony original.

    Light leak issue – a day later I had bright full sunshine and was able to position the camera with the mount getting direct sun, and give exposures of 30 seconds to 1 minute with the lens completely stopped down and blocked off, and the ISO set to 1600. The results proved that it’s not the camera mount assembly which has most effect –

    40mmon2875mm

    The pure black exposure above is from the 28-70mm kit zoom set to 40mm, at f/25, with the lens cap on.

    40mmonLeicaadaptor

    This result is from a Voigtlander 40mm f/1.4 mounted using a Novoflex Leica M adaptor, at f/22, with the lens cap on. Simply swapping the Voigtlander adaptor for a Fotodiox helical focusing Leica M adaptor, which has a far wider flange and double the ‘bearing surface’ on the mount and it also a much firmer overall fit, produced the same solid black as the 28-70mm. The 10-18mm also produced a solid black though it was clear that the lens cap lets in a bit of light at the spring clip positions.

    To double check, I fitted a disc of Rosco Black Cinéfoil (totally lightproof heavy metal foil you can cut with scissors) into another mount so it sat behind the back of a 50mm lens. This was a Ukrainian shift mount and Zenitar lens. This mount also has a large, black anodised rear surface. No light was admitted. I found that most of my third party adaptors let in light, usually the small angled line/crescent top right, and so did the Sony LA-EA3 and 4. The Novoflex has me surprised and baffled as it let light in over a wider pattern, and it seems to be the best engineered adaptor I have, but the well for the bayonet locking pin is shallow and perhaps too precise as the pin does now not engage (you can feel it just begin to hit the lock position).

    (don’t read beyond this point if you don’t like seeing measurements…)

    This adaptor works perfectly on other NEX/E bodies and worked perfectly before changing the mount. Relaxing and re-tightening the mount fitting screws, to be doubly sure of correct seating, did not solve the problem. The pin recess in the Novoflex adaptor is 2.30mm wide, and in all the other adaptors measured and also on Sony lenses, from 2.36mm to 2.5mm. The slight wiggle present on Sony lenses when fitted seems to be down to approx 0.07mm tolerance allowed for the locking pin to engage, as this is the part of the mount which limits or fixed the position of the mounted lens. Lenses and adaptors tested, when mounted with the locking pin depressed, can move around 0.5 to 1mm beyond the optimal mounting position.

    It looks as if the locking pin mechanism is one area identified as a source of light leaks, and that if the pin is not allowed to engage fully (recess too shallow or not accepting the pin) more light will be admitted. All my manual adaptors varied in the depth and exact design of the locking pin well – 1.1mm deep on Kipon, 0.69mm deep on Fotodiox, 1.23mm on Novoflex, 1.1mm on Sony G 10-18mm, 1.18mm on Sony 16-50mm PZ. The 28-70mm which had perfect light sealing also has an unusual locking pin hole, almost perfectly circular not an elongated oval like all the other lenses. This was 1.2mm deep and with a 2.5mm radius. It is obviously perfectly placed and very precise despite this being a non-G, non-CZ, cheap Sony kit lens.

    Anyway, 10 seconds with a Dremel and the Novoflex adaptor is now a perfect locking fit ready for another test if the sun comes out again this year.

    Sony did say, back in 2010, they would make the E-mount specifications public for all to use. If anyone has information on what tolerances were specified, please let us know!

    Update 30/10/14: using a high intensity single LED torch, the Novoflex adaptor problem was eventually narrowed down to light leaking through the mount between high-grade Leica mounts (Cosina Voigtlander, and Carl Zeiss) and the adaptor. Tightening the flange pressure did not cure the fault. No leak is present when using a low-cost Chinese M adaptor on a screw thread lens, which is a firmer fit. The Nokton and Tele-Tessar lenses also show no leak with the Fotodiox adaptor. It’s just an issue with these mounts – probably from the same source, as Cosina assembles CZ Leica mount lenses – and the Novoflex.

    Absolutely no light leak can be identified on the A7R body with the new mount fitted. All leaks turn out to have been down to third party adaptors. The LA-EA3 and LA-EA4 give no light leaks, same for all E/FE mount Sony lenses. The Kipon Tilt-Shift (Nikon, $200+) has so many light leaks I can’t map them – every stage of the unit from the lens mount to the body mount, and all the moving parts, admit light; unit dangerously tight on Tought-E mount. Kipon Shift adaptor (Canon FD) admits light freely, especially when shifted. Canon FD plain adaptor, low cost – leaks at body mount. Cheap Minolta MD adaptor – no leaks. Cheap Nikon adaptor – OK at the body mount, lens release catch admits light freely (repaired using black putty compound but ineffective, still leaks light). Cheap tilt MD to Nex adaptor – one strong light leak in mount between some lenses (chrome flanges) and the adaptor, but otherwise light-tight to the body and in its tilt mechanism. Low-cost L39 to NEX adaptor – no problems at all. Ukraine/Kiev/Zenitar 50mm tilt combo – perfect, no leaks in any position. Samyang 12mm f/2 – small local leak at mount (top right crescent issue). 28-70mm FE – absolutely light-tight, no issues. 10-18mm Sony G – ditto, no light leak at all. 16-50mm Sony PZ – no light leak. Tamron 18-200mm – top right crescent issue. Fotodiox Leica M helical, with any lens, no problems. Focus brand Canon EF to FE mount AF adaptor – no leaks. Original 1st gen Kipon 42mm tilt device – no leaks at all.

    – David Kilpatrick