A700, 6400 ISO, seven raw processors
There’s a lot of controversy right now about whether or not the image structure of the Alpha 700 files at very high ISO – mainly 3200 and 6400 – is as clean as raw processed results from other comparable cameras like the Canon 40D (does not offer ISO 6400), the Olympus E-3 (does not offer ISO 6400) or the Nikon D300. At the heart of this is the way different raw processors handle file conversion, and most specifically, the current performance of Adobe Camera Raw 4.3.1.
I am going to argue that ACR 4.3.1 may be best left alone unless any future improvements retain its ability to recover shadow detail. In testing a set of Mac OSX image converters compatible with the A700, I found that ACR’s defaults have more open tones and better shadow detail, along with higher colour saturation. In fact, the converters which produce finer ‘grain’ noise generally do this at the expense of colour fidelity.
One particular processor, Andrey Tverdokhleb’s ([email protected]) Raw Photo Processor, is able to use two different deBayer algorithms (AHD and VNG) and can also be set to recover unenhanced RAW colour values and linear contrast. It also reveals a great deal of information about the files. Apple is even putting RPP up for download on the Apple support website. I’ll show examples from RPP at the end of this article.
Here is the image I’m going to use for a detailed 1:1 look at the various processor results, as seen in my earlier posting on coverage of Cirque du Soleil:
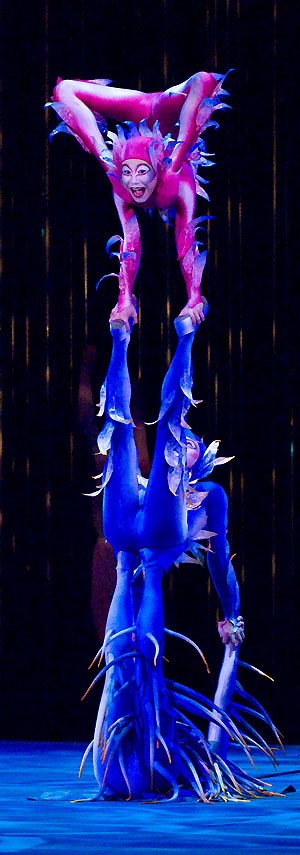
This colourful result is typical of three methods of getting your final picture – using the in-camera JPEG, using Sony Image Data Converter SR 2.0, and using Adobe Camera Raw 4.3.1. All are capable of very good colour saturation. This is a crop from part of a full frame to start with, and the sample I show to follow are 100 per cent crops. In the order to avoid adding any further artefacts, I have used JPEG Level 10-12 compression throughout.

In-camera sRGB JPEG at ISO 6400 set to -3 sharpness and strong high ISO NR (the best way to avoid high ISO noise when planning to make use of camera JPEGs).

Sony Image Data Converter SR 2.0 set to minus 100 (-100) sharpness, zero Noise Reduction, +100 Colour Noise Reduction, zero Edge Noise Reduction. The raw file is in cRAW format, compressed. More about this later!

This is the Adobe Camera Raw 4.3.1 version. ACR lightens the entire image considerably and then clips the shadows to level 5 by default. No sharpening is used (all sliders set to zero) and Colour NR is set to 50. No Luminance NR is used. In terms of real exposure brightness, ACR is turning the Alpha 700 ISO 6400 setting into ISO 12,800. This error also applies to lower ISO settings and to uncompressed RAW. It has a substantial effect on how ACR is obliged to handle noise reduction, as increasing the lightness of the image in this way greatly increases noise levels.
But you will notice that ACR does recover good, if posterized, shadow information. By moving the Shadows (Black Point) slider down to zero from the default of 5, even more detail is visible:

It does this without removing the clipping of the darkest tones. Other raw converters can drill into the shadows too, but often just reveal noise. These ACR 4.3.1 results can be duplicated exactly in the Lightroom 1.3.1, on Mac or PC, as the conversion engine is shared. It is also used in the latest versions of Adobe Photoshop Elements, but with slightly more limited adjustments.
Bibble, which is also a dual-platform app for PC or Mac, has been recommended for creating a much tighter grain structure from the noise in high ISO A700 files. Here is a Bibble conversion:

For this Bibble result no sharpening was used, and no noise reduction. Colours are as good, I think. Another multi platform converter is LightCraft’s LightZone, a Java-based application with some excellent features for tone and colour tuning:

For LightZone, defaults were used (as with all the processors) but with sharpening removed and noise reduction limited to colour only, if available. LightZone defaulted to a value of 4 for Chroma NR and zero Luminance, so this was left alone.
It would have been good to have used Capture One v4, which offers A700 support, but sadly this support does not extend to cRAW files, and this is the rather frightening result:
I don’t want to hurt your eyes, but click the image for a large version! While I have recommended C1 Pro v4 for its very good deBayer algorithm and handling of A700 noise/grain structures, it clearly has major problems with cRAW, and purchase can not be advised until Phase One fix this unacceptable situation.
Moving on to Mac specific processors, Apple’s own Aperture 2 now has A700 support:

Aperture 2 produces a finer type of noise but it’s obtrusive. No NR was used, and no sharpening. The image was extremely flat and dull on default settings, and ‘Boost’ and ‘Hue’ were both increased to 50 to get this colour and contrast.
RawDeveloper is an excellent Mac processor which is not too over-featured, and its noise control is sophisticated. For this examination, I’ve not used the Auto NR function:

The only control used ‘Chromalogic NR’, set to value 4 – colour noise reduction.
The final processor used is Raw Photo Processor, the utility mentioned at the start of this article. First, let’s look at what RPP does when asked to process with RAW colours, no profile, no enhancement:

This is RAW with AHD conversion. It represents more accurately what’s really present in the Bayer image. There is an alternative deBayer algorithm, VNG:

RPP RAW VNG conversion shows something immediately familiar – that softness and lack of ‘grain’ which so criticized in many raw conversions of ISO 6400 files. Raw conversion methods do have a big effect on the final image appearance.
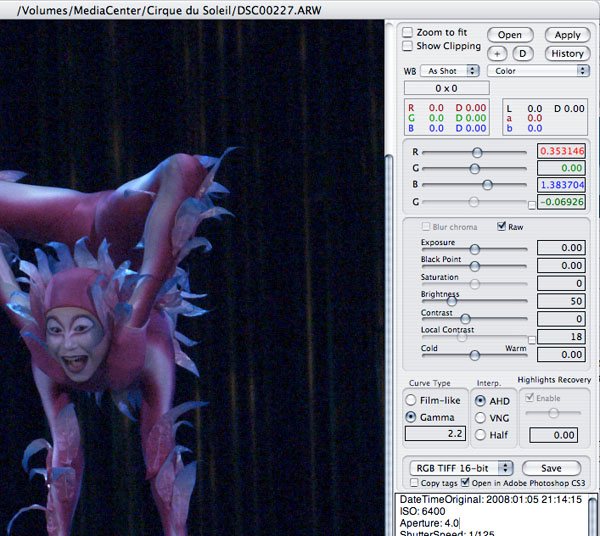
You can see the simplicity of the Raw Photo Processor controls, and at the same their depth (adjusting the values for R, G, B, G separately).
Using these controls, it never seems entirely possible to get the same colours as IDC, ACR or an in-camera JPEG, but what is interesting is the tightness of the noise structure using AHD deBayer, and the sharpness of the result:
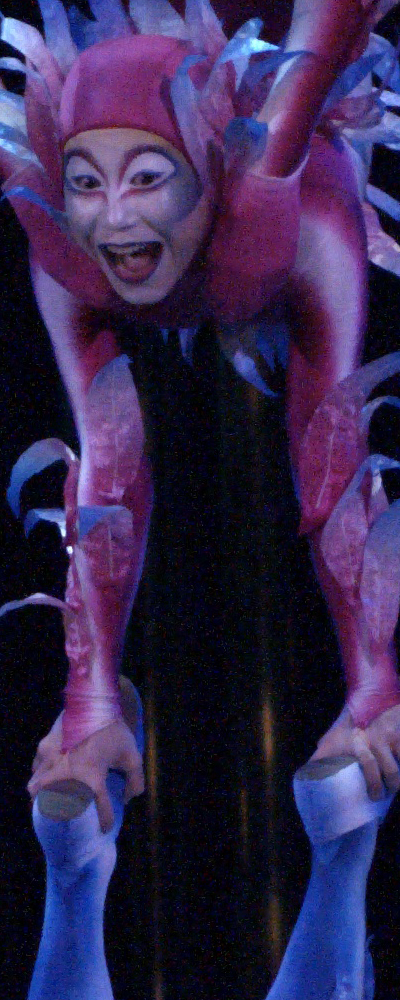
I find it pretty incredible that the fine embroidery on the sleeves is visible at 100 per cent in a shot like this at ISO 6400, let alone the texture where the fabric has wrinkled up above the acrobat’s right hand. The image as seen here on my screen measures 4.25 inches wide and it is 400 pixels wide. The entire image would be 30.26 inches wide by 45.39 inches high, and we are looking at identifiable details 1/32nd of an inch wide. To do this requires a resolution of around 2000 lines/image height which, at ISO 6400, is exceptional.
However, even ACR 4.3.1 creates very sharp edges:
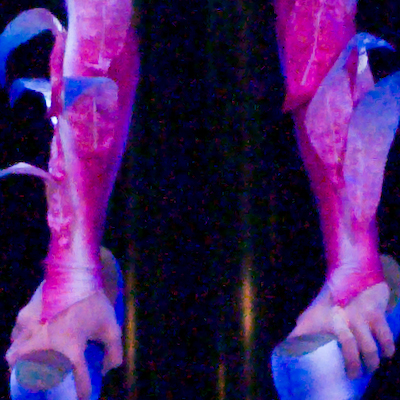
It’s just that edges are the only thing which is sharp (this example uses default sharpening, 25/1/25/0, and no noise reduction at all). Clearly, different strategies lead to different end results.
Remember that a print from this image would be no bigger than half this scale for inkjet output, at around 180-200dpi:

And for a litho printed page, it would be less than one-third of the size, and unsharp masked for CMYK screening:
These are the realities of the technology we are dealing with. The level of ‘pixel peeping’ complaints and criticisms levelled at the Alpha 700, which has unrivaled colour fidelity and tonal rendering straight out of the camera at ISO 6400, is either sad or laughable, I’m not sure which. This is a performance we could never have dreamed of when Konicacolor 3200 was the fastest colour film on the planet.
Sometimes I think we have absolutely no concept of the tiny scale of the pixel sites involved, and the micron-level engineering, to produce a sensor like the Sony IMX021. Imagine a room 14 by 9 feet or so. Not hard is it? You probably have a room about that size. That room is your CMOS sensor, you are walking over it (watch out for the anti-dust). Each sensel is just 1mm square. Imagine dividing your 14 x 9.33ft room into millimetre squares. One tuft of your close-weave high quality carpet is as big as six pixels.
In practice, even Adobe ACR offers all the quality needed to make stunning and superbly colourful A2 size prints from ISO 6400 – as does the camera itself, with in-camera JPEGs displaying plenty of detail compared to even the best raw conversions. If you want confirmation of that, look at the acrobat girl’s smile. Look at her teeth, and see how well defined they are in the camera JPEG, then study the same in all the other conversions. If you want to look for details finer than a dog hair on your carpet, you have a choice of other converters. RawTherapee and ACDSee for PC users offer sharp conversions too.
Links:
Silkypix (free version will not handle A700 files)
Capture One (v4 only will handle A700, and messes up cRAW)
Lightcrafts Inc LightZone
Apple Aperture 2.0
Bibblelabs Bibble Pro 4.9
DxO Optics Pro v5 (Windows only, Macintosh version follows and remains v4 for moment, now very weak on Sony support)
Adobe Camera Raw 4.3/Lightroom 1.3
– David Kilpatrick


As I use 99% Silkypix for my pro work (IMO, best colour by far, very good texture redering etc), I would like to compare your results with this software. Could it be possible for you to send me the raw file ?
Thanks
I am more than astonished about the excellent results you obtained even with ISO 6400. Myself I am still struggling with A700’s high ISO raws and never getting similar results by using lightzone as I can see in the default (high NR on) jpg’s. In this http://i282.photobucket.com/albums/kk263/springm_photo/raw_jpg_noise.jpg comparison file I have from left to right three ISO 3200 pixel-level image crops, first is pure jpeg, next is lightzone with just the defaults and third is with sharpening – the raws suffer in my eyes extremely from clusters or aggregates of pixels. Sharpening even creates red artefacts which Note that this is example is from a shadowy area of the image as I see the noise most prominent there.
For any hints how to process such shadowy files I would be very grateful
Very interesting comparative.
I would like to know if you have checked the configuration you recommend for High ISO JPG, with ARW files, I understand the ARW are affected by the High ISO NR
Finally, I have to say that ADOBE must release a new ACR version that fixes the probelms with ARW files
Dear David,
It is hard for me to understand why you were using RAW mode in RPP, with local contrast switched off and tonal curve set to gamma instead of “film-like”. This is an instrumental mode used for creating camera colour and tonal transforms more then anything else. And of course it switches off any colour “profiles”, so the colours are sure off.
It also seems that you are using an older version of RPP. RPP is updated on a frequent basis, the current version is improved over the one you used; and by the way right now a new A700 profile is in the works – so you can expect further improvements.
AHD is a generic name of the algorithm, different AHD implementations will result in very different image quality.
I would be very much interested in processing this raw file through RPP. I also hope this will help improving the converter further.
—
Best regards,
Iliah Borg
We do not want ACR watercolors at high ISO.
ACR needs to be fixed for us high ISO shooters! Nobody said anything about making ACR worse once they fix it. It should be a simple fix so let Adobe do the work…ACR does butcher many high ISO files and you can not deny that fact.
-Sonolta
http:///www.sonolta.com