Apple Aperture 2.0 processes A700 raw
Apple’s Aperture 2.0 is a tedious program to test, with all its creation of ‘projects’ and ‘libraries’, ‘albums’, ‘vaults’ and nonstandard GUI, and it isn’t fast in processing files or passing them to Photoshop (which it does in 16-bit form, just another step to reverse before saving as far as I’m concerned). However, it’s handling Alpha 700 raw quite well. And it does things differently, with non-destructive raw editing, stacks of image versions, and so on.
There are many things about Aperture which don’t work for me as somone who gives every one of our images a unique long filename related to the subject (searchable) and also identifying the photographer. I also process every file individually in Photoshop and do a lot of editing very rapidly and destructively – no Layers here – and do not save any copies apart from one final JPEG, which is then copied to additional media for archive security. Aperture works in a very different way, and is best for workflows where you can adjust a whole set of raw conversions and perform basic image enhancements and retouching within Aperture itself, then Export a batch using one master filename and sequence numbering.
Using Aperture to open the one image below into Photoshop was not efficient; the browsing and raw conversion adjustment was certainly no faster than using Adobe Camera Raw, with a very cluttered screen to content with despite using a 24 inch iMac. The fonts and symbols used for the Aperture GUI are smaller than standard Mac GUI dialogs and windows, and would be very hard to read on some systems. I chose my 24 inch screen because it has a relatively coarse dot pitch (106dpi) but a laptop installation would probably be much finer and render the interface miniaturised. It took 15 seconds to send the file to Photoshop, and the only options were to send as 16-bit TIFF or PSD. Why would it need a format to be specified to send to Photoshop? Easy – on exit, a copy of the file is saved in your source folder or your library. This added an extra 70MB image to my disk usage.
While it is no longer necessary to duplicate files by ‘importing’ them into ‘projects’, this rather over-managed method is still your only access to image. You can not simply browse existing folders and open single images. Capture One changed their interface for version 4 to remove the need to create program specific file directories, so it’s easier just to dive into any folder and locate a file to process. Adobe’s Lightroom still works with its tedious ‘Catalog’ concept, asking you to import files rather than just allowing you free access to standard Apple GUI directory navigation.
To me, these approaches from Aperture and Lightroom are non-Mac-like; if I wanted to work like this, I might as well use a PC, where the internal navigation of the programs becomes a delight and a relief instead of a constriction. From experience, I’m not typical. Many users find the apparent chaos of a fully loaded Mac impossible to work with – countless overlapping windows which you can move freely, multiple copies of file directory views, very little visual heirarchy. My Mac resembles my office, where only I know exactly what’s in each pile of papers and what the post-it notes stuck all round my screen are about.
Aperture, perhaps wisely, attempts to eliminate this random clutter and force a degree of organisation on the photographer. For anyone who likes to import images into workflow from card media rather than copying the image folders to storage first, it will work very well (as will Lightroom). I just happen to fall into the 5 per cent of users with a working approach it does not suit.
If you don’t have Photoshop or Lightroom or Expression Media Pro or half a dozen other programs, Aperture can do a lot and more. Many things Apple thinks I might want – like creating web galleries on dot-Mac webspace, or sending images to my email program to mail out – are things I don’t want because I do these things separately. All that matters to me is speed, ease of workflow, and quality of raw conversion result.
Aperture 2 adds new camera support to older Mac systems like OS 10.4.11 which I am using. Sony Alpha 700 support is present in the core system for 10.5’s latest release, but not in updates for 10.4.
Here anyway is a shot from my visit to Cirque du Soleil:
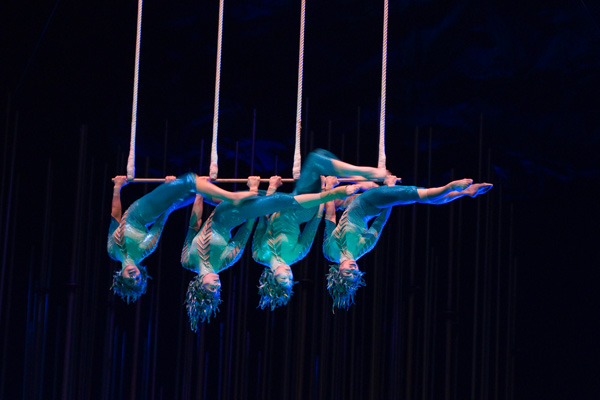
It’s not one of the best but it was taken at ISO 800, and in exploring the difference between ACR 4.3.1 and Aperture 2, I found that speeds around 100-800 show some useful gains with Aperture. I am not so sure about 1600-6400 and my initial 6400 tests showed heavy salt speckles in dark areas which the Auto Noise Reduction did not remove. In many ways the in-camera JPEGs remain hard to beat at the higher ISOs, and ACR 4.3.1 while smearing the image at 100 per cent retains superb colour and actually produces excellent prints.
Here is the ACR 4.3.1 conversion of the ISO 800 file. It was made with Sharpness set to 25, Radius 1, Detail 25, Masking 0, Luminance NR 0, Colour NR 25.

If you want to study anything carefully look at the fabric texture. It’s not difficult to find your eye drawn to this!
Here is the Aperture 2.0 conversion. The program was allowed to use defaults (which are what you see in the ACR settings above) for detail control. These were 0.50 Sharpening, 0.79 Edges, 0.10 Moire, 4.0 Radius, and Auto Noise Reduction. It’s interesting to note that Nikon D300 defaults are as above but 0.64 Edges. Each camera type has its own presets which you can alter and save as a new default for that camera type, but Aperture does not recognise camera serial numbers (ACR does) or ISO settings (ditto) for even further refinement of defaults.
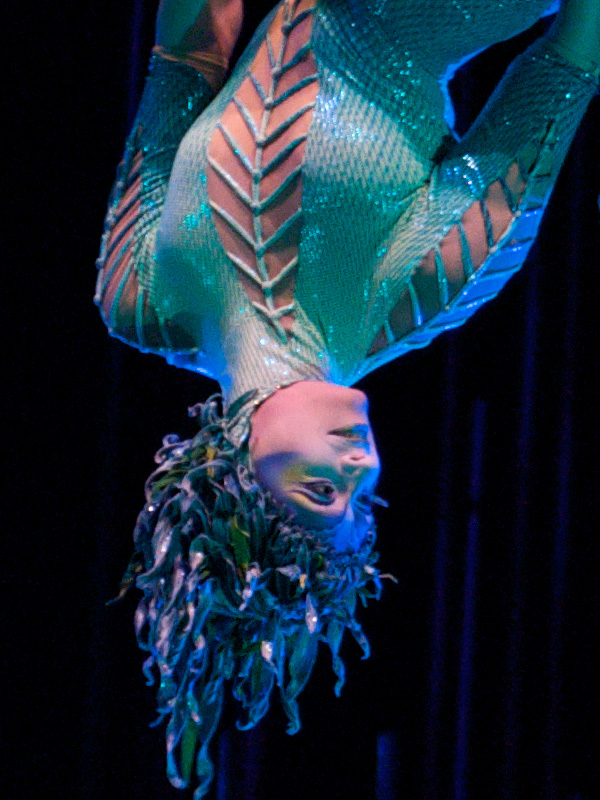
Is it loaded with artefacts and spurious detail, or is it just much sharper than ACR 4.3.1? I suspect the answer is already obvious the more you compare the two. Adobe Camera Raw 4.3.1 is doing some softening or involuntary noise reduction. So, you ask, why not see whether ACR can be set to extract the same detail?
Here is what happens when Sharpening is boosted to 75, Radius 0.5, Detail to the maximum 100, no masking, Luminance NR 25 (without this the image is extremely noisy!) and Colour NR 50:
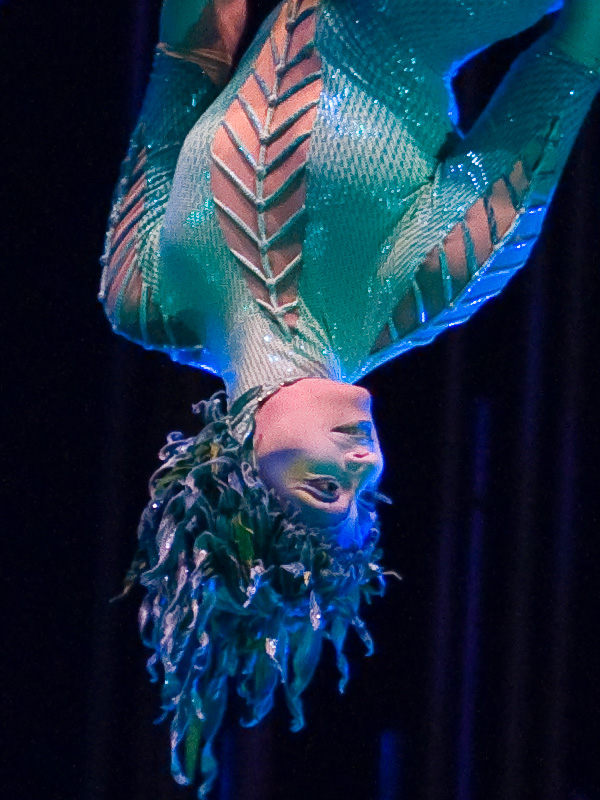
Well, now you can see what artefacts look like, and you can identify that the pattern on the fabric of the outfit above the artiste’s chin is not just a random effect of Aperture. I tried many positions of the ACR 4.3.1 sliders and no combination came close to recovering the same detail as the default Aperture settings with the same control of noise and minimal artefact effects.
So, how about ISO 100?
Here is a beach scene in Tenerife – younger man looks on, afraid to venture into the water despite the obvious attractions of paddling.
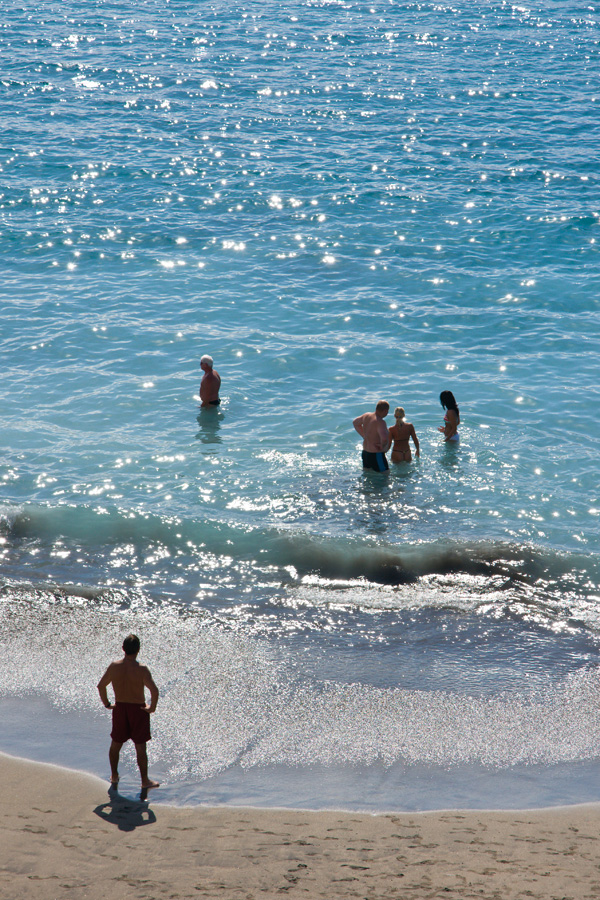
ACR produces very good colours, but it would be wasting bandwidth to show that Aperture 2.0 is considerably more neutral and dull for this shot. Here is the ACR version close-up, 100 per cent clip, using the regular defaults of 25 Sharpening etc:
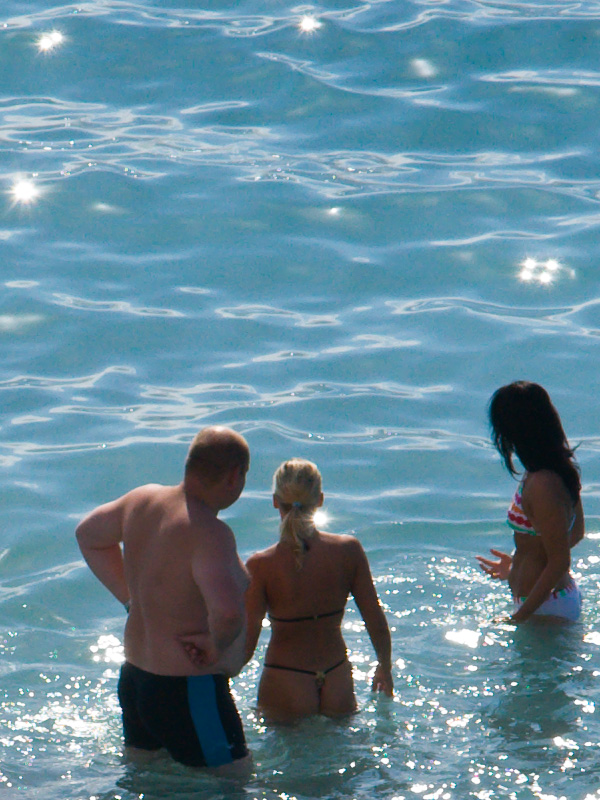
What you should be looking at here includes not what you are actually looking at, but:
The blonde girl’s pony tail and hair; the colour fringes on the dark-haired girl’s hair; the colour of the chromatic effects on some of the small glints on the water; the graininess; general sharpness.
Here is the same processed using Aperture 2 defaults (which do not vary dynamically with ISO speed, any more than ACR‘s do – you need to make your own adjustments and save presets, here ACR has the advantage of remembering specific camera bodies and ISO settings, and using your presets to match exact the combination, if you wish, automatically – see above).
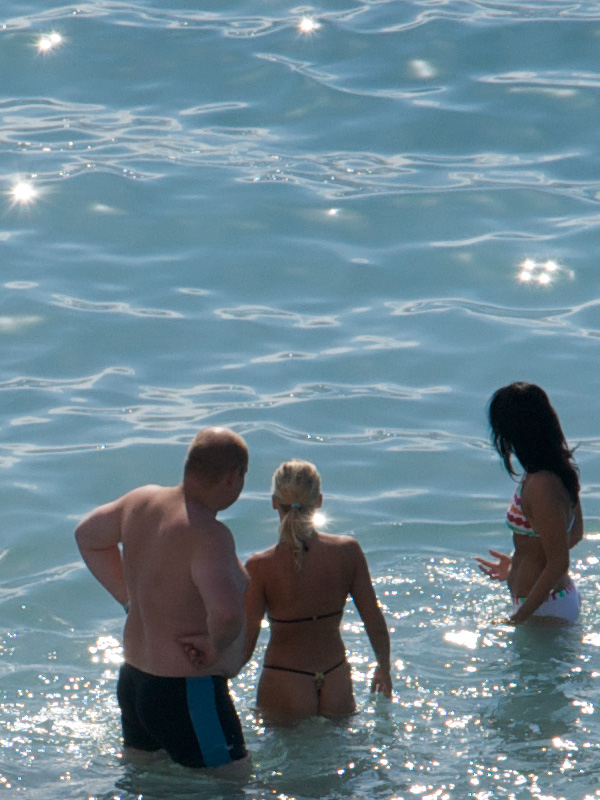
You will see that colour saturation is slightly lower overall, but sharpness is much higher. The decoration on the bikini thong, the bikini top clasp, hair bobbles, and hair are all better rendered as very fine details (this is the Carl Zeiss 16-80mm doing its resolution stuff at 80mm). You will also notice that the small pink and green chromatic highlights on the water visible in ACR (despite Chrome NR at 25) are absent in Aperture 2, and the visible blue/red fringeing on the dark girl’s hair is reduced. No CA correction was applied in ACR; if a figure of +20 Red/Cyan is set, this disappears entirely with the CZ at 80mm. Aperture 2 does not have any similar function that I can find.
Obviously you could apply changes to hue and saturation to balance the Aperture 2 result against a better overall tonality from Adobe Camera Raw 4.3.1.
What I also find impressive is that the blue sea has a coarse graininess even at ISO 100 with ACR 4.3.1, something I have noticed in skies as well. In Aperture 2, this is replaced by a finer grain with less colour variation. It is difficult to tell at this extreme pixel-peeping level the effect of seeing extra apparent detail in the blonde’s hair is just grain artefacts, or actual detail which Aperture 2 resolves and ACR smooths out.
The Aperture 2 trial download, of interest only to Mac users as it’s only a Mac application, is at:
http://www.apple.com/aperture/trial/
It’s definitely worth the 30-day trial and may improve your Alpha 700 raw file exports.
Installing Aperture 2 trial demands that you disable 1.5 by re-naming it, and it will require its own serial number re-entering to reactivate it, if you decide not pay $99 and upgrade. If you have lost your 1.5 Serial Number you will not be able to revert.
– David Kilpatrick

I have deleted several comments and my own replies, and revised the article substantially (the comments referred to the original post, and I’ve changed a lot of the introduction). Unfortunately I’m now up to having spent about eight hours on this and must move on!
David
David,
In particular, look at the skin tones in the shadows of the man. You’ll see blotchy color spots in LR, but nothing in Aperture’s (there’s the luma pattern but chroma is all gone).
You may not like Aperture’s concept as a DAM but it is pretty clear that even at low ISOs it kicks LR’s butt.