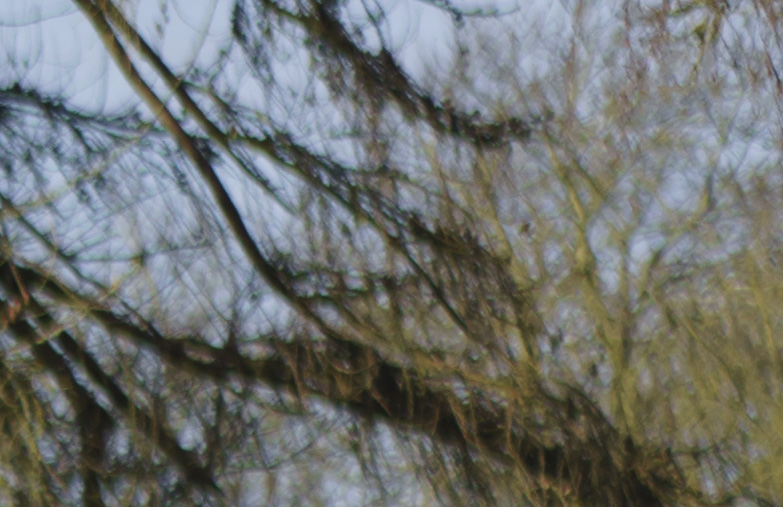
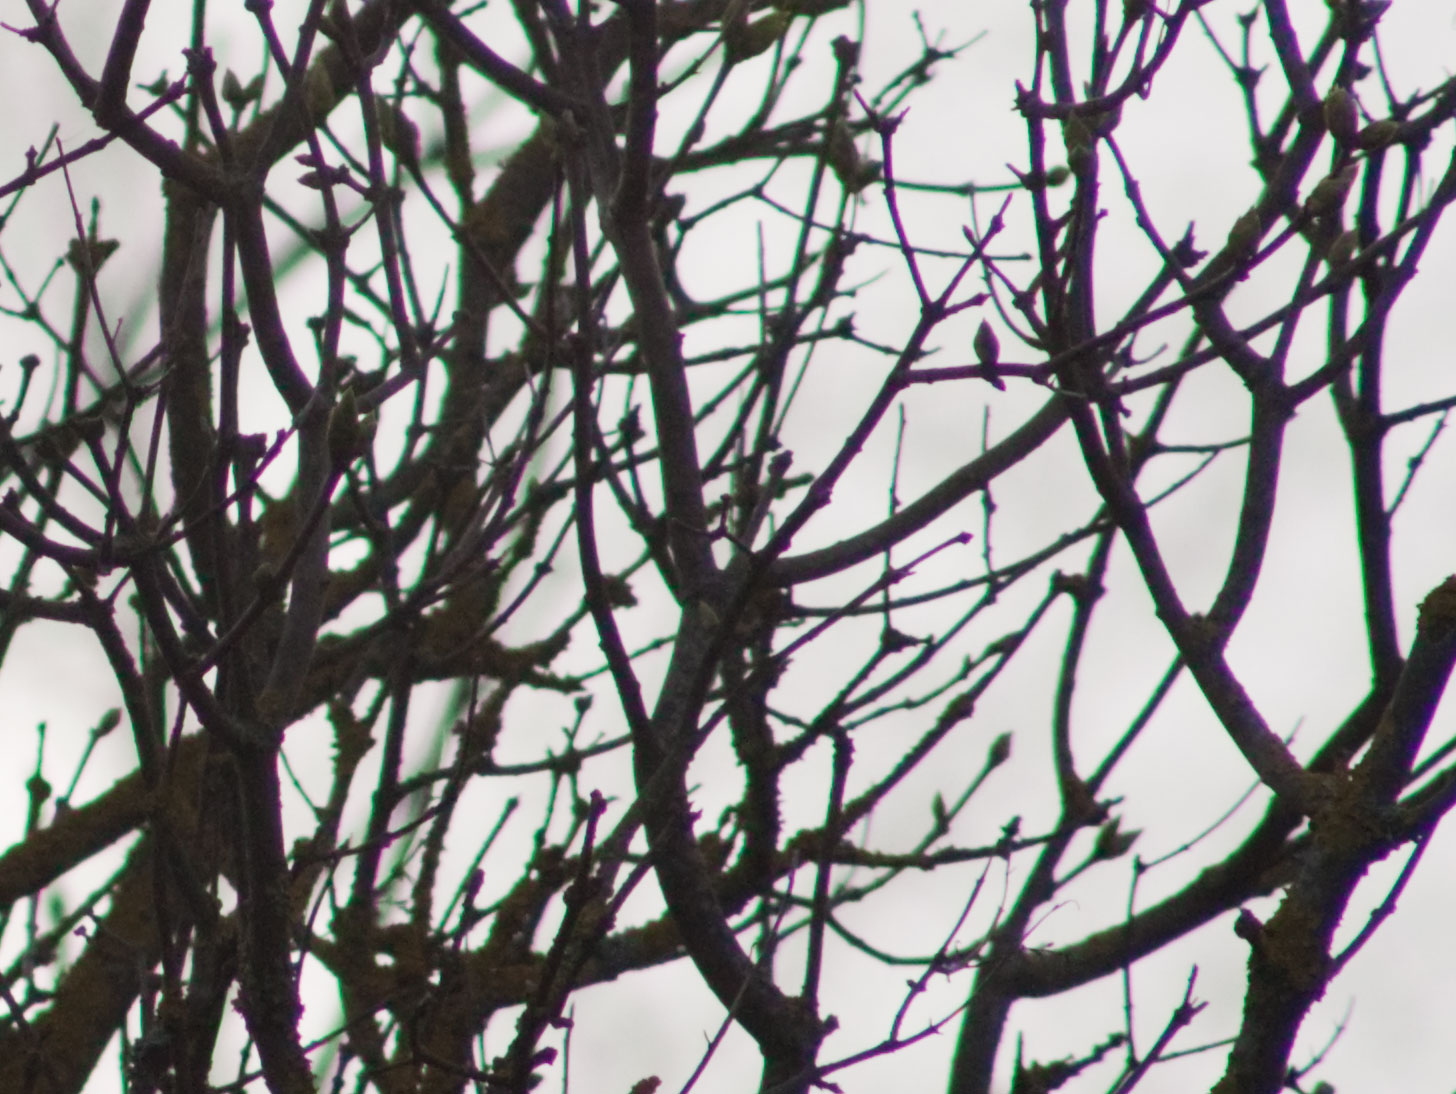
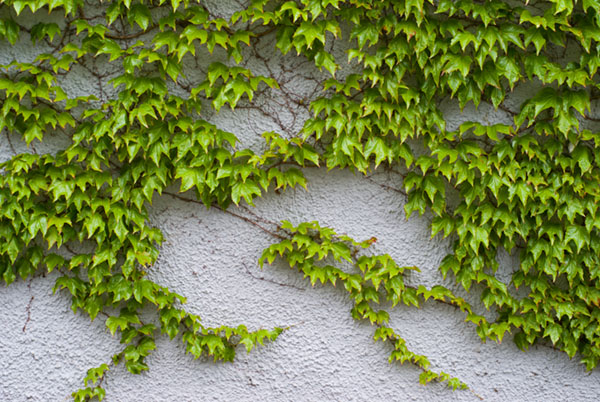
After testing the Sony Carl Zeiss 55mm f/1.8 FE in 2014, I was less than impressed. I may have had a decentred example (it happened to dPreview and at least one photographer I trust to know his lens performance expectations). It was, certainly, pin-sharp on a test chart or a brick wall but the moment three-dimensional subjects were involved at wide aperture the defocused detail could be very untidy. The clip below from trees behind a building which was sharply focused is at f/1.8 and 1/2500th (a suggestion that it could be caused by camera shake is easily ruled out). See my additional notes at the end!
It’s worth saying that when I had this lens I made some tests of the bokeh using very strong defocus which looked good. Many examples I’ve seen, which true believers put forward, show a figure (from full length to portrait) centre of a horizontal frame at f/1.8 with a pleasant enough looking distant background. My gripe has been with what happens when your subject is further away, or the background is not all very distant. This is an expensive lens but it seems to me to have fussy bokeh with too much CA fringe and also more focus-related colour shift than desirable.
Now I’ve got a fair collection of 50, 55 and 58mm lenses and also the little Canon 40mm f/2.8 STM which is my alternative to having a 35mm and a 55mm. No matter what the lens – Pentax, Minolta, Sony 50mm f/1.4, Helios, Zenitar, Nikon, CZ Jena – the full aperture between f/2 and f/1.4 always proves to be a touch soft. They all have residual aberrations that the CZ 55mm f/1.8 design has eliminated. While they can have a smoother bokeh, they also have marked colour shifts and uncorrected CA. Generally, they also all perform extremely well once stopped down to f/8 and most designs are great by f/4.
Despite the advantage of full AF functions, the CZ 55mm does not have a particularly good close focus or maximum image scale. In use I often found myself framing up closer than 50cm. That’s half a metre – it’s even further than the old 55 and 58mm lenses of the 1960s, which generally manage 45cm. I find this limitation hard to understand. 50 years ago CZ Jena started to put helicoids on their standard 50mm lenses which enabled focus down to 35cm. We have gone backwards since then.
And then I realised I’ve already got a lens which is free from all vices, gives me AF and manual focus options using adaptors I already own, which cost me about a third of the price of a CZ 55mm – and I was not being used on my A7RII. We bought a good used example of the Sony SAL 50mm f/2.8 Macro to use with our Alpha DSLR.
First of all, I compared this with the idea of buying a Zeiss Loxia 50mm f/2, by fitting it to the LA-EA3. Although the focusing ring does not communicate to the camera to invoke magnified manual focus, the lens has a Focus Hold button which can be set to this. The focusing throw is steep but in practice very accurate focus is easily set. At f/2.8, the lens is already perfectly sharp with some contrast improvement at f/4. The lack of vignetting and distortion, the flatness of field and generally very attractive smooth defocusing without CA issues make the lens better than typical fast standard designs.
On the LA-EA4 with autofocus, a limited set of AF functions ends up activated and there’s always the issue of the slight delay and sound caused by mechanical aperture operation. AF-C is of limited use, along with this video functions. However, I don’t generally use this type of lens for action or for video.
I made plenty of non-image tests by defocusing bright edges, both ways, and could find no hint of colour problems. I then set up a small food shot using the close focus – exactly the reason I find a lack of close focus restricting – and made tests at f/2.8, f/5.6, f/11 and f/22 to look at the bokeh. My conclusion is that I will be hard pressed to find anything technically better, or with a more pleasant character to the background defocus, in the c.50mm focal length. The series covers all four apertures.
I am aware that one comment will be that f/2.8 simply isn’t wide enough. There’s no significant differential focus and you’d need 50mm f/1.0 to get what many photographers want. However, this is all to do with viewing size. We all tend to see pictures on smartphone screens, on Facebook, or even on our own camera three-inch screens. In fact, at f/2.8 there isn’t enough depth of field for a typical real-world use of a full page reproduction and f/5.6 is just about right. For a poster, f/11 would be good. At f/22 the whole image is slightly softened as expected and it’s just there to complete the set.
For the moment – at least until a Batis version of the 50mm f/2 Makro Planar appears and answers all my demands perfectly – I think this Minolta-derived 50mm macro will do fine as my ‘standard’ lens.
Added August 30th 2016: Sony has announced an E-mount 50mm f/2.8 Macro focusing to 1:1 with a stated RRP of $500 – really, they must have read this article in March. In the meantime, during the Brexit fiasco I caved in and bought a 55mm f/1.8 CZ, suspecting the price would be 20% higher soon enough (and sure, it was). My new example is no better than those I originally tested but it has its uses and in a flat plane – no defocused image to screw the results up with an ugly mess – it’s the sharpest 50-55mm I have used. I’m still using the 50mm macro and recently spend a month using the Samyang 50mm f/1.4, which is not as sharp as the CZ but handles blur and bokeh more elegantly. Both lenses don’t really excel at suppressing Longitudinal CA, one of the strengths of the A-mount macro. Hopefully the new SEL FE 50mm macro will also give clean, colour-shift free foreground and background bokeh.
Added July 29th 2017: I have now bought the 50mm f/2.8 Sony FE Macro, and put my A-mount macro lenses up for sale. The E-mount focuses to 1:1 rather closer than I would like, at 16cm which indicates its internal focusing changes the focal length to something more like 37mm to 1:1 (16cm is a pure 40mm at 1:1 assuming no optical thickness to the lens). It’s an extremely sharp lens with bokeh as good as the A-mount 50mm and no trace of CA.
We have decided to make a Lulu print-on-demand digitally produced paperback edition covering the last three years of Photoworld magazine, covering the period from the launch of Alpha 900 and photokina 2008, through to the final edition of our quarterly magazine in Summer 2011, when the Alpha 77 was about to hit the streets.
This 312-page book includes the content of 12 editions of Photoworld, each with its cover and contents page, with some advertising and some regular content or ‘diary dates’ removed. A few items like this remain in place, notably Sigma advertisements, because the alternative would be to pay for a blank white page – or they are small ads and part of a larger page layout. We think even these are still of interest for the future.
Some typos and errors have been corrected so this book has more accurate versions of many articles. Some content has been changed, such as the A2 foldout print included in the Autumn 2008 edition to show the quality of the A900 24 megapixel file. As far as we know, Icon Publications Ltd remains the only photo magazine publisher to use the option of a ‘centerfold’. We’ve done it in our professional titles as well, to show medium format quality at its best. But in a digitally printed book, it’s not possible to staple in a 16.5 x 23.75 inch poster. Instead, we’ve used a different choice of a spread and two full page images.
Through this book-form edition, you can track the birth of the NEX system and the death of the optical viewfinder.
If you can not see the Flash preview above, use this link:
http://www.lulu.com/shop/david-kilpatrick/photoworld-2010-11/paperback/product-20477114.html?showPreview=true
The book costs £64.50 - the original three years of magazines would have cost £53.85 absolute minimum (UK annually renewing subscription) and a typical binder costs £10. However, for worldwide customers the overall cost of the magazines over three years plus a binder would have been £90. Digital printing is expensive and we don't make much on these, but we've had Lulu print calendars in the past (2011) with super results and this should be a very good quality book, fairly matching the original litho magazines.
- David Kilpatrick
It’s a funny word to use, because the mirrors involved are transparent and not translucent (which implies passing light but not in an image-forming manner). Translucent means semi-opaque, letting light through in the way that an opal perspex sheet or Kodatrace foil does. Transparent means something you can see through.
But now, thanks to the wonder of changing language, translucent is also going to have to mean transparent, or semi-transparent. Pellicle, semi-silvered, whatever term you wish to use.
Unfortunately, for this writer the misuse of the word translucent stands as one of the biggest schoolboy howlers ever imposed on the entire world by the ignorance of a corporation. It’s such a glaring error I can hardly bring myself to use the term – others, like Dave Etchells, have happily assimilated the new meaning into their technical lexicon. And as the video above shows, they’ve made it into a trademark, a permanent part of the future of this technology.
Wiki, and pretty well every dictionary ever published, disagree with Sony’s imaginative use of a word from which they have now removed its exact meaning:
Wikipedia: “Transparent materials are clear, while translucent ones cannot be seen through clearly.”
Merriam-Webster:
trans·lu·cent/transˈlo͞osnt/
Adjective: (of a substance) Allowing light, but not detailed images, to pass through; semitransparent. (the semi bit of semitransparent cited here seems to mean semi-detailed, vaguely delineated – not slightly darker; otherwise the primary definition of the word is diluted). There has been some heated argument on dPreview forums about this post of mine (my view is shared by many). No-one has made the point that words evolve to have useful exact meanings. Transparent and translucent are words which may once have shared a common poetic meaning in 18th century descriptive writing, but whose meanings were refined with the progress of science and technology. This process in the course of over 200 years resulted in a useful distinction between the meanings of transparent and translucent. Sony’s commercial misuse of the word Translucent is damaging to the English language and to the scientific and technical lexicon; it predisposes future confusion about the meaning of the words. It is also a fait accompli; there is no turning back, since Sony’s corporate stance is much like that of Mrs Thatcher; no u-turns and never admit to be being wrong. They have also no doubt invested hundreds of thousands of dollars in the consultancy involved, and the registration of the term as a trademark, the creation of branding artwork. They could have branded the mirror TransLumina® or, more usefully, just called it a transflecting mirror – transmitting-reflecting. That term is already used to describe the sort of mirrors used in ‘Big Brother’ with cameras behind them.
As to whether it’s a true pellicle mirror (a thin stretched film of vacuum coated Mylar or a similar polymer) no-one seems to be clear. It moves out of the way to allow sensor cleaning but could be relatively fragile. It certainly does not need to move to allow 10fps (Alpha 55) or 7fps (Alpha 33) continuous shooting. Sensor dust is often created within the camera by wear and tear on the shutter mechanism, so access for cleaning is essential and the mirror can not be designed to seal the sensor chamber. The Alpha models still have a shutter, that’s the next thing we shall see eliminated. That old rumour of the 15fps silent shooting Alpha DSLR seems to be more than a rumour; we are almost there.
For many users, the critical advantage of all four new Sony models will be HD Video with sensor-based in body image stabilisation. This will enable all kinds of lenses from macro to ultrawide or soft focus, manual adaptations and Minolta AF legacy glass to be used for video with confidence.
Welcome back the circular polariser, unlike mirrorless ILC cameras these new models will not allow the use of linear polarisers without AF efficiency reductions, but exposure should be unaffected as the sensor itself provides the metering with 1200 zones.
This will be one of the tests reviewers need to carry out on the new pellicle mirror Sony Alpha 33 and 55 models – to confront them with not only polarising filters, but conditions in which light is naturally polarised. How will they render sky gradations or reflections off water?
Two further Alpha models are being released, which are essentially updates for the 500/550 – the Alpha 580 which will hit the shops before the winter buying season, adding 16.2 megapixels and a 15-zone AF module, HD 1080p video and (non-video) Contrast Detect AF with all Alpha mount lenses. The 560 will not arrive until some time in 2011, using a 14.2 megapixel sensor. Versatile features
More of a landmark than a benchmark, the inclusion of 10fps continuous shooting with active phase detect AF and 16.2 megapixel file size in the Alpha 55 is unprecedented and possibly unforeseen by competitors, in this class of sub-$1000 consumer DSLR (let’s continue to use the term, since they are clothed as DSLRs). The dual format card drive supports the 30Mb/s transfer rate of the latest Class 10 SDHC cards and Sony’s fastest MemoryStick Pro Duo generation. The HD video also has a reasonable 17mbps bitrate.
The new technology has been well documented before the launch, but the fine detail of the new cameras is now clearer. The Alpha 55 is some markets will incorporate GPS geo-tagging for stills and videos (we wait to see whether raw files are tagged, and how accurate this is – the accessory Sony geo-tagging system available to date has only permitted JPEG tagging, and has not been accurate enough to know which street in a town the picture was taken in).
Rumours that the 33 and 55 bodies would be SSM/SAM only, with no internal focus drive, were unfounded as Sony states clearly that both are compatible with ‘the full range’ of over 30 Alpha lenses (indeed, the product shots of the 33 and 55 alone show the 18-200mm SAL DT lens fitted). The 55/33 1080i/60p (1080p in AVCHD camera archive format) video claims ‘smooth, precise’ phase detect auto focus during video shooting, but makes no reference to this being limited to in-lens motor lenses. Therefore we can assume it works with in-body AF drive lenses as well, and you just have to edit the soundtrack.
The new ISO 25,600 mode does not imply a radical sensor change as it is only available using Multi-Shot Noise Reduction, which requires a burst of 6 frames at the 10fps/7fps native maximum speed of the camera, and can not save raw files. The ISO range of the sensors is 100 to 12,800. Is this range quoted as absolute, or after accounting for the semi-silvered mirror light losses? If it’s the range before allowing for the mirror, then the 14.2 megapixel sensor of the Alpha 33 may be more like the Nikon 3100’s sensor than the NEX (ISO 200-12,800) is. Thom Hogan has shown pixel dimensions and size data which support Nikon’s claim to have an entirely different sensor fab line of their own, compared to the A550/NEX sensor. But how about compared to the A33/560 sensor?
The 55’s new 16.2 megapixel CMOS will probably appear in the forthcoming Alpha 700 successor, which it is believed will form the main Sony exhibit at photokina (Cologne, September 21st-27th). Both models have a new 15-zone AF sensor with three cross sensors, but not f/2.8 sensors – all are designed to operate at f/5.6 virtual aperture. However, there is a hidden clue that the cross sensors may be f/3.5 capable, as the high-speed shooting modes with continuous AF set f/3.5 by default on any lens capable of this (if the lens is, say, only f/5.6 then the largest aperture is always set). Setting f/3.5 implies that this confers an advantage in focus sensitivity over f/5.6, f/4 or any other particular aperture – and that f/3.2, f/2.8 or wider would bring no benefit. That points to some of the sensors having an f/3.5 virtual aperture.
The new cameras are known as SLTs – Single Lens Translucent – instead of SLR. See my intro. Did they have no English speaking staff on their team? I’m sure there is a German word which describes their mirror correctly. I’d rather have the right German word than the wrong English one. Ah well, as the bloke leaning on the pub bar says, durchsprung vor technik…
Confusing aspects – Auto HDR is said to be available in P/A/S/M modes. I guess in M mode it must leave the aperture alone and change just the shutter speed. Regular bracketing is still limited to a disappointing 3 exposures at 0.7 EV intervals, maximum.
But you’ll love the direct D-Range button which gives access to D-Range and HDR options directly, and the direct Finder/Screen button which toggles between using the very high resolution EVF with its ‘virtual 1.1X’ 100% view of the subject – effective visual scale, larger than the Alpha 700 and larger than any previous Alpha digital model except the Alpha 900 and 850. That’s one of the benefits of the EVF, a relatively tiny display is viewed through a high magnification ocular and ends up with a ‘window’ on the world which beats the tiny tunnel vision of optical finders. Technically it is very similar to the last EVF produced by Konica Minolta on the Dimage A200, with the benefit of five years’ further development. It has the same 60Hz refresh rate and visually almost raster-free RGB.
Where the A550 and its earlier stablemates vary slightly around a viewfinder with an effective 0.50X scale (relative to a full frame 100% view using a 50mm lens), the A55 and A33 provide an effective 0.73X and that’s impressive. The ocular is set well back (remember the Konica Minolta A2, and the Sony Cybershot DSC R-1?) because it is a telescope design. This also gives it a very narrow range of possible eye positions, a common feature of EVFs. The eyepoint is close, and you must position your eye precisely.
The rear screen uses the same type of (Schott?) reinforced glass with (3M?) resin gel adhesive as Canon’s 7D – this totally seals to the LCD module itself eliminating air gaps, and improves contrast. It is a technology first seen in the 7D and becoming standard across the industry though the NEX has shown Sony to have the best implementation so far. It is scratch proof, by the way, and it can be cracked by impact like any other screen.
The tilt-swivel action is borrowed directly from the Nikon D5000. In fact, it’s so identical in articulation it even included the amazingly silly front facing mode where the screen is obscured by your tripod, hanging under the camera and preventing it from being placed on a flat surface for self-portraits or videos. But it has the same benefit as the Nikon, the screen can be flipped to face the camera and protected completely while you use the EVF.
Functions familiar from the NEX including Sweep Panorama and Sweep 3D Panorama are built-in and accessed from the main mode dial, which also provides physical settings for all the main modes. Depth of field preview is restored – with the usual button – because is can now actually work. It was always useless in real terms on optical viewfinder cameras, as the focusing screen never represented wide apertures correctly.
Now, with an EVF, for the first time ever an eye-level Alpha gives absolutely perfect and precise previewing of depth of field and bokeh effects whatever aperture you are working at – even at f/1.4, which was never possible and still isn’t with the A850 or A900 for that matter (which is why their Preview mode is useful).
You can also preview the exact image appearance. By pressing the AE lock button, the auto gain of the EVF or rear screen are turned off and replaced by an exposure-compensated view. So if you dial in -1 EV (using the adjacent dedicated button), and change the WB, and use a different picture style with more saturation and contrast just pressing AE-Lock will immediately preview your image with these adjustments applied. And you can enlarge in the usual two steps to check auto or manual focus.
The finder and screen also have a Nikon-style two axis spirit level (flight simulator horizon) display to help you get your horizontals straight and your verticals parallel. It can be activated on either, and does not have to appear on both simultaneously.
For movie makers, the binaural stereo microphones are a great move. Even on the NEX, the two small top aperture mics give excellent stereo. The 33/55 mics are placed either side of the ‘prism’ housing, rather like the ears on your head. This will give the stereo image created by these cameras a really natural quality. Natural, that is, to a pygmy marmoset monkey… but still, I will wager, the best stereo image of any DSLR/HybriD. And Sony provide a stereo 3.5mm mic jack socket, though without any manual control of gain levels.
I’m sure we will have to buy the A780 to get that. Click the picture above for a big version. Who says Sony does not have a range to match Nikon or Canon, whether or lenses or of cameras? From the left, the cameras show the current range before we even see the magnesium-bodied Alpha 700 replacement arrive. A900, A850, A580, A560, A55, A33, A390, A290. – David Kilpatrick
Read Sony Press releases and full technical data: Alpha 33 and 55 Press Release Alpha 560 and 580 Press Release
As the generation of Alpha 200, 300 and 350 reaches early retirement age it may be the time to grab bargains. The new Alpha 230, 330 and 380 have plenty of bonus points to win over new users despite the critical lack of video capture. But the older generation has some very tangible benefits.
The most obvious changes in the ‘Plus-30’ range are the use of a new smaller battery (NP-F50AM) shared with Cyber Shot consumer models, a dual MS ProHG Duo and SD card interface, substantial reduction in weight and size, improved rear LCD screen with auto brightness adjustment (only on the A330 and A380), and a radical overhaul of the graphical user interface to include sample picture tips (pioneered by Nikon). (more…)
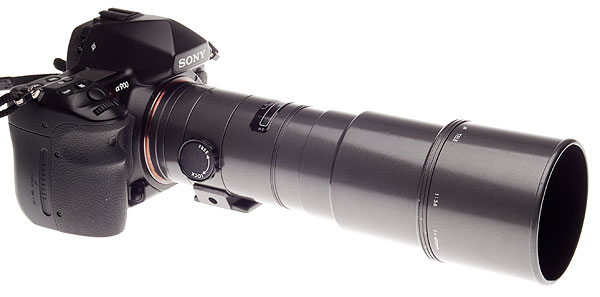
There is no need to dismantle the mount of the original series Sigma AF TELE 400mm f/5.6 lens, to bring non-functional versions (old chip) up to speed with later film and current digital SLRs. The whole process takes under five minutes, and requires two tools – a small Philips screwdriver, and a precision end cutter.
The appeal of the original AF TELE and the later, identically sized, AF APO TELE should be obvious. They weigh in at less than 900g in the first non-apochromatic version, which like the later apo (1053g) will only focus to around 4 metres. The cost and weight penalty for the later, much larger, Apo Tele Macro focusing down to 1.5m is considerable.
This lens – an original version in gunmetal finish – is impressively solid, a real metal barrel with a precision made extending hood, lined like the rear lens tube with flock anti-reflection black. The mount is well made, the tripod collar is ultra-neat though fitted with only a 1/4 inch thread:
The dilemma is that inside this lens is a chip which means it won’t function at all on digital SLRs and many later film SLRs (almost anything which actually says Dynax or Maxxum on it won’t work, this lens was made for the original 5000-9000 Minolta AF series). It will not even work in a manual focus mode, as the chip reports an error, not just ‘no lens fitted’.
The answer is to rechip the lens using a new contact plate array fitted with a new chip, provided for around $60 including post by James Lao in China: http://eadpt.cn.webz.datasir.com/eadpen.htm
This service is absolutely reliable, James emails to check the lens type you want to rechip, sends using signed-for post and I had my new chip in just four days to the UK.
Some reports on how to rechip the lens advise dismantling the entire rear mount. This is not needed, nor is any sanding or cutting with a hacksaw. A pair of miniature end cutters as used in the electronics industry for trimming wire exactly will do the job – so will luthier’s fret end cutters, and many pliers with high precision wire cutters.
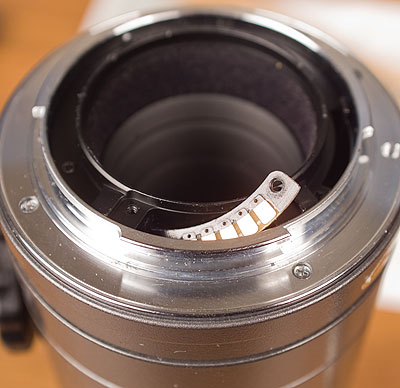
The original contact array looks like this:
Note that the board does allow the countersunk head screws to lie fairly flat. Removing the screws over a suitable tray, with the lens held sideways, requires a No 1 jeweller’s screwdriver – 1mm or 1.5mm will do well. I used a screwdriver set with an illuminator in the handle.
With the old board still attached to its ribbon cable, just ease it up, twist it and push it into the void the left as viewed here. If badly placed, it can inferfere with the aperture mechanism, so after fitting your new chip and testing the lens, I suggest opening up again, pulling the old board out and cutting it off for good. It will never be needed again. Check the aperture lever operation anyway to make sure the board, when pushed into the lens, is not jamming the action.
Here’s the contact side of the James Lao board. Note that it has excess substrate on the ends, which will need shaping down to fit, and that the screw holes are brass lined. This will result in the screws being very slightly raised when it is fitted, but this is not an issue, just a cosmetic difference.
On the back is the new chip, connected by small wires instead of a ribbon cable. It is not as fragile as this shot indicates, nor are you likely to damage it through static unless you groom the cat first then rub a balloon, stick it to your 8ft 6 regulation height ceiling and walk across a nylon shag pile carpet wearing crimplene trousers. But it is not 1975, so no worries there…
This is a pair of fine end cutters (so called because the clipping edge is right at the front, not set back by angled grinding/sharpening). It can be used to clip off the excess, then nibble the correct shape at each end, with minimal effort and no risk. No dust is created but little bits of board do fly off and land in watching eyes, so wear glasses or protective goggles if you do this. I wear off-the-shelf reading glasses, it makes this sort of small work much easier.
The trimmed new board will fit easily and firmly into the space left by the old one.
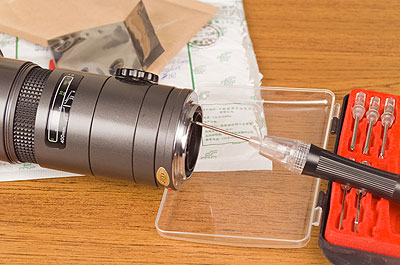
Here’s how I replaced the screws. My screwdriver is a good enough fit to hold the screw and introduce it to the hole with the lens safely over the lid of the screwdriver kit. Do not stand the lens upright and do it from above, you risk losing a screw inside the lens. This way is safe.
Once fitted, it is perfectly functional though the trimmed ends and non-recessed screws make it look a touch agricultural. You could black-pen the ends I guess, but this is not going to affect flare or any other aspect of the final picture quality. Note the flock-lined rear lens tube – these optics were well made, 20 years ago.
Taking the lens out on the A900, not a very good day, ISO 400 and really wide-open are the defaults, I found that it absolutely must be stopped down to f/8 to be useful. This quick snap of a blackbird on the roof actually shows very fine detail:
This is un-sharpened, with some NR, and is at +1.3 plus brightness boost in processing – in other words, really ISO 1600 on the A900, not ISO 400 as set. The tiny hair-like feathers are resolved at f/8. Not all my first attempts to autofocus the lens were as accurate, it’s easily confused and dithers even if it does not hunt. Into the light, it’s pretty awful on anything which shows the serious level of CA present in an original version at f/8, click the image for the full size view:
Colour bokeh? Yup, red and green, your own Christmas decorations provided free for every tree. It can be improved in ACR from raw, but really, this sort of subject (edge of full frame shown) is best avoided.
Here’s another quick snap in the garden, not much sun but not totally dull, again managing f/8 with a reasonable shutter speed (1/200th I think on this one). The 100 per cent clip from the A900 shows a decent level of detail, without adding any sharpening:
It’s soft but remember this is part of a five to six foot wide image. At f/11, which I may get to try in better weather, and at ISO 100 on the A700 cutting off the rather CA-prone outer field and getting that valuable effective 600mm-angle view – well, it’s probably worth it. I do not get much better than this, and often get worse, from the Minolta 500mm f/8 mirror lens on the A900 at ISO 400.
The rechipping operation is so fast and hassle-free there is no great risk in buying one of these lenses at a bargain price, against the risk it will not work on your digital SLR. You can make it work. For 7D/5D owners where the resolution is less challenging, it would be a great buy. Do not expect fast focus – it is not – but the handling more than makes up for that. Balance and feel are just great, and the sliding collar which covers the moving focusing ring is a great design feature. – David Kilpatrick
A mention of 16mm Minoltas reminded me that a few years ago I found a perfect kit – without outer box or instructions, sadly – at an antique fair. A daylight developing tank for the film turned up in the closing-down stock from Konica Minolta’s warehouse. I decided they should really find a new home together via the normal eBay route, but before they went, a studio shoot was needed to record them for our virtual museum. (more…)
HAODA FU has been supplying alternative focusing screens for the 5D and A100 since 2006 and for many other makes before this. While the Alpha system DSLRs are not intended to have user-changeable screens, it is relatively easy and risk-free.
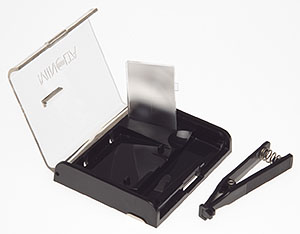
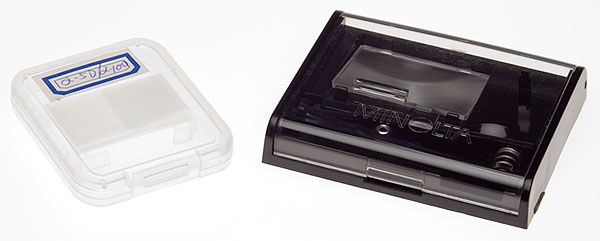
The worst that is likely to happen is that you end up with dust on a screen and find this distracting. Minolta AF SLRs had interchangeable focusing screens from the start with the 7000 and 9000. The screeens, like this Type S for the 9000 with crossed graticle markings, came in a rigid plastic case complete with a pair of screen changing tongs. The case has a slot into which the screens can be placed, vertically, during changing.
The Haoda screens, being the much smaller digital size, come in a small dust sleeve packed in a memory card case, which happens to be the perfect size. Unlike the 5D/A100 screen, a Haoda screen does not have a tab on the side to aid removal, nor does it have any position locating pins. It is a plain rectangle. I have not photographed the screen on its own as it really doesn’t lend itself to a useful image!
You can see here the screen as it arrives, labelled for Alpha 5D or Alpha 100, next to my 1986 screen kit for the original AF cameras. In order to change the screen, you need a well lit, dust free, uncluttered table like my studio light table.
Suggestions that you use fabric or carpet to place cameras on are a bit ill-advised unless you have a freshly unpacked or washed large microfibre cleaning cloth to use.
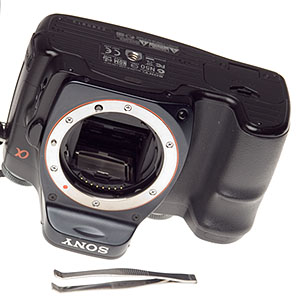
The camera should be placed upside down – not on its back, but resting on the prism/flash shoe area, so the screen is facing upwards. Remove the lens.
Unlike CCD cleaning, you do not need to lift the mirror or power the camera up at all.
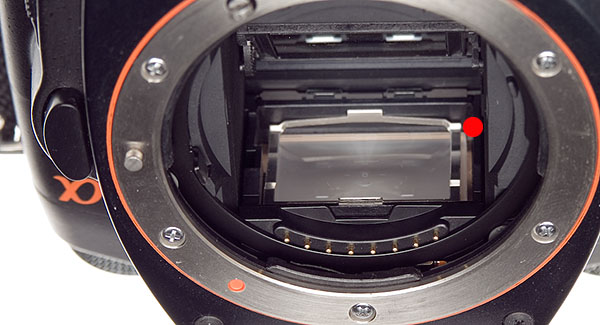
Here is a view of the A100 with its own screen fitted. Look carefully at the area near the red dot. You will see that the bright metal clip holding the screen has more space on this side (the S of the Sony prism logo side).
Some screen is visible sticking out beyond this, and then there is some space. This is how the original Alpha screen, which has one small locating pin, seats. Since the Haoda screen is plain, with no lugs or pins, it can move from side to side within whatever free space remains.
It is not symmetrical, and the microprism/split-image central focus aid will only be in the right position if you get the screen in the correct way round. Compare it with the original screen, and you will quickly see which way it goes in.
To remove the original screen, it is easy to unclip the metal spring frame from the front. Just push the metal tab visible in the shot above inwards a little and easy it upwards. I found that a fingernail works fine but my small forceps with a bent end (from a craft shop) could have been used.
With the camera in this position, you can withdraw the metal clip without disturbing the screen itself. At the front of the screen there is actually a small tab which can be grasped with tweezers, but you can’t see this, it is hidden below the clip’s front catch.
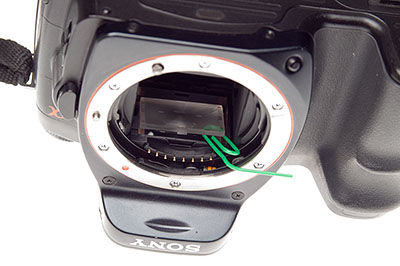
To ease the screen up, a plastic coated paper-clip is ideal. It is smooth, and the rounded end is used to flip the screen up from the gap at the end seen in the earlier shot, so it rests slightly out of the well. Then the clip can be used to support the screen as shown below, allowing you to grab the tiny lug with tweezers or very fine pliers.
Once the screen is out, just hold it by the sides with clean fingers. The focusing area is slightly inset all round, so any risk of oil or moisture getting far enough on to the surface to be seen is minimal. I do not recommend wearing gloves, you need to be able to feel the tiny, lightweight object easily.
Once the screen is out, popping in the Haoda replacement is easier. There is a brass shim frame under the screen, and below that a clear LED display relay screen. These should not be disturbed.
Just slide the Haoda screen from its dust wrapping, and holding it by the ends with the SHINY SIDE UP pop it into the camera and let gravity do the rest. If necessary, nudge it into place with the plastic-covered paperclip tool.
On older SLRs, the groundglass faced the lens and a condensor was positioned above this, sometimes moulded on to it. The focusing image fell directly on the ground surface. On newer models (late 1970s on) a fresnel condensor was sometimes moulded on the surface facing the lens, and the ground glass surface is on the other side of the screen – facing the prism/eyepiece.
With the A100, the original screen has a slight condensor moulding rather than fresnel and you can see the gentle curve of the shiny side. The Haoda either has no condensor moulding, or so little than the shiny side looks flat. Even so, the shiny side faces the lens/mirror and the working side of the screen goes DOWN as you pop it in the camera.
It will not be centered first time. Put the retaining clip back in, carefully inserting its smaller rear tab into the slot visible at the back of the focusing screen well. Do not clip in it fimrly.
Now, lift the camera STILL UPSIDE DOWN to your eye and look through the finder (no lens needs to be fitted, just have some light available). You will see the Haoda split-image and prism annulus in the middle, and it probably does not line up at all with the focus aids of the LED-screen which has remained in the camera, and provides the markings you see all the time.
Tilt the camera slightly left or right side down a degree, and gently tap the camera body at the other end, so the new screen can slide in its over-long well. You will see the Haoda focus aids move. It took me two minutes to get mine perfectly aligned with the focus marks, both vertically and horizontally. There is no need to put up with a wildly off-centre mismatch.
Taking care not to shake the camera and move the screen, push the retaining clip down at the front, to put the screen under the normal spring pressure which will now hold it in place. In practice, although the pressure is very slight, the screen does not shift around.
Despite great care you will probably have some tiny dust present on the microprism (its facets hold dust well) and this will show up with slower lenses. It will disappear with fast lenses. My installation was pretty clean, and I know from long experience with screens that chasing a single dust speck or fibre wriggle can lead to introducing even more and ruining your screen. The less you handle it on installation, the better.
In use, the Haoda focusing aid is much bigger relative to the DSLR APS-C/DX format than it would be for a full frame, leading me to guess that the screen is cut down from one made for conventional SLRs. However, when centered up by my ‘tapping the camera’ method the focus circles neatly fit some of the AF aids. I think it’s important to get the new screen as well centered as possible, or you will be unhappy with the installation.
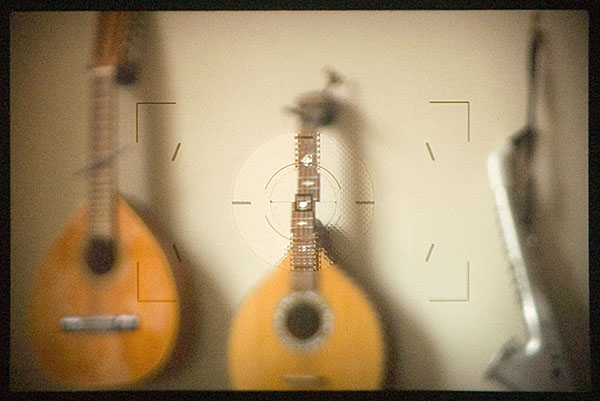
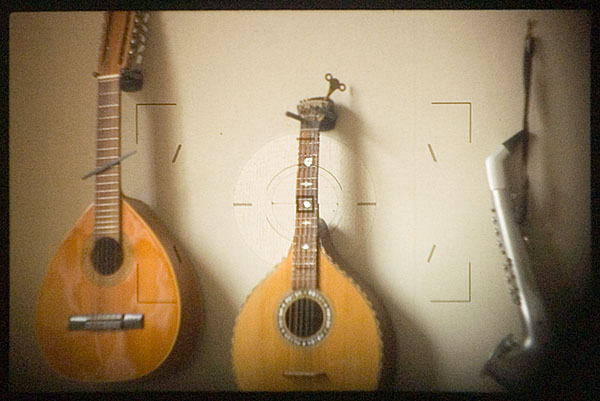
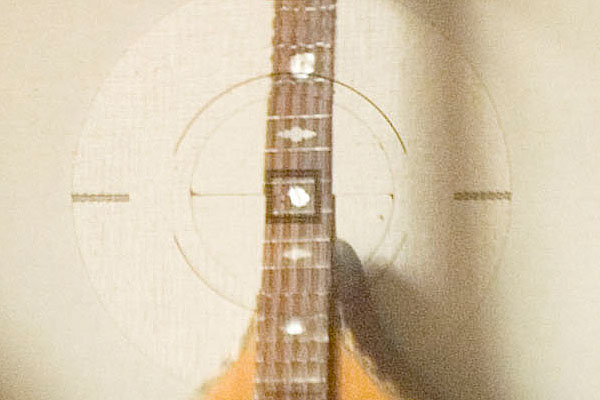
When the image is totally out of focus, the microprism breaks up dramatically:
You can also see that the split image, which is horizontal rather than the Minolta originated 45 degree angle (first appearance in the SRT-303b), shows clearly that the subject is not in focus while also showing a sharper view due to the clear lightpath through the two angled faces of this aid.
The microprism consists of a grid of miniature split image aids, alternating facets set at opposed angles.
Bringing the image into focus, as long as your finder eyepiece dioptric correction is correctly set and you have good eyesight, the microprism mosaic pattern will gradually lessen and turn to a watery shimmer, easily detected by moving the camera a little.
If you have poor eyesight, the split image focus aid provides a better tool. You will still see a slight step in any suitable target line or edge. It’s finding the target which is harder, especially for portraiture. You still have full AF of course, fitting this screen does not switch off or change your autofocus! It does enable better confirmation that the AF has locked on to the right subject.
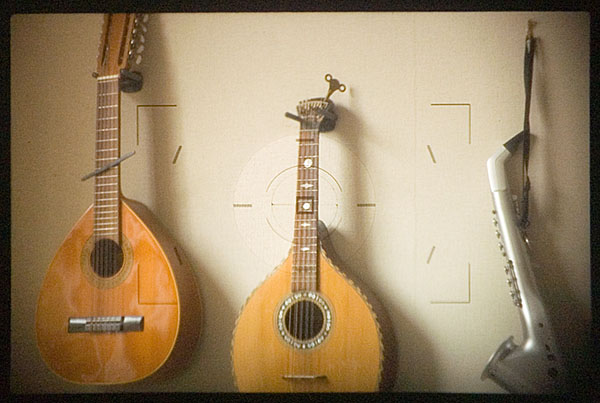
This setting above would be typical of an AF error – I have actually focused on the wall behind the instrument. A viewfinder focus magnifier can useful. The Sony right-angle finder FDAA1AM for Sony or Minolta incorporates a 2.5X magnification, there is a cheaper copy of the original Minolta Vn finder now made by Seagull in China, and a fixed 2X straight ‘tube’ accessory can be found on the used market. Here’s a magnified view:
In case you are wondering how an earth I got live pictures through an A100 finder, I did not use my Zigview and capture video! They are actually taken using the Loreo 35mm f/11 ‘PC Lens in a Cap’, a tiny simple lens with fixed infinity focus which can be placed close enough the finder eyepiece to get a good view.
Focusing is adjusted using the finder dioptre wheel. These images are hand-held, as mounting the camera together and adjusting the exact position of the Dynax 5D used to take these shots proved extremely difficult. AS solved the problems of shake at 1/13th (ISO 400) well enough to get decent views of what you actually see on the Haoda screen.
The screen shots occupied less than half the full frame.
Here is the focused image, with the microprism now totally clear (no shimmer) and the split image lined up:
To test the Haoda screen, I used my 50mm f/1.4 original series Minolta AF lens. This lens, over 20 years old, is extremely sharp from f/2 downwards though it shows a dramatic glowing flare at f/1.4 with a sharp image core. Optimum apertures are around f/2.8 to f/5.6, with a slight loss at f/8, and more marked diffraction loss at f/11 and f/16.
In the past I have found focusing with this lens to be unreliable using AF, and the standard screen gives a very poor indication of depth of field through the viewfinder.
The Haoda screen, you will notice, darkens much more in the outer field. With a lens like the CZ 16-80mm or the KM 11-18mm the groundglass field is dark, and with superzooms which run to f/6.3 at the tele end, you will not appreciate the dim view. With a 28-75mm f/2.8, 28mm f/2, 100 or 50mm macro lenses, 100mm f/2.8 SF and of course the 70-200mm SSM f/2.8 the Haoda is fine.
The benefit of this more ‘interceptive’ groundglass is much more accurate previewing of depth of field. You actually see what you will get, instead of a much sharper impression of focus in depth. This is a complex issue which I can’t go into here, but modern focusing screens from the Minolta ‘Acute Matte’ onwards do not relay accurate visual information about depth of field. You will have noticed that the clear area of the split image shows the subject apparently sharp even when the lens is well out of focus. Modern screens, designed for extra light with today’s tiny viewfinder prisms and slow zoom lenses, are midway between clear and groundglass. Haoda’s screen is still a modern type, but it’s not as deceptive – or bright – as the standard Minolta/Sony screen, and it’s much more like the Minolta Type M matt screen which was offered as a service-fitted alternative for the Dynax 7D.
Out and about, I used my 50mm f/1.4 with more confidence. Here’s the very first ‘focus test’ target I found:
It’s taken at a sensible 1/200th, f/2.8 – exactly the kind of aperture where a back focus error would often take the edge off shots with this great vintage lens. I used DMF (Direct Manual Focus) and fine-tuned the focus using the microprism for this subject, and here’s a section of the shot at 100 per cent:
Clearly, the Haoda screen is agreeing with the manual focus and sensor position well enough. I did some further tests of very difficult subjects with several lenses and conclude that there is a very slight difference – focusing with the Haoda leads to a very minimal back focus, less than often encountered with AF. However, infinity is true, and by using manual focus you quickly learn how to target different subjects to place the focus correctly. You also learn how tiny depth of field can be at apertures like f/2.8 or even f/4.5 with a focal length like 50mm.
It is now time to take the A100 with its newly fitted screen out into the world and find out whether the edge darkening, the large distracting focusing aid and the overall metering response work out well. My first shots indicate that the Haoda screen meters much like the standard, but that large clear area of microprism and split image is not part of the A100’s matrix metering program, and I can see some unwanted metering errors occurring. To identify these will take time. My first walkround with more challenging subjects indicated that setting a minus factor – between -0.7 and -1.3 stops – may be necessary in high contrast, sunny conditions when using matrix metering on the A100.
In some ways, having good eyesight and not needing aids like split image or microprism, I would prefer a plain groundglass with grid lines as an aftermarket screen for the A100. I miss the Type L grid lined screens I always used to install in my film SLRs, and the grid display of my Konica Minolta A2 electronic finder. I like the Nikon models like the D80 where a grid can be displayed at choice.
Only you will know whether you need a screen like the Haoda combined split image and microprism and whether you are willing to undertake the camera gynaecology (or should that be proctology?) to change it.
For more details visit Haoda Fu’s website and ordering page. I shall be reviewing some of Haoda’s other products here as well. My Haoda order was paid for by credit card; email contact was personal and excellent; the package arrived within a few days to the UK.
There was no documentation enclosed and instructions for the 5D/A100 are not found on his website (there is one downloadable PDF for a Canon model which can be found, and this mentions discarding their copper shim; I do not suggest this is done with 5D/A100 installation).