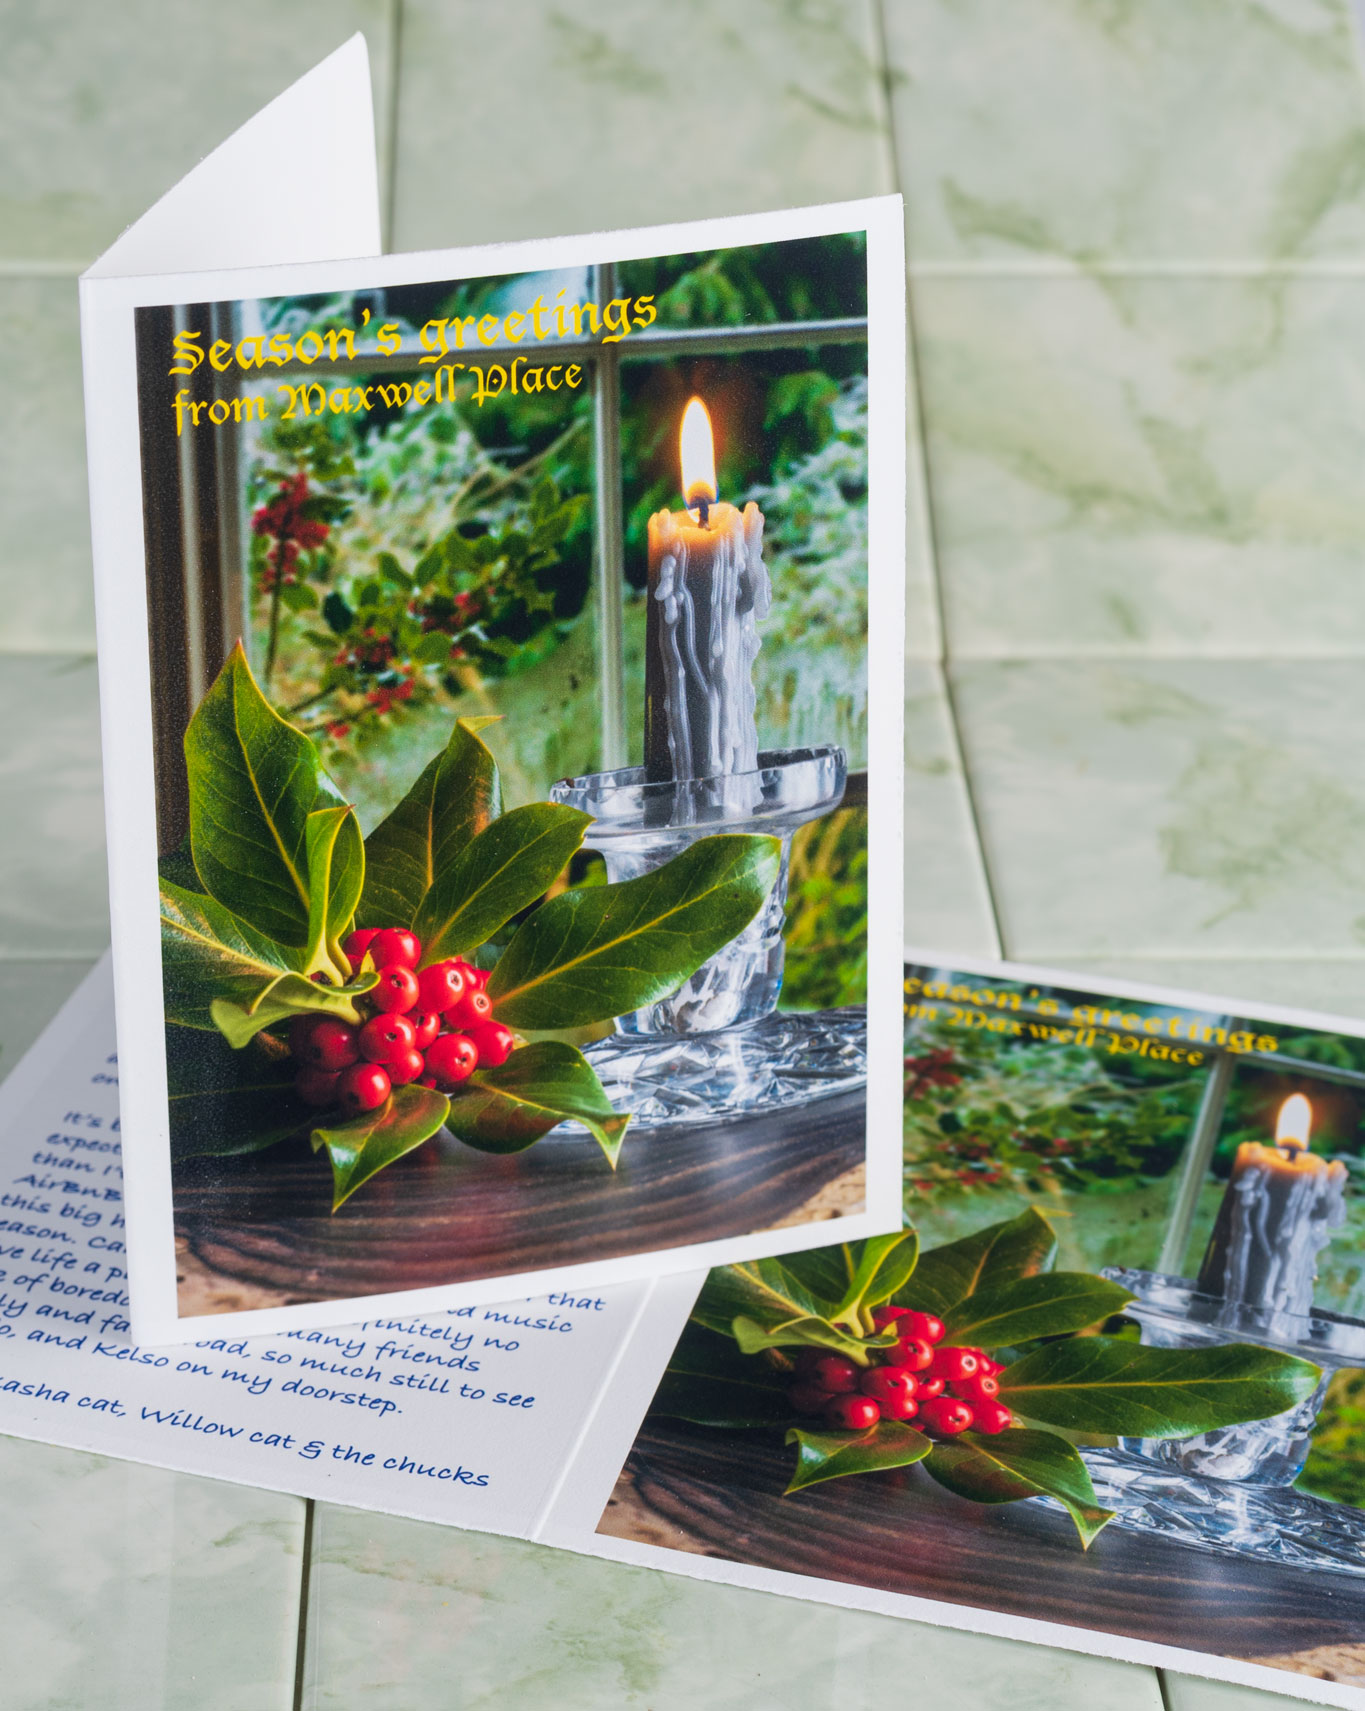
A seasonal montage for a Christmas card

In early November, my local camera club held a non-studio table top photography evening, inviting members to bring three items along, set them up and see what photographs could be got. Lighting was either none (the room’s ceiling lights) or portable camera flash. A few backgrounds and reflectors were brought along too.

I took a candle in cut glass holder and a wooden base of polished cut teak, and some holly with berries from my garden, along with the new Tamron 90mm f/2.8 Di III VXD full frame macro lens for my Sony A7RV, and a tripod. For lighting, I brought two UYLED USB recharged photo-video light sticks with adjustable colour temperature and brightness.

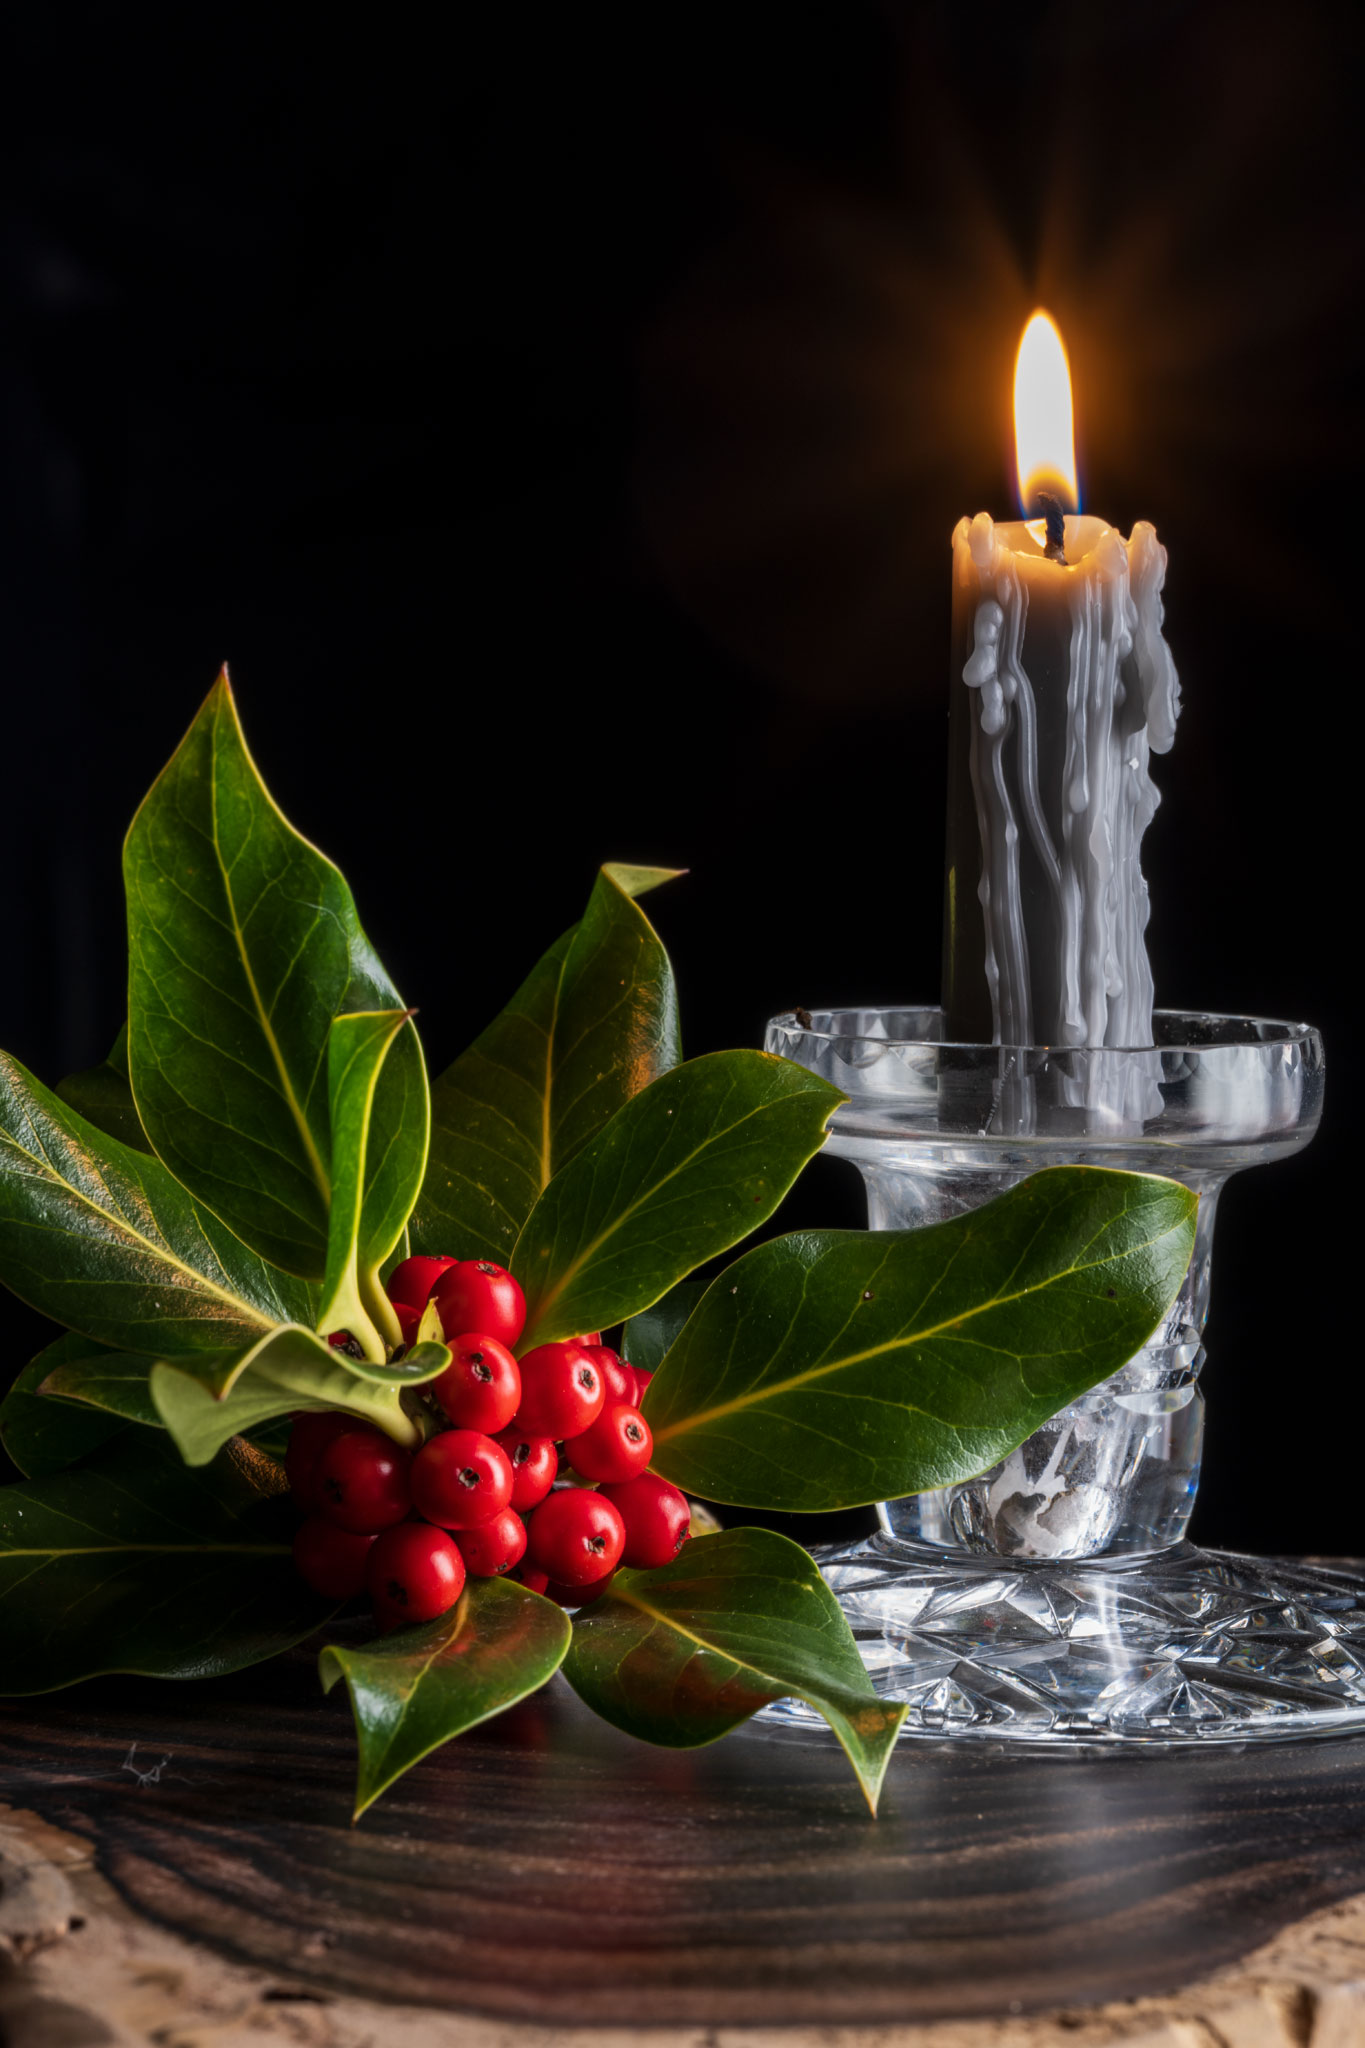
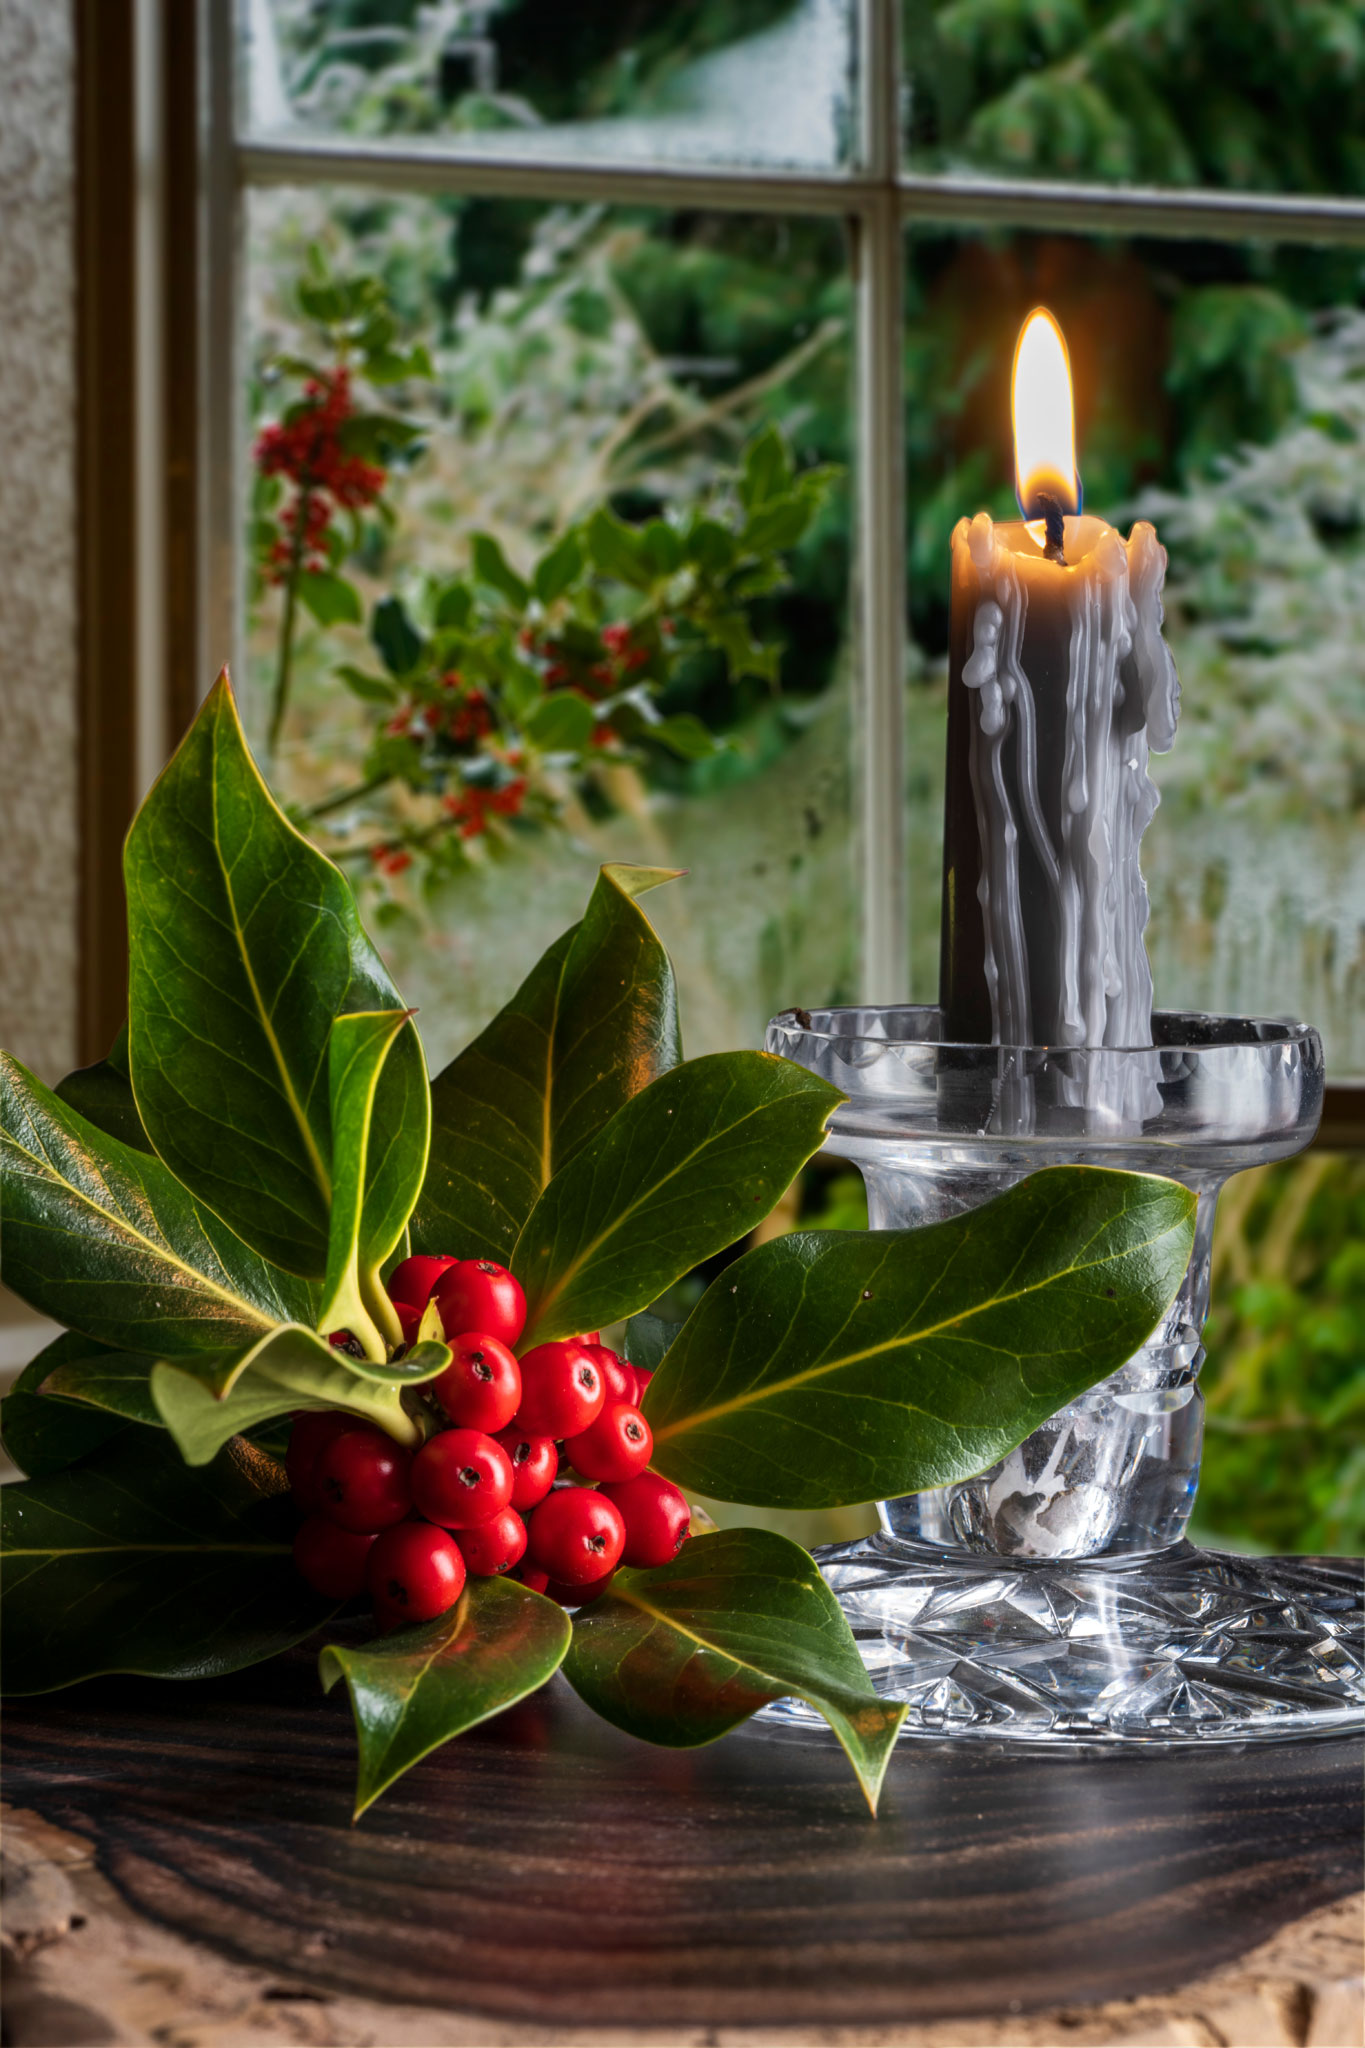
This one of the frames taken. There was no black background, just a dark curtain about 2m away at the end of the room. For my set-up, the room lights were turned off, with the camera first focused and composed and locked to manual focus. ISO was set to 100, WB to Daylight, the aperture to f/16 for a long exposure moving the light sticks all round the subject to wrap the light. Aperture priority auto was used, with no EV correction for this example. A few auto exposures were made with +1 EV and the time ranged from 5s to 25s giving a choice of how much detail appeared in darker areas, and the colour of the candle flame. Moving the light sticks around gave a range of exposure times. The one I chose to work with later was the shortest exposure.

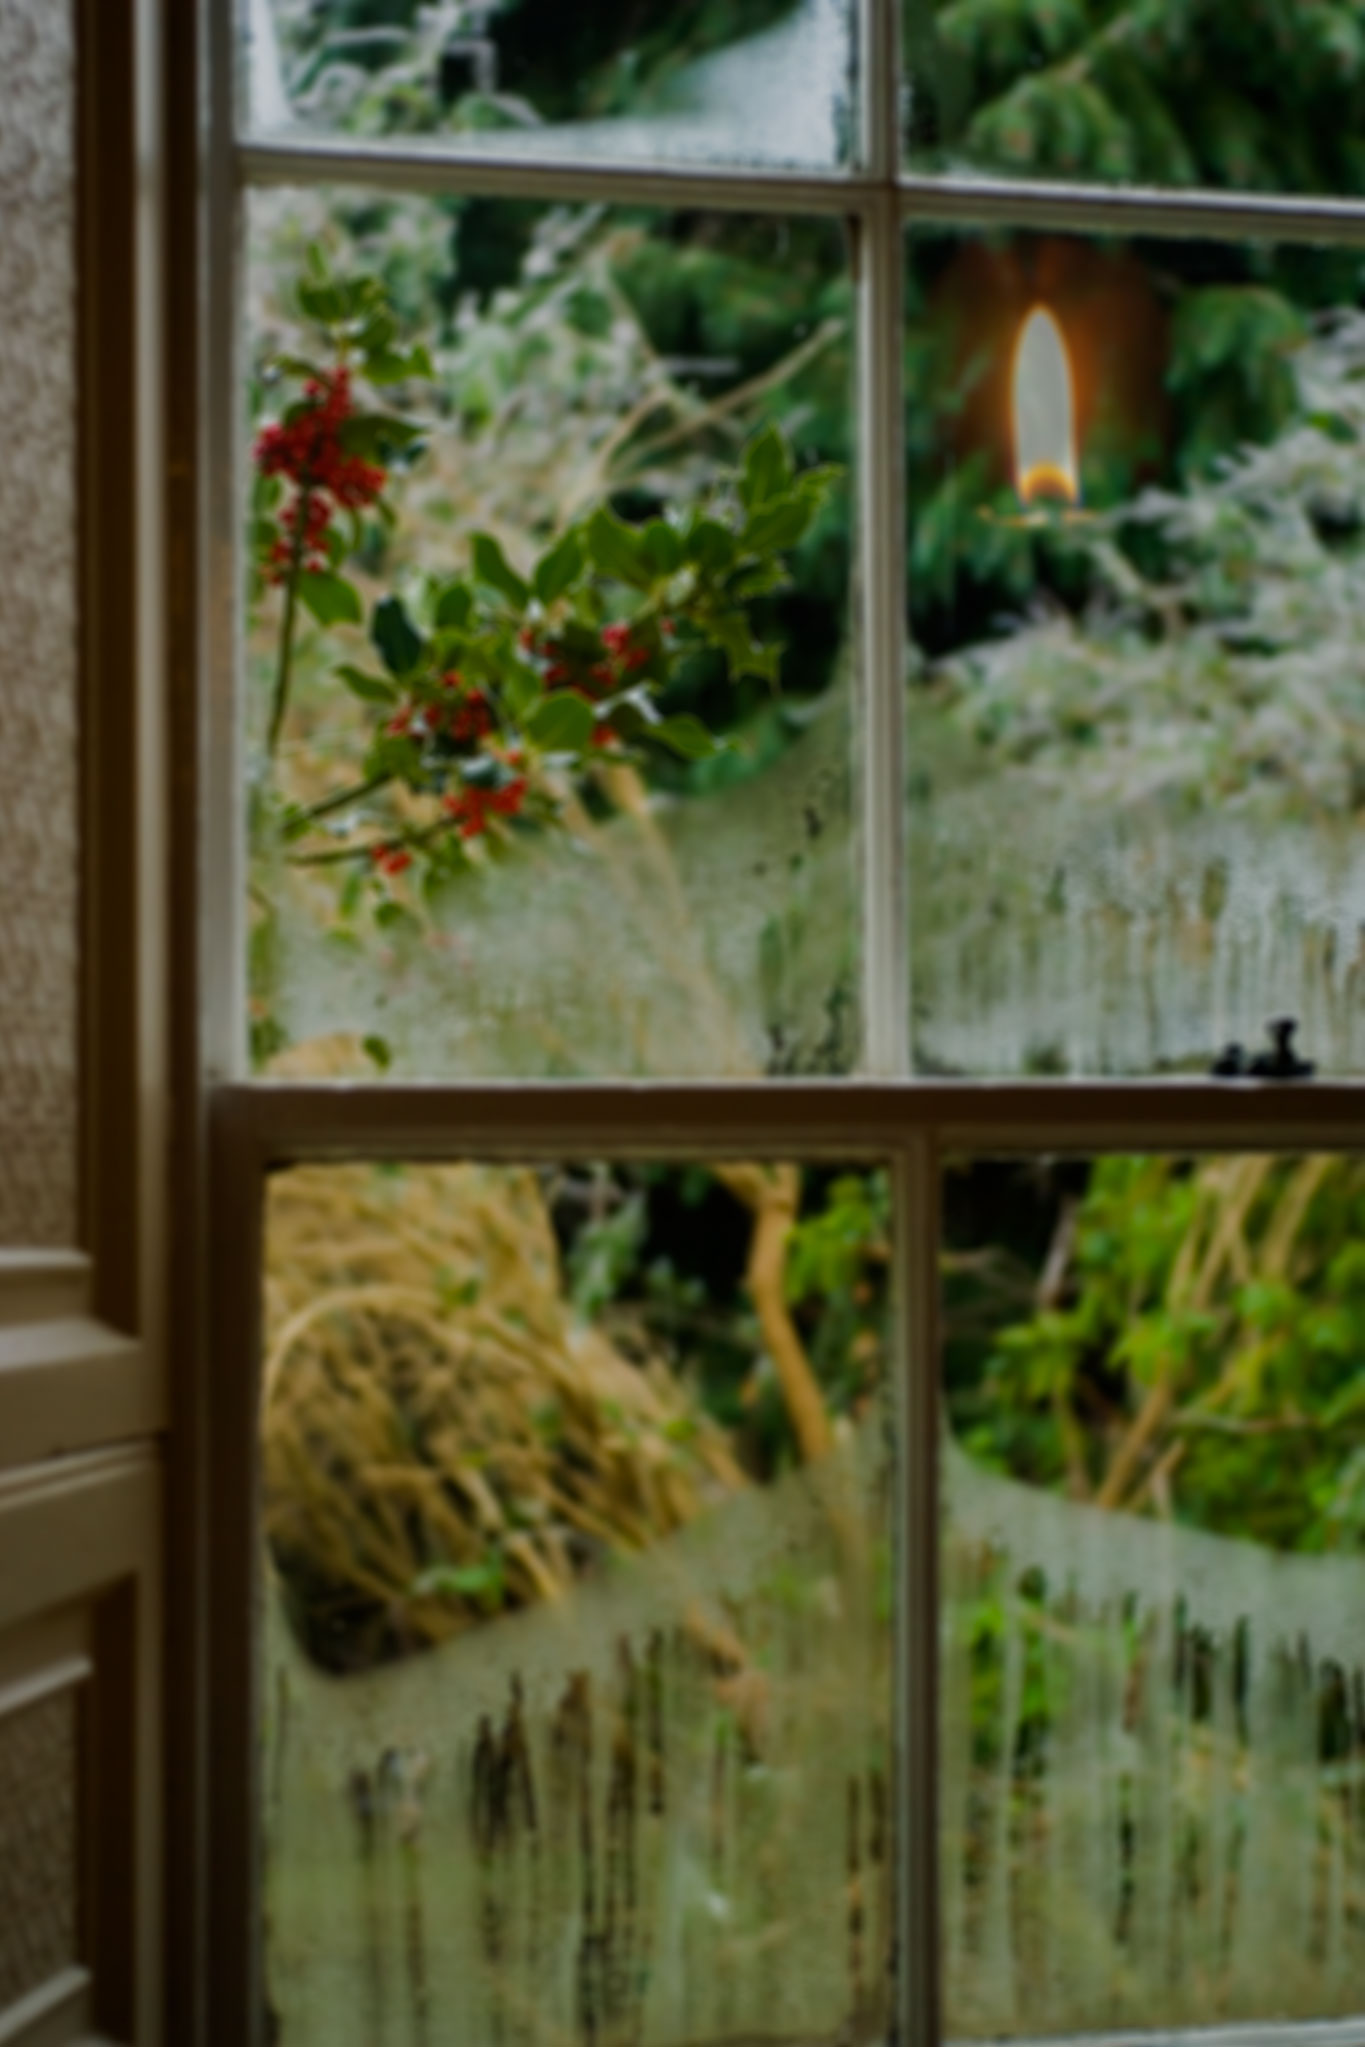
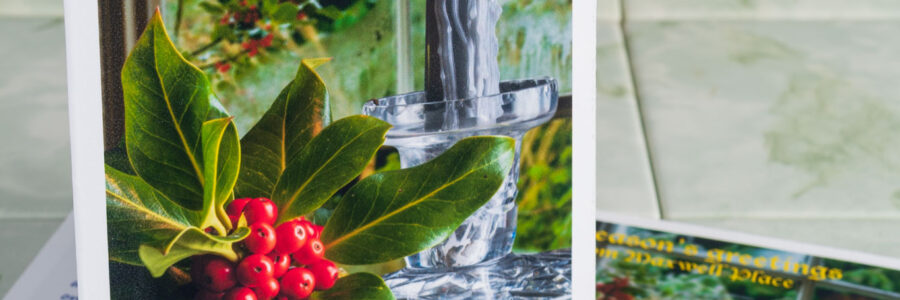
With so little light reaching the background, it’s effectively black. This could be used as a Christmas card with a message in the upper left black area, but a brighter exposure would be my choice for that. This rather more subdued shot was destined to be quickly combined with an old shot taken of my dining-room window in winter.

What may be seen straight off is the floating candle flame! That’s because where I wanted to cut the candle out in a Layer by making a quick mask using a Path, this would not work for the blended flame. The original window photo (Christmas 2006, Sony A100) is sharp, so was given brushed-in Lens Blur adjusted by eye to look right, before the flame was clone-brushed in using Lighten.

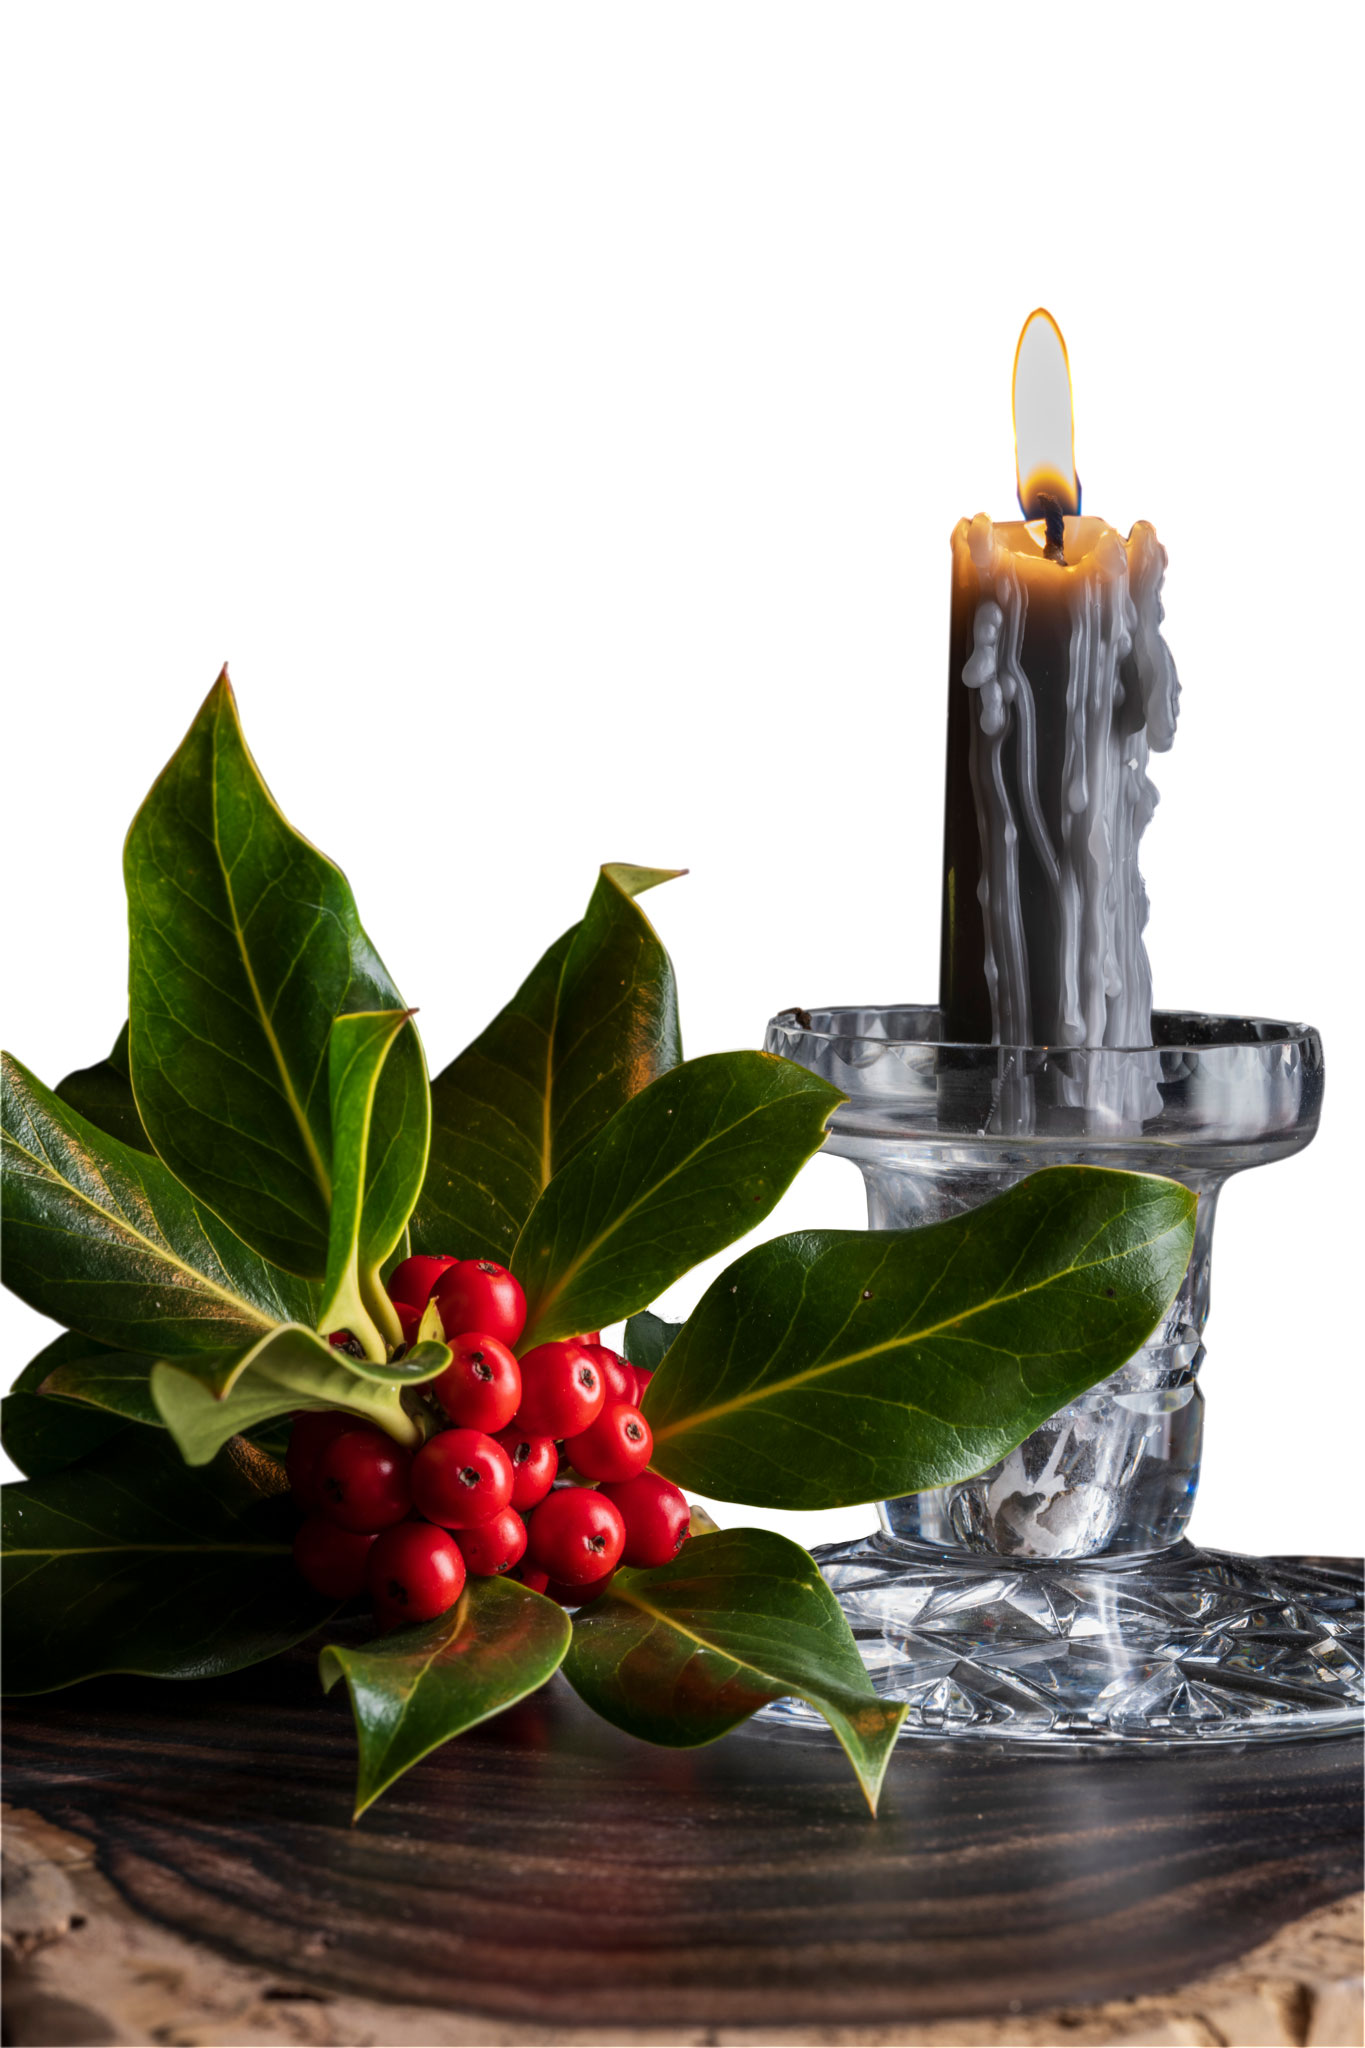
This is the Layer on top of that Background Layer, as masked. A fair amount of retouching for dust was also done, as the subject had been around for a year or so since the candle was last lit! For a ‘proper’ studio job, everything would have been scrupulously cleaned. A 61 megapixel sensor with a lens of the Tamron’s sharpness reveals even the smallest speck of dust or scratch on the glass. With the cutting out and masking, and tidying up, it took me about an hour before saving the Photoshop file as a .psd with its two Layers.

It doesn’t matter that the cut out round the flame looks rough, as the tones at its sharp edge are identical to the tones in the background image.

This is the result. It’s not entirely convincing as the glass did not have that garden view beyond it, and has a metallic look from the dark background. The candle was dark grey and I think if there had been a suitable red or green one attractively melted in the same way it would have been better. But it looks wintery!

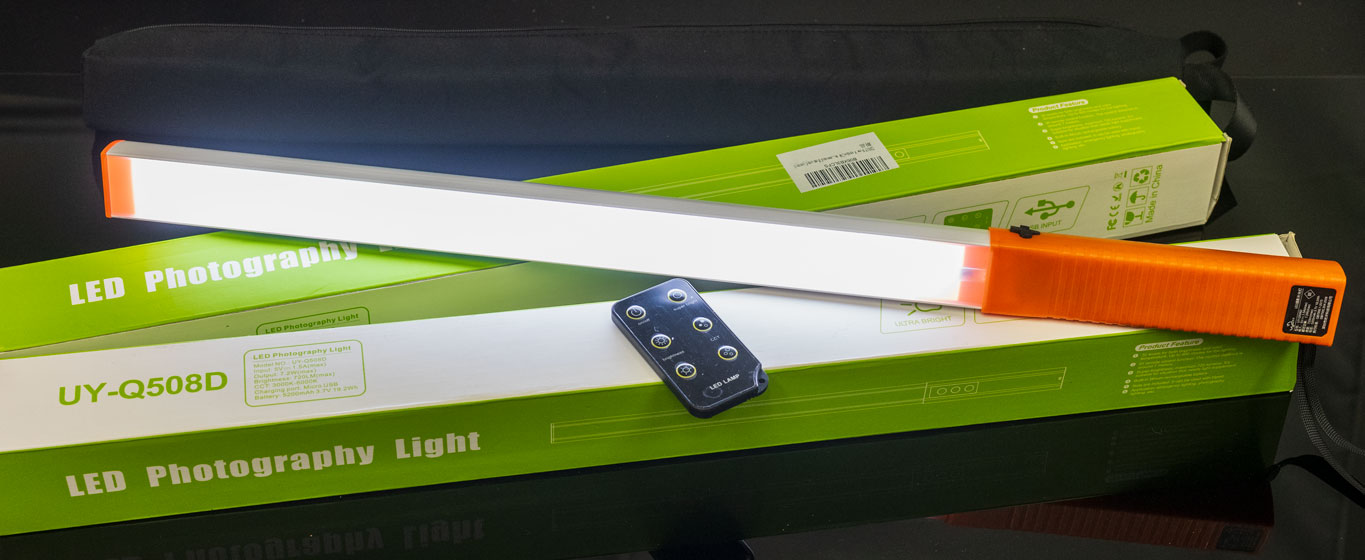
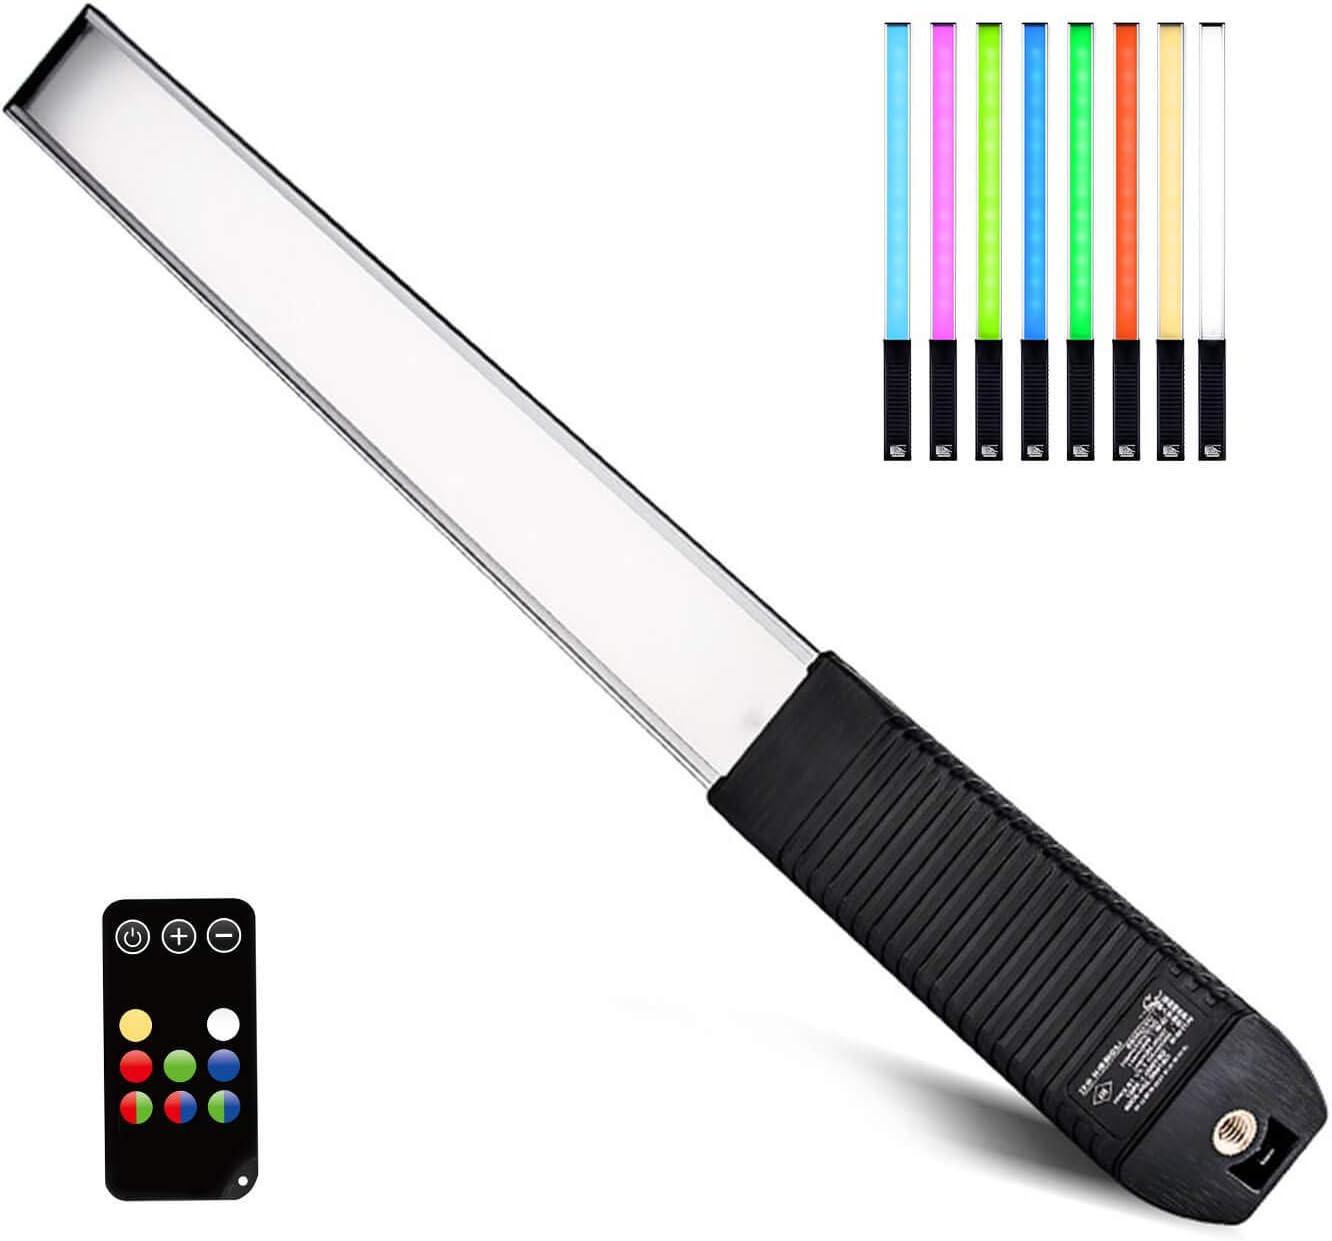
These are the LED sticks I used to wave all round the subject, either side and ahead of the camera position. They don’t seem to be made any more, as there’s a new version with full RGB colour change, otherwise similar with a tripod thread for mounting at the handle end, and the remote control for colour and dimming. The LUXCEO Q508A, below, is £49.99 on Amazon.

I’ve found my tungsten-to-daylight adjustable pair from 2018 very reliable! If a roomful of readers click any affiliate link in this article and decide to buy, I may be able to afford an RGB upgrade…

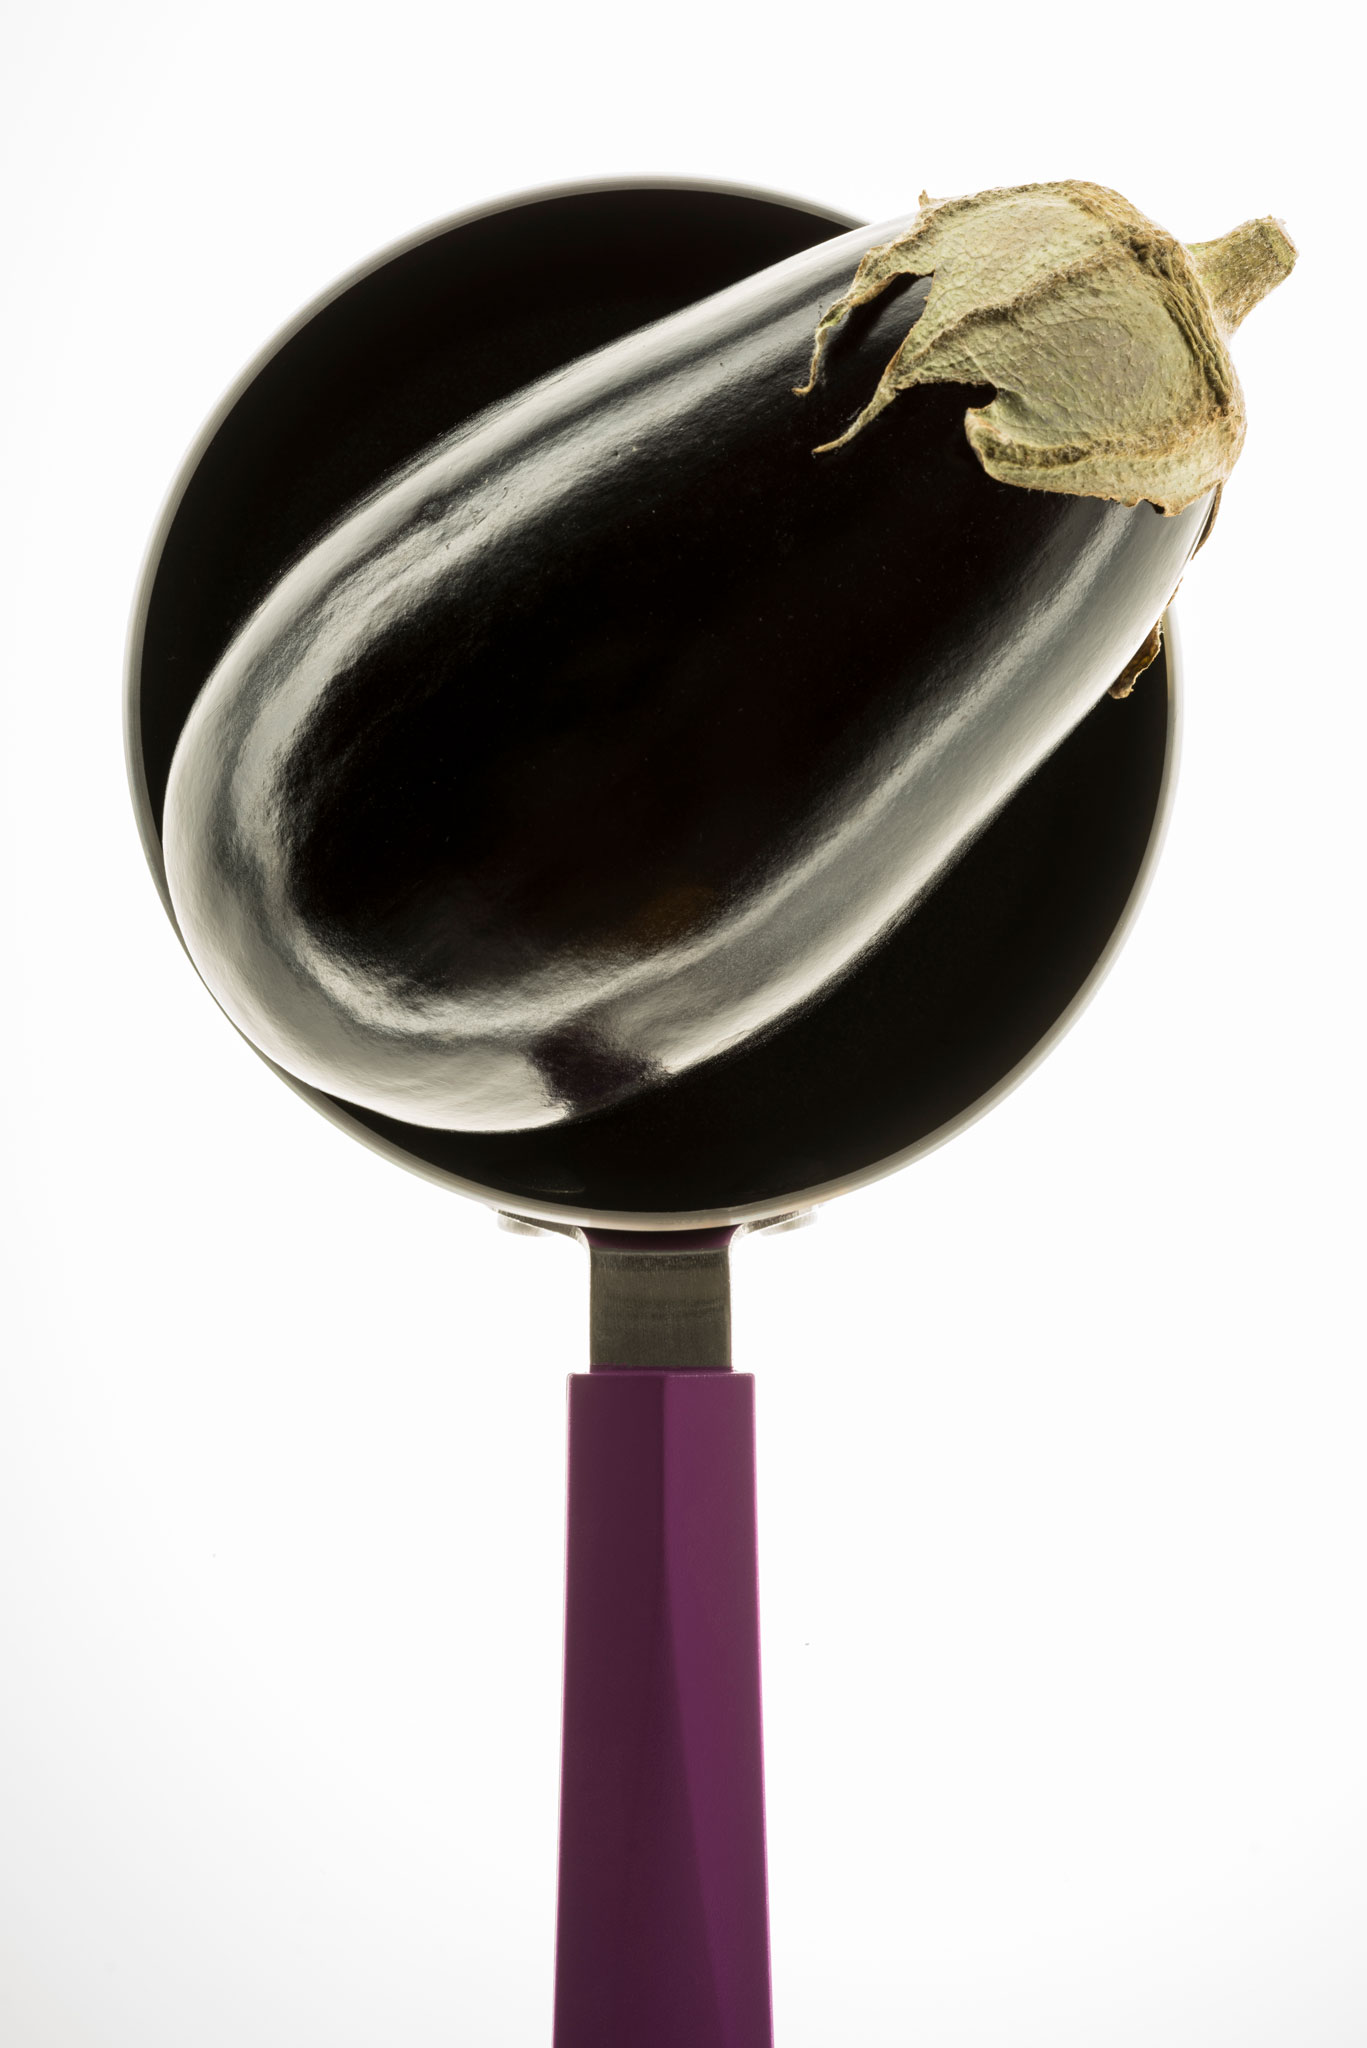
Here’s a studio shot from when I bought the light sticks, created by carefully moving one in a circle round the subject and keeping the distance and time as steady as possible. At least two circuits were made with the light at different heights, level with the subject and higher up.

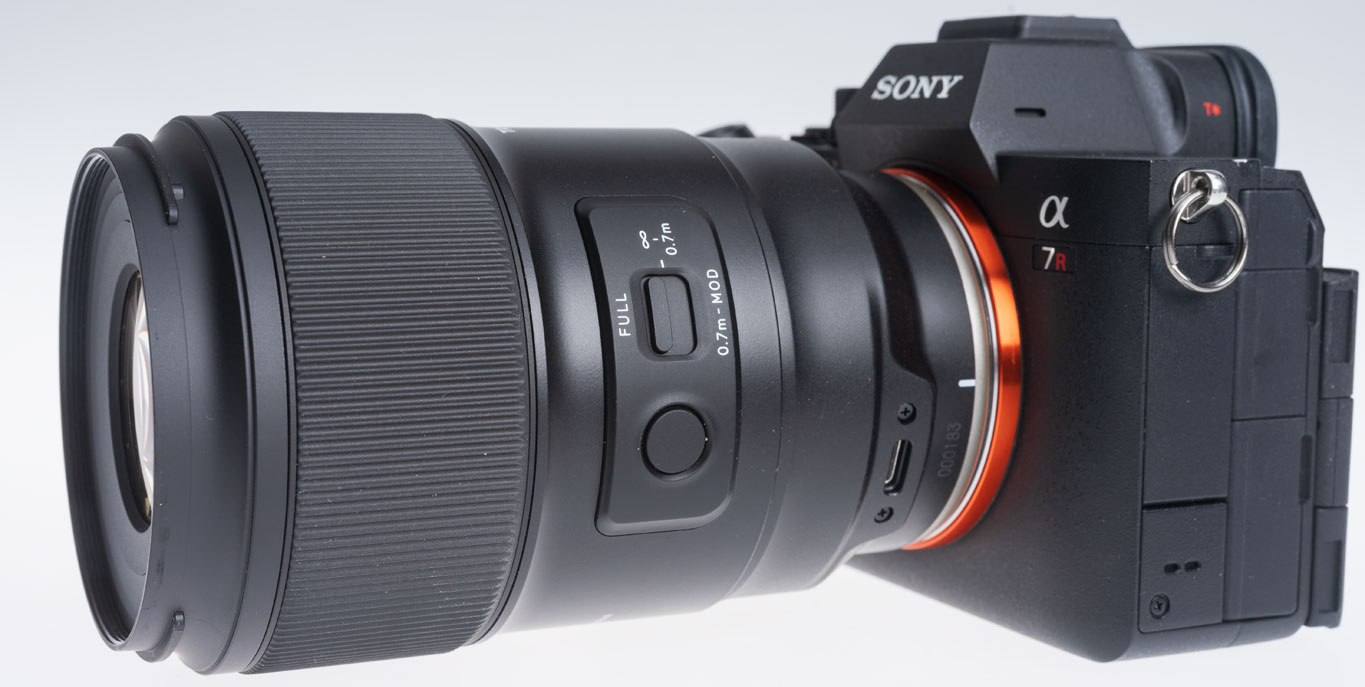
This is the new Tamron. I have a report to be published in Cameracraft due out on January 1st 2025, but in a month of using it I’ve also taken many more different images – more than the magazine can show. So I’ll be putting a page of photographs here with a link on the printed page. The lens costs under £600 in Sony FE/E mount or Nikon Z mount. Thanks for the loan of the review lens to Tamron UK – https://www.facebook.com/TamronUK

The Christmas card prints were made on 20-plus-year-old Lyson 300gsm double sided Smooth Fine Art paper – a box abandoned after I got an Epson P3800 pigment ink printer (which still runs thanks to Marrutt refill cartridges and inks). These original Lyson papers don’t handle pigment inks well. But they DO work with Epson Eco-Tank ET8550 dye-based inks, even if the black is pigment. In fact they work so well that ‘Printer Manages Colours’ and no colour management at all was needed. Set the printer to Matte paper, load the main tray with A4s halved to A5, use Velvet Fine Art as the paper setting and the cards were dry enough to crease on my Unibind Creaser directly off the output tray. The Lyson paper came from Marrutt too all those years ago for tests with their Quad Black inks. I never throw anything away!

– David Kilpatrick

Portrait Pro discount boosted

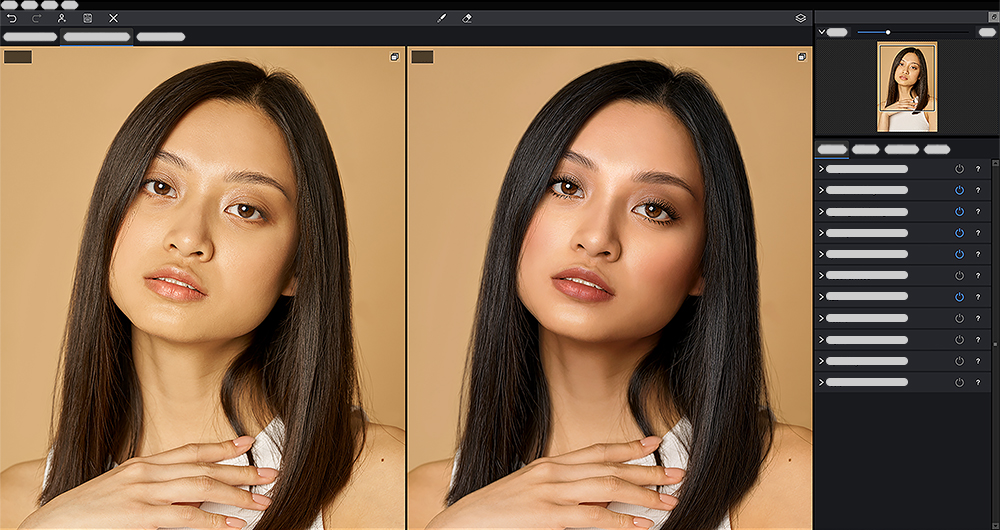
For those who must keep family or paying clients happy, in this era of completely modified selfies and altered perceptions of what a portrait should be, the latest AI version of Portrait Pro has real value. The discount has been increased pre-Christmas 2025 to 50% plus and extra 25% instead of 10% when using our new code F2BF24.

If badly out of focus faces within a group can be recovered, reflections removed from glasses, and smiles improved without the £10k my dentist suggests is necessary to replace teeth you can’t even see… take a look at this full info. – David Kilpatrick

  • Key New Features
  • Mouth Inpainting & Teeth Replacer
  • Glasses Reflection Remover
  • Face Recovery
  • Skin and Hair masks
  • Improved workflow
  • New gender and age detector

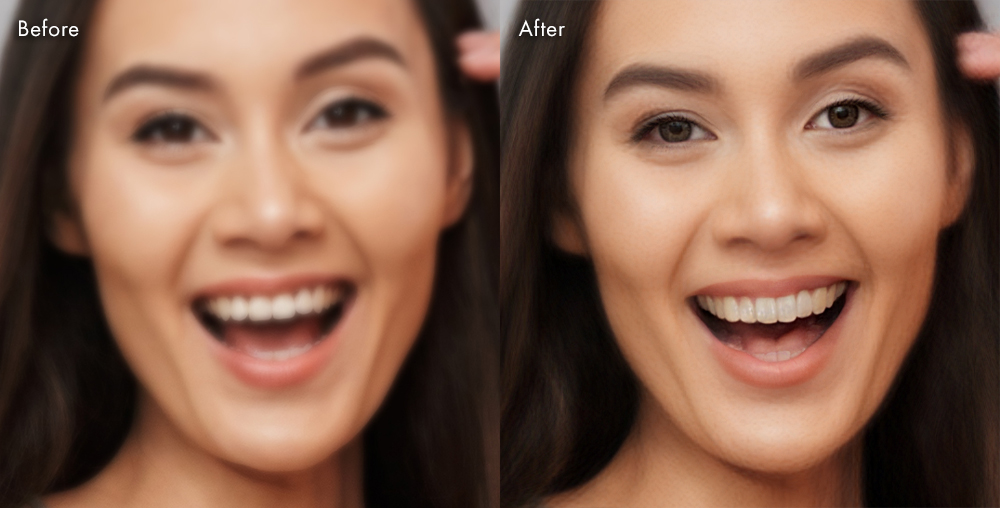
This is Face Recovery, though the lass has become a bit long in the tooth – the AI teeth are more realistic than any amount of focus retrieval and sharpening plus retouching could achieve in a few minutes.

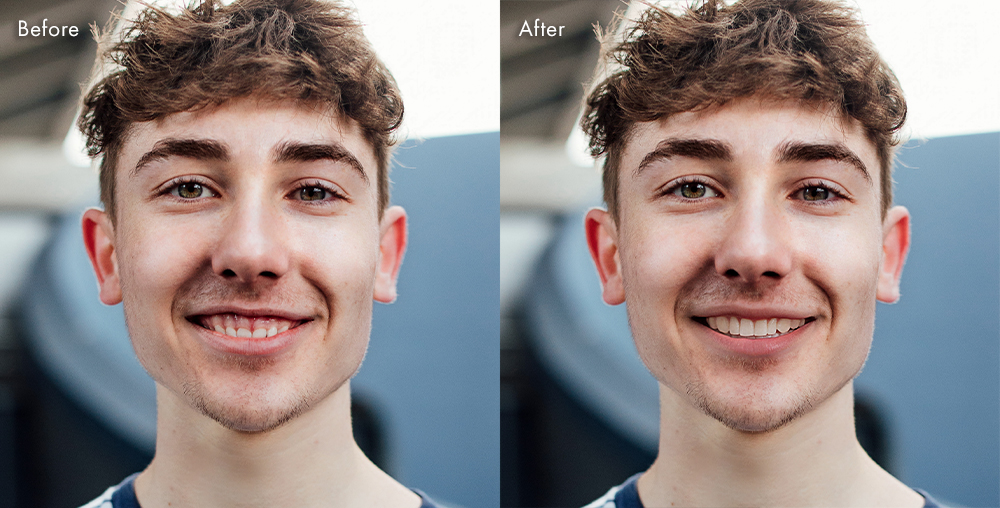
This is Mouth Inpainting.

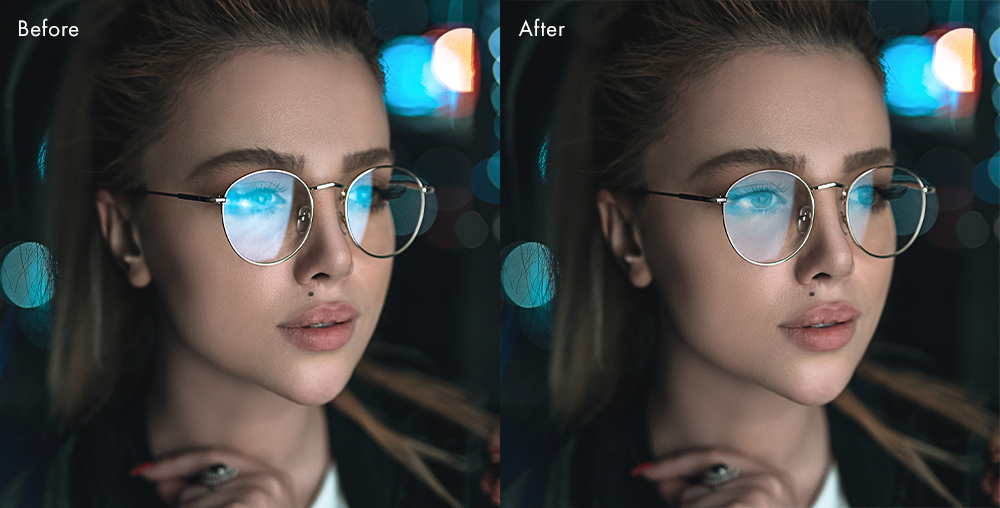
And this is Glasses Reflection removal, which again is a task not to be relished in Photoshop, and the top end version of PortraitPro (Studio Max) can handle in groups, in a series of shots where it’s having a similar effect.

This pair shows a cumulative but very subtle effect from the improved workflow, and it clearly compensates for failings in the colour management and lighting. It’s impressive to note that PortraitPro started life being a very obvious process, and our advice was always to turn the default sliders down rather than up. It has matured considerably. The new workflow has improved gender and age detection, and Studio Max is well-tuned to Apple Silicon to make optimum use of CPU, GPU and RAM.

PortraitPro 24 Editions

PortraitPro Standard is standalone software for photographers working with JPG or 24-bit TIFF files.

PortraitPro Studio is for photographers who work directly with RAW files or want the higher quality of 48-bit colour files, supports conversion between different color spaces, and provides JPEG/TIFF embedded color profile support. Offers Batch Dialog.  

PortraitPro Studio Max For professional photographers or those working with a large number of images. Full Batch Mode to speed workflow greatly.

Compare the different editions: anthropics.com/portraitpro/editions

Availability and Pricing

PortraitPro 24 editions are available from: anthropics.com/portraitpro

Remember to use Cameracraft’s latest code F2BF24 for maximum discount! This can also be used for PortraitPro Body, Landscape Pro and the user-recipe Smart Photo Editor.

high speed flash two images combined

Elinchrom ELC500 TTL studio flash

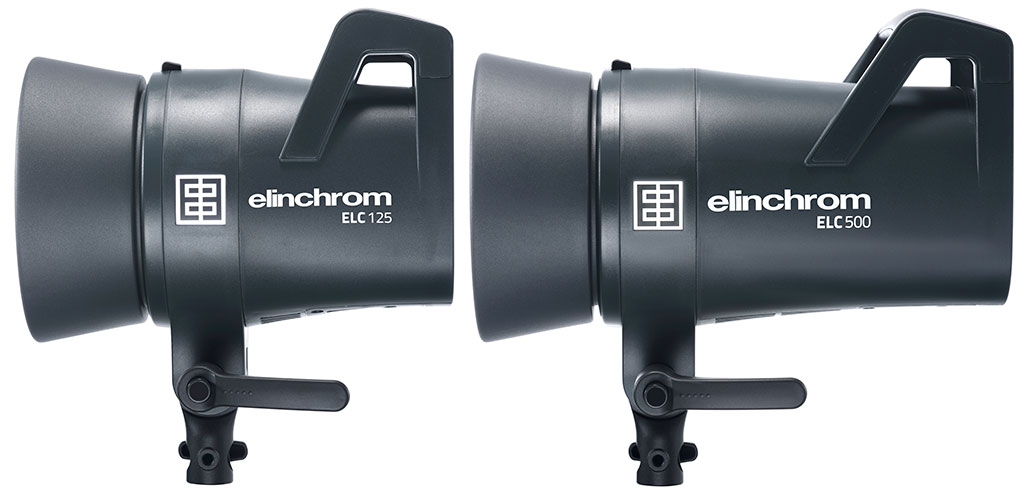
A new generation from Swiss masters of studio flash Elinca SA brings multi-platform TTL, super-fast recycling and flash durations, brilliant LED modelling and many design innovations. David Kilpatrick has been trying out the twin head kit.

The second wave of any innovation in technology is often safer to invest in than the pioneering first generation. Studio flash offering IGBT duration and power control, allowing much the same TTL and high speed functions found in camera speedlights, has been in development for over a decade but whole generations have been orphaned by advances in wireless trigger and camera firmware.

Finally bringing this to their new mid-range ELC TTL heads – one rung below the ELC Pro and one above the BRX – Elinchrom has worked for maturity in the whole technology. So, when the ELC 125 and 500 TTL arrived they worked much like any head with the EL Skyport Pro. Days later new firmware for the triggers enabled TTL operation, across a range of camera platforms already proven with the portable ELB 500 TTL.

The ELC 125 TTL is a little larger than a D-Lite. The ELC 500 TTL is substantial – as expected.
Continue reading »

Frank’s a definite Alpha Male

We shall be sending Frank Doorhof one of our original and rare Alpha Male T-shirts, in black, though I’m not sure we have anything quite large enough to fit him – which goes for his personality too. He’s a great workshop presenter, overcoming technical problems by just cracking on with whatever will work best. At Edinburgh for The Flash Centre’s full day fashion seminar with Frank on May 24th, the last thing I expected was to be using the same camera as Frank. All workshop leaders use Canon, right?

Frank now uses Sony Alpha 99, and he had a lot to say about it. Since we already know the benefits of the Alpha system and the current Sony full frame 24MP sensor with its extreme 14-bit dynamic range, most of what he said was not new, but it’s rare to hear a course leader extol the virtues of a system which not one of his delegates (apart from me) was using. He did rather talk down the value of CZ lenses (while using a 24-70mm CZ) and praised the quality of his vintage Minolta 85mm f/1.4 and 35-200mm xi, but I can’t argue with that as I’ve made similar decisions. Indeed, the 35-200mm owes much of its reputation to results we published seven years ago. I was beating him at his own game by using my SAM 28-75mm f/2.8 – cheaper by half than the CZ 24-70mm, and extremely sharp.
doorhof-church

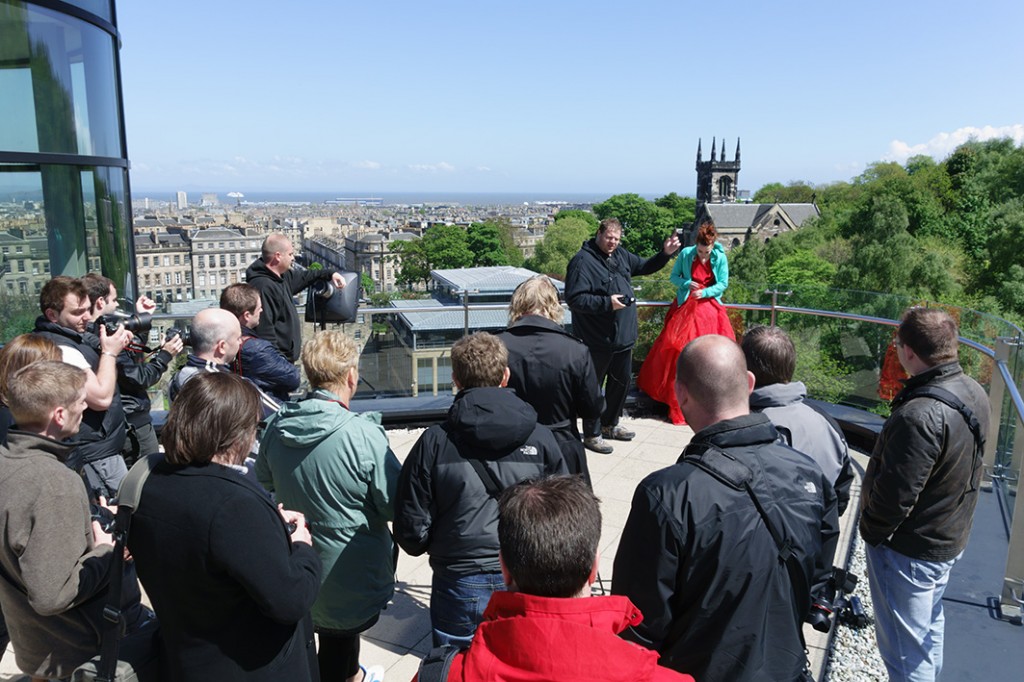
We had a rare sunny clear day in a run of mixed weather, though it was cold and windy on the roof terrace of the Glasshouse Hotel in central Edinburgh. The location provided strong backgrounds and details. Simon Burfoot and Chris Whittle from The Flash Centre brought along the Ranger (battery location) and Ranger Quadra (lightweight version) flash systems with Elinchrom Skyport wireless triggers. Of course, in the past if you turned up to a workshop with an Alpha body, you were unable to use the wireless flash connection unless you also remembered to bring a standard hotshoe adaptor. With the A99 (and NEX-6, RX1 and future models) the new Alpha multi function accessory shoe works directly with triggers.

Frank put everything into using just one light source, and used no reflectors, aiming instead for dramatic lighting by underexposing the main scene but lifting his model subject Nadine by local flash. This was achieved with the 44cm rigid square softbox, newly re-introduced to the Elinchrom system (I have used the original grey one for over 20 years – you only need to buy these expensive accessories once in a lifetime). Fitted with a honeycomb but no diffusing scrim, the single lighting head with this light shaper put a tightly controlled pool of light on to his subject. Though it’s easy to use digital SLRs as a pre-test light metering and flash balancing method, Frank works with a Sekonic flash and ambient light meter able to take incident, reflected and partial spot readings. It is very similar to the discontinued classic Minolta Flashmeter IV/V, with the same 1/10th stop accuracy and display of contrast and memorised values. If I was doing this type of work, I would use my Flashmeter IV, but I would also use its calibration function to match it to specific ISO settings on the A99.
doorhof-setup2

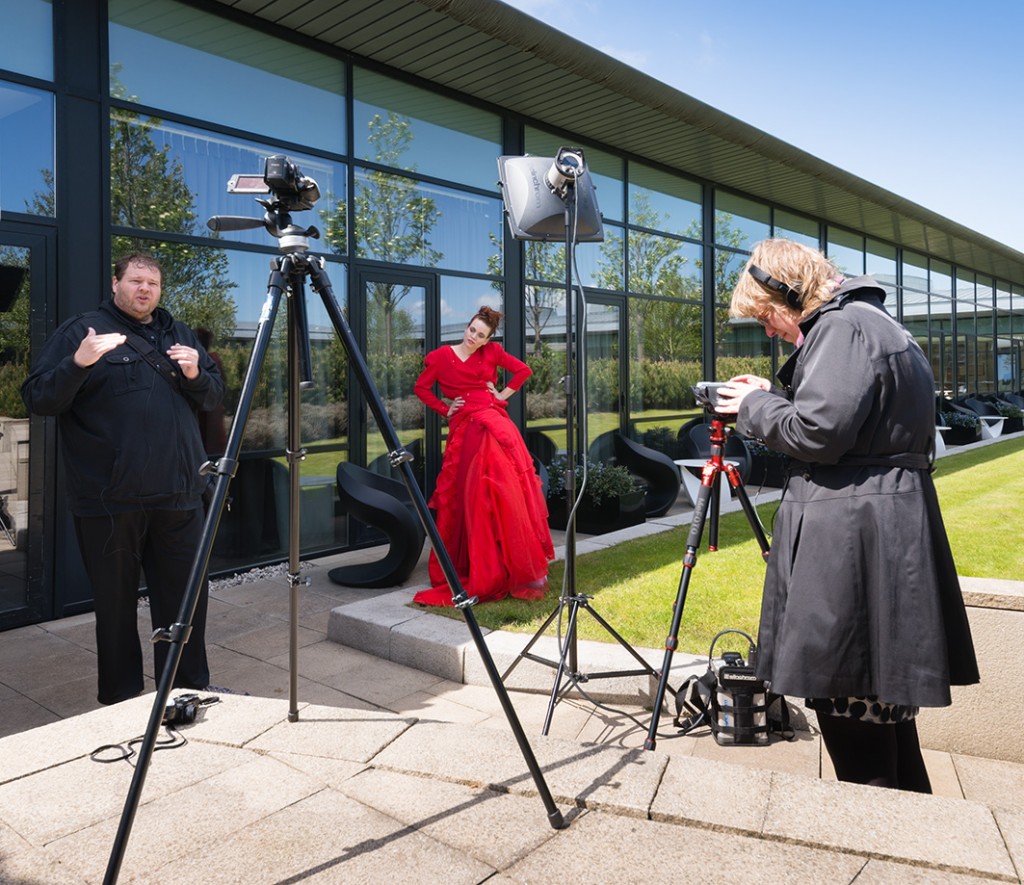
Frank’s wife Annewiek used multiple video cameras to film the workshop, as Frank provides his on-line tutorial material through Scott Kelby’s training site. Here you can see one set-up as he explains how he’s seeing the location, addressing the used of the glass window wall, avoiding unwanted reflections, placing Nadine in the shade then adding the flash to match an underexposed daylight scene. To achieve the required settings, he used ISO 100 at apertures around f/16 to f/22, with a 1/160th shutter speed, and mechanical first curtain shutter. I also followed these settings, which are not kind to sensor dust spots. Anyone using a Nikon D600 would have been in serious trouble! Even my ‘clean’ A99 which never needs any spot removal at my regular optimum working apertures between f/8 and f/13 showed a few visible spots at f/18. I would have used ISO 50, which I consider to be an advantage of the A99, and trusted shutter speeds to 1/250th with this camera for flash sync. But Frank was dealing with photographers some of whom had cameras incapable of shooting at less than ISO 200 or synchronising with studio flash at 1/250th without a slight second curtain crop to the frame. It would not have been fair to demonstrate using the advantages of the Alpha 99…

I did have in my bag, and normally carry, a 4X ND filter. With the Alpha 99, fitting an ND filter has absolutely zero effect on the viewfinder brightness, or the quality of view in sunlight. After all, sunshine with a 4X ND is just like a cloudy day in brightness, and you have no problems on a cloudy day. You can work with an ND just as ‘transparently’ as you can use an UV filter. An alternative would have been to use a polarising filter, which can also enhance the dramatic ‘dark sky – bright subject’ mix. However, Frank wisely kept clear of this. Polarisers have some pretty horrible effects on fabrics, skin and hair. Use them on portrait or fashion shots only with great care. Digital sensors are usually able to do deep blue skies without help.

doorhof-elinchrom44-web

Here’s the Elinchrom Ranger head as used. Frank asked delegates to restrict themselves to three shots per situation, a request generally ignored. I took some before the flash had recycled, to show the effect of the scene without flash, and with flash.

doorhof-set2-shot-web

This was my ‘take’ on this setup and it’s probably different from most as I used a 12-24mm Sigma HSM lens at 12mm. Now Frank did not explain to the photographers how he was using his electronic viewfinder, and I didn’t ask, but I’m sure he had it set to over-ride manual setting gain, as he was shooting on manual (M) with a degree of underexposure that would have made the finder extremely dark. I didn’t change my setting and though for all the other situations I was able to compose well enough, for this set-up my EVF showed nothing but solid black where the model was. As a result, I did not see what an ungainly shape was made by the extreme angle of the 12mm lens for a couple of poses.

alpha99-noview

The left hand side is very much how my finder looked. I don’t like this result, but I could not tell until after it was taken. Nadine was changing poses rapidly. This is one case where the optical viewfinder of my Alpha 900 would have been a better choice.

If you have a Sony/Minolta wireless flash set-up, you can overcome this whole problem. Your remote flash would perhaps need a softbox, or more realistically a small umbrella to match Frank’s localised soft flash and also receive the control signal from the on-camera flash. You would simply set the remote flash to Manual power not TTL, set the A99 (or other EVF DSLR) to Aperture Priority (A), set f/20, and rely on the flash’s auto communication with the camera body to set 1/160th flash sync and ignore the ambient light. You can also do the same with a slave cell triggered by a small camera top unit converted to invisible IR using a gel filter or old transparency unexposed film-end. You can not do this with the sync cable (PC socket) or flash triggers, as these connections do not tell the camera there is a charged flash fitted, and set the shutter speed.

Elinchrom! We need, for Sony and other EVF or LCD screen-only cameras, a flash trigger designed to provide a signal to the pin which the camera’s own flash system uses to auto-set flash sync speed when using Aperture priority. When this is live, the viewfinder brightness is set to auto gain regardless of the exposure mode (PASM) used.

For his first set-up, Frank was actually shooting full lengths from a distance with Nadine making a small element in a large view. I liked the structure she was posing under, and prefer in general to get pictures which are not a copy of the course leader’s work. Although this was also slightly underexposed for the background, I had no problem with the EVF when the subject was in a normally lit area.

doorhof-set1-shot-web

You may say, the subject was in sunlight anyway, so why use flash? The dual lighting gives a filmic look, like a movie set lit in Californian sunshine (and Scotland’s legendary blue skies complete the illusion). This essentially sidelight from the sun, with a frontal fill you can see most clearly on the fingers of the left hand glove.

For a further set-up, Frank moved to the roof terrace view over the north of Edinburgh towards Leith and the Forth (first image on this page). He had demonstrated sets suitable for normal to wide angle lenses, using the 24-70mm, and switched to the 70-200mm f/2.8 Sony SSM G for a different relationship between the model and the background.

doorhof-churchview-noflash-web

This was the view without flash – not a bad set-up as it stands. When processing my images, I found that the in-camera standard JPEGs of the A99 handled the red of the dress better than almost any setting or camera profile using Adobe Camera Raw. Colours like this are a good case for trying alternative raw converters, such as DxO Optics Pro or Capture One Pro. Their camera profiles are generally closer to the in-camera conversions than Adobe’s. Frank demonstrated how to use the MacBeth ColorChecker Passport colour patch target and its camera profiling software to create an on-the-spot profile for better ACR/LR conversions.

doorhof-churchview-flash-web

This is the shot with flash, again, in-camera JPEG sRGB. AdobeRGB would retain more potential detail in the red, raw conversion to 16-bit using ProPhotoRGB the maximum. But for that you also need something like a Eizo 10-bit monitor with a matching video driver, and no Apple Mac made comes with that. Build yourself a tower system and it’s just about possible to get 10-bit colour… but not using Mac OSX! My monitor is a regular old 27 inch iMac and if it’s 8-bit it’s having a good day. The colour looks lovely, but accurate it certainly is not. I don’t mind as 99% of all the screens any of my images will ever be seen on are no better, and the printed page is far inferior. Putting the above pictures into print would almost guarantee the differences you see here are lost.

smallscreeneducation

Because the Glasshouse’s rooftop function suite has a white translucent fabric roof, the overhead projector could not be used. So, Frank sat down with his laptop and the photographers. Later on in the day, the group moved to an inside room, and he demonstrated a series of processing steps in Lightroom with special attention to the use of plugins producing Clarity, pseudo-HDR and ‘image look’ and to fashion and beauty retouching.

To read more about Frank’s work, visit his own website www.frankdoorhof.com or follow him via Kelby Training. He regularly does workshop tours. I’ll be reporting on some of his views and hints for professional photographers, specifically, in the June 2013 edition of Master Photography magazine (you can subscribe here for this 10X a year magazine which we also produce).

For more information on the Elinchrom flash system, Skyport wireless triggering and battery powered Ranger/Ranger Quadra location flash, see The Flash Centre website.

– David Kilpatrick
Alpha in the cathouse….

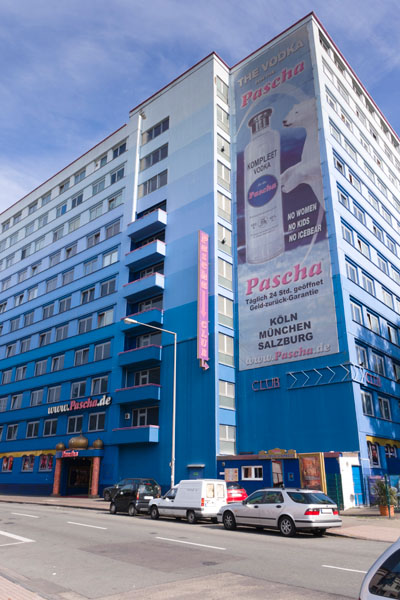
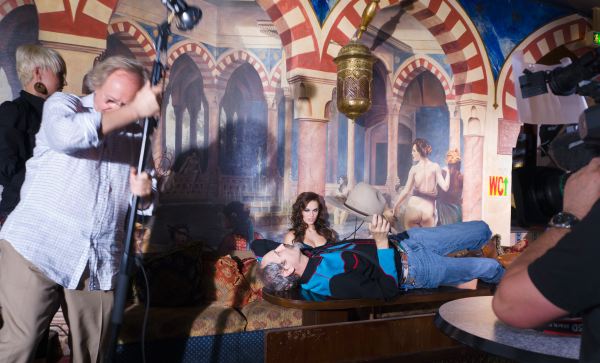
It was a photo-call too good to be missed. Shirley Kilpatrick reported for duty at Europe’s biggest brothel where fashion photographer Steve Thornton was staging a publicity stunt for California Sunbounce. Welcome to the House of the Rising Sunbounce, also known as Pascha.
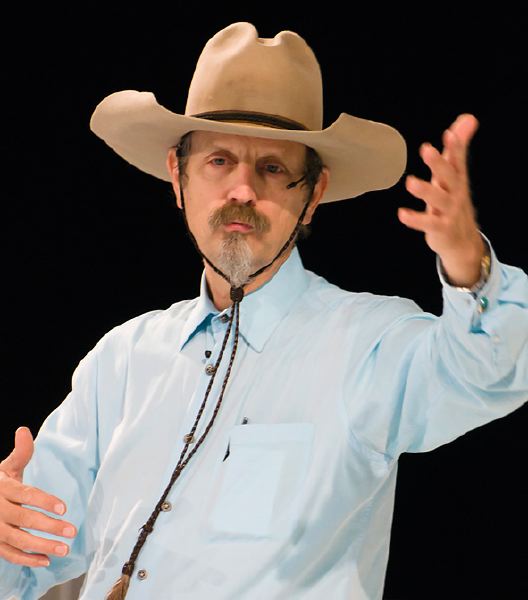
The first person we saw in the empty corridors of the photokina 2010 halls, the day before the show opened, was Steve Thornton. You can’t really miss a six-foot-something figure with an extra six inches of hat, cowboy boots and everything except the spurs and chaps, even from behind.

“That’s Steve Thornton”, said David. “He’s the guy you are going to the brothel with on Thursday…”

Cologne has always been known for its robust seamy side. When David went to one of his first photokinas with John Battison and David Shaw from Japanese Cameras Ltd – importers of Minolta in the 1970s – he was courteously treated. “After you”, said Messrs Shaw and Battison as they hit yet another hostelry. Gay bars were not common in Britain in 1976, and it was a minute before he realised they had stayed outside the revolving door…

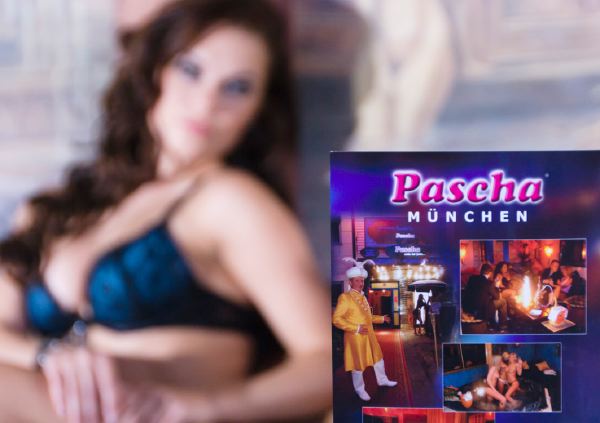
But this location, Pascha, had to be seen. It is Europe’s largest legal brothel, a multi-storey block just outside the inner city limits of Cologne (it would be illegal within them). It is claimed to have 120 working girls, and one thousand customers a day. Thursday mornings must be quiet, as they seemed able to close down the main cabaret and lapdancing bar to allow German lighting and accessory makers California Sunbounce to stage their model shoot with invited press and TV crews.

Because of its location, Pascha was a taxi fare away – half the taxis in Cologne seem to carry advertising for it, and unless a visitor already knew the true identity of the business you’d assume it was a nightclub. Indeed, it does stage music gigs and many will visit it just for the floorshow.

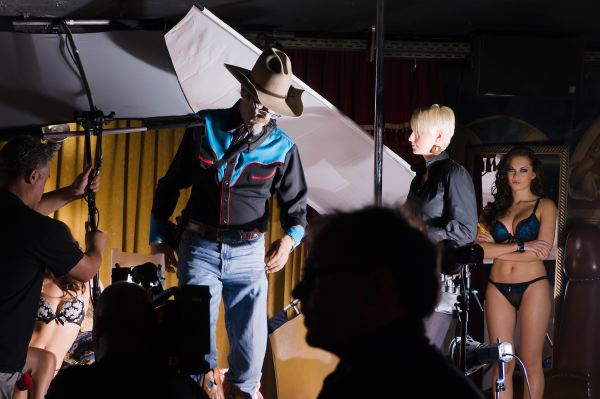
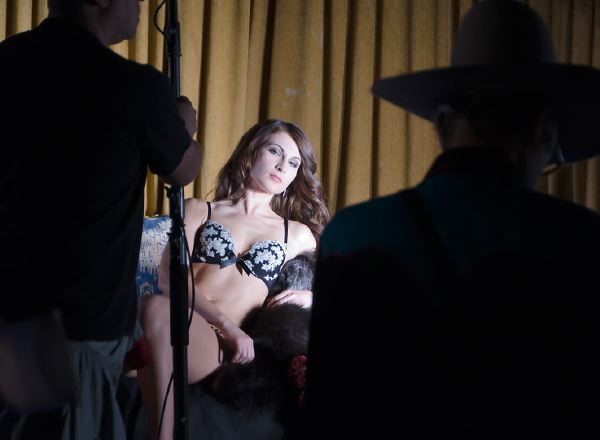
In the cocktail-cabaret bar, with Thornton’s halogen video lights positioned on stands or waved on poles by assistants, the grubby state of the decor was only too clear. The floor carpet stuck to my sandals and the beige curtain behind the first model to ‘take the stage’ had threadbare patches. The furnishings felt as if you really wouldn’t want to touch them without rubber gloves on, let alone lounge around posing in undies. Pascha may be the biggest cathouse in the west, but it didn’t smell wonderful and looked about as tired and well-used as its statistics suggest. Our models, of course, were unconnected with the venue and along with make-up and stylist Davina took the occasional wry look at their location.

As for Steve Thornton, we had stopped by one stand during photokina where he was holding forth with a lecture. He was animated, gesturing, extrovert and kept his audience attentive.

At Pascha, he did less to explain what he was doing with the lighting, or how he was using the large California Sunbounce reflector panels  which were the key to controlling such small, hard light sources. His instructions to his crew were not aimed at the posse of journalists and press photographers assembled to witness the event. I had thought he would be conducting the shoot more as a masterclass or demonstration, but it was very much a working session with one exception, permission for the invited media to take their own pictures and publish them as we are doing here.

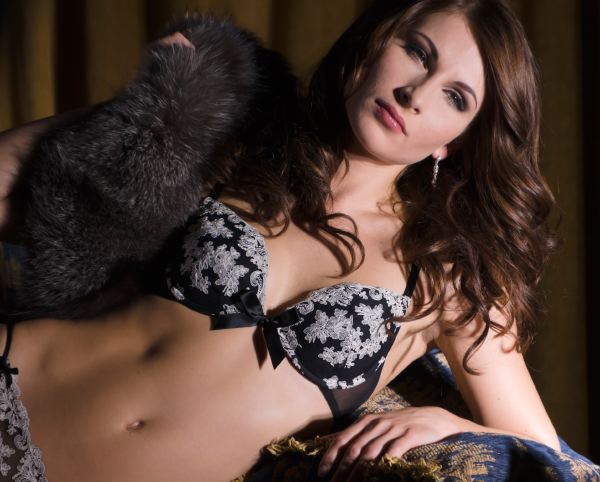
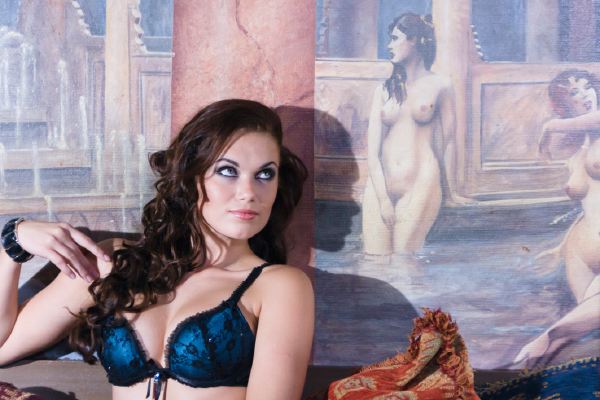
This is unusual, but our models knew the score and posed for all of the press gang in turn. The second girl, working in front of a not-quite-good-enough Turkish bath wall painting, had more direct communication but from my angle the lighting cast a strong face profile shadow. When this worked with a flattering face silhouette and visible shadows from her eyelashes, it was good; when it cast the wrong shaped shadow from her profile, much less so.

Thornton worked hard and his crew moved the halogen lights and Sunbounce panels round while dodging both the still cameras and the video crew. I was shooting with my Sigma 18-250mm ƒ3.5-6.3 OS stabilised zoom, which proved more than useful  at the long end. Originally, I planned to use just a 28mm ƒ/2 Minolta RS on my Alpha 700, but this would not have got me either the overall scenes or the close-up final shots.

The A700 was set to use auto ISO all the way to 1600, as we have found that Adobe Camera Raw 6.2 (or Lightroom 3.2) makes such excellent noise-free conversions it is safe to use even 1600 for model shots. At this setting, typical exposures were around 1/80th wide open at ƒ6.3. The slight hint of softness in lens at full apertures was flattering; a few shots stopped down in stronger direct light were cruel to skin, to say the least.

Well, it may be the first and last time I will be able to claim I went to work in a brothel. German social morals accept this place in a way which I think real Californians might not. The brand name makes you think it’s an American product, but California Sunbounce was developed in Germany and all their early publicity shots were taken on the sunny shores of the Baltic!

They also make the SunSniper camera sling (used by Thornton) and they are imported to the UK by The Flash Centre.

– Shirley Kilpatrick
All photographs are © Shirley Kilpatrick and use is reserved in connection with media coverage of this event. You can view and download full size (as cropped for repro) images from the full set of shots as a 13MB zip file from our Subscriber Pages.
Tilt-shift with full frame DSLRs

After just a short while working with full frame, high resolution DSLRs the need for tilt lenses has really come home to me. Most lenses deliver their best results at fairly wide apertures like f8, it’s easy for detail to begin to look soft and lacking impact if you are forced to stop down to f22 to get everything sharp. Tilt adaptors and tilt lenses solve the problem. This article is repeated here after originally appearing on dPhotoexpert (and similar instrument images, in my first D3X test report for the British Journal).
Continue reading »

Alpha Live View in the studio – solved!

One of the problems with the Alpha 350/300 is that the Live View is linked to the settings when you use Manual exposure. It provides a form of metering, a relatively accurate preview of under or over exposure. This makes it impossible to use Manual with studio flash (AC mains strobe) setups. Currently, there is no menu setting to turn off ‘exposure preview with manual’ and enable ‘auto LV gain with manual’. But there is a solution.
Continue reading »