Sharp vintage glass – and subject

Twenty years ago I was operating one of the first full service digital photo studios in the world. I had already published, back in 1986, the world’s first desktop published commercial periodicals and won the UK Printing Industries Research Association inaugural DTP Awards, in 1987, for this. We’d bought the first Apple laser printer in provincial Britain and when Letraset’s ReadySetGo layout package failed to produce usable output for our first such magazine, Aldus stepped in and provide a pre-release beta of PageMaker. In 48 hours, I had to re-create the entire magazine – and it worked.

From then on we progressed, through having the first separation-capable film imagesetting in Scotland to reproducing the first magazine cover from Kodak Photo-CD and soon after the first full colour page from a Kodak DCS camera. By the beginning of 1995 we had Photon, the first major photo-mag style website, in by the end of that year we had a Leaf Lumina based studio with Scandles lighting. There’s an article about this in our repository of past articles, https://cameracraft.online/2007/08/06/the-leaf-lumina-scanning-camera-1995/

That year, Shirley had planted an entire bed of flowers specifically for drying. They make good photographic subjects. The (now relocated) university college of St Margaret’s in Edinburgh asked me to give a lecture about the new technology – and so the Leaf Lumina (a scanner on a tripod with a  Micro Nikkor up front, and an Apple Mac Powerbook on the end of a SCSI-2 cable) went along with the fluorescent studio light heads and a tray of the dried flowers. We also took our Kodak dye-sub printer, which had made hundreds of prints alongside other printers during that year, when Shirley completed her M.Sc.Colour Science and created pre-ICC colour tables to reproduce fabric colours accurately. With this carload of gear, we were able to shoot and produce a print on the spot.

The picture remained on file – a 25MB TIFF, roughly 8 megapixels, but equal to 8 megapixels in the Sigma Foveon sense as every pixel was true RGB with no Bayer filter involved. The exposures took over a minute, limiting it to still life, but the quality was not exceeded until 12 megapixel Bayer cameras like the Sony A700 appeared. And a few months later, we were producing Paterson’s catalogues and price lists and needed a cover. One list covered black and white and colour chemicals, the former mostly from Paterson and the latter from Photo Technology. Photoshop offered an easy way to take the image, and divide it accordingly. So that’s what we proposed, and what was used for the cover.

Paterson1996-web

It was intended to show the gamut from plain monochrome through toning to colour and it did look very good in print, because relatively low overall contrast combined with high detail contrast is easily handled by litho.

Now, forward two decades, and I’m looking for subjects to test out the latest Elinchrom ELB400 portable li-ion powered two head flash kit. This has LED modelling lights over twice as bright as its predecessor and they now really show how the light is falling even when using light shapers. I wanted to show texture using my optical Mini Spot attachment, which works very well with these new heads and their cool-running LEDs.

On top of a wardrobe, in a basket, were the dried flowers. They are called everlasting and apart from gathering loads of dust, they are. The most difficult job was holding each flower against the nozzle of a handheld vacuum cleaner to remove 19 years of dust.

The first shot I took was with the Sony A7II, 24 megapixels, using my Pentax SMC Macro Takumar 50mm f/4. Like the flowers, this is also everlasting. It’s not yet 50 years old even though the lens design, a simple Tessar-type corrected for magnifications from 1:2 (50%) to 1:10, is well over 100 years old. It’s also a tolerable lens for general scenes, though the extreme resolution it achieves centrally only covers the full frame when you focus close. With Pentax’s original multicoating in every way a match for the latest Zeiss T* as found on new Sony Zeiss lenses, and a deeply recessed very small optical unit, it has a contrast and colour saturation you just don’t find from lenses using hybrid or moulded aspherics or many more air to glass surfaces.

This picture appears, fairly small, in my review of the ELB40 in f2 Freelance Photographer magazine July/August 2015. When editing it, I was struck by the extreme resolution. Within the planes of sharp focus, it was exceptional.

So, I decided I’d shoot a new shot, and improve on the use of the spotlight attachment on the Quadra head to cast the shadows and create a sunlight-like effect – and this time, use the A7R with its 36 megapixel resolution. Although the A7R has no AA filter and is sharper in theory, the larger pixel count calls for a smaller aperture to secure a little more depth of field for the larger viewing scale, and this when using any macro lens always risks diffraction limits on fine detail contrast. For example, at half life size a setting of f/12.5 (between f/11 and f/16) which I found desirable for best sharpness distribution gives an actual f-stop of c.f/19 and this does cause some sharpness loss. If the lens was extended on a tube to give 1:1, a setting of f/16 as nearly always needed for depth of field is really a true f/32 for diffraction calculations and light readings alike.

Fortunately, our brains are sensitive to perceived scale, and we ‘see’ close ups as sharper than distant subjects even when they are not. The A7R and the Pentax macro lens also combine to produce an extreme level of textural detail, the information our eyes and brains use to see 3D solidness, shape and form in a flat photograph. So in practice you can shoot macro and use whatever aperture the subject depth demands, without resorting to focus stacking techniques.

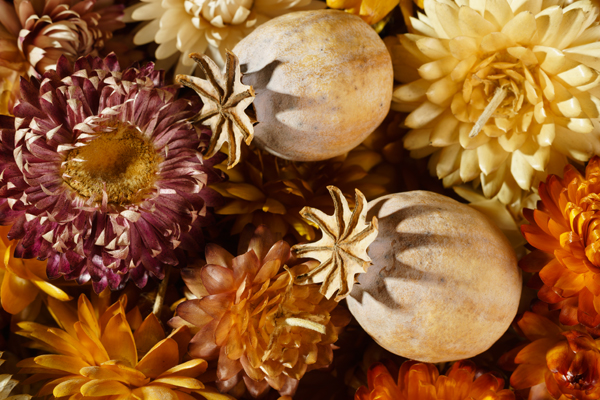
And here, anyway, is the result. You can click on this image and it will take you to a pBase hosted full size, JPEG compression level 12 version (this is over 24MB of image data, and it is not compressed like Facebook or indeed a WordPress image – though it’s still not ‘virgin’ data).

driedflowermacro-cleaned-srgb-web600

In a couple of days, I have another SMC Takumar of the same era arriving. It’s a 35mm f/3.5, which was the cheapest of the line back in 1970 when Shirley bought me my very first brand new, marque brand lens for Christmas! We were both only 18 and that represented an entire month of her basic salary working behind the counter at Dixons in Sheffield… helped by a staff discount. It was my first Super-Multi-Coated lens and I can remember still how the high contrast and bright colours could even be seen through the viewfinder – and how amazing the first box of slides looked, midwinter close-ups of fallen leaves rimmed by frost and frozen puddles.

These lenses have never lost the edge they had, if they have been looked after, but the truth is we never knew how good they really were. We can now focus them within a fraction of a millimetre. I’ll probably never compare the 50mm f/4 SMC Macro Takumar with the 55mm f/1.8 CZ (I’ve used it, but only for low light high ISO tests on the A7S) or the 35mm f/3.5 with the CZ 35mm f/2.8 because it’s unlikely I’ll ever buy the new lenses with their inflated prices and reliance, however marginal, on software correction to be ‘good’.

I know I have not written much about the A7R, or the A7II I’m using, or about any of the new lenses I can not manage to borrow from Sony and can’t afford to buy. I have an amazing set of lenses from 12mm to 500mm for full frame, including tilt-shift, wide aperture and mirror but just one single Sony FE lens for convenience (the 28-70mm FE kit lens). In contrast, my A6000 kit is all Sony plus the Samyang 12mm f/2 because it is just so good it had to have a place.

So, please do take a look at the full size file. The critical plane for focus crosses the smooth surfaces of the two poppy seed heads and it’s in this relatively low contrast zone that the quality of the lens shows up. Elsewhere in the image the defocused quality is very pleasant (there was no CA to correct and there’s no bad colour bokeh) and the plane of sharpness passes through a few other more interesting flower details.

Finally, a word for A7II users. If you use a manual macro lens, as I do, remember that when you program in the focal length for Steady Shot you should only enter the actual focal length for distant views. For my 1:2 macro Pentax, most often used in the range from quarter to half life size, I program in 70mm as the focal length because this represents the view angle. Using a macro at 1:1, you should enter double the focal length to get the correct Steady Shot compensation. Sony and Minolta macro lenses with the D chip (eight contacts) convey accurate extension information, so the auto Steady Shot works perfectly with them. But manual, or Canon lenses on adaptors which may or may or not pass the right information through, are best used with the Steady Shot focal length entered via the menu screen and adjusted to allow for the actual lens extension.

– David Kilpatrick

Check out B&H prices for all full frame lenses for the Sony FE (A7) system here

Check out B&H Secondhand Department for all ‘film camera’ manual and vintage lenses

Check out B&H Secondhand for Sony E-mount adaptors to allow you to fit your vintage/legacy lenses

Check out the huge list of new adaptors for almost every lens ever made!

Using the 10-18mm OSS zoom on full frame

The Sony E-mount (not FE) 10-18mm f/5 OSS lens can be used effectively on full frame for creative work and within limits for technically more demanding shots. Below, an uncropped A7R shot of the concourse at Abu Dhabi Airport, taken at 13mm setting, f/6.3 with my lens profile as provided below. Check the straight lines in the floor tiling, if you doubt that this lens would be of any use for architecture.

However, you don’t get this without a lens profile, and without due care to limit the focal length to a range of 13 to 16mm – not the full 10 to 18mm. Below, you could get this if you try 12mm straight out of camera…

uncorrected12mm

This is a pretty awful case of vignetting and distortion – as you would expect. It’s from an APS-C format wide angle zoom, the 10-18mm f/4 SEL OSS lens for NEX, used on the Alpha 7R full frame mirrorless body. Early in the launch period of this camera, various far more attractive images appeared on-line using subjects like roads, rail lines, beaches and even shop counters where the lines look straight – rather like that drainpipe – because of where they fall in the shot. As you can see, anything with a horizon near the long edge of the framewould have given a very different impression.

However, Adobe offers a free utility which enables you to make lens profiles to correct vignetting and distortion.

I created a lens profile for ACR/LR using full frame and the 10-18mm on the A7R. The vignetting is such that the profile creator really can’t handle it, and overcorrects the extreme corners as a result. I’ve done f/4, f/8, f/16 at 12, 14, 16 and 18mm focal lengths using an A2 chart; for a lens like this, a much greater working distance and an A0 chart would really be desirable. The link below is to a zip file of the Adobe Lens Profiles I produced – for A7 and A7R, with .lcpp files for final use, and .lcp files for different settings of the 10 18mm I found useful.

10-18AdobeLensProfiles

corrected-customprofile12mm

At 12mm you can probably see the vignetting artefacts in the corners, the magenta corner shift and incomplete correction of the horizon line. You’ll also be quick to spot that the 12mm coverage has been reduced to something much less, lens profiles always reduce the field of view (they can not do otherwise).

The profiler simply can’t handle the degree of sudden fall-off in illumination given by the 10-18mm used on full frame. Manual distortion corrections can actually do a better job. At other focal lengths, the profile I’ve made works well enough, and if the frame is cropped slightly (still exceeding the APS-C area the lens is designed for) it’s possible to get good results and wider angles.

I have sold my Sigma 12-24mm HSM II which was used with the A99, and also sold a Voigltander 15mm f/4.5 I bought to test (zero cost fortunately, as it made a small profit between Gumtree source and eBay destination). The Sigma was not only very difficult to focus using CD, its HSM motor won’t play with Sony CD.

My .lcp full-frame file can be downloaded from:

//www.photoclubalpha.com/AdobeCameraProfiles/ILCE-7R FF (E 10-18mm F4 OSS) – RAW.lcp.zip

Just for good measure, here is an uncropped A7R 13mm focal length shot of the church of Maila Dumpara in Kerala taken to use dramatic converging verticals – which fail terribly unless the lines are properly corrected, the last thing you want in a strong upward angle is lens distortion. It’s very stiff test of any lens to do this. I have left the vignetting uncorrected. I rather like it. Click either this or the Abu Dhabi photo and you’ll get a larger image, about 1000 x 1500 pixels.

Samples produced for a dPreview forum question

There’s been a lot of discussion on dPreview forums of which lenses work on full frame E-mount, as Sony saw fit to put a Disable APS-C crop option in the menus of the A7 and A7R (almost as if they wanted owners to experiment). They have made other welcome changes of a similar kind which I’ll cover in a full review of the camera – which I can not do yet as I have no FE mount lenses for it, and with the current choice and prices, I can see I may never use FE mount lenses on this camera.

So, to answer some questions on dPreview’s E-mount forum, I posted these images and comments.

Here is a ‘native’ uncorrected shot of a local building taken on the 10-14mm on A7R at 11mm, f/10, ISO 100:

View: original size

Here is the result of using the profile, doing a crop and some straighten of slight rotated tilt, and pulling the scale down (with the profile applied, the roof apex is clipped off at the top as the lens has so much distortion its 11mm probably becomes more like 15mm when corrected):

View: original size

I’ve used some clarity and local burn adjustments on the sky to treat the image more or less as I would (except that I wouldn’t actually photograph this building at this time of day, with blinds drawn, etc).

For me, the 10-18mm on A7R with our without the profile correction offers the same options as using assorted lenses on 5 x 4 sheet film. It never mattered whether a 47mm didn’t cover the entire film, you got an image circle and could use whatever part of it you want. At 10mm the image, with the profile used, has strong corner cut-off but the overall circle of usable image greatly exceeds APS-C provided you stop down (f7.1 seems just OK, f/10 is maybe optimum, I’d certainly try f/16 despite fears of detail loss).

View: original size

The red crop mark is square – my ‘Hasselblad SWC killer’, as the classic SWC had just a 38mm wide angle lens. You needed to get an Arcbody with 35mm Rodenstock to go any wider on 56 x 56mm film (6 x 6). With the A7R and 10-18mm at 10mm, you get the equivalent of a 24mm lens. Not a 24mm fisheye on 6 x 4.5 like the widest ever offered by Mamiya… a 24mm rectilinear on 6 x 6.

The yellow crop mark represents a significantly larger area than APS-C (which is actually just a little under the 24 x 24mm square in width). It is shifted vertically, as if the lens was being used as a shift lens. If only the APS-C area is considered, its approximately 16 x 24mm area can be positioned right to the top of the frame, equalling a 4mm rise, or the equivalent of using a 6mm rise on a full-frame PC lens (most actually go to 11 or 12mm rise). There is only one lens made which can compete with this, and that’s the Canon 17mm f/4 TS. Admittedly this is a superb lens and when stopped down to f/11 and used on the 6D (Canon’s most shift-friendly sensor) will blow this result away for clean rendering of detail toward the frame edges.

And then, you can still use the 10-18mm in APS-C crop mode as a snapshot wide angle with pretty much perfect correction (Adobe’s own Sony profile for APS-C), for videos too.

– David Kilpatrick

Frank’s a definite Alpha Male

We shall be sending Frank Doorhof one of our original and rare Alpha Male T-shirts, in black, though I’m not sure we have anything quite large enough to fit him – which goes for his personality too. He’s a great workshop presenter, overcoming technical problems by just cracking on with whatever will work best. At Edinburgh for The Flash Centre’s full day fashion seminar with Frank on May 24th, the last thing I expected was to be using the same camera as Frank. All workshop leaders use Canon, right?

Frank now uses Sony Alpha 99, and he had a lot to say about it. Since we already know the benefits of the Alpha system and the current Sony full frame 24MP sensor with its extreme 14-bit dynamic range, most of what he said was not new, but it’s rare to hear a course leader extol the virtues of a system which not one of his delegates (apart from me) was using. He did rather talk down the value of CZ lenses (while using a 24-70mm CZ) and praised the quality of his vintage Minolta 85mm f/1.4 and 35-200mm xi, but I can’t argue with that as I’ve made similar decisions. Indeed, the 35-200mm owes much of its reputation to results we published seven years ago. I was beating him at his own game by using my SAM 28-75mm f/2.8 – cheaper by half than the CZ 24-70mm, and extremely sharp.

doorhof-church

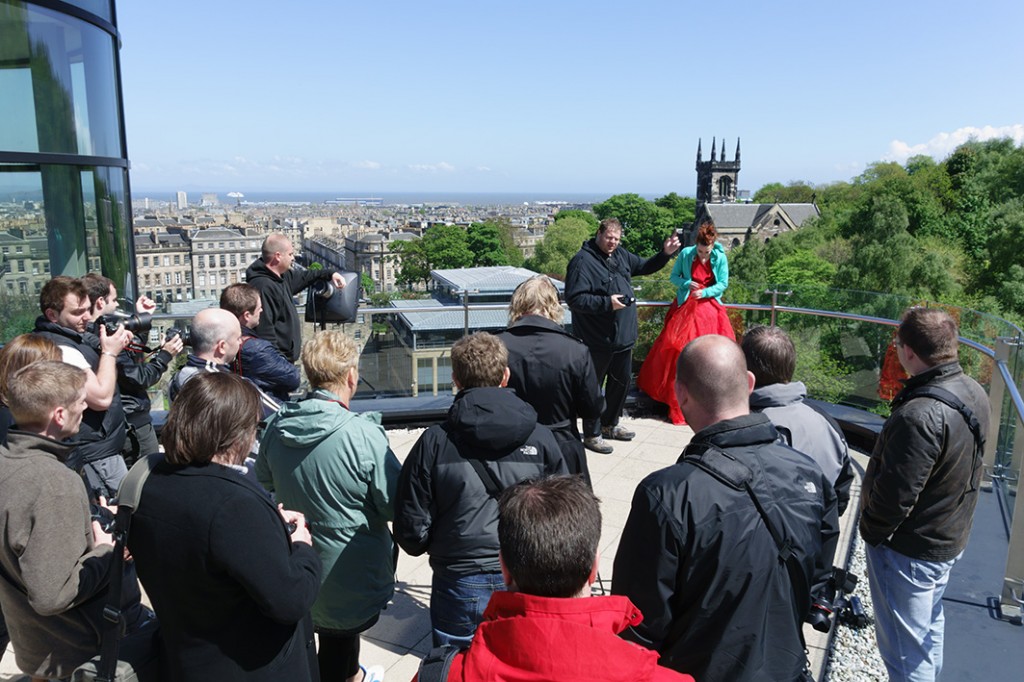
We had a rare sunny clear day in a run of mixed weather, though it was cold and windy on the roof terrace of the Glasshouse Hotel in central Edinburgh. The location provided strong backgrounds and details. Simon Burfoot and Chris Whittle from The Flash Centre brought along the Ranger (battery location) and Ranger Quadra (lightweight version) flash systems with Elinchrom Skyport wireless triggers. Of course, in the past if you turned up to a workshop with an Alpha body, you were unable to use the wireless flash connection unless you also remembered to bring a standard hotshoe adaptor. With the A99 (and NEX-6, RX1 and future models) the new Alpha multi function accessory shoe works directly with triggers.

Frank put everything into using just one light source, and used no reflectors, aiming instead for dramatic lighting by underexposing the main scene but lifting his model subject Nadine by local flash. This was achieved with the 44cm rigid square softbox, newly re-introduced to the Elinchrom system (I have used the original grey one for over 20 years – you only need to buy these expensive accessories once in a lifetime). Fitted with a honeycomb but no diffusing scrim, the single lighting head with this light shaper put a tightly controlled pool of light on to his subject. Though it’s easy to use digital SLRs as a pre-test light metering and flash balancing method, Frank works with a Sekonic flash and ambient light meter able to take incident, reflected and partial spot readings. It is very similar to the discontinued classic Minolta Flashmeter IV/V, with the same 1/10th stop accuracy and display of contrast and memorised values. If I was doing this type of work, I would use my Flashmeter IV, but I would also use its calibration function to match it to specific ISO settings on the A99.

doorhof-setup2

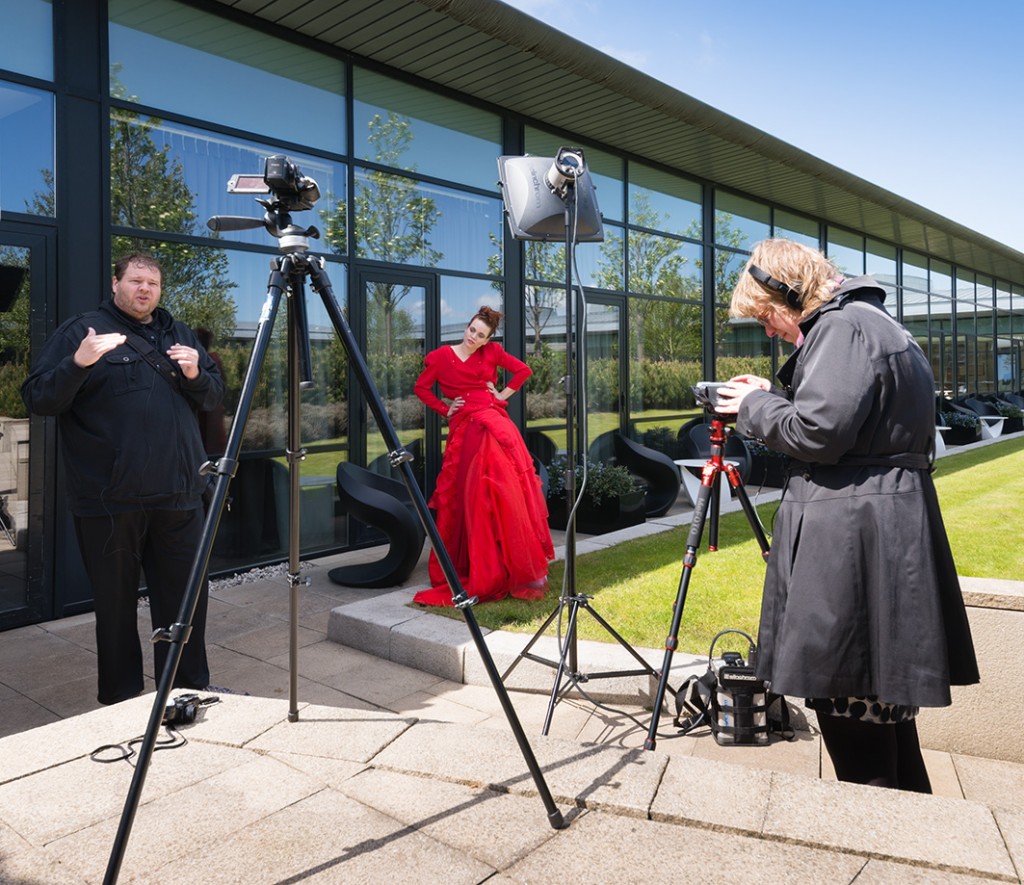
Frank’s wife Annewiek used multiple video cameras to film the workshop, as Frank provides his on-line tutorial material through Scott Kelby’s training site. Here you can see one set-up as he explains how he’s seeing the location, addressing the used of the glass window wall, avoiding unwanted reflections, placing Nadine in the shade then adding the flash to match an underexposed daylight scene. To achieve the required settings, he used ISO 100 at apertures around f/16 to f/22, with a 1/160th shutter speed, and mechanical first curtain shutter. I also followed these settings, which are not kind to sensor dust spots. Anyone using a Nikon D600 would have been in serious trouble! Even my ‘clean’ A99 which never needs any spot removal at my regular optimum working apertures between f/8 and f/13 showed a few visible spots at f/18. I would have used ISO 50, which I consider to be an advantage of the A99, and trusted shutter speeds to 1/250th with this camera for flash sync. But Frank was dealing with photographers some of whom had cameras incapable of shooting at less than ISO 200 or synchronising with studio flash at 1/250th without a slight second curtain crop to the frame. It would not have been fair to demonstrate using the advantages of the Alpha 99…

I did have in my bag, and normally carry, a 4X ND filter. With the Alpha 99, fitting an ND filter has absolutely zero effect on the viewfinder brightness, or the quality of view in sunlight. After all, sunshine with a 4X ND is just like a cloudy day in brightness, and you have no problems on a cloudy day. You can work with an ND just as ‘transparently’ as you can use an UV filter. An alternative would have been to use a polarising filter, which can also enhance the dramatic ‘dark sky – bright subject’ mix. However, Frank wisely kept clear of this. Polarisers have some pretty horrible effects on fabrics, skin and hair. Use them on portrait or fashion shots only with great care. Digital sensors are usually able to do deep blue skies without help.

doorhof-elinchrom44-web

Here’s the Elinchrom Ranger head as used. Frank asked delegates to restrict themselves to three shots per situation, a request generally ignored. I took some before the flash had recycled, to show the effect of the scene without flash, and with flash.

doorhof-set2-shot-web

This was my ‘take’ on this setup and it’s probably different from most as I used a 12-24mm Sigma HSM lens at 12mm. Now Frank did not explain to the photographers how he was using his electronic viewfinder, and I didn’t ask, but I’m sure he had it set to over-ride manual setting gain, as he was shooting on manual (M) with a degree of underexposure that would have made the finder extremely dark. I didn’t change my setting and though for all the other situations I was able to compose well enough, for this set-up my EVF showed nothing but solid black where the model was. As a result, I did not see what an ungainly shape was made by the extreme angle of the 12mm lens for a couple of poses.

alpha99-noview

The left hand side is very much how my finder looked. I don’t like this result, but I could not tell until after it was taken. Nadine was changing poses rapidly. This is one case where the optical viewfinder of my Alpha 900 would have been a better choice.

If you have a Sony/Minolta wireless flash set-up, you can overcome this whole problem. Your remote flash would perhaps need a softbox, or more realistically a small umbrella to match Frank’s localised soft flash and also receive the control signal from the on-camera flash. You would simply set the remote flash to Manual power not TTL, set the A99 (or other EVF DSLR) to Aperture Priority (A), set f/20, and rely on the flash’s auto communication with the camera body to set 1/160th flash sync and ignore the ambient light. You can also do the same with a slave cell triggered by a small camera top unit converted to invisible IR using a gel filter or old transparency unexposed film-end. You can not do this with the sync cable (PC socket) or flash triggers, as these connections do not tell the camera there is a charged flash fitted, and set the shutter speed.

Elinchrom! We need, for Sony and other EVF or LCD screen-only cameras, a flash trigger designed to provide a signal to the pin which the camera’s own flash system uses to auto-set flash sync speed when using Aperture priority. When this is live, the viewfinder brightness is set to auto gain regardless of the exposure mode (PASM) used.

For his first set-up, Frank was actually shooting full lengths from a distance with Nadine making a small element in a large view. I liked the structure she was posing under, and prefer in general to get pictures which are not a copy of the course leader’s work. Although this was also slightly underexposed for the background, I had no problem with the EVF when the subject was in a normally lit area.

doorhof-set1-shot-web

You may say, the subject was in sunlight anyway, so why use flash? The dual lighting gives a filmic look, like a movie set lit in Californian sunshine (and Scotland’s legendary blue skies complete the illusion). This essentially sidelight from the sun, with a frontal fill you can see most clearly on the fingers of the left hand glove.

For a further set-up, Frank moved to the roof terrace view over the north of Edinburgh towards Leith and the Forth (first image on this page). He had demonstrated sets suitable for normal to wide angle lenses, using the 24-70mm, and switched to the 70-200mm f/2.8 Sony SSM G for a different relationship between the model and the background.

doorhof-churchview-noflash-web

This was the view without flash – not a bad set-up as it stands. When processing my images, I found that the in-camera standard JPEGs of the A99 handled the red of the dress better than almost any setting or camera profile using Adobe Camera Raw. Colours like this are a good case for trying alternative raw converters, such as DxO Optics Pro or Capture One Pro. Their camera profiles are generally closer to the in-camera conversions than Adobe’s. Frank demonstrated how to use the MacBeth ColorChecker Passport colour patch target and its camera profiling software to create an on-the-spot profile for better ACR/LR conversions.

doorhof-churchview-flash-web

This is the shot with flash, again, in-camera JPEG sRGB. AdobeRGB would retain more potential detail in the red, raw conversion to 16-bit using ProPhotoRGB the maximum. But for that you also need something like a Eizo 10-bit monitor with a matching video driver, and no Apple Mac made comes with that. Build yourself a tower system and it’s just about possible to get 10-bit colour… but not using Mac OSX! My monitor is a regular old 27 inch iMac and if it’s 8-bit it’s having a good day. The colour looks lovely, but accurate it certainly is not. I don’t mind as 99% of all the screens any of my images will ever be seen on are no better, and the printed page is far inferior. Putting the above pictures into print would almost guarantee the differences you see here are lost.

smallscreeneducation

Because the Glasshouse’s rooftop function suite has a white translucent fabric roof, the overhead projector could not be used. So, Frank sat down with his laptop and the photographers. Later on in the day, the group moved to an inside room, and he demonstrated a series of processing steps in Lightroom with special attention to the use of plugins producing Clarity, pseudo-HDR and ‘image look’ and to fashion and beauty retouching.

To read more about Frank’s work, visit his own website www.frankdoorhof.com or follow him via Kelby Training. He regularly does workshop tours. I’ll be reporting on some of his views and hints for professional photographers, specifically, in the June 2013 edition of Master Photography magazine (you can subscribe here for this 10X a year magazine which we also produce).

For more information on the Elinchrom flash system, Skyport wireless triggering and battery powered Ranger/Ranger Quadra location flash, see The Flash Centre website.

– David Kilpatrick

Go wider than wide with Photomerge

In the latest incarnation of Photoshop, CS6, the Photomerge function is faster than ever before and leverages all the context-aware, pixel matching math of the previous versions enhanced to a degree you’ll find hard to believe.

Sony NEX and Alpha cameras have the same technology built-in for their sweep panorama mode, but anyone who’s used this frequently will know that failures happen, like stepped sea horizons and double imaged or squished-flat people.

Photoshop has the menu item Photomerge under ‘Automate’ in the File Menu. It is a panoramic stitching function, but it does not need you to shoot with a tripod or even shoot with care. You can stick a wide angle lens on your camera, take two pictures with radically different vanishing points, and still end up with a neatly stitched perspective.

What you need to know is how to NAME your images or what order to shoot them in. Contrary to what you might expect, Photomerge inherits its geometry from the LAST image in your sequence. So, if you have these three images:

This is the order you need to name them. I shot these with the bottom one first, of course – my level horizon straight-on shot. Then I aimed up, and then up again, overlapping three shots. If I then select these for Photomerge, Photoshop will correctly realise I want a vertical panorama stitch but it will not use the straight-on shot to set the image angle and geometry. It always picks the LAST shot, so I must rename my JPEG conversions 1, 2 and 3 as they appear above.

If your open tabs, or the stacked order of open windows, does not place the target perspective LAST you’ll get the wrong result. Here is what happens if the first shot (the bottom one above) is placed as the first tab in a multi-tab PS window, or the top window in a stack of separate windows, before adding OPEN FILES to the Photomerge window:

I used the NEX-7 with the 16mm f/2.8 SEL wide angle for these three shots. The composite, before cropping, measures a substantial 130MB. This technique enables you to use almost any wide-angle lens to create impossible wide views.

Here is the result when you stack the shots in the right order, so the program takes its perspective cues from the vertically-correct frame (the last one shown at the top):

You have no manual control over the perspective rendering. It’s all down to feeding Photomerge the right images, in the right order. Here is the fine tuned and cropped result:

This is an unretouched merge of the three frames. I’ve been trying this on various subjects, some rather silly, and Photoshop CS6 simply nails the merging even with focus, exposure or tilted camera errors. There are much lower cost programs which stitch images and do it well, but this takes a matter of a few seconds to create a final image equal to 40 or more megapixels. Not bad for a tiny 16mm lens!

Tip: instead of adding Open Images, browse and add one at a time, making sure the perspective-key shot is the last one added.

If you shoot architectural or landscape images, this function’s enhanced performance allows you to leave behind your 8mm. Except, of course, you don’t have one. If you do have an 8mm, welcome to the world of 5mm…

Added example – the next day…

I returned to the building (the other end of it) the day after posting this article because I wanted to add something far more complex, still shot by hand, using the NEX-7 and 16mm, showing just how amazing Photomerge has become. I wanted foreground and background elements, complex geometry and a matrix of shots not just a row of them.

Here is my matrix of shots – every one of these is an 85° diagonal view, 16mm on APS-C:

Here is the result of the Photomerge window before final adjustment and cropping:

This is a 400MB+ Photoshop document and over 200MB in flattened data size. Below is the final crop, with a small rotation and correction of vertical perspective:

This is a 119MB JPEG 6919 x 6013 pixels in size, no retouching has been used and the raw conversions are default with the 16mm E lens profile. Some fringes remain visible, the image could be downsized and corrected further. Remember.. this is the often-criticised 16mm which I find to be an excellent little lens. You can download the full size sRGB JPEG saved to Level 10 quality (14MB file) from the link below if you are Photoclubalpha subscriber. It will not appear if you are not a subscriber.

[private]

Subscriber Link

[/private]

– David Kilpatrick

Using Adobe Bridge/ACR for ‘film looks’ controlled by your Alpha

It’s now easy enough to find camera profiles – image looks created by independent photographers, as Adobe and Sony do not provide any – which make a big difference to raw processing using Adobe Camera Raw or Lightroom. There are also many fine adjustments you can make within these programs, able to customise the image output so that it either looks just like an in-camera JPEG of a chosen picture style, or like nothing you can produce in-camera.

Many users wonder, sometimes, why their raw pictures viewed in Adobe Bridge look different from in-camera JPEGs. Sometimes they look identical but then after working for a while and fine-tuning your preferences, you see big differences between the two if you shoot RAW+JPEG. This is in addition to differences which can happen if you set the camera to shoot in sRGB (useful for the JPEG) but your computer to save as AdobeRGB (superior in many ways for raw conversions intended to be printed).

In ACR/Bridge, you can choose as a Preference whether to build fast thumbnails or high quality, and whether to build full screen previews or accept whatever is embedded in the file. If you do not set the preference to build high quality previews and thumbs, what you see in the thumbnails is normally an embedded JPEG which is part of the raw file and an exact match to an in-camera JPEG even if you don’t save one of these. What you see in the larger preview pane will depend on your screen size, the camera, and the type of raw but for nearly all modern DSLRs on laptops the basic quality option will show the embedded JPEG and you will even be able to zoom it without interpreting the raw data.

If, on the other hand, you set your Bridge prefs to large size and high quality previews using a large screen such as an iMac 27″, and you have ACR/PS/CS5/Elements installed, Bridge will access the ACR engine behind the scenes and will render your raw files. It creates a ‘cache’ of full screen size JPEG files (which will eventually use a lot of disk space) which exactly reflect the settings for any given camera/ISO default. You have the choice, in Preferences, between having a single Default for each camera or a different Default for every single ISO increment on each camera. If you set the ISO specific Default, the conversion used to build the preview/thumb will be exactly the settings you have saved for that ISO. See below where I repeat this all again for emphasis.

The 100% and full screen fast forward keystrokes

Bridge/ACR will render the full sized 100% view of the raw using saved default settings if you used the Loupe (a small section only) or the very useful sequence of: press space bar = show the full screen preview; mouse-click with the cursor at any point on this to zoom in to 100%; scroll round using controls/mouse; magnify 200%, 400%, or 800% using scroll-wheel or Apple Magic Mouse finger-touch; return to Bridge browsing using space bar. Be warned that even with a fast machine, Bridge builds the sharpness of your enlarged view (normally 100%) in stages.

What you first see may look a bit soft, wait two seconds and it will get sharper, another two seconds and it will be transformed to pixel-perfect rendering. Never judge a Bridge/ACR 100% or loupe view the instant you access it. Bridge/ACR is clever enough for you to be able to go to the magnified view with one shot, and using your arrow keys move to exactly the same position in your other shots at the same view. You can, by this means, compare sharpness in a set of shots. Once each has rendered for that point in the shot, the cache makes sure you can go back and forth between images faster, they do not need to render again.

But it’s Bridge Camera Raw Preferences which hides the great feature I’m telling you about here – a tip which can enable to you use the lower, manual-only set ISO values of some Alpha cameras like the new 77 to ‘load’ different ‘raw’ films just by changing the ISO setting. Or indeed, other camera makes which have similar ISO control.

Different raw conversions can be made specific to exact ISO settings, so that if you select a given setting, its unique conversion will automatically be used and its effect will be shown in the preview and thumbnail created.

This would be a disaster for Auto ISO – but the Alpha 77 has six different ISO settings between 50 and 160 which are NEVER used by Auto ISO, and can safely be used for my tip here. Also, there’s really not a great deal of difference between the noise, sharpness, and dynamic range of ISO setting with this low range. They are all very good.

ISO-specific default magic

So, I have an Alpha 77 with ISO settings 50, 64, 80, 100, 125, 160 all of which are very low noise and good quality. In Bridge/ACR, I can decide that ISO 50 will be used the Vivid camera profile, strong contrast curve, a certain degree of capture sharpening, a certain black point and so on. I can adjust all this until I think that ISO 50 looks just like Velvia film. Then I save the new default.

Taking a frame set to ISO 64, I can make a default which I think looks like Kodachrome 64 perhaps using the Landscape profile. For 80, I might decide to make a fake infra-red process default with added grain, monochrome conversion and contrast effects. For ISO 100, a default which is standard and looks like a good neutral colour slide. For 125, maybe an FP4 in acutance developer printed on G4 paper mono; for 160, a Portrait profile combined with no sharpening, to imitate Vericolor Type S or Fujicolor 160N.

The examples below do not use different ISOs, I have used one raw file to show the differences, of course!

‘Standard’ – this is the colour, contrast and profile used when Adobe Standard is set as ‘Camera Raw Default’ in Bridge on the Alpha 77. This default includes WB As Shot, Exposure as shot (0), no Recovery, no Fill, Black point 5, Brightness 50, Contrast 25, Clarity/Saturation/Vibrance all at 0, Medium tone curve.

This is the same overall conversion, using a profile called ‘Neutral’ designed to be similar to the camera’s Neutral JPEG setting.

This is a profile called ‘Vivid’, again with no other adjustments.

This is an interesting custom profile called ‘Positive Film’ which clearly has some major adjustments.

This is ‘Standard’ (not the Adobe Standard) but with multiple adjustments saved in the Default – Brightness to 75, Clarity to 25, Saturation and Vibrance both to 20, Strong contrast curve. This Default is a custom one which I prefer for many shots where good saturation and midtone brightness is needed. In fact, many Alpha 77 users advise changing the ACR default Brightness from 50 to 75 permanently as the 50 figure used by Adobe appears to make the images flat and dark.
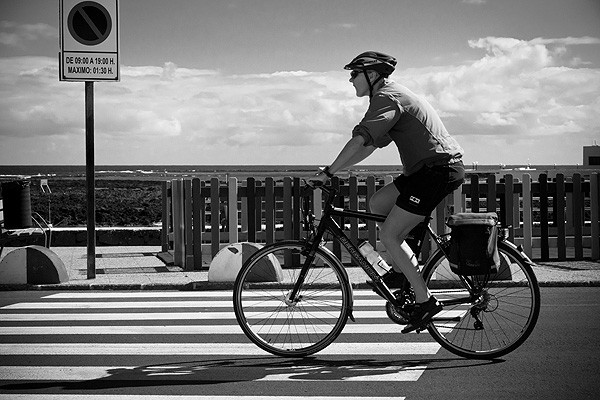
This custom high contrast ‘red filtered’ mono conversion includes strong lens vignetting added (by moving correction sliders to zero) and a greyscale rendering controlled using the Hue/Saturation/Luminance control tab for colour balance. Blue, Aqua and Purple values have been lowered and Red and Orange values raised to imitate a camera filter on panchromatic film.

If you have not found and installed any third-party profiles, you can instead make detailed adjustments including contrast and saturation for much the same effects.

I am fully aware of the ‘well I can do all this in Photoshop‘ response, the point is that all these and other far more complex processes (including any of the raw conversion Presets found in popular styling packages by Marcus Bell, onOne and others) can be effectively assigned to one chosen ISO setting in the ‘protected from Auto’ range 50-160 on the Alpha 77.

Now, when I open my folder of raw of images in Bridge set to create High Quality thumbs and large previews, they can all get exactly my customised process treatment for the thumbnails depending on the ISO I have set. One image might appear with the b/w process above and the next with colour. I will be able to preselect a different Bridge preview and a different startpoint ACR process just by selecting a different ISO on the camera. I can leave ACR’s default settings in place from 200 and up, so I will never get Auto ISO producing strange differences from one frame to the next due to Bridge/ACR presets. Yes, I did once set some different conversions for specific ISOs in the Auto range and it really messed up by image selection – I found I had increased brightness for 320 but not for 400 (etc) so my exposures seemed to go all over the place when Auto ISO chanced to pick small changes from one shot to the next.

You can apply more NR and sharpening control to ISO 200 to 12800 as needed – and again, this will automatically be applied according to the ISO, to the preview and thumb as well as the opened raw for conversion. But it won’t look odd as the exposure, colour and contrast will remain constant.

Pros and cons

If you want to revert to a standard single process for all ISO settings, you’ll lose the customisation of Bridge/ACR but you can save each setting as a Camera Raw Default process (named) and restore the settings at any time. Or, you can just reserve one careful combo for a single ISO setting such as 80 and only set this when the specific result is wanted, leaving every other setting at factory default.

It only applies to one camera body at a time, you would need to set up the same defaults for every different similar body you use – and not all Alpha bodies offer the useful 1/3rd step ISO increments and low ISO range which make the idea practical. But, this is also an advantage, because if you process files from another camera of the same exact model it will be unaffected unless you set it up. Camera Raw Defaults can be set as specific to each serial numbered body, and each different ISO, so there is never any need for someone else’s raw files to be accidentally altered by your own personal setup.

Profiles

I use a set of Alpha profiles I have assembled from as many sources as possible, but mainly from Maurizio Piraccini’s development for every KM/Sony Alpha camera:

http://www.piraccini.net/2011/02/profili-colore-sony-a900-per-adobe-lr.html

These are also linked to via a Photoclubalpha Forum thread:

http://www.photoclubalpha.com/forum/viewtopic.php?f=6&p=66090#p66090

To read a Forum thread about ‘Deep’ profiles (which is mainly about noise levels, not about the image looks themselves, but includes instructions on how to install all similar profiles) go to:

http://www.photoclubalpha.com/forum/viewtopic.php?f=32&t=5786&p=60905

These threads contain links to profiles provided or sourced by Agorabasta as a forum contributor including some for most makes.

If you have any sources for other sets of created profiles, for any Alpha models, please add a Comment at the end of this post, and provide the link (crediting the source or the author if you have that information).

You read it here first – and you’ll never forget how this can be used. Lightroom offers the same functions and preferences. Other programs may follow suit. Now you can use your manual ISO settings for raw files just the same way you can apply picture styles to in-camera JPEGs, and get the results in ACR/Lightroom – no need to be restricted to Sony Image Data Converter to read tags.

– David Kilpatrick

Free download PDF guide to Adobe Camera Raw

You can open or download an excellent (slightly dated, unrevised since ACR 6.1 but finally translated into English from the original Italian by Francesco Marzoli) guide to all the deeper functions and tricks of efficient workflow using Adobe Bridge, Camera Raw, Lightroom and Photoshop from X-Rite:

http://www.xritephoto.com/Documents/Literature/EN/GuidaCameraRaw_en.pdf

This PDF instruction book obviously mentions the use of X-Rite’s ColorChecker Passport for calibrating cameras, that’s why they have sponsored the guide. But it goes far beyond this to explain with clarity all the controls of ACR, and many tips are given on how to use them best.

As an example, we didn’t know that Bridge could be forced to use Camera Raw without taking over Photoshop – meaning it can be run separately, allowing you to do other work in Photoshop while ACR does file conversion and saving from within Bridge alone.

You can load this guide into your iPad or other reading device. Just SAVE the target file, and ADD to your iTunes Bookstore Library, it will then be readable. For other devices simply save the PDF and transfer.

Sony ‘HowTo’ videos – a different level

Paul Genge of Sony UK noted my criticism of the Sony corporate videos. Well, what Sony were not publicizing so well was that Paul has been making some rather homespun but far more valuable and interesting videos – in fact, going beyond the usual remit of Sony staff to do stuff almost off the cuff.

I remember Paul telling me a few years ago that Sony was most cautious about any publicity material, especially its wording. Even short press releases had to be approved by a management meeting and looked over by the lawyers. That is not unusual with large corporations.

It’s also, back in the 1970s to 90s, what made Dick Bryant’s job with Minolta so remarkable – he had a roving brief and an expense account and he could travel pretty much anywhere in the world and publish any set of images he wanted (such as his exceptional treatment of Eugene Smith’s Minimata essay). He may have reported back to Osaka but he certainly had a degree of freedom, creative and fiscal, which very few representatives of corporations seem to have today.

Could Paul convince Sony that uncontrived, honest, genuine enthusiastic reporting and involvement with photographers merited a similar job today? Doing a Dick Bryant?

Here’s one example, Paul with our friend Gustav Kiburg on Inner Farne in July.

What you need to do, though, is visit Paul’s complete SonyHowTo YouTube collection (as I write this I think there are 27 short vids up, varying from wobbly and unpolished to pretty good – all well edited, with excellent use of inset illustrations and still photo examples).

Here’s the link:

http://www.youtube.com/user/SonyHowTo

So far Paul’s channel only has 44 subscribers (Sept 1st, I’ll bet that changes) and if you subscribe you can also ask to be notified by email of new vids. Also, you can chat with Paul on the comments sections, and you can probably request subjects to be covered. I think we should ask for – using the Alpha 99 and 500mm G lens…

– DK

Alpha 55 video of a rare occasion

On Saturday, the Household Cavalry chose to provide a guard of honour for a wedding couple lucky enough to have planned their wedding for the day the mounted regiment was in town. I photographed the event from the unique viewpoint of an Alpha 55 fitted with a Sigma 8-16mm superwide zoom, mounted on a 3.5m high Manfrotto stand with a 7″ Lilliput HDMI monitor connected on a long HDMI cable to compose and follow the action. The sound is just what the camera recorded, no external microphone was used.

Alamy blacklists compact and bridge digitals

In an unusual move, probably designed to cut down the work of rejecting submissions which fail to make the grade, the on-line picture library Alamy has published lists of cameras (by make) which will NEVER produce a file acceptable to pass their Quality Control. It includes all the Sony Cyber-shots ever made as far as we can tell! They say: “Check your camera – do NOT submit any images from camera models featured on the list below. Camera models featured on this list do not produce files that are capable of passing Alamy’s QC standards.”
Continue reading »

1 2 3 4 5