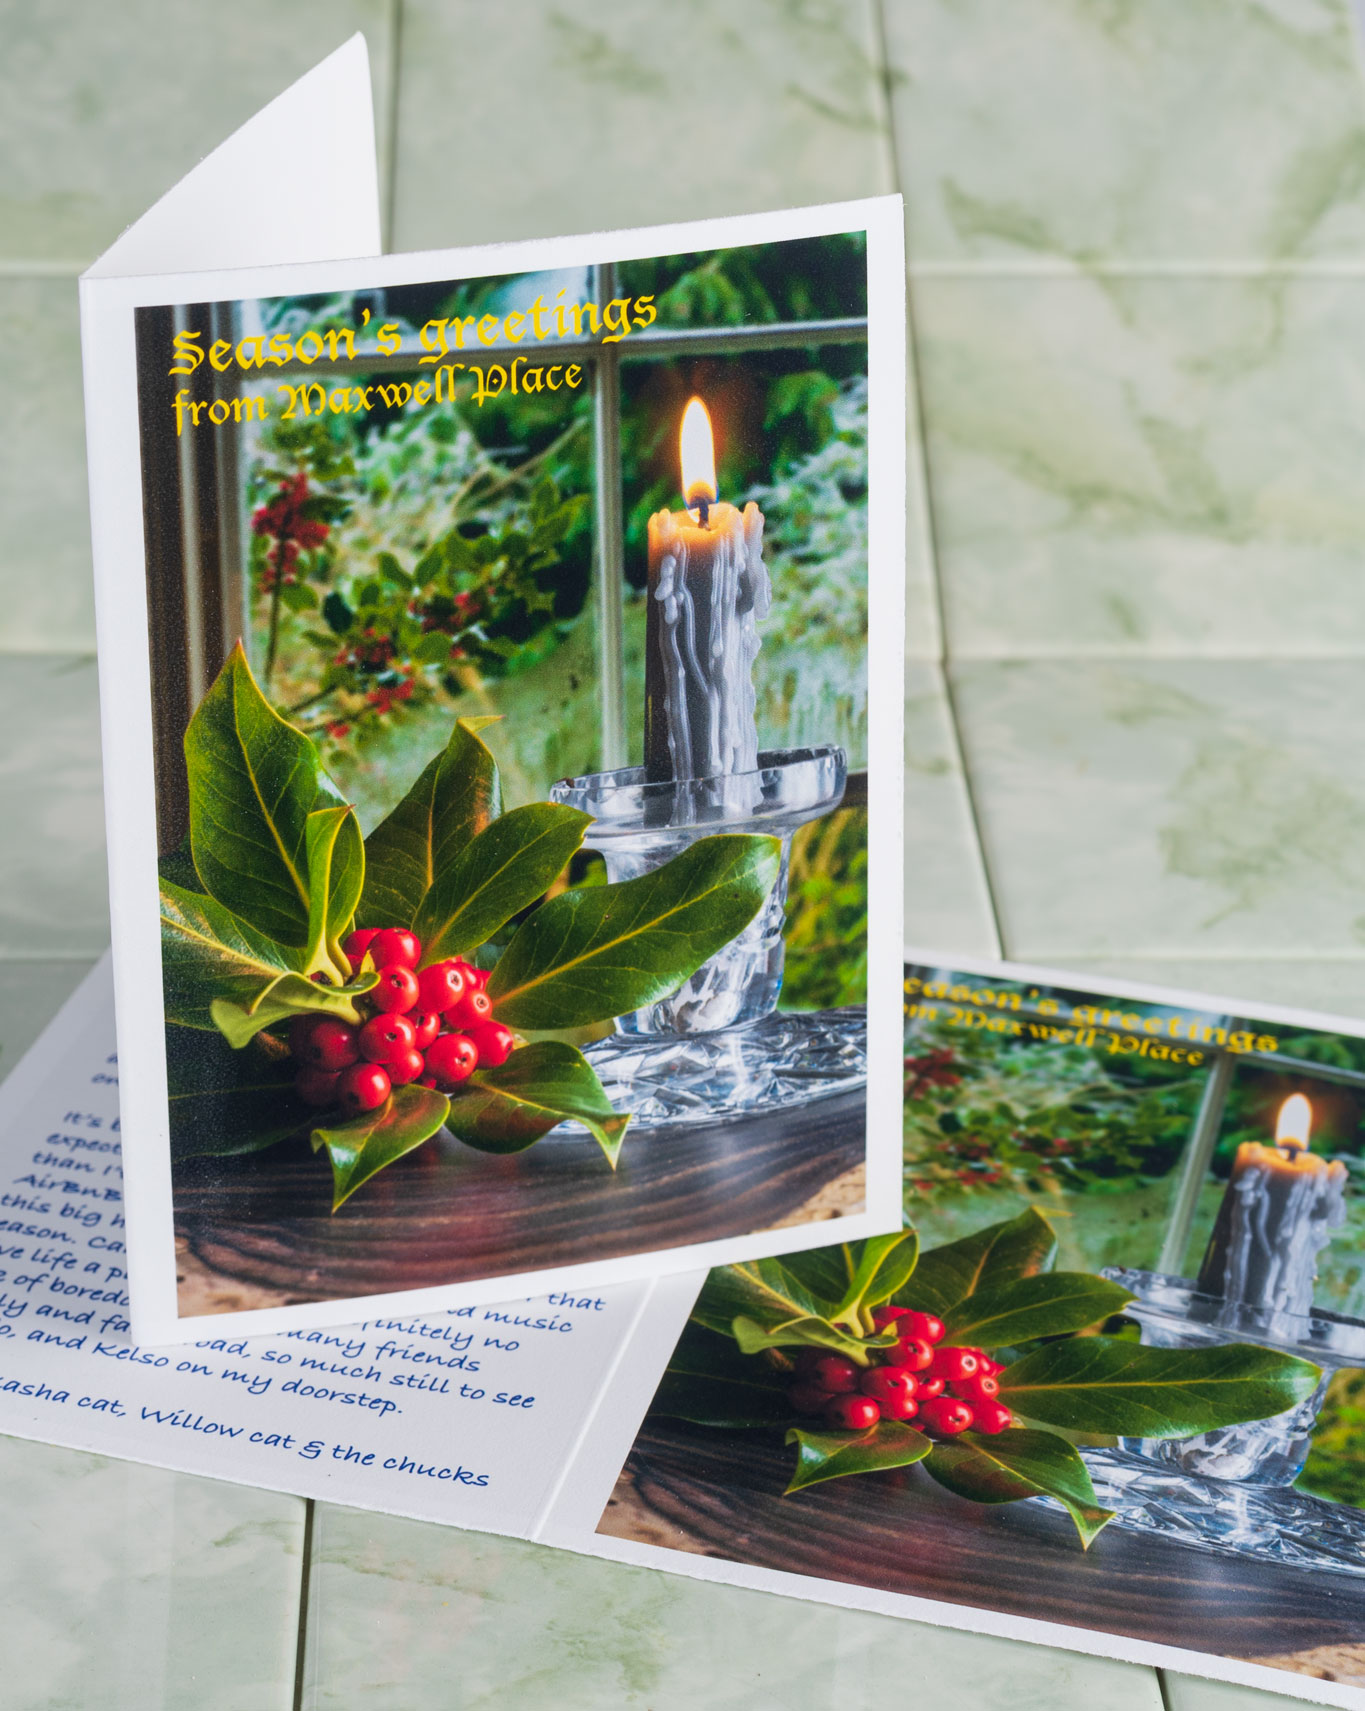
A seasonal montage for a Christmas card

In early November, my local camera club held a non-studio table top photography evening, inviting members to bring three items along, set them up and see what photographs could be got. Lighting was either none (the room’s ceiling lights) or portable camera flash. A few backgrounds and reflectors were brought along too.

I took a candle in cut glass holder and a wooden base of polished cut teak, and some holly with berries from my garden, along with the new Tamron 90mm f/2.8 Di III VXD full frame macro lens for my Sony A7RV, and a tripod. For lighting, I brought two UYLED USB recharged photo-video light sticks with adjustable colour temperature and brightness.

This one of the frames taken. There was no black background, just a dark curtain about 2m away at the end of the room. For my set-up, the room lights were turned off, with the camera first focused and composed and locked to manual focus. ISO was set to 100, WB to Daylight, the aperture to f/16 for a long exposure moving the light sticks all round the subject to wrap the light. Aperture priority auto was used, with no EV correction for this example. A few auto exposures were made with +1 EV and the time ranged from 5s to 25s giving a choice of how much detail appeared in darker areas, and the colour of the candle flame. Moving the light sticks around gave a range of exposure times. The one I chose to work with later was the shortest exposure.

With so little light reaching the background, it’s effectively black. This could be used as a Christmas card with a message in the upper left black area, but a brighter exposure would be my choice for that. This rather more subdued shot was destined to be quickly combined with an old shot taken of my dining-room window in winter.

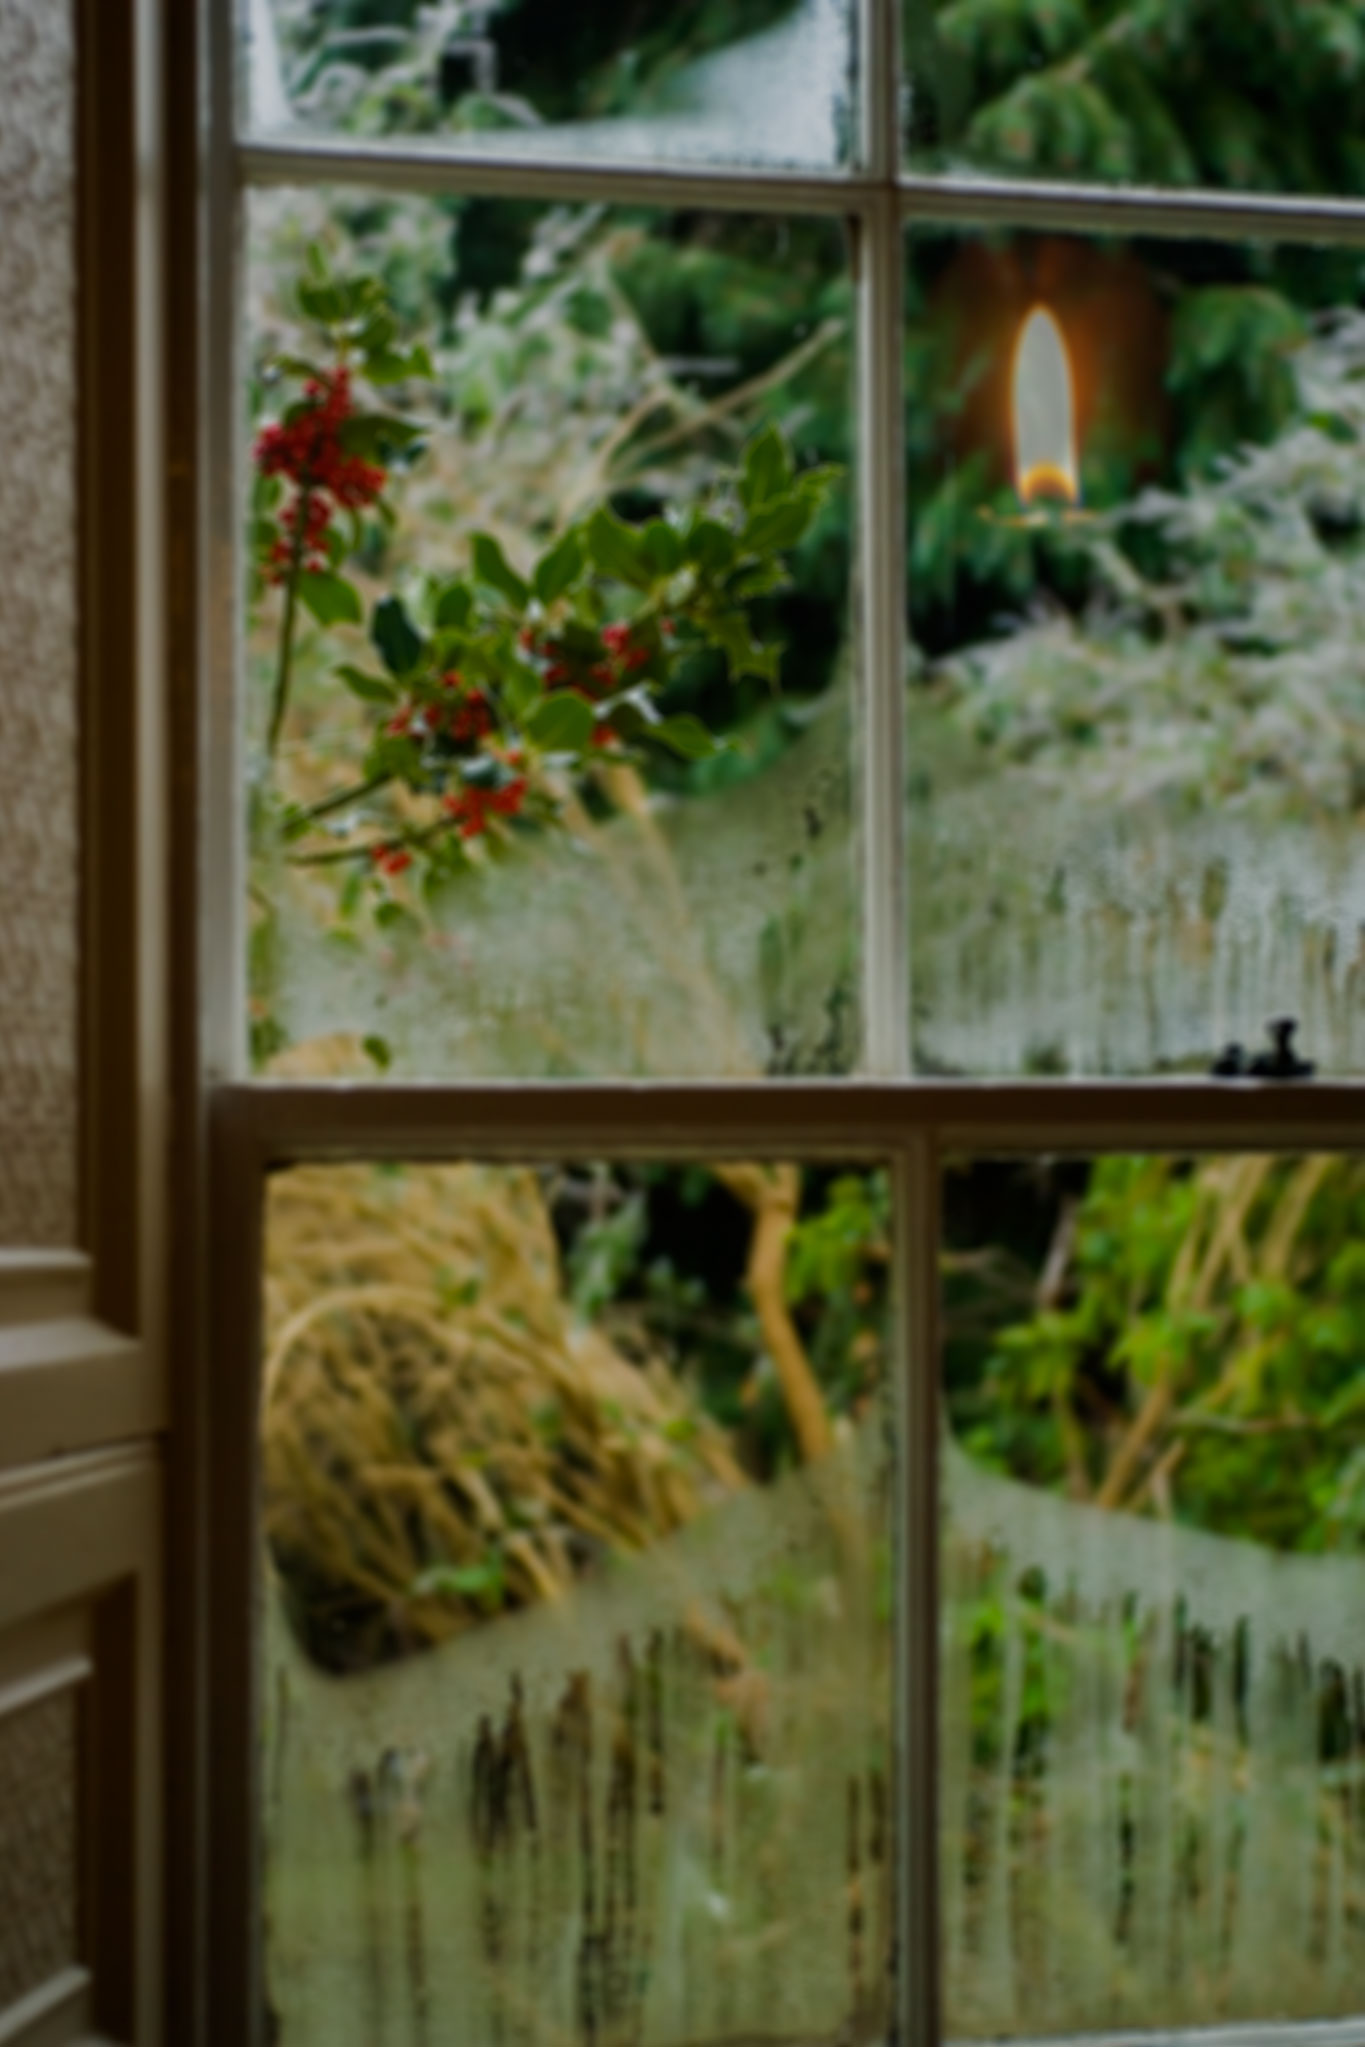
What may be seen straight off is the floating candle flame! That’s because where I wanted to cut the candle out in a Layer by making a quick mask using a Path, this would not work for the blended flame. The original window photo (Christmas 2006, Sony A100) is sharp, so was given brushed-in Lens Blur adjusted by eye to look right, before the flame was clone-brushed in using Lighten.

This is the Layer on top of that Background Layer, as masked. A fair amount of retouching for dust was also done, as the subject had been around for a year or so since the candle was last lit! For a ‘proper’ studio job, everything would have been scrupulously cleaned. A 61 megapixel sensor with a lens of the Tamron’s sharpness reveals even the smallest speck of dust or scratch on the glass. With the cutting out and masking, and tidying up, it took me about an hour before saving the Photoshop file as a .psd with its two Layers.

It doesn’t matter that the cut out round the flame looks rough, as the tones at its sharp edge are identical to the tones in the background image.

This is the result. It’s not entirely convincing as the glass did not have that garden view beyond it, and has a metallic look from the dark background. The candle was dark grey and I think if there had been a suitable red or green one attractively melted in the same way it would have been better. But it looks wintery!

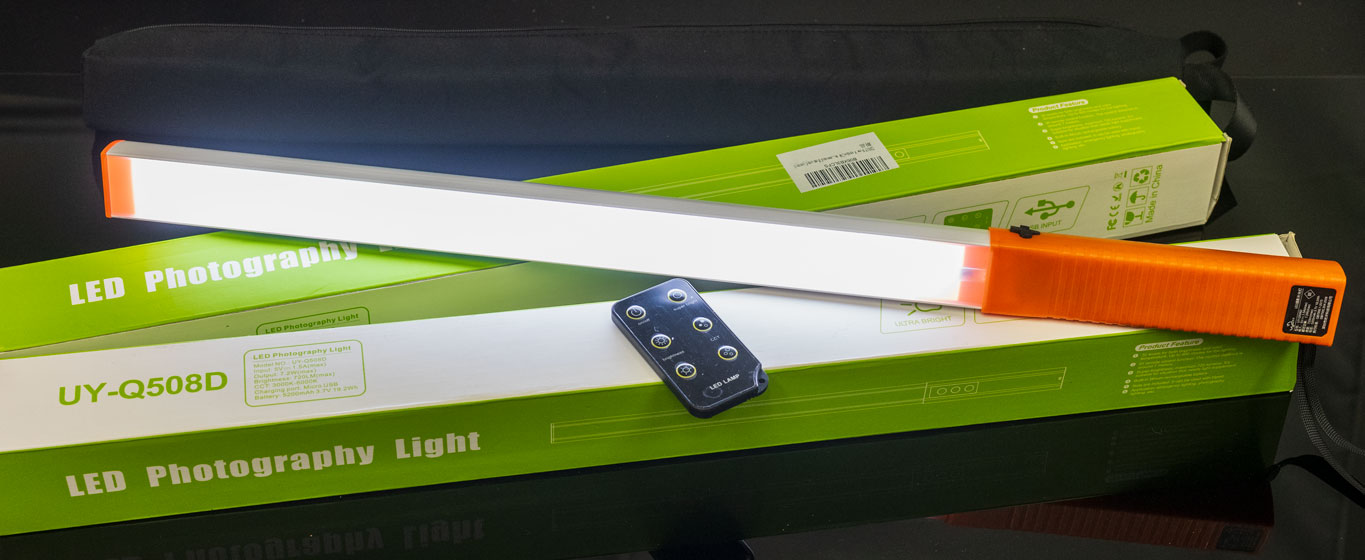
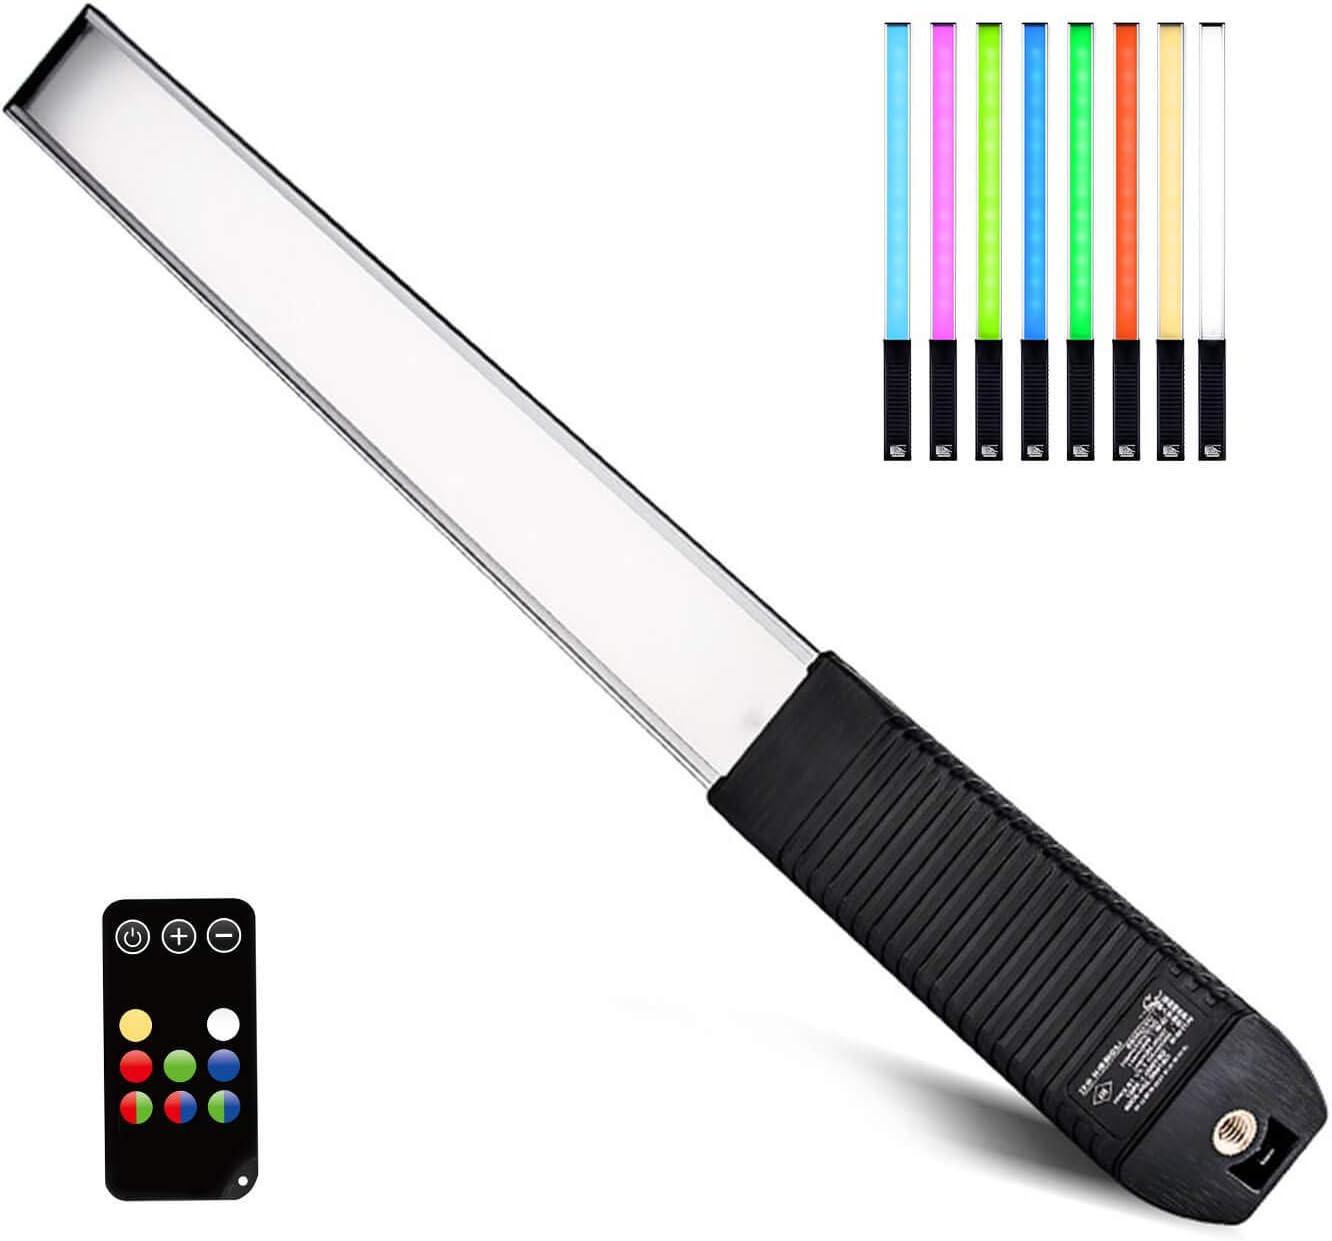
These are the LED sticks I used to wave all round the subject, either side and ahead of the camera position. They don’t seem to be made any more, as there’s a new version with full RGB colour change, otherwise similar with a tripod thread for mounting at the handle end, and the remote control for colour and dimming. The LUXCEO Q508A, below, is £49.99 on Amazon.

I’ve found my tungsten-to-daylight adjustable pair from 2018 very reliable! If a roomful of readers click any affiliate link in this article and decide to buy, I may be able to afford an RGB upgrade…

Here’s a studio shot from when I bought the light sticks, created by carefully moving one in a circle round the subject and keeping the distance and time as steady as possible. At least two circuits were made with the light at different heights, level with the subject and higher up.

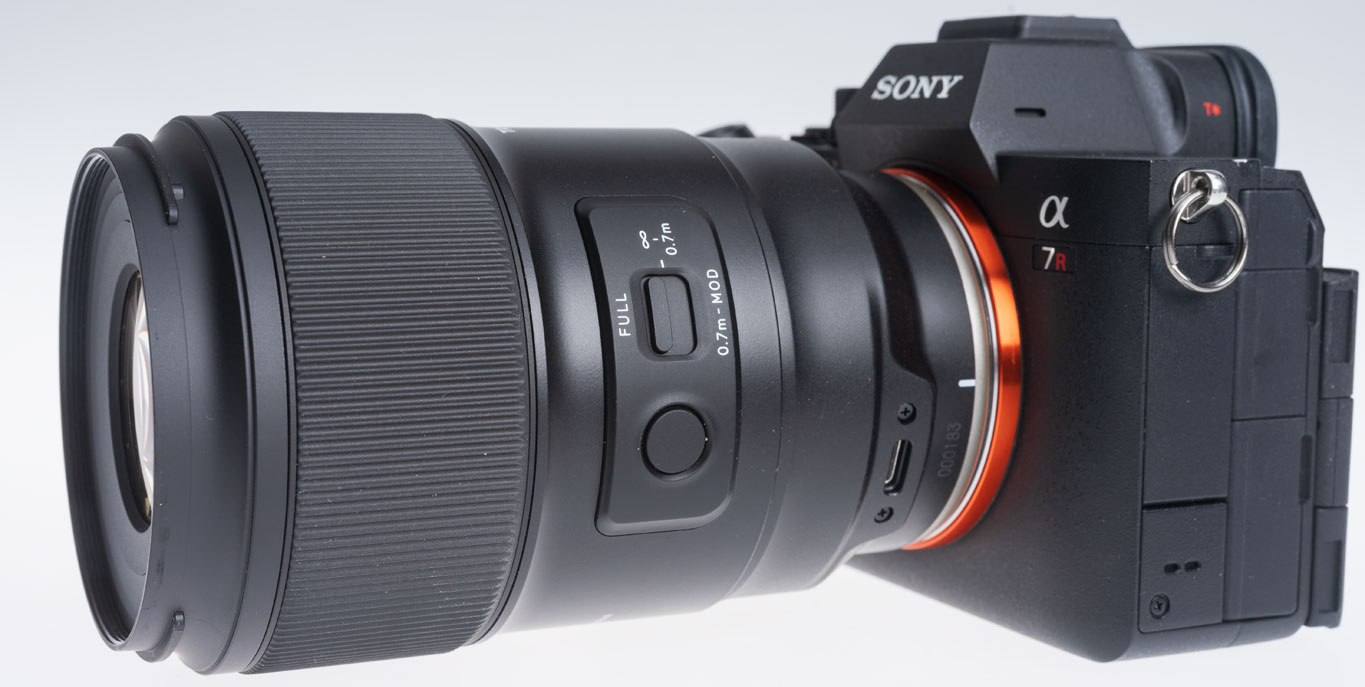
This is the new Tamron. I have a report to be published in Cameracraft due out on January 1st 2025, but in a month of using it I’ve also taken many more different images – more than the magazine can show. So I’ll be putting a page of photographs here with a link on the printed page. The lens costs under £600 in Sony FE/E mount or Nikon Z mount. Thanks for the loan of the review lens to Tamron UK – https://www.facebook.com/TamronUK

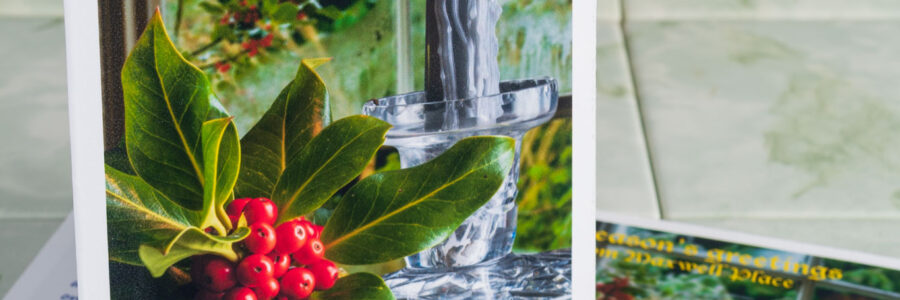
The Christmas card prints were made on 20-plus-year-old Lyson 300gsm double sided Smooth Fine Art paper – a box abandoned after I got an Epson P3800 pigment ink printer (which still runs thanks to Marrutt refill cartridges and inks). These original Lyson papers don’t handle pigment inks well. But they DO work with Epson Eco-Tank ET8550 dye-based inks, even if the black is pigment. In fact they work so well that ‘Printer Manages Colours’ and no colour management at all was needed. Set the printer to Matte paper, load the main tray with A4s halved to A5, use Velvet Fine Art as the paper setting and the cards were dry enough to crease on my Unibind Creaser directly off the output tray. The Lyson paper came from Marrutt too all those years ago for tests with their Quad Black inks. I never throw anything away!

– David Kilpatrick

AI cuts reflections in glasses

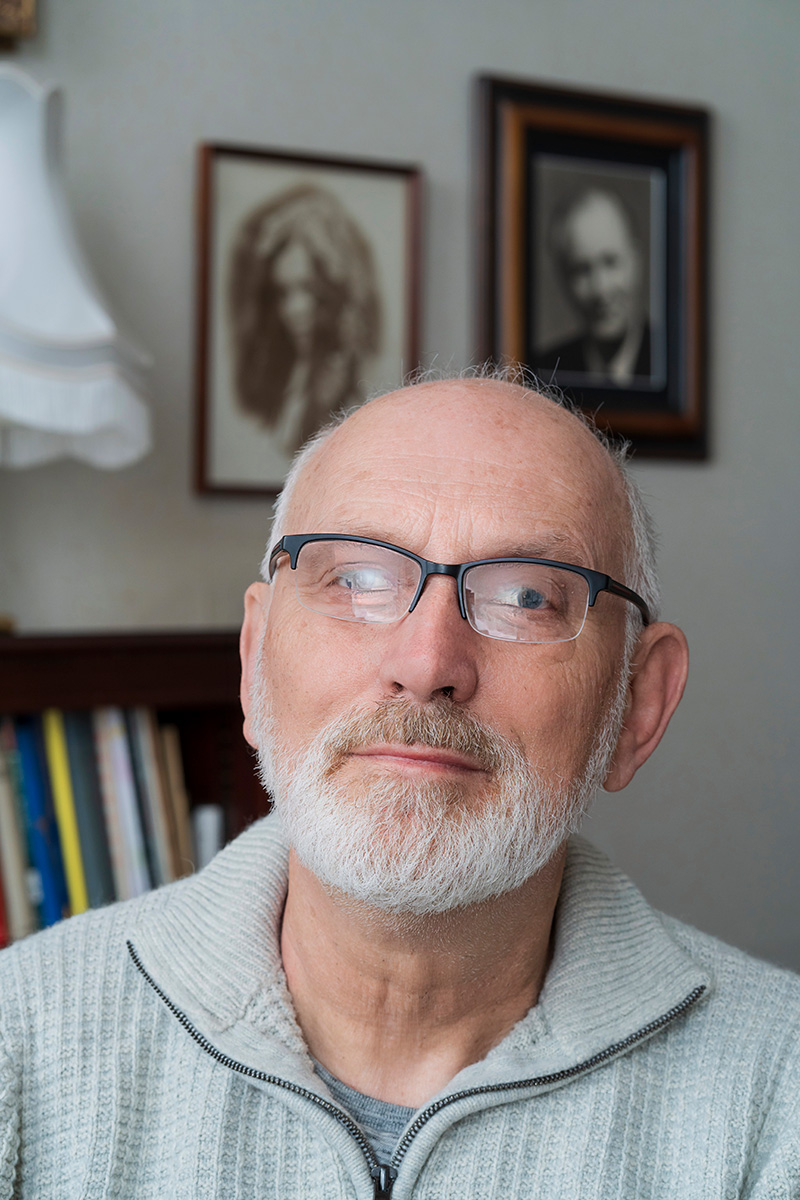
This is a follow-up to our last post about PortraitPro. Using a self-portrait taken for the purpose with bad reflections in uncoated reading specs, I went through the options of the reflection removal process. Mid-May a 15% discount was authorised for code CC524 at www.anthropics.com which applies to all 50% discounted program downloads.

It was taken on the Sony A7IV with 85mm f/1.8, tripod, ISO 400, lens at to f/8 and control through iPhone 15 Pro Max using Sony Creators’ App remote viewing and control. The screen on the A7IV was vertical and facing me, so I could also look at the camera and see the reflections move as I changed my head angle. Setting this up showed me some problems with the A7IV articulated screen design I had not realised – it can only face the self-portrait subject when folded out at the left-hand end of the camera, which with a Arca-Swiss L-plate means hanging down… obscured by the tripod head! So no L-plate but standard Arca small plate, and camera upside down compared to normal hand holding.

This is the result using PortraitPro V24. Read on to learn more, and don’t forget if you decide to get this program use Cameracraft’s additional 10% discount code, CCV245.

PortraitPro has come a long way in a few years. At the top end, the Studio Max version is a £308 program which costs £154 with the 50% download discount that Anthropics have offered ever since the days of CDs in packaging. Since no-one now buys a CD, the real price is £154 (with 10% off for Cameracraft’s code, CV245 in the latest May/June issue).

You may not need Studio Max with its 48-bit file capability, workflow from raw to exported finals, multiple image batch processing intended to auto retouch complete portrait sessions, handling of wedding groups and granular control fine-tuning its effects. The basic V24 includes this function and costs £99 less 50% download only less our 10% – so £44.55.

It is now very fast indeed on Apple Silicon and integrates with Adobe’s photo programs. Under the hood it uses some of Adobe’s functions, without venturing into Generative Fill AI to change a digital capture beyond the scope of many competitions. It uses AI, but does not rely on on stolen images or ones licensed for almost nothing in bulk from the big picture libraries. Anthropics built their platform on measurements of the human face and body, research into what people like or dislike, and many years of coding. When it uses image-based AI it draws that from your photo and its bank of facial features modelling data.

The Reflections in Glasses problem

Recently we came across a question in a professional photo organisation Facebook group asking how it was possible to remove reflections from glasses. It’s very difficult, and when it happens in a set of pictures where the photographer is unable to prevent it, it can ruin groups and presentation shots. Many battery studio-location flash heads now have very low power modelling and it’s all too easy to light your subject and fail to spot that your octa-box is reflecting in specs.

PortraitPro’s specimen example might just be good luck, so I decided to test Version 24. My studio room has shutters when blackout is needed. Two pure white plain blinds 110 x 220cm cover the tall south facing windows to prevent furniture, fabrics, art and photographs fading or warping in direct heat. They make a wonderful giant dual light source in daytime sun even in midwinter but reflect in glasses when the camera angle is not just right.

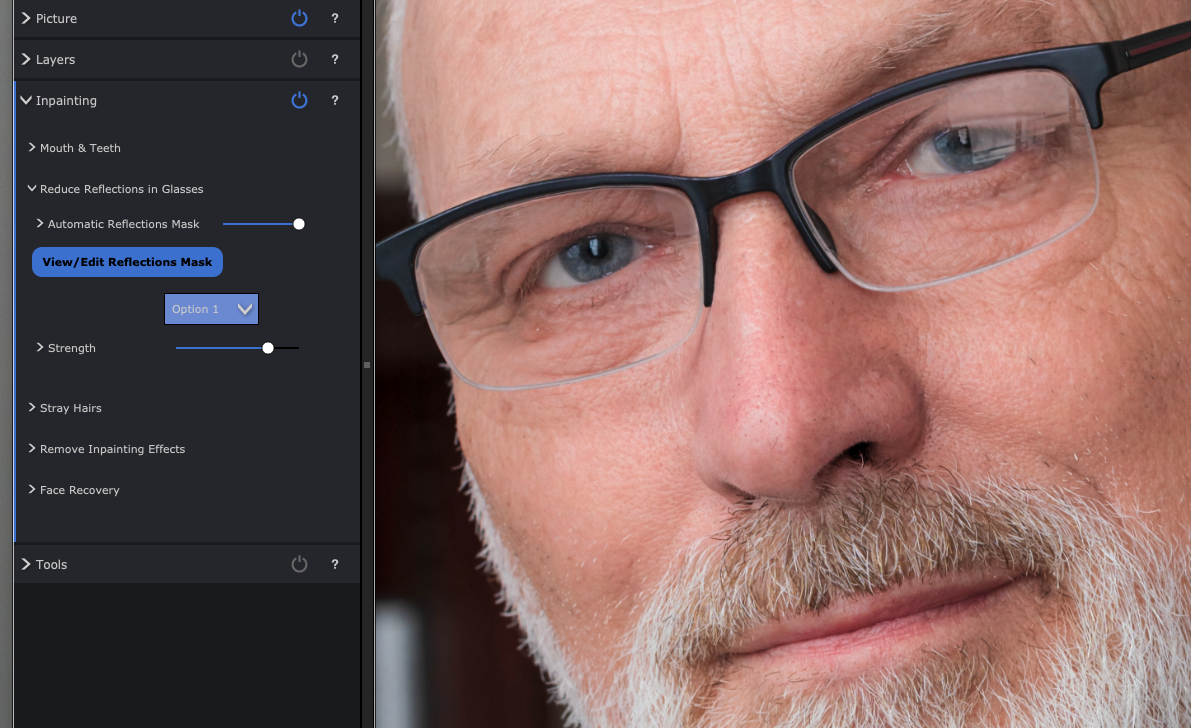
Removing reflections from specs does not come under the Eye menu – it’s under the “Inpainting menu” along with Mouth & Teeth and Remove Stray Hairs.

This is a crop from the original file.

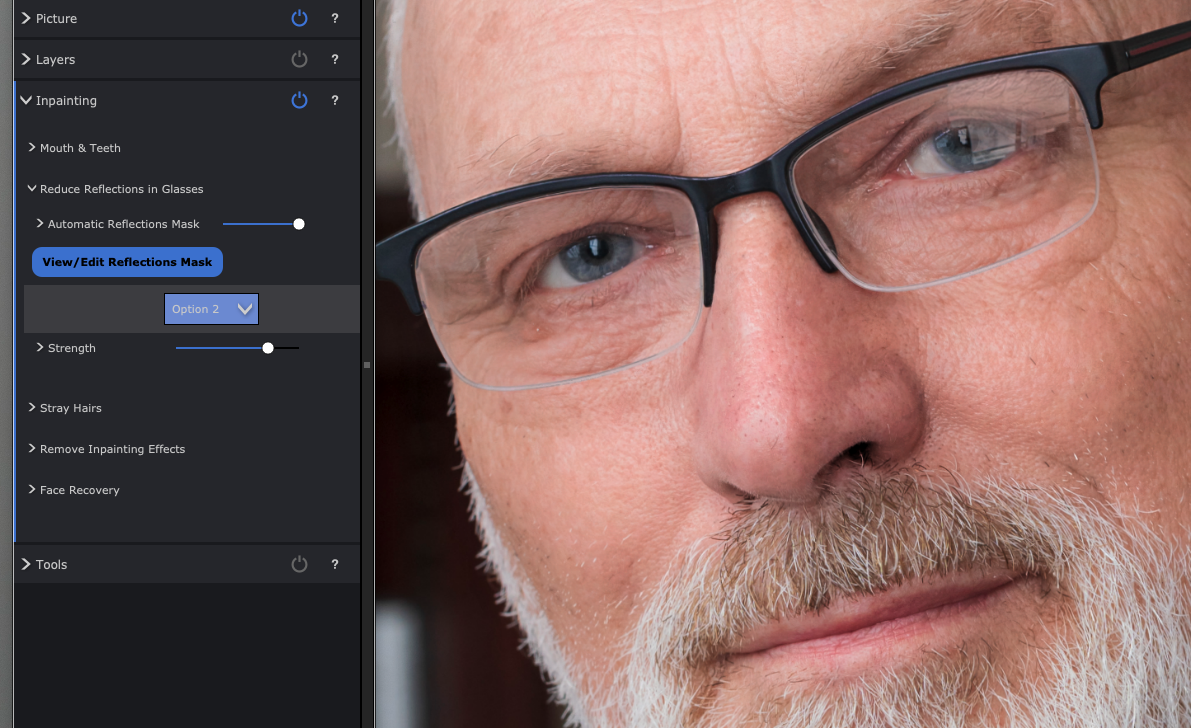
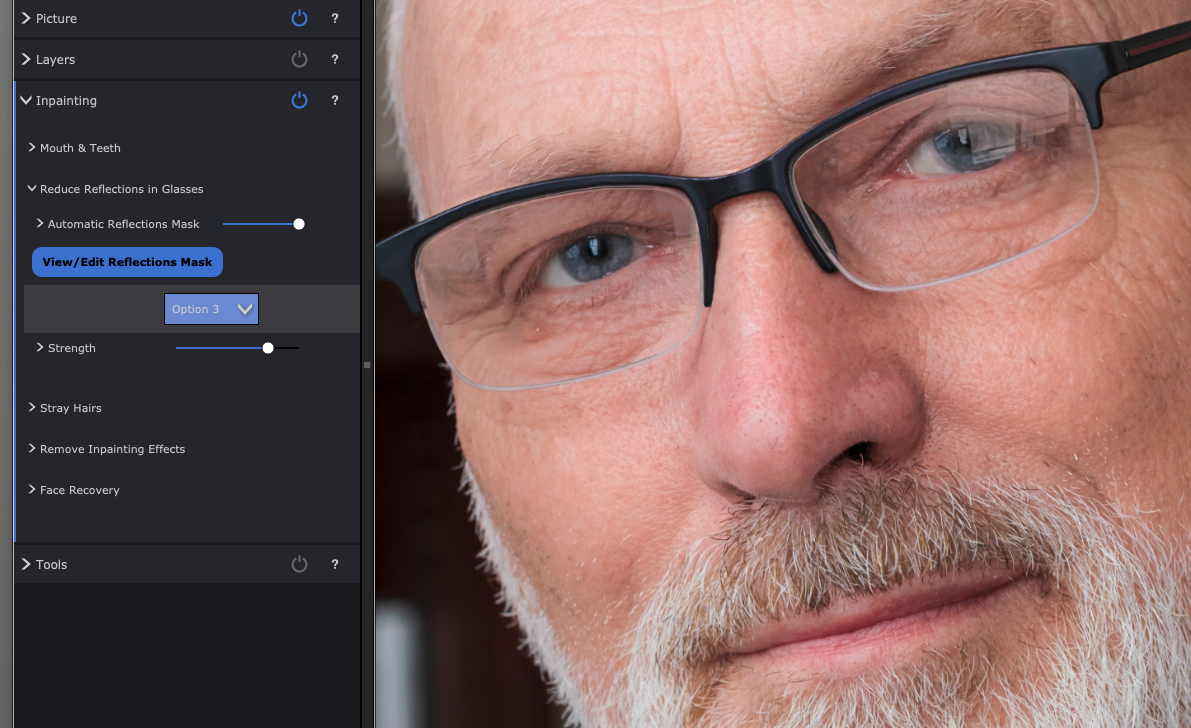
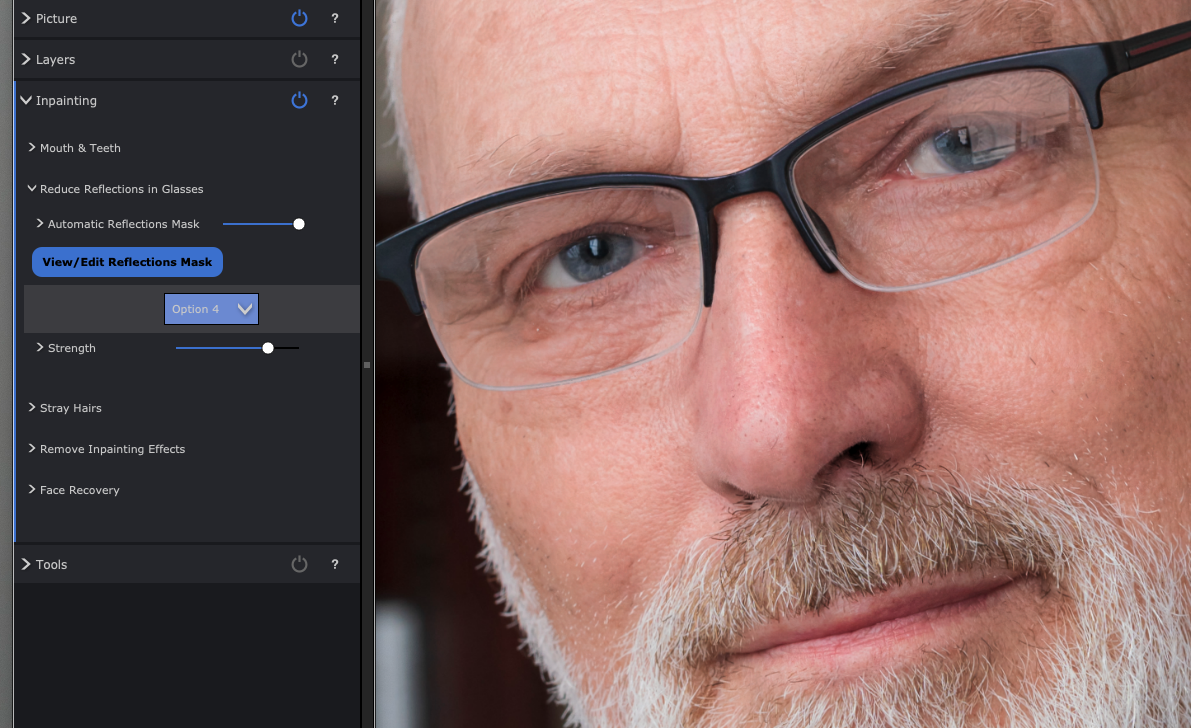
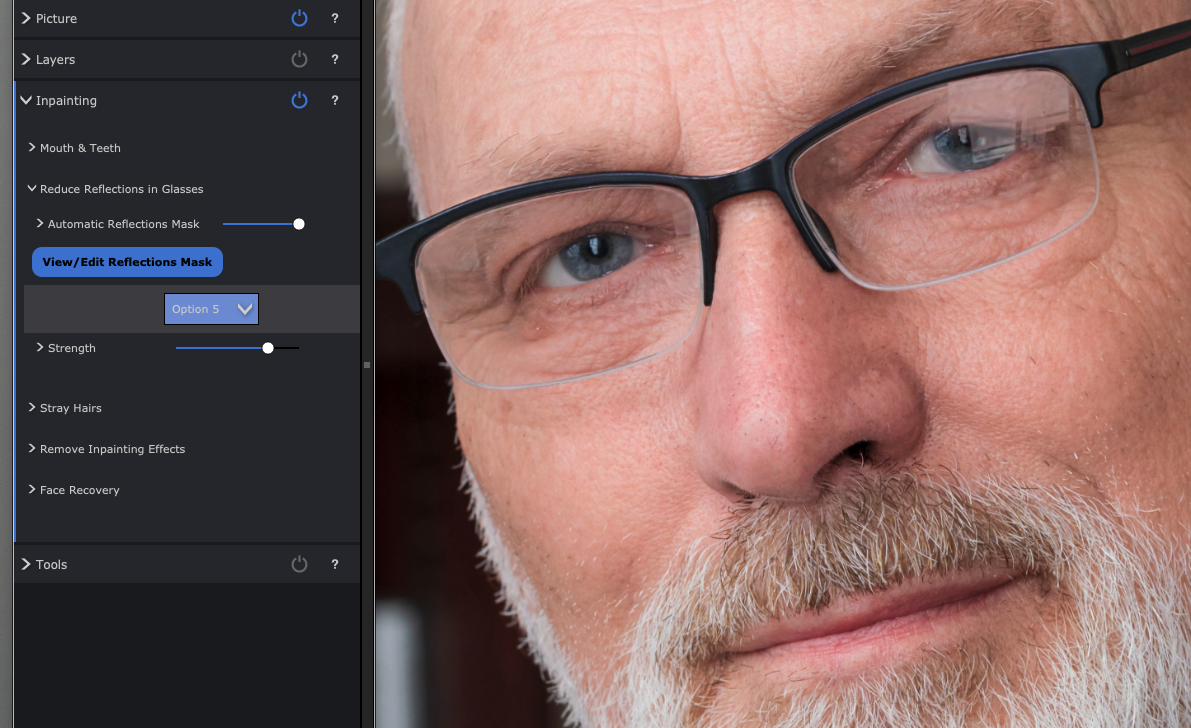
The Reduce Reflections in Glasses view above shows other retouching functions too (notice some reductions in skin blemishes and wrinkles) but has the reflections reduction set to Off. When you select Remove Reflections in Glasses, you see choices for Off (the start position) then Options 1 to 5. Each is a different AI generated restructuring of what should be visible through the reduced reflection. My eyes are old enough to be slightly difficult and it was interesting to see the five choices.

Option 1

Option 2 (note the left eye eyelid in all these and how it changes).

Option 3 which I felt got the eye almost right, though further retouching would be needed for a portrait. It would be good enough for a PR or informal shot.

Option 4 rather odd mismatched detail.

Option 5 eyelid droop…

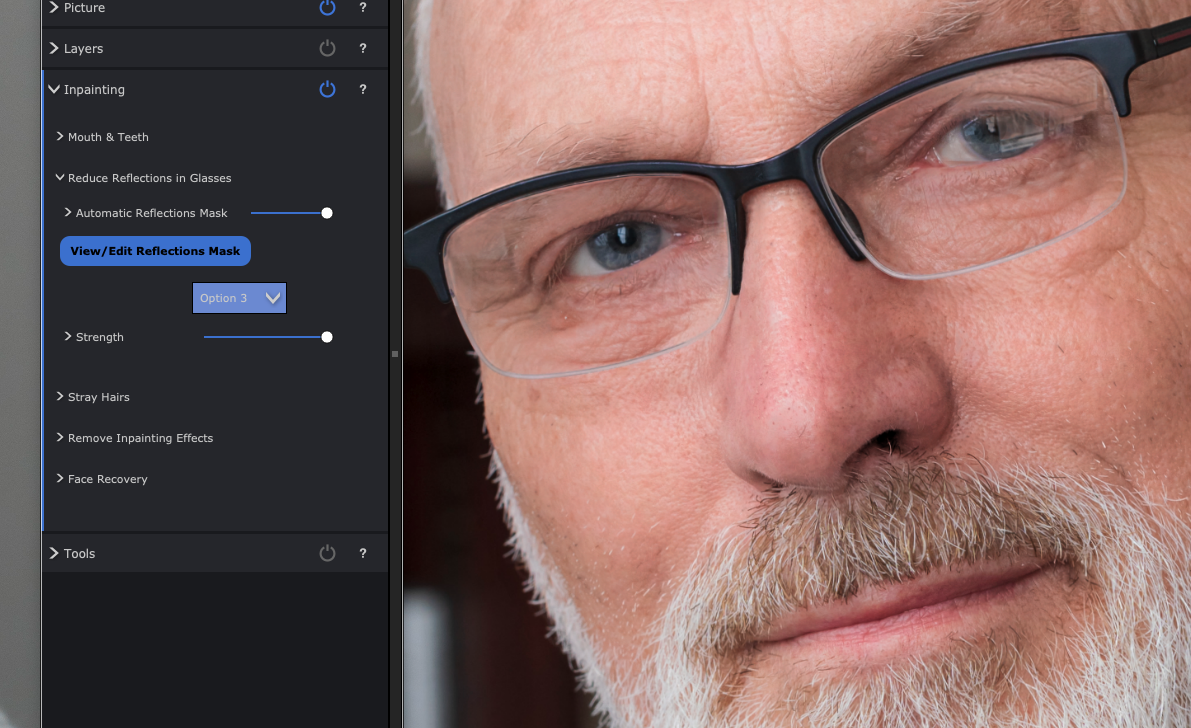
Option 3 got the upper eyelid almost perfect (not quite but acceptable) and the Strength slider did allow the reflection to be eliminated to the degree shown above. However, it looked better with 85% effect or even the 50% of the earlier example, a faint reflection remaining without obscuring the eye.

The time taken on my Mac M2 Studio Max was next to nothing, I didn’t bother to time it as everything happens in real time include the export from the starting 33MP JPEG to a same size with all PortraitPro’s very subtle modification of the portrait. The defaults were just right but I increased fine wrinkle reduction out of vanity!

After saving a copy of processed result I also saved a .ppx file (the Project) which is a bit like an Adobe .XML sidecar file, and re-opens your original with all the edits at the point you saved this snapshot, reversible and adjustable as needed.

A tougher test

Here’s a worse example than anything you should end up with, so I set maximum strength on this. Option 4 worked best, and despite my eyes being almost entirely obscured by double reflections in my computer reading specs, it was not a bad fix at all. My ‘proper’ specs are coated of course and don’t reflect as badly.

I’m sure I could ask Adobe AI to do something the Generative Fill after masking the reflection area, but in the time it would take me to brush a mask in place, the entire PortraitPro glasses reflection removal would be done and dusted. Is it worth £139 (after our code CCV245 discount)? That depends on what your time is valued at and whether you ever encounter an error in shooting which leaves reflections ruining a shot.

– David Kilpatrick

To see Anthropics PortraitPro Studio Max, and the other versions which start from £49.95 (right now there’s a 15% CC524 discount, update May 23rd 2024) – all include this reflection removal function alongside stacks of other tools – go to https://www.anthropics.com/portraitpro/

Download or read through our July-August edition free

Cameracraft is received exclusively by subscribers and members of The Guild of Photographers. It’s easy to get single copies or subscriptions from this site, and in addition to the printed magazine digital delivery is an eco-friendly low cost alternative which fully supports our unique magazine.

After our subscribers receive their copies whether digital or printed, we wait a couple of weeks before releasing this viewable and downloadable PDF version. It’s a good quality too with the PDF created at Retina screen resolution so you can zoom in or use a large screen. To download and keep you may need to right-click if the PDF opens in a browser window – it’s normal now to have an extension installed which does this. You will however get a better choice of view modes by saving an opening using Adobe Acrobat. Select Two Page view to see the spreads properly, and expand your window to fill your screen. Don’t select ‘Full Screen’ mode as for some reason Adobe make this disable the two-page view!

Your downloaded PDF will include all email and URL links from the text on the pages.

CCJulAug2022
https://cameracraft.online/wp-content/uploads/2022/07/CCJulAug2022.pdf
Read here using the navigation tools. Download using the link below the embedded version.

Goodbye white sky…

With cloud covering much of Britain and our own home territory in near the North Sea coast shrouded in featureless white for days, remember that post-processing can transform landscapes

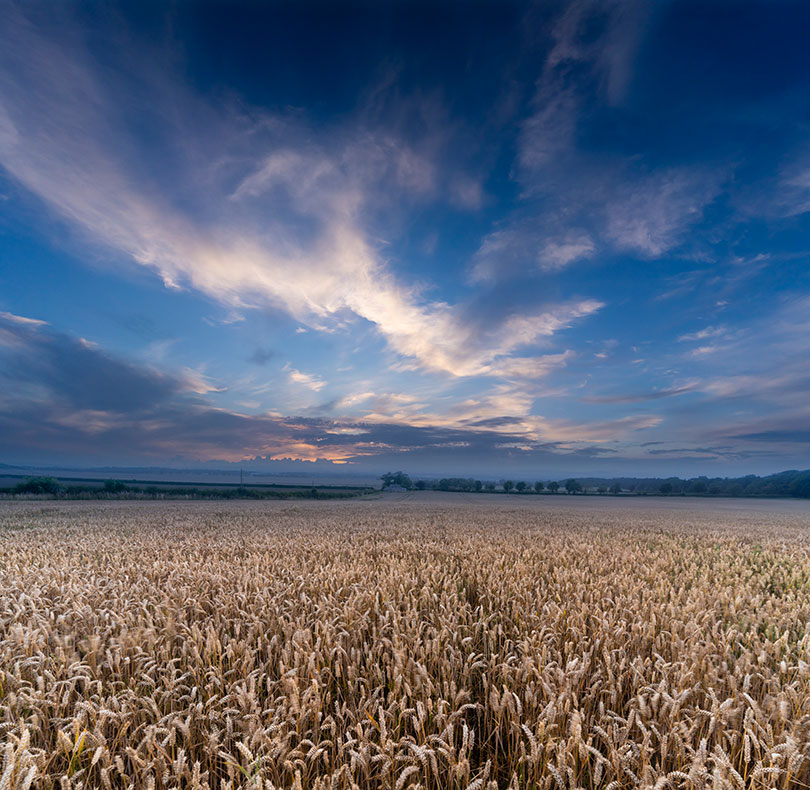
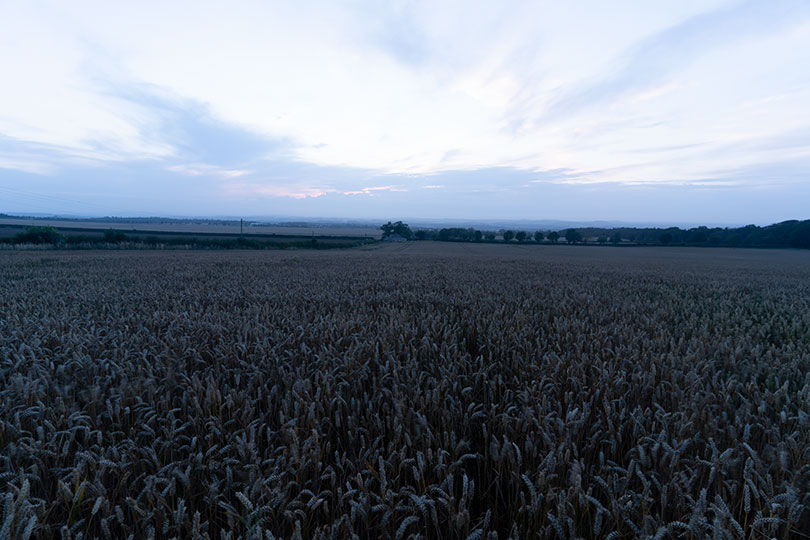
This was just a few days ago when the promise of a sunset disappeared. The sky was taken ten minutes before I expected the best sunset, and shot without any ground – it had potential for use as a stock sky to compose into other shots. The ground, a field of wheat taken from the highest point looking north-west a short distance from our office, was shot hand-held with a 1/5th exposure, stabilisation providing a sharp image from the 17-28mm Tamron FE Sony lens – but the wind blowing the crop selectively, so some ears show contrasting movement.

And that, above, is what a straight conversion from the raw capture looked like (you can also see how the sky had not morphed into a lovely sunset but instead lost any colour and became a neutral dusk). The point is that even a shot like this, in conditions like this, can be turned round by adjustment from raw and combining two frames. The almost square result is also a 170MB file, big enough for an acceptable print the size of some living room walls.

Landscape Pro as a solution when the weather lets you down

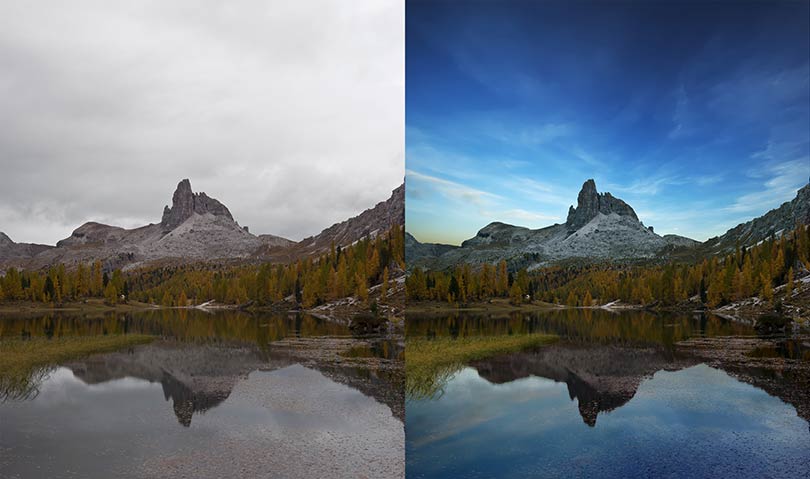
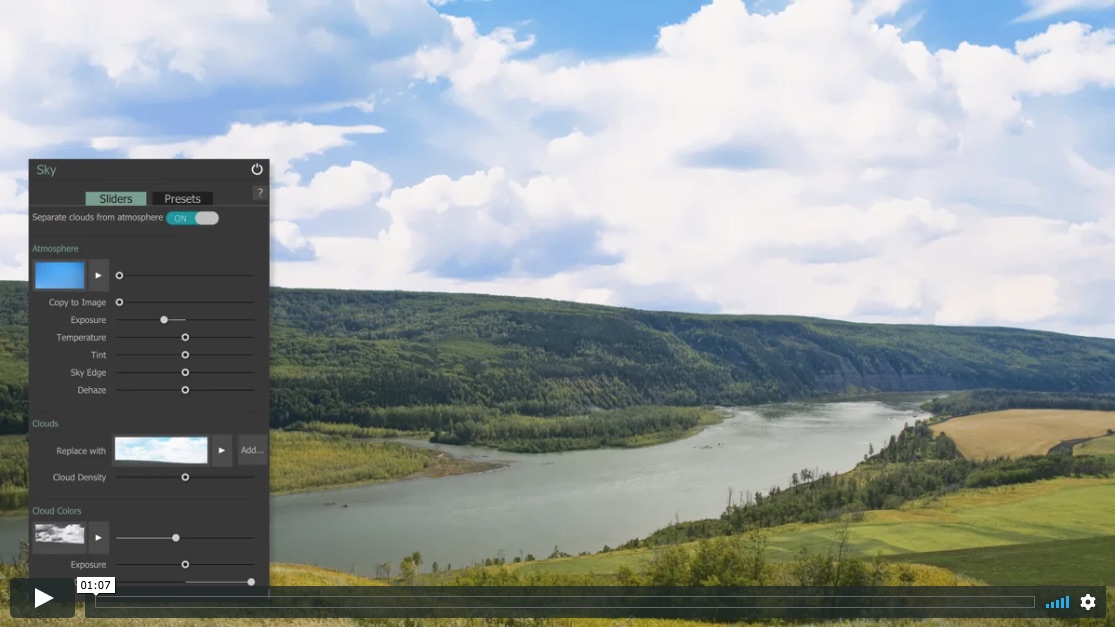
We used Photoshop for this but if you don’t have a full Mac or PC editing program, Anthropics’ Landscape Pro is purpose-designed for even more complex fixing-up and comes with its own library of royalty-free sky images (you can add your own). Here’s an example from Anthropics:

This one uses the masking functions of Landscape Pro to fit the sky to the shape of the rocks, and its controls to define water, mountain and trees as separately adjustable zones. There is also an intelligent function to create reflections in water with a realistic density. Notice that the water-weed in the foreground remains intact in the processed image and the sky reflection has been very accurately masked at the left hand side.

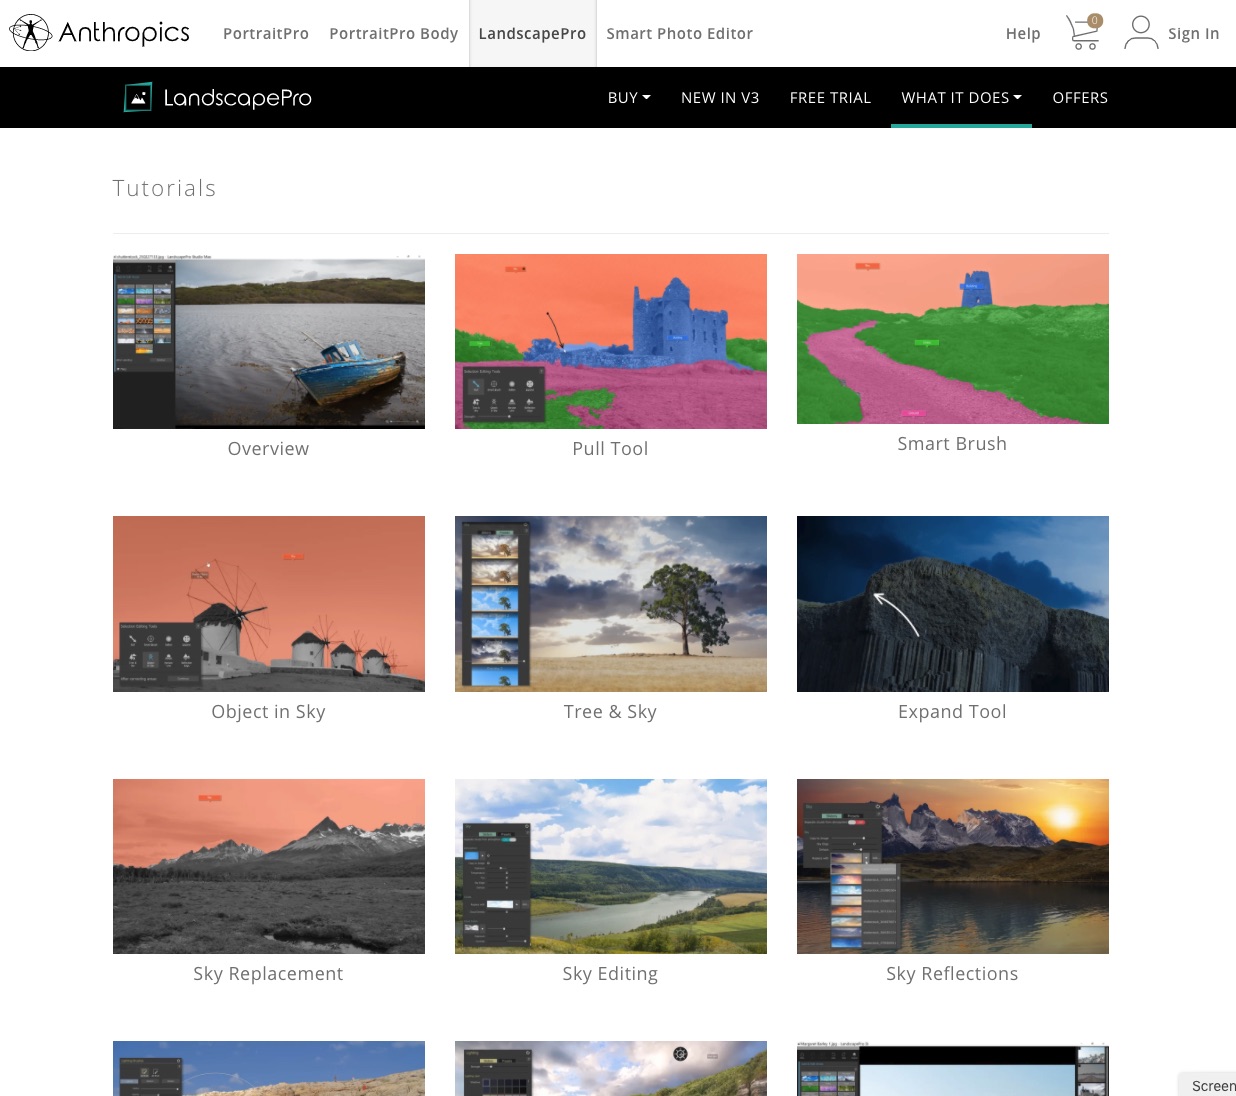
Using the program is well explained in a series of short videos on the Landscape Pro website. These are not the tedious kind of how-to vids you tend to find on YouTube which seem to aim to take several minutes to get to the point, maybe to enable advertising to appear. They are short and very clear in their message, and there’s a good selection (screen shot below).

There is a discount offer of 50% at the moment and an additional 20% off with our code CC8L – this code was not working when this post went out on August 16th due to a technical glitch, it is now working and can be used up to Sunday August 23rd.

Save on Landscape Pro & Portrait Pro using Cameracraft code CC8L

Code valid on any Anthropics software (PortraitPro, PortraitPro Body, LandscapePro or Smart Photo Editor), new editions, upgrades, or bundles. Download your free trial today! 50% OFF sale now on + for an EXTRA 20% OFF use the code CC8L.

Portrait perfection is just a few clicks away

PortraitPro 19’s Artificial Intelligence cuts retouching time – and right now it’s at 50%+20% off!

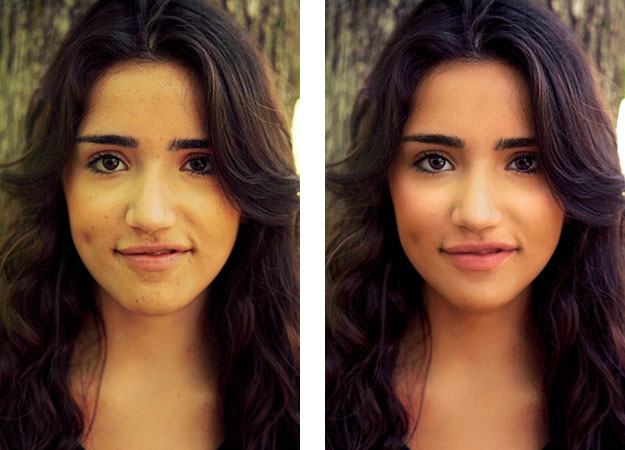
It’s the season for outdoor portraits and you want to make them studio-perfect. There’s never been a better time to invest in PortraitPro, used by professionals everywhere for the best looking skin, eyes, mouth, hair and more.

Outdoor light can be great but may not be kind to complexions. PortraitPro 19 auto retouches without needing complicated layers, frequency separation or cloning whether as a plug-in or stand alone. It’s fast, not memory or disk space hungry, and runs on Windows or Mac OS without needing the latest updates.

In parks and gardens sunshine on grass and light through trees can put a green cast on to skin tones. It’s hard to fix – but see how PortraitPro 19 does it effortlessly.

“Thanks to AI face detection, PortraitPro 19 is quicker and easier to use than previous versions and makes it possible to apply realistic effects in a matter of minutes, which which would otherwise take hours to do manually. For the portrait photographer who enjoys shooting more than editing, this could be essential software.” – DSLR Photography 

SPONSORED WEB CONTENT – SAVE USING CAMERACRAFT’S CODE:
Code valid on any Anthropics software (PortraitPro, PortraitPro Body, LandscapePro or Smart Photo Editor), new editions, upgrades, or bundles. Download your free trial today! 50% OFF sale now on + for an EXTRA 20% OFF use the code CC8B (ends Monday, August 17, 2020).

READ Cameracraft’s original November/December 2019 review of PortraitPro 19 on ISSUU –
https://issuu.com/iconpublications/docs/ccnovdec2019/10

high speed flash two images combined

Elinchrom ELC500 TTL studio flash

A new generation from Swiss masters of studio flash Elinca SA brings multi-platform TTL, super-fast recycling and flash durations, brilliant LED modelling and many design innovations. David Kilpatrick has been trying out the twin head kit.

The second wave of any innovation in technology is often safer to invest in than the pioneering first generation. Studio flash offering IGBT duration and power control, allowing much the same TTL and high speed functions found in camera speedlights, has been in development for over a decade but whole generations have been orphaned by advances in wireless trigger and camera firmware.

Finally bringing this to their new mid-range ELC TTL heads – one rung below the ELC Pro and one above the BRX – Elinchrom has worked for maturity in the whole technology. So, when the ELC 125 and 500 TTL arrived they worked much like any head with the EL Skyport Pro. Days later new firmware for the triggers enabled TTL operation, across a range of camera platforms already proven with the portable ELB 500 TTL.

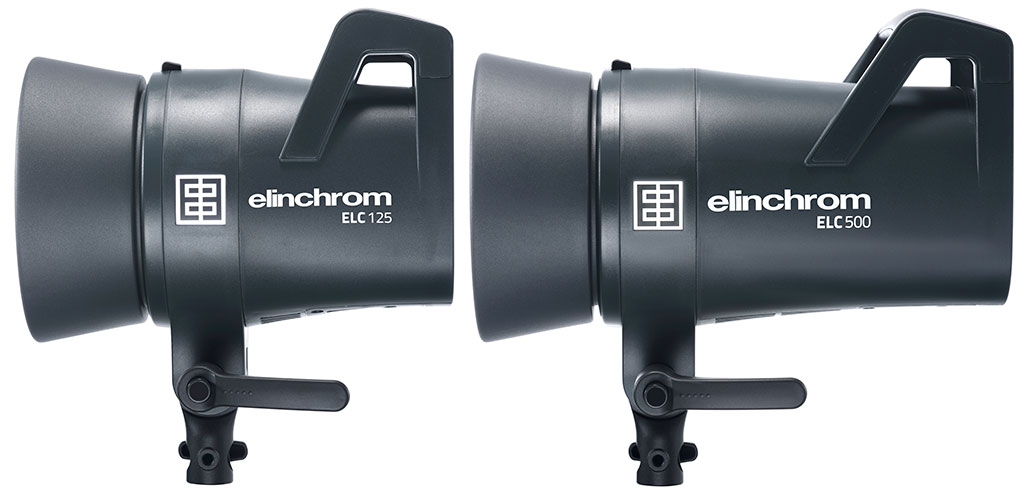
The ELC 125 TTL is a little larger than a D-Lite. The ELC 500 TTL is substantial – as expected.
Continue reading »

Never say ‘zoom with your feet’…

There’s a dismissive and rather superior position some camera club buffs take – ‘why not zoom with your feet?’. It is well worth ignoring. The focal length of your lens, whether your use a zoom or a range of fixed focal length lenses, decides the exact relationship of elements in the picture including one component you just can’t ‘zoom with your feet’, the sky. The depth of blue above the horizon, the scale of clouds, can only be changed by using a different focal length.
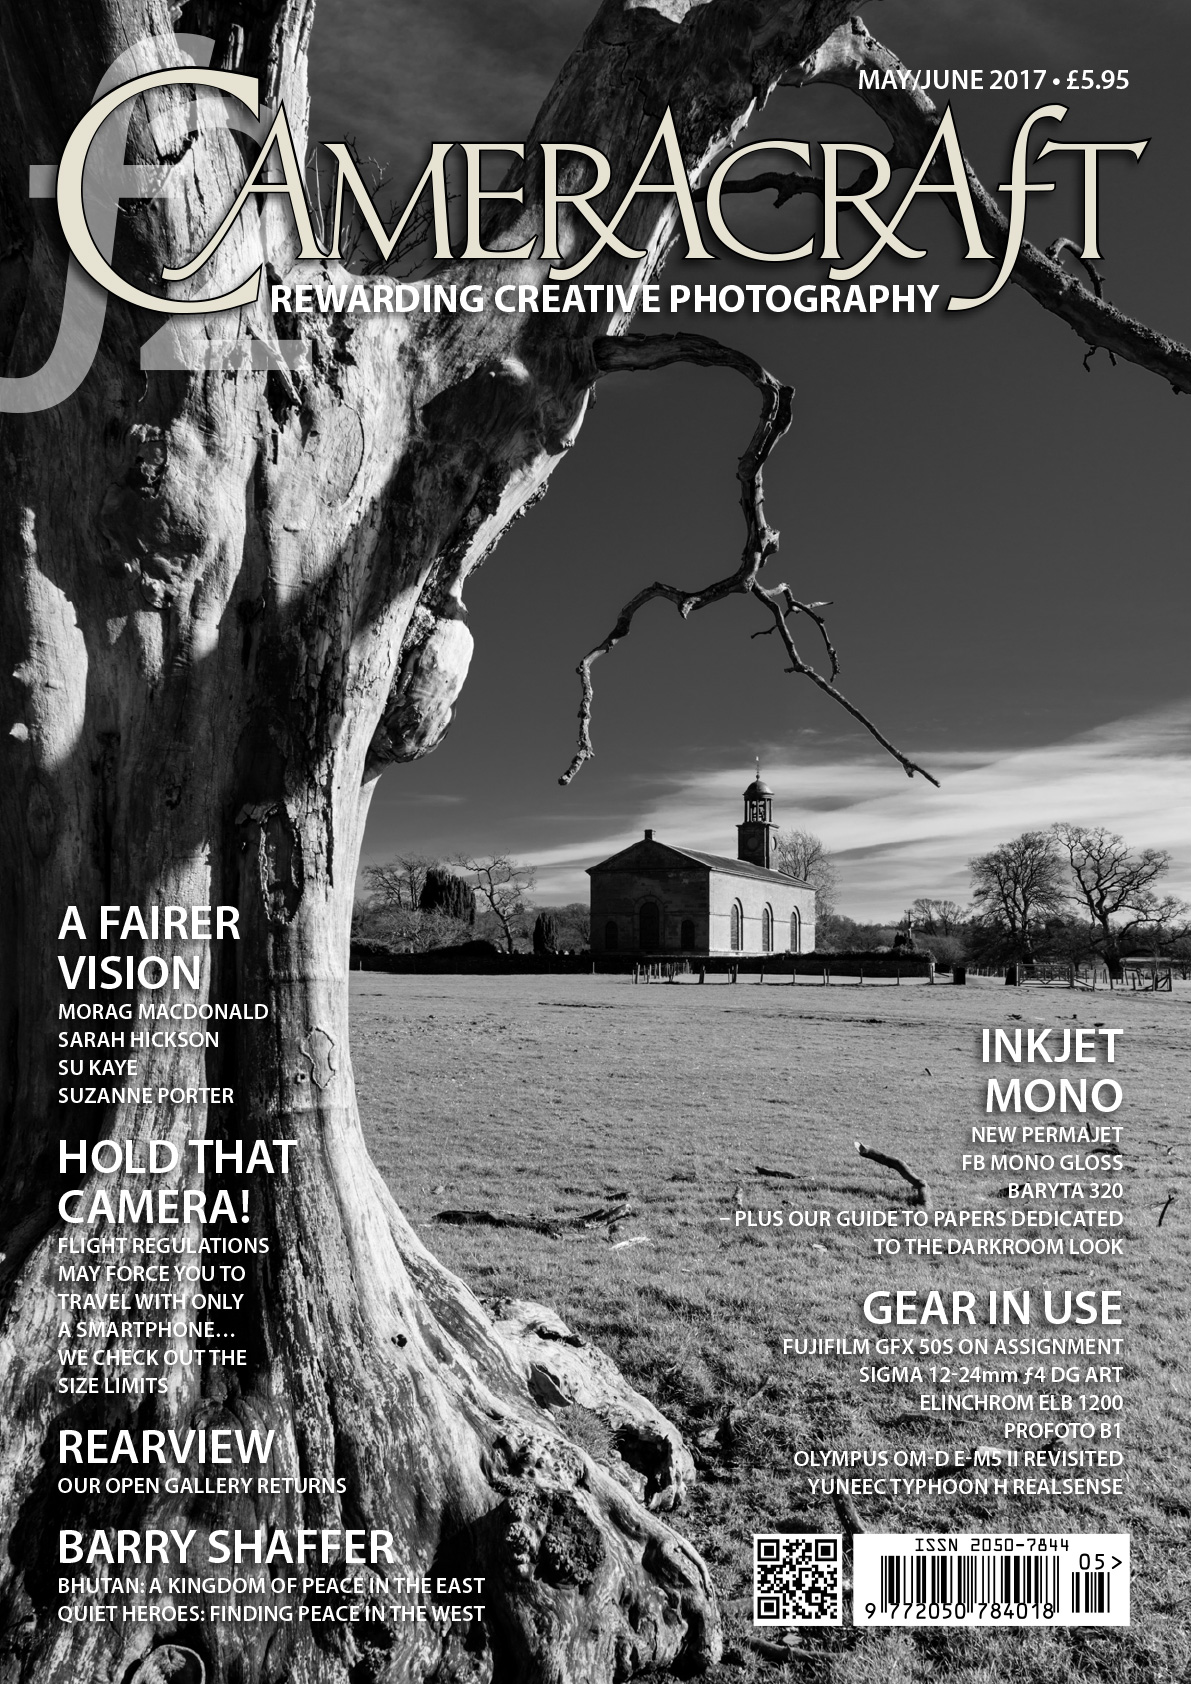
Here is the cover of the May/June 2017 Cameracraft magazine, and in a very rare lapse of judgment I used one of my own photographs. I had never photographed this church before despite driving past it on the A7 Scotland to England road through the ‘debateable lands’ for the last 28 years. A quick left turn down a farm estate road led to St Andrews church of Kirkandrews, an 18th-century gem with the unusual feature of being built on a north-south alignment instead of east-west. This put the late March afternoon sun on to the south door and sundial.

Now this is a typical deliberately uncorrected 24mm steep angle shot, and I also have very straight versions taken from further away on the 24-70mm CZ f/4 lens and A7RII. but they are all at between 24 and 32mm with the church smaller and composition using the churchyard and walls. That’s because the sky simply looks best with a wide angle.

Despite some bad press, I’ve found the 24-70mm to be an excellent lens. You can get good deals and Amazon UK is showing discounts up to 19% – check our affiliate link which helps photoclubalpha cover its costs if you buy.

When we pulled up here, there was a car on the other side of the church spoiling the view I had seen from the road, spotting a dramatic old dead tree. We chatted to a lady who was looking after the churchyard and gardens, a lifelong commitment. She said it was a pity the church was locked as the interior was worth seeing – and left taking her car which had been prominently in my planned shot. So, we parked the car in the field further away, and I returned to the area of the tree.
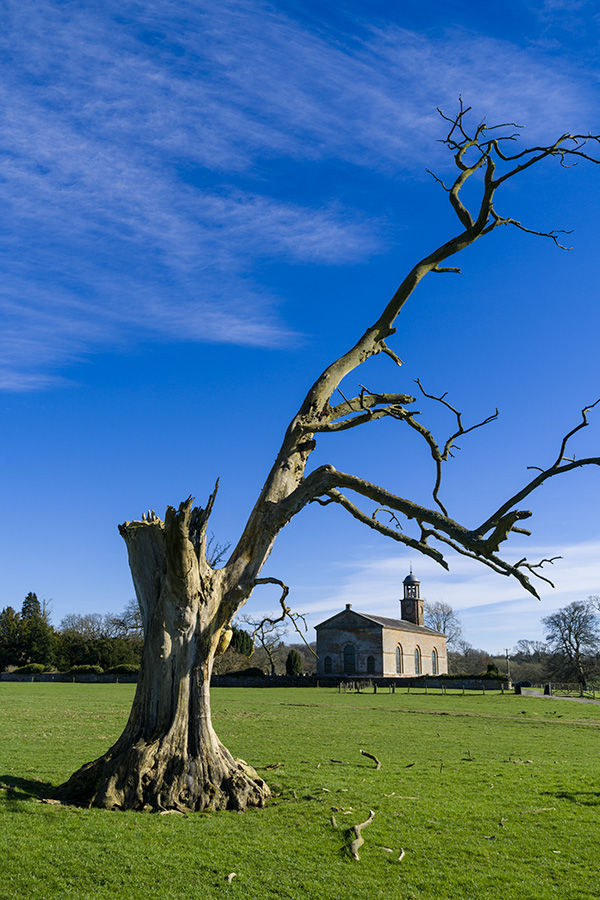
I knew what I was looking for, and at first walked to a spot and composed this at 30mm. But by moving round and just looking at the possible camera positions (and heights above ground) I could see the relative scale of the church and tree could be changed by finding the best angle of view and perspective. This is what using your feet AND a zoom helps you do, and ‘zooming with your feet’ most certainly does not if all you have is a fixed lens. A 35mm or 28mm would have been fine here, but I knew how much clearance I wanted between the church bell tower and the branch, how large or not I wanted the fallen branches to be (and I do not ‘garden’ subjects like this which are someone else’s property).

This shot at 26mm was able to give me more sky. It’s also one which I could straighten for converging verticals (it has space to do that) using Photoshop/Camera Raw‘s excellent tools for this. To the right, there was an ugly wooden barrier to keep livestock off a sapling. Below, you can see why this was not a good addition to any composition. Earlier on there was that white car between it and the church, which had departed.

From this position, I was generally happy with the scale of the tree and church and their relative weights in a vertical composition, but felt it needed to be a little tighter.
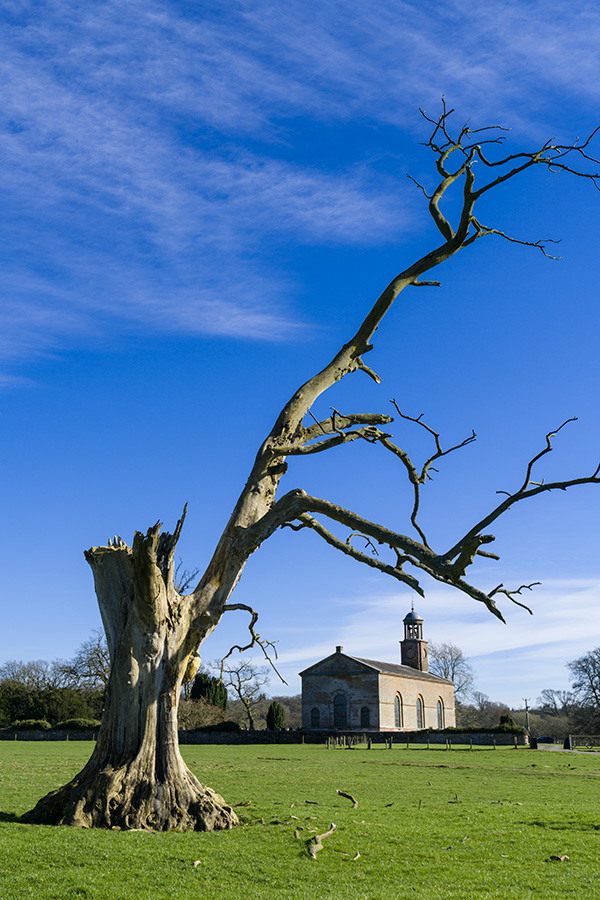
This framing at 35mm kept all parts of the tree clear of the church, placed them neatly and avoided any strong foreground of fallen wood.

This example moved me closer to the tree, at 24mm again, giving the most attractive sky and clouds. But I felt the broken main trunk of the tree was slightly too strong and the ratio between the tree and church just missed the mark. Such small differences do count. Normally I don’t show anyone the ‘ringaround’ compositions, only the final shot. In what is essentially a landscape scene, it’s not always that important. In commercial work, including portraits, wedding or fashion you need to realise that a centimetre or two difference in where you place your lens can distinguish good photography from ordinary. This, and the timing of your shot, also marks out the best press photography.

Precision viewpoint is where both your feet and zooming come in. By moving much closer to the tree, and using it as a solid closure to the left hand side of the image, the small forked branch could be positioned to frame the church and no slightly more ugly broken branch ends would be shown. The closer viewpoint was controlled to within an inch or two side to side and vertically, by crouching slightly to get the lens in exactly the position I wanted.

This also kept the church centred and therefore without converging verticals. I was already seeing this as a black and white conversion, and possibly a cover image, with the space necessary for typical cover lines and logo. This was the picture I did use for the cover.

However, from the same viewpoint zooming to 41mm allowed a different crop with a larger scale to the church.

You can see how I have moved to my left just a small amount, and also stepped back a couple of paces to change the relationship between the forked branch and the church. This is the control you gain from a lens like the 24-70mm – and why you should zoom PLUS your feet, not zoom WITH your feet. Above all, you should walk round and look, even without the camera, studying the interplay between foreground, background, middle distance and the sky.

For my first three years of using the Sony full-frame mirrorless system I have been without a 24-70mm, using a range of primes and the 28-70mm instead. Although I had used excellent work from the 24-70mm f/4 in our magazines, from other photographers, there were so many bad reports about it. But 24mm has always been a critical focal length for me, so I had to buy it when a good deal came up (a refurb from Sony, which allows me to recover the 20% VAT which I can’t claim on regular secondhand items). Well, it’s not perfect because at 24mm the focus field is very curved (cap-shaped) to the extent that detail at the edge of the frame is focused on around 45cm when the centre is set to 45m. This can lead to the idea it’s soft. In fact, this curvature improves the sharpness of the tree trunk and the distant church at f/11 – 42 megapixels can be demanding. But if this was a portrait, with a distant scene beyond, it would have the reverse effect and make the outer field seem less sharp.

  • David Kilpatrick

Affiliate links to help photoclubalpha if you order the 24-70mm Carl Zeiss Vario-Tessar f/4 FE – B&H Photographic, Amazon, and WEX.

Is retouching acceptable?

There’s been a controversy surrounding Steve McCurry, a photographer I have listened to on the edge of a conversation a couple of times courtesy of Kodak who were always great sponsors and put his ‘Afghan Girl’ on display at photokina 2012 where McCurry’s work was celebrated.

Here’s the story – he’s been changing, or allowing his retouchers and agents to change, the material content of some shots. This has included the removal of people, changes to their clothing, tidying up messy objects and distractions. First, this is not something new and great photojournalists never saw harm in burning in or dodging back areas of a print to make something disappear into a shadow or burn out to white. It was OK to use bleach on prints if needed to remove blemishes, including things which damaged the shot. It was even OK to use tints or pencil to enhance outlines so that newspaper reproduction didn’t lose the subject in a grey mush.

http://petapixel.com/2016/06/07/eyes-afghan-girl-critical-take-steve-mccurry-scandal/

That’s the current controversy.

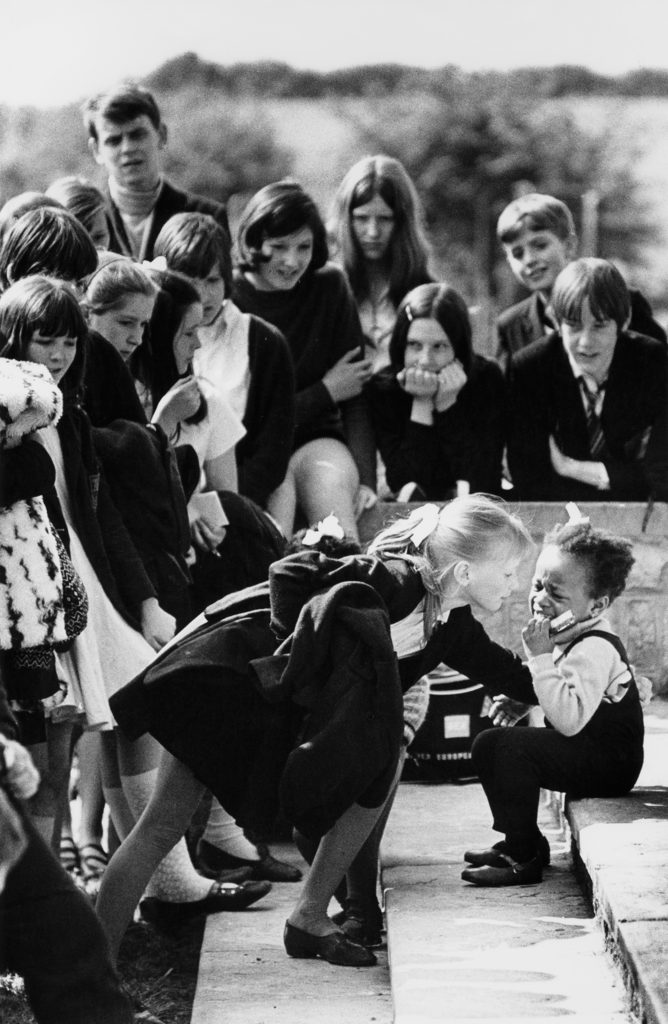
Well, here are some examples from my archives. One dates from 1969 and back when the first prints were made from this, with publication in The Guardian and various magazines, I used pencil and bleach to try to ensure the faces at the centre of the group were properly defined from the wall behind them. This was a very mild treatment and not very successful.

Here’s a not-totally straight print. Some detailed dodging and burning was done in the darkroom to try to get the definition needed between the blonde girl’s face and the wall. It was this lack of definition which meant it was never a real winner, though it did well enough in competitions. It was also taken on outdated Perutz film using a very cheap manual Hanimex lens – I was only 17 and could not afford anything more!

Vintage 1969 black and white print scan secondary school pupils crowd round a little black girl who has fallen and is crying at Maltby Grammar School sports day. Note the black child was one of twins from the only coloured family in this Yorkshire mining town and at this time there was no discrimination just a lot of attention.

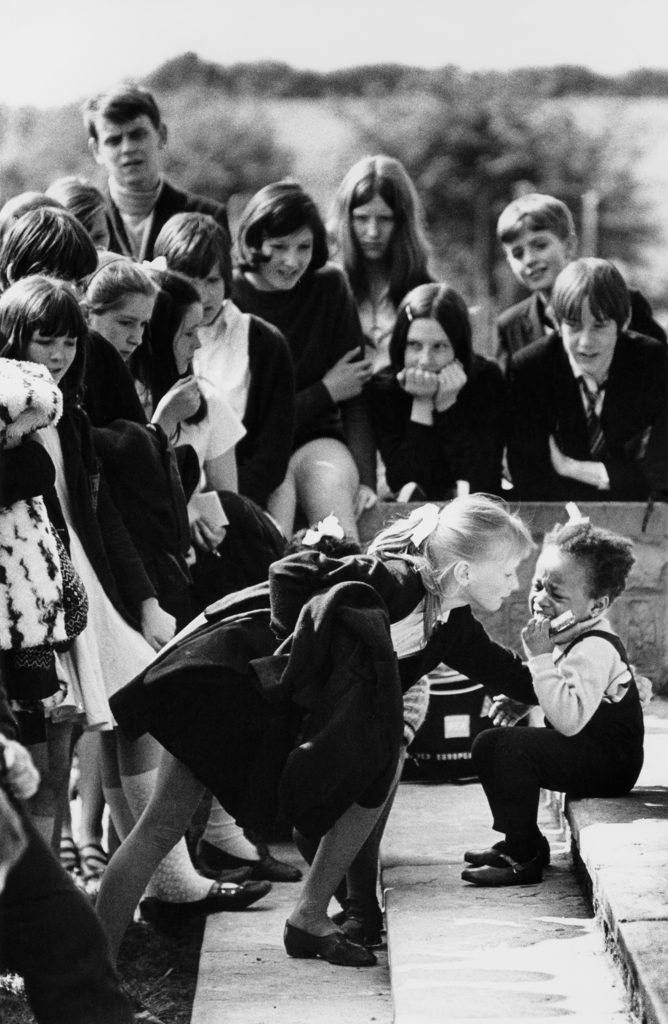
Once scanned, the print could be retouched digitally, Photoshop giving much more accurate control of burning-in the tone of the wall behind the girls. This is the result – it’s not a huge change. and I do not think anyone would suggest it falsifies the image.

Vintage 1969 black and white print scan secondary school pupils crowd round a little black girl who has fallen and is crying at Maltby Grammar School sports day. Note the black child was one of twins from the only coloured family in this Yorkshire mining town and at this time there was no discrimination just a lot of attention.

Moving on, here’s another group of children – three kids in the timed-burst water play fountain at Alnwick Castle Garden. It’s a picture I was very pleased to catch, the best of three frames with the children at the best critical moment for action and composition. But in the darkroom I would certainly have burned in the people in the background to reduce their distracting highlights.

Children run into a fountain released by build up of a head of water visible in a tube popular water feature in Alnwick Garden Northumberland UK

One of the principles of making a picture which works is to reduce it to a simple form. Extra faces always distract (we are drawn to look at faces regardless of composition). So, for this image, I retouched our the entire background scene. This would not be allowed by many competition, awards and some news or general media.

Children run into a fountain released by build up of a head of water visible in a tube popular water feature in Alnwick Garden Northumberland UK

Since I offer both images as licensable stock, with the retouched version clearly identified as retouched, I don’t feel there is any wrongdoing here.

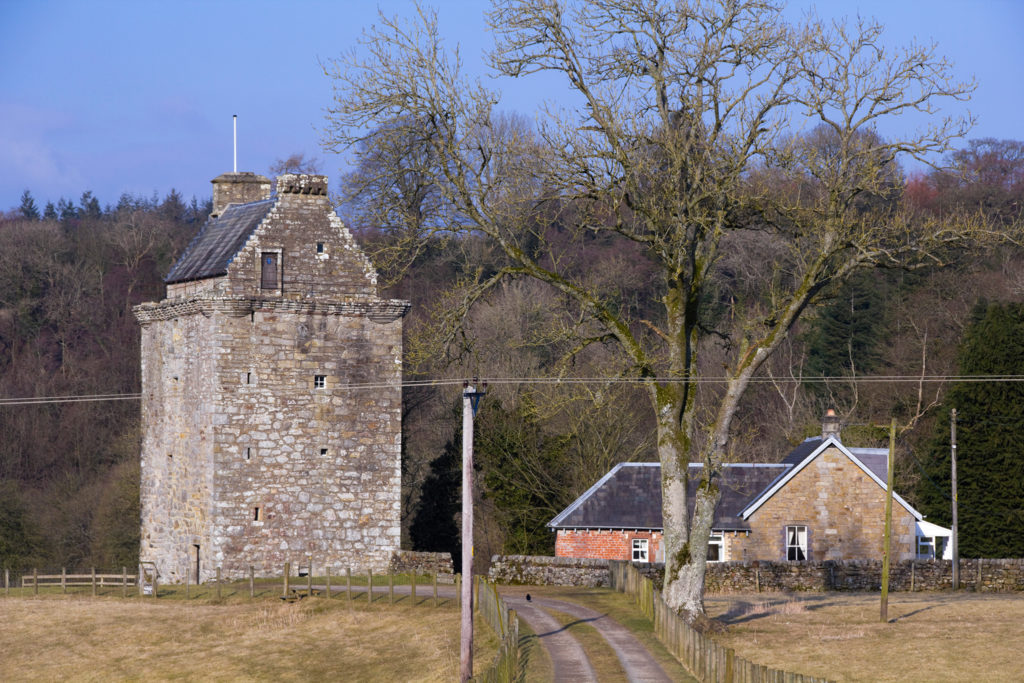
The next example is less controversial because it has no people at all. Wires interfere with the view of Hollows Tower, the old stronghold of the reiver Johnny Armstrong in the debateable lands as you pass from Scotland into England.

Hollows, the tower house of the Armstrong clan lairds of Gilnockie on the border between England and Scotland. Unretouched see also version with power lines removed from shot.

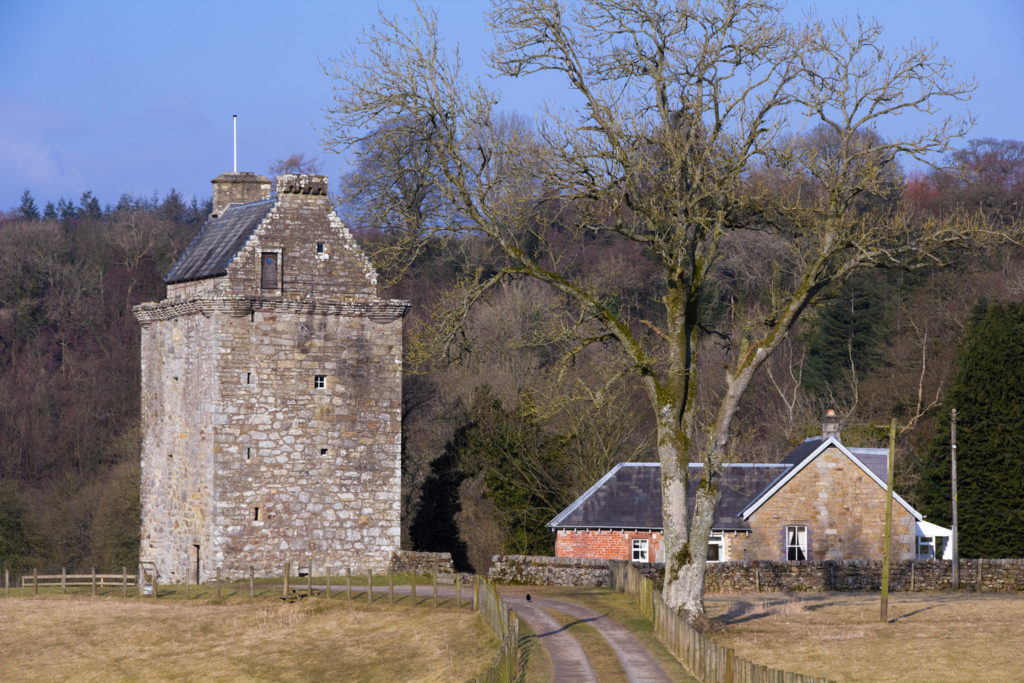
It’s not a massive task to remove the pole and wire mess. It falsifies the state of the scene, but only from a viewpoint which is not typical – most tourists see the tower as they drive past, from many angles.

Hollows, the tower house of the Armstrong clan lairds of Gilnockie on the border between England and Scotland. Retouched image with power lines removed.

I have not removed all the poles!

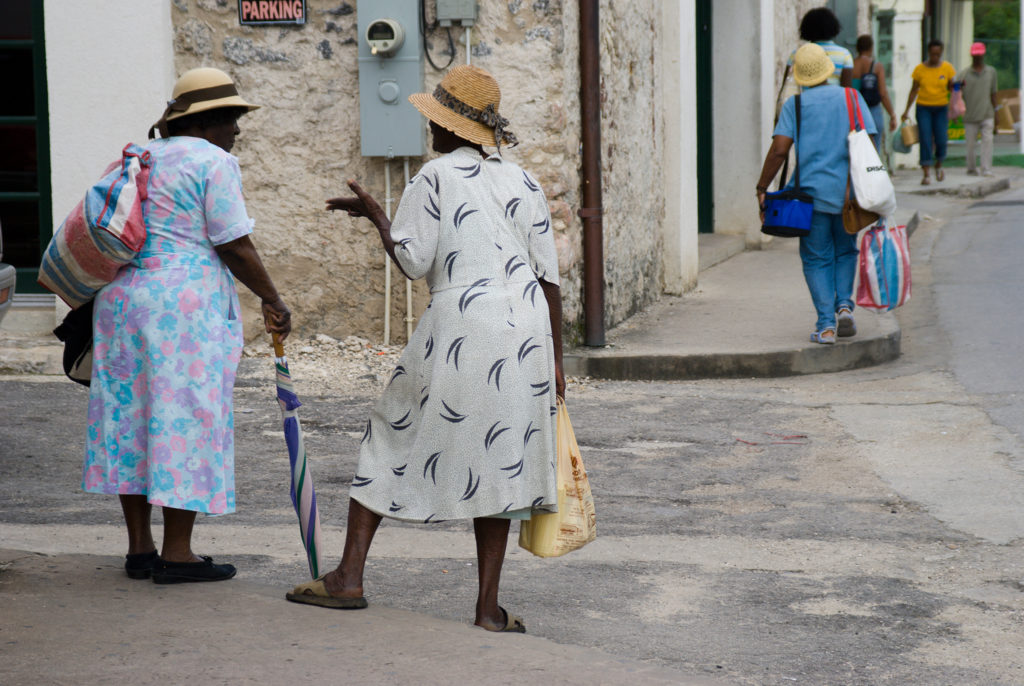
Finally, another example of where the infrastructure spoils the scene. In Holetown, Barbados, local ladies tend to dress up well to do the shopping and tend to stop to chat in the street. Even so, it’s a matter of framing and shooting quickly to catch a neat moment before they move on or something else gets in the way. And the wiring on the wall really does spoil the shot.

Barbados Holetown St Thomas parish west coast two Bajan ladies typically dressed chat on a street corner

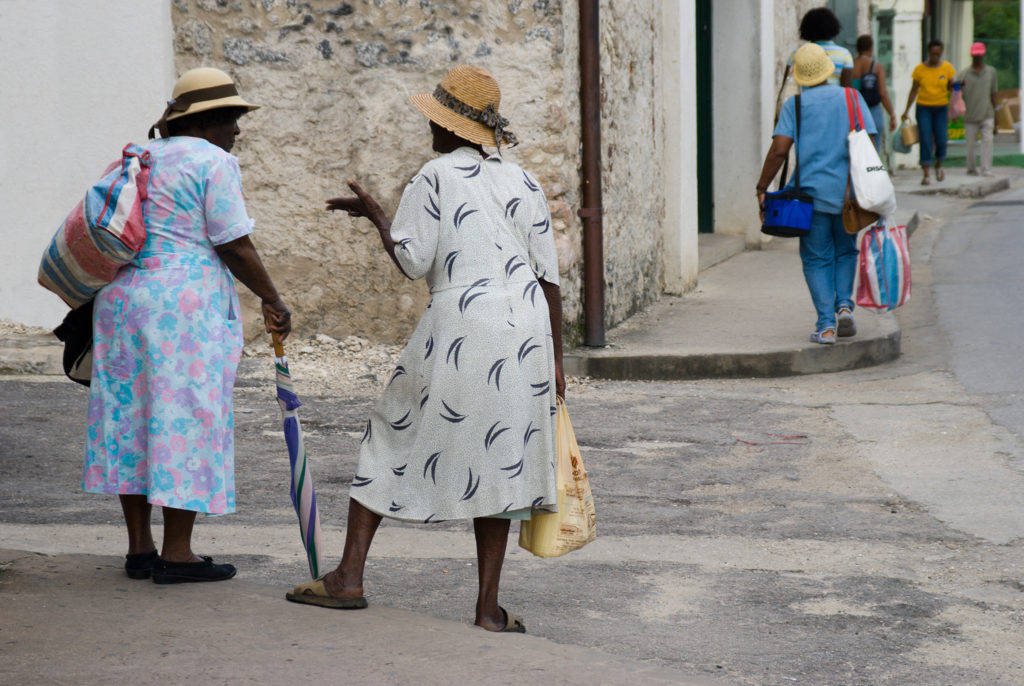
The retouching here was more complex. Is it a crime, or a routine part of modern photography?

Barbados Holetown St Thomas parish west coast two Bajan ladies typically dressed chat on a street corner retouched version

My work is generally used by travel guides, or in articles and books relating to people and places, travel and everyday life. The meter on the wall clearly documents the real place. The retouched image is an imaginary place. However it’s not been removed because it was an ugly meter. It’s removed because it spoiled a shot which I liked.

You can make your own judgments on Steve McCurry or his retouchers. Did they alter the pictures because they were really spoiled by the way they were? I feel I would have been happy with the unretouched image in most cases or used less obvious major changes.

– David Kilpatrick


A7RII shoots in Iceland’s glacier caves

Sony camera sensor technology enables a closer look at some of Mother Nature’s rarest sights that could not previously have been photographed in this way

 Story: Sony Corporation UK PR release with high resolution images and full metadata – click to view. All images are copyright and may not be copied or reproduced.

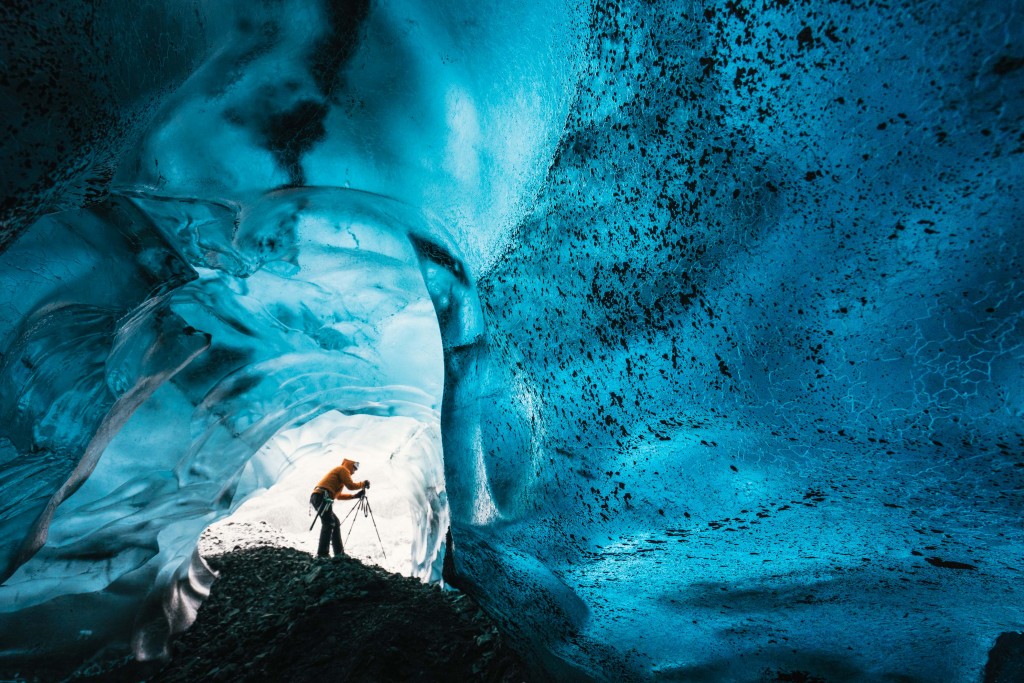
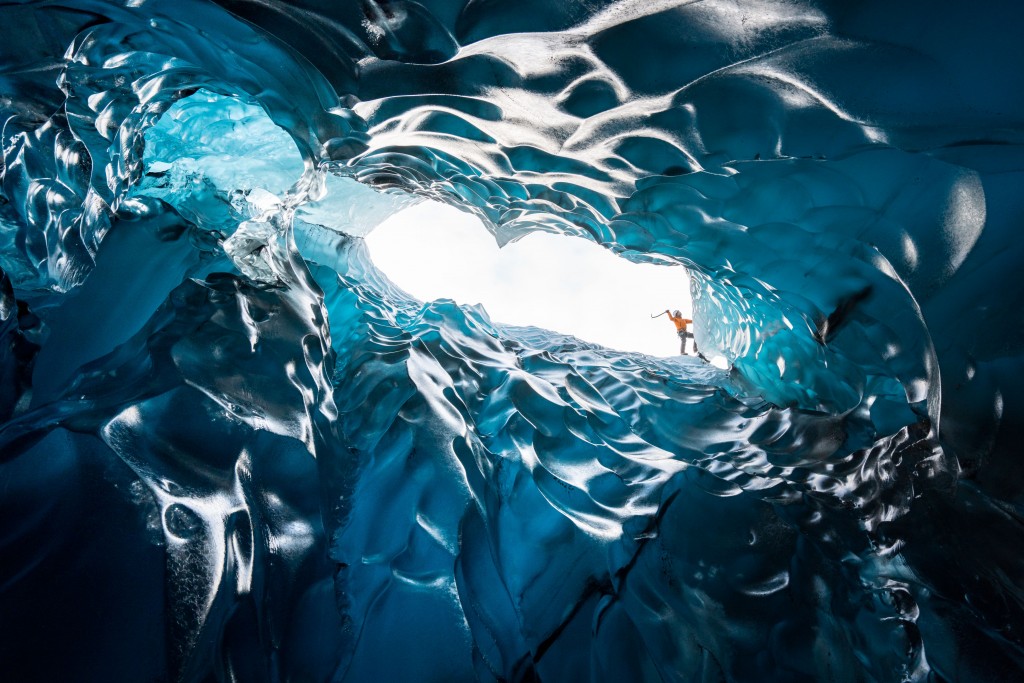
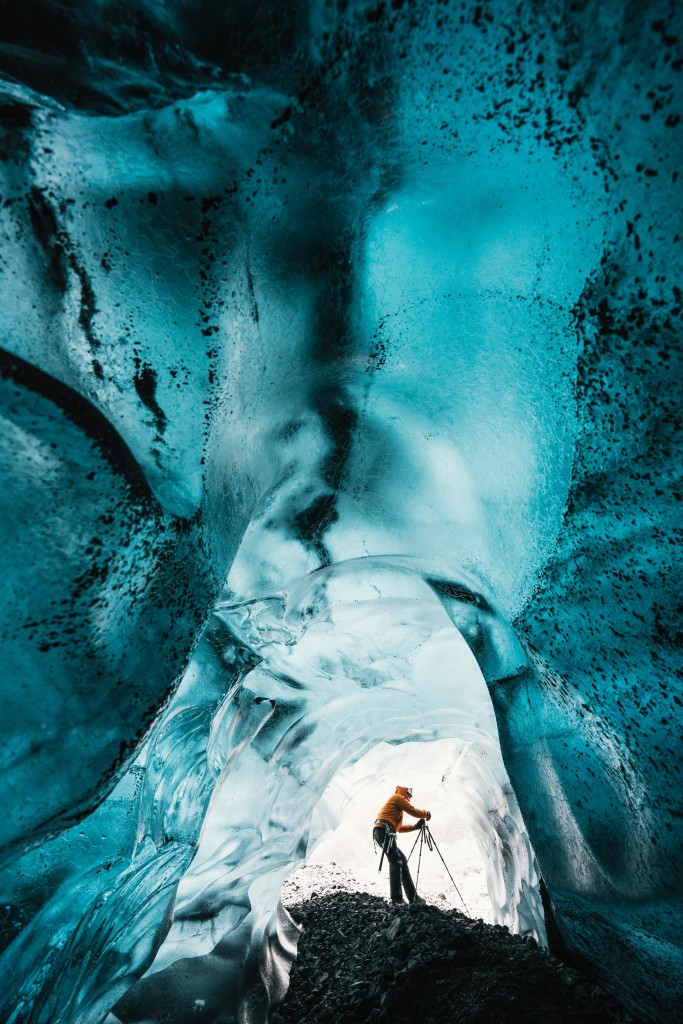
Wednesday 25th November 2015, Vatnajökull national park, Iceland: Photographer Mikael Buck with assistance from renowned local Icelandic guide Einar Runar Sigurdsson, explored the frozen world of Vatnajökull glacier in Iceland using Sony’s world first back-illuminated full-frame sensor – which features in the ?7R II camera. His images were taken without use of a tripod or any image stitching techniques in photoshop. This was made possible through Sony’s new sensor technology, allowing incredibly detailed low-light hand held photography. Previously images this detailed would have required carrying bulky equipment to the caves, some of which can require hiking and climbing over a glacier for up to two hours to to access. This picture: Inside the 'ABC cave' - which stands for Amazing Blue Cave. Guide Einar Runar Sigurdsson is seen taking a photo at the entrance to the cave PR Handout - editorial usage only. Photographer's details not to be removed from metadata or byline. For further information please contact Rochelle Collison at Hope & Glory PR on 020 7014 5306 or rochelle.collison@hopeandglorypr.com Copyright: © Mikael Buck / Sony 07828 201 042 / mikaelbuck@gmail.com

Inside the ‘ABC cave’ – which stands for Amazing Blue Cave. Guide Einar Runar Sigurdsson is seen taking a photo at the entrance to the cave. Copyright: © Mikael Buck / Sony

The enigmatic beauty of the caves of Vatnajokull, one of the largest glaciers in Europe, is revealed in all its frozen, icy splendour through astoundingly sharp and detailed photography.

The sensor sits at the heart of every camera and defines its capability to capture the amount of light and detail that goes into photographs. Advancements in Sony’s sensor technology are enabling photographers to take pin-sharp photographs in the most challenging low light conditions with the latest cameras from Sony, which formerly would not have been possible.

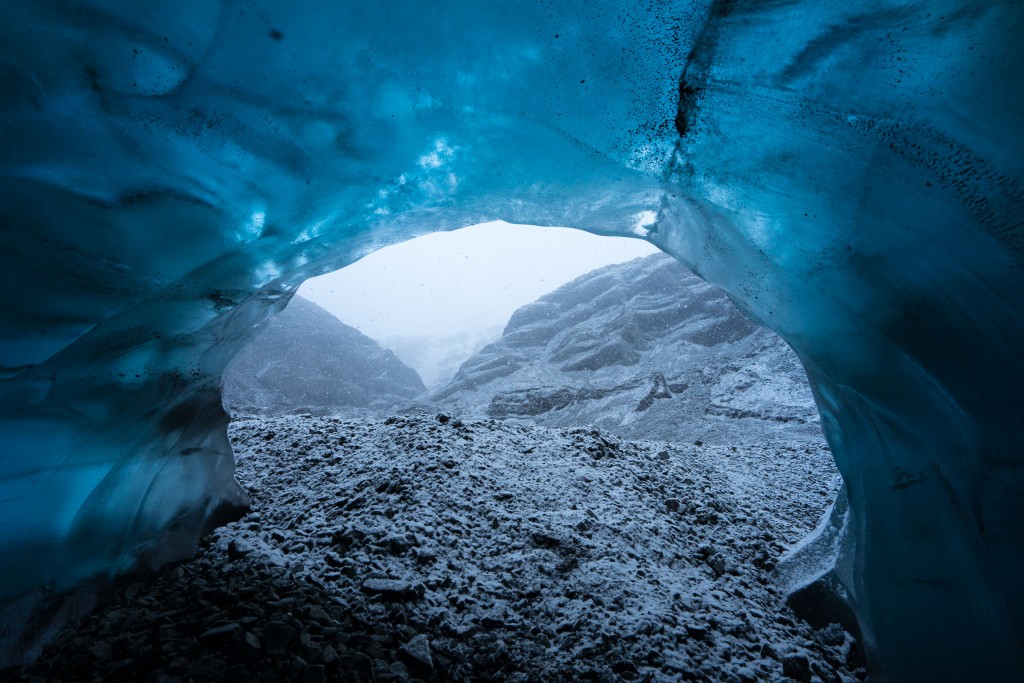
Wednesday 25th November 2015, Vatnajökull national park, Iceland: Photographer Mikael Buck with assistance from renowned local Icelandic guide Einar Runar Sigurdsson, explored the frozen world of Vatnajökull glacier in Iceland using Sony’s world first back-illuminated full-frame sensor – which features in the ?7R II camera. His images were taken without use of a tripod or any image stitching techniques in photoshop. This was made possible through Sony’s new sensor technology, allowing incredibly detailed low-light hand held photography. Previously images this detailed would have required carrying bulky equipment to the caves, some of which can require hiking and climbing over a glacier for up to two hours to to access. This picture: Inside the 'ABC cave' - which stands for Amazing Blue Cave. This view shows a snow storm outside the entrance to the cave. PR Handout - editorial usage only. Photographer's details not to be removed from metadata or byline. For further information please contact Rochelle Collison at Hope & Glory PR on 020 7014 5306 or rochelle.collison@hopeandglorypr.com Copyright: © Mikael Buck / Sony 07828 201 042 / mikaelbuck@gmail.com

A snow storm outside the entrance to the cave. Copyright: © Mikael Buck / Sony

Stunning photo series heroes Iceland’s otherworldly ice caverns, with the cave’s bright blue and bubble-like walls resembling an almost underwater scene. Images also capture flowing waterfalls, and crystal clear crevasses and icy tunnels within the frosty fortress.

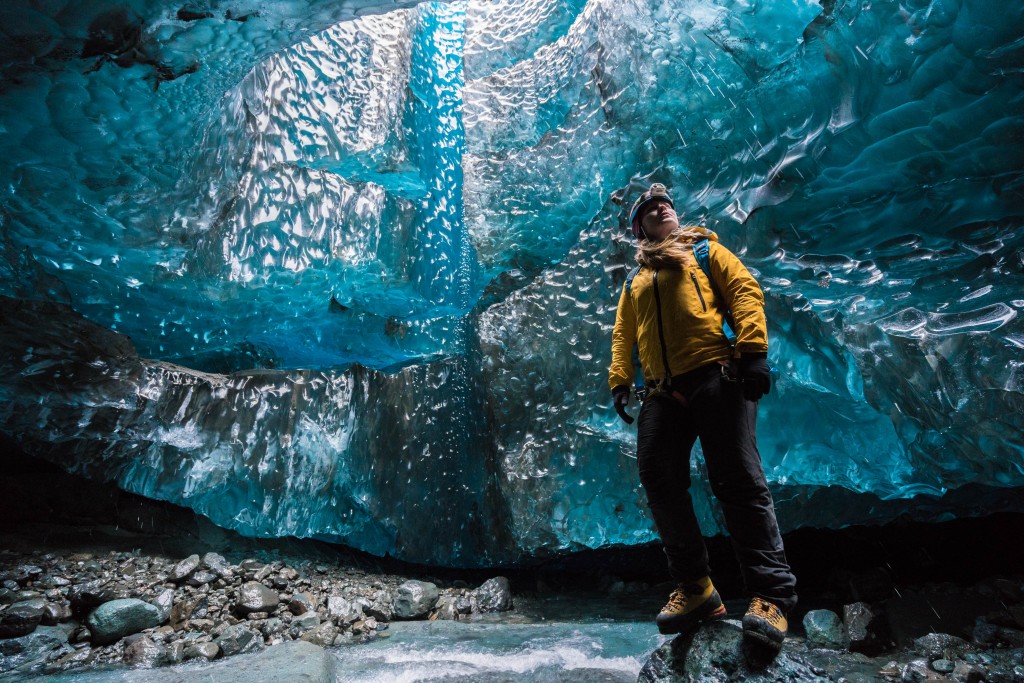
Wednesday 25th November 2015, Vatnajökull national park, Iceland: Photographer Mikael Buck with assistance from renowned local Icelandic guide Einar Runar Sigurdsson, explored the frozen world of Vatnajökull glacier in Iceland using Sony’s world first back-illuminated full-frame sensor – which features in the ?7R II camera. His images were taken without use of a tripod or any image stitching techniques in photoshop. This was made possible through Sony’s new sensor technology, allowing incredibly detailed low-light hand held photography. Previously images this detailed would have required carrying bulky equipment to the caves, some of which can require hiking and climbing over a glacier for up to two hours to to access. This picture: Looking up from inside the 'ABC cave' - which stands for Amazing Blue Cave. Guide Einar Runar Sigurdsson can be seen ice climbing on the glacier outside. PR Handout - editorial usage only. Photographer's details not to be removed from metadata or byline. For further information please contact Rochelle Collison at Hope & Glory PR on 020 7014 5306 or rochelle.collison@hopeandglorypr.com Copyright: © Mikael Buck / Sony 07828 201 042 / mikaelbuck@gmail.com

Looking up from inside the ‘ABC cave’. Guide Einar Runar Sigurdsson can be seen ice climbing on the glacier outside. Copyright: © Mikael Buck / Sony

This incredible photo series displays the immense intricacies of never-before-seen ice caverns in Vatnajokull, Iceland – only made possible through Sony’s new sensor technology, allowing incredibly detailed low-light photography.

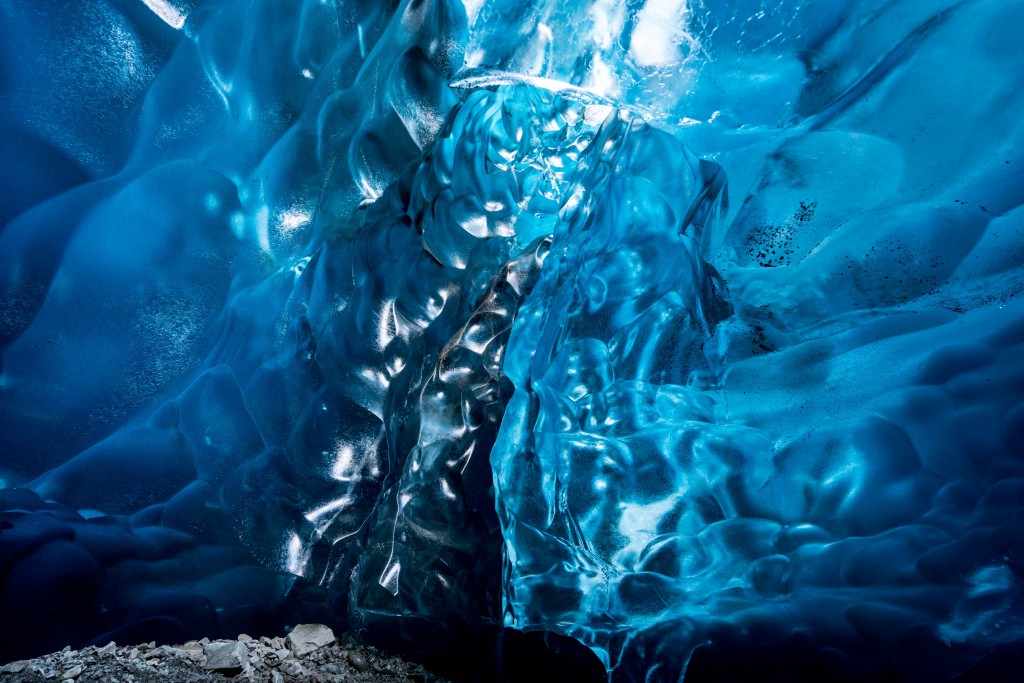
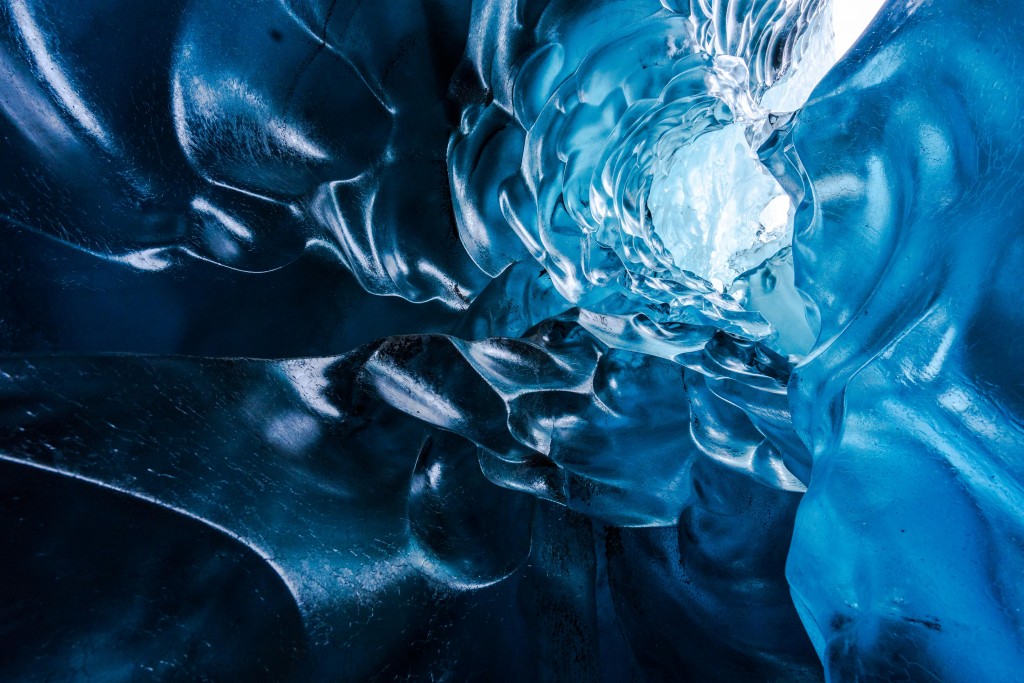
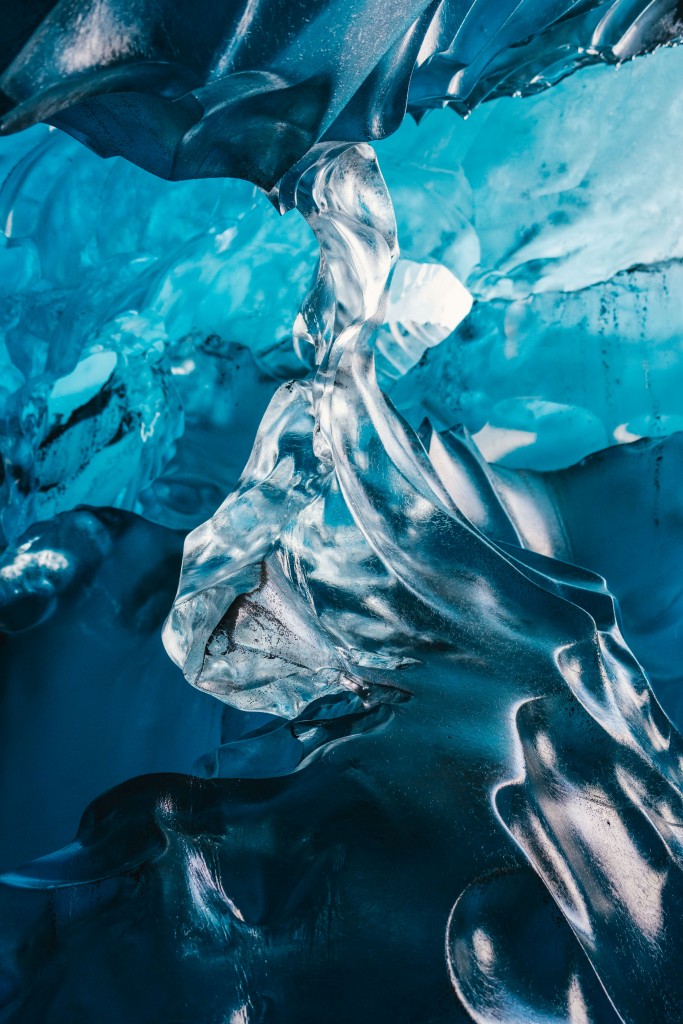
Wednesday 25th November 2015, Vatnajökull national park, Iceland: Photographer Mikael Buck with assistance from renowned local Icelandic guide Einar Runar Sigurdsson, explored the frozen world of Vatnajökull glacier in Iceland using Sony’s world first back-illuminated full-frame sensor – which features in the ?7R II camera. His images were taken without use of a tripod or any image stitching techniques in photoshop. This was made possible through Sony’s new sensor technology, allowing incredibly detailed low-light hand held photography. Previously images this detailed would have required carrying bulky equipment to the caves, some of which can require hiking and climbing over a glacier for up to two hours to to access. This picture: Inside the 'ABC cave' - which stands for Amazing Blue Cave. PR Handout - editorial usage only. Photographer's details not to be removed from metadata or byline. For further information please contact Rochelle Collison at Hope & Glory PR on 020 7014 5306 or rochelle.collison@hopeandglorypr.com Copyright: © Mikael Buck / Sony 07828 201 042 / mikaelbuck@gmail.com

Inside the ‘ABC cave’. Copyright: © Mikael Buck / Sony

Each year, the Vatnajokull glacier shifts and changes, revealing complex cave systems that are there for only a matter of weeks before metamorphosing again.

Wednesday 25th November 2015, Vatnajökull national park, Iceland: Photographer Mikael Buck with assistance from renowned local Icelandic guide Einar Runar Sigurdsson, explored the frozen world of Vatnajökull glacier in Iceland using Sony’s world first back-illuminated full-frame sensor – which features in the ?7R II camera. His images were taken without use of a tripod or any image stitching techniques in photoshop. This was made possible through Sony’s new sensor technology, allowing incredibly detailed low-light hand held photography. Previously images this detailed would have required carrying bulky equipment to the caves, some of which can require hiking and climbing over a glacier for up to two hours to to access. This picture: Inside the 'ABC cave' - which stands for Amazing Blue Cave PR Handout - editorial usage only. Photographer's details not to be removed from metadata or byline. For further information please contact Rochelle Collison at Hope & Glory PR on 020 7014 5306 or rochelle.collison@hopeandglorypr.com Copyright: © Mikael Buck / Sony 07828 201 042 / mikaelbuck@gmail.com

Inside the ‘ABC cave’. Copyright: © Mikael Buck / Sony

Photographer Mikael Buck and renowned local guides Einar Runar Sigurdsson and Helen Maria explored the frozen world using Sony’s latest digital cameras including the α7R II featuring the world first back-illuminated full-frame sensor which brings together ultra-high resolution and ultra-high sensitivity, the  RX10 II and RX100 IV which feature the world’s first 1.0 type stacked Exmor RS CMOS sensor that truly shine in low-light and high contrast conditions. The images were taken without the use of any external sources – just the natural light that filters through the ice caves.

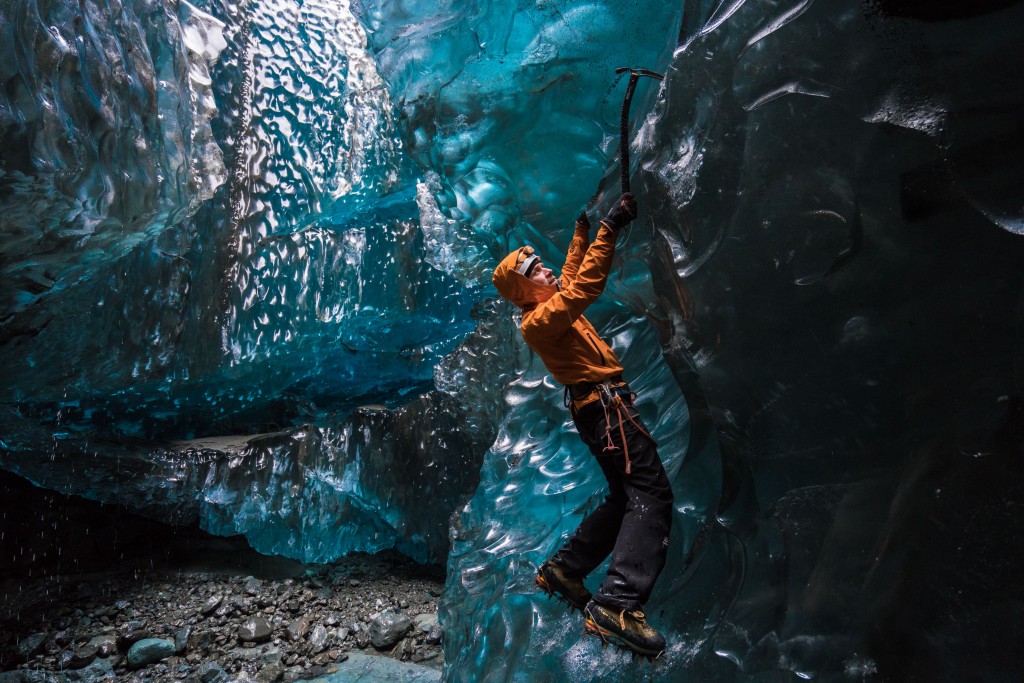
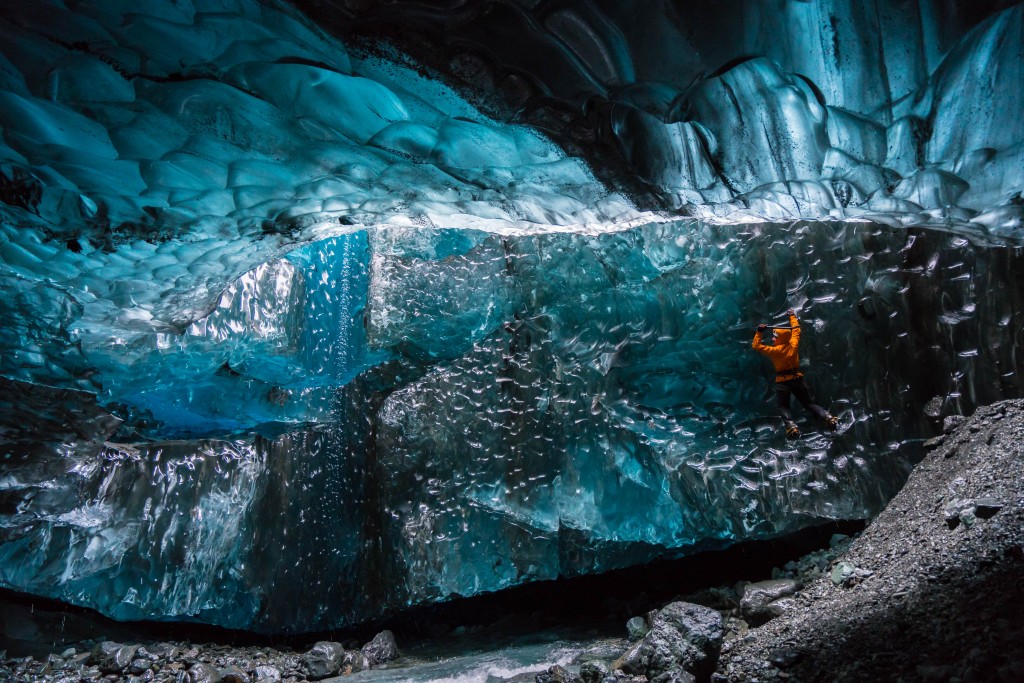
Wednesday 25th November 2015, Vatnajökull national park, Iceland: Photographer Mikael Buck with assistance from renowned local Icelandic guide Einar Runar Sigurdsson, explored the frozen world of Vatnajökull glacier in Iceland using Sony’s world first back-illuminated full-frame sensor – which features in the ?7R II camera. His images were taken without use of a tripod or any image stitching techniques in photoshop. This was made possible through Sony’s new sensor technology, allowing incredibly detailed low-light hand held photography. Previously images this detailed would have required carrying bulky equipment to the caves, some of which can require hiking and climbing over a glacier for up to two hours to to access. This picture: Guide Einar Runar Sigurdsson is seen ice climbing inside the 'Waterfall Cave' PR Handout - editorial usage only. Photographer's details not to be removed from metadata or byline. For further information please contact Rochelle Collison at Hope & Glory PR on 020 7014 5306 or rochelle.collison@hopeandglorypr.com Copyright: © Mikael Buck / Sony 07828 201 042 / mikaelbuck@gmail.com

Guide Einar Runar Sigurdsson is seen ice climbing inside the ‘Waterfall Cave’. Copyright: © Mikael Buck / Sony

Within the photo series, barren caves have been brought to life, making visible the intricate curves of the natural sculptures, the delicate structure of its icicles, and the smooth and the marble-like texture of the cavern walls, which are formed through constant movement. Images capture the misty waterways that flow within the frosty fortress, as well as the ice-cold waterfalls that cascade down and transform the cavern’s bright blue walls. Buck has also captured images of a skilled local climber ascending the icy walls to showcase the scale of the majestic blue cave.

Wednesday 25th November 2015, Vatnajökull national park, Iceland: Photographer Mikael Buck with assistance from renowned local Icelandic guide Einar Runar Sigurdsson, explored the frozen world of Vatnajökull glacier in Iceland using Sony’s world first back-illuminated full-frame sensor – which features in the ?7R II camera. His images were taken without use of a tripod or any image stitching techniques in photoshop. This was made possible through Sony’s new sensor technology, allowing incredibly detailed low-light hand held photography. Previously images this detailed would have required carrying bulky equipment to the caves, some of which can require hiking and climbing over a glacier for up to two hours to to access. This picture: Guide Einar Runar Sigurdsson is seen ice climbing inside the 'Waterfall Cave' PR Handout - editorial usage only. Photographer's details not to be removed from metadata or byline. For further information please contact Rochelle Collison at Hope & Glory PR on 020 7014 5306 or rochelle.collison@hopeandglorypr.com Copyright: © Mikael Buck / Sony 07828 201 042 / mikaelbuck@gmail.com

Sigurdsson ice climbing inside the ‘Waterfall Cave’. Copyright: © Mikael Buck / Sony

Helen Maria of Local Guide – Iceland’s oldest mountain guiding company – comments: “I have been exploring these ice caves for years with Local Guide. Being here in them is a truly wonderful opportunity. Knowing you’re experiencing such a fleeting phenomenon makes it even more special – the opportunity to help capture this nature in all its intricate glory and now in more detail than ever thanks to Sony’s sensor technology is a truly magical experience. This series of photographs has done it justice like never before, and I hope many more people will be spurred on to visit as a result.”

Wednesday 25th November 2015, Vatnajökull national park, Iceland: Photographer Mikael Buck with assistance from renowned local Icelandic guide Einar Runar Sigurdsson, explored the frozen world of Vatnajökull glacier in Iceland using Sony’s world first back-illuminated full-frame sensor – which features in the ?7R II camera. His images were taken without use of a tripod or any image stitching techniques in photoshop. This was made possible through Sony’s new sensor technology, allowing incredibly detailed low-light hand held photography. Previously images this detailed would have required carrying bulky equipment to the caves, some of which can require hiking and climbing over a glacier for up to two hours to to access. This picture: Guide Helen Maria is pictured inside the waterfall cave PR Handout - editorial usage only. Photographer's details not to be removed from metadata or byline. For further information please contact Rochelle Collison at Hope & Glory PR on 020 7014 5306 or rochelle.collison@hopeandglorypr.com Copyright: © Mikael Buck / Sony 07828 201 042 / mikaelbuck@gmail.com

Guide Helen Maria is pictured inside the waterfall cave. Copyright: © Mikael Buck / Sony

Yann Salmon Legagneur, Head of Product Marketing, Digital Imaging for Sony Europe, commented, “These images wouldn’t have been possible a few years ago without having to take bulky kit, lighting and other accessories to the glacier – all of which would have weighed down a photographer. The sensors inside Sony’s α7 and RX cameras ensure that all a photographer needs is a small form factor camera and with its low light photography capabilities and they can then capture incredible images like these.”

Wednesday 25th November 2015, Vatnajökull national park, Iceland: Photographer Mikael Buck with assistance from renowned local Icelandic guide Einar Runar Sigurdsson, explored the frozen world of Vatnajökull glacier in Iceland using Sony’s world first back-illuminated full-frame sensor – which features in the ?7R II camera. His images were taken without use of a tripod or any image stitching techniques in photoshop. This was made possible through Sony’s new sensor technology, allowing incredibly detailed low-light hand held photography. Previously images this detailed would have required carrying bulky equipment to the caves, some of which can require hiking and climbing over a glacier for up to two hours to to access. This picture: Inside the 'ABC cave' - which stands for Amazing Blue Cave. Guide Einar Runar Sigurdsson is seen taking a photo at the entrance to the cave PR Handout - editorial usage only. Photographer's details not to be removed from metadata or byline. For further information please contact Rochelle Collison at Hope & Glory PR on 020 7014 5306 or rochelle.collison@hopeandglorypr.com Copyright: © Mikael Buck / Sony 07828 201 042 / mikaelbuck@gmail.com

Sigurdsson is seen taking a photo at the entrance to the ABC cave. Copyright: © Mikael Buck / Sony

As the global number one in Sensor technology and production with approximately 50% global market share, Sony is proud to continue to push through the perceived boundaries of sensor development and thanks to advancements in this field, images like this are now possible. Sensors are such a vital part of camera performance and being able to release two new advanced sensors this year is enabling Sony to continue its growth in the digital imaging industry.

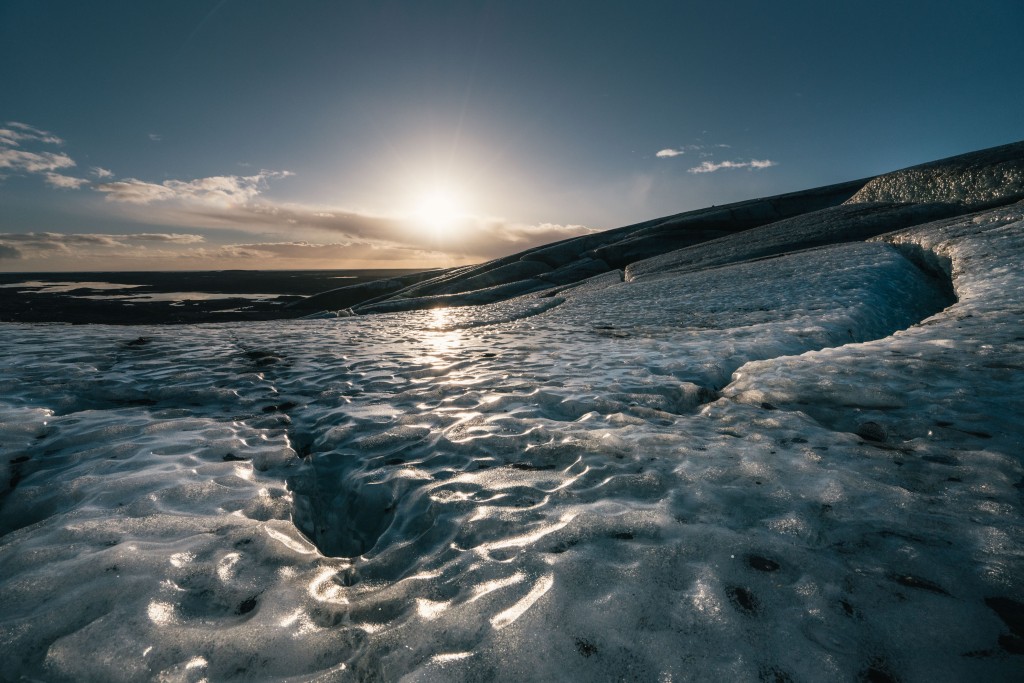
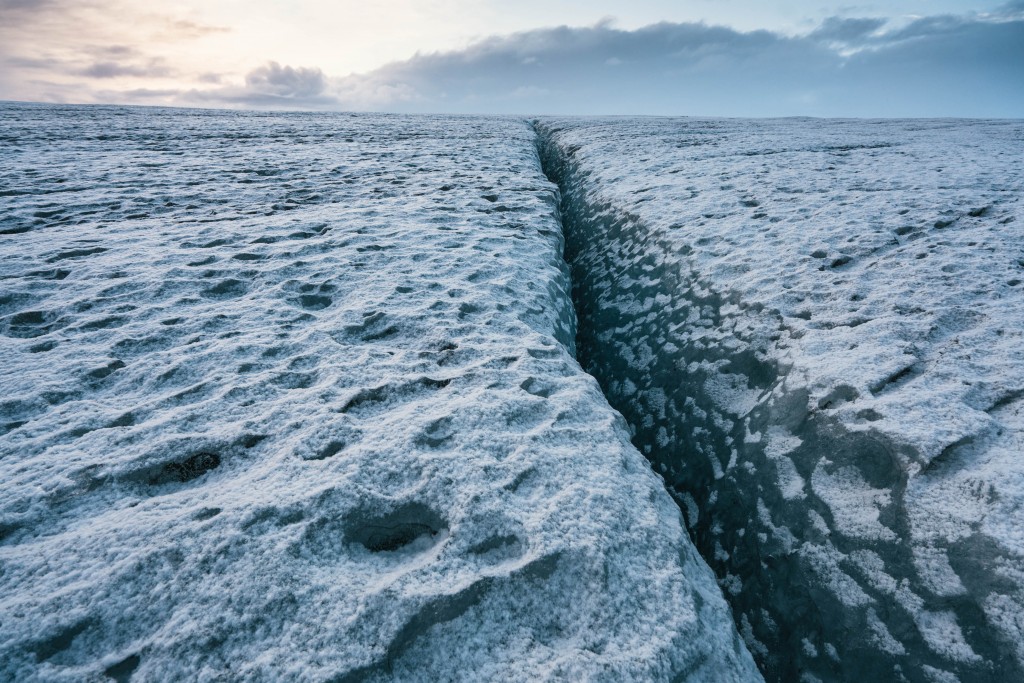
Wednesday 25th November 2015, Vatnajökull national park, Iceland: Photographer Mikael Buck with assistance from renowned local Icelandic guide Einar Runar Sigurdsson, explored the frozen world of Vatnajökull glacier in Iceland using Sony’s world first back-illuminated full-frame sensor – which features in the ?7R II camera. His images were taken without use of a tripod or any image stitching techniques in photoshop. This was made possible through Sony’s new sensor technology, allowing incredibly detailed low-light hand held photography. Previously images this detailed would have required carrying bulky equipment to the caves, some of which can require hiking and climbing over a glacier for up to two hours to to access. This picture: The view on top of the Vatnajökull glacier whilst hiking to access the caves PR Handout - editorial usage only. Photographer's details not to be removed from metadata or byline. For further information please contact Rochelle Collison at Hope & Glory PR on 020 7014 5306 or rochelle.collison@hopeandglorypr.com Copyright: © Mikael Buck / Sony 07828 201 042 / mikaelbuck@gmail.com

The view on top of the Vatnajökull glacier whilst hiking to access the caves. Copyright: © Mikael Buck / Sony

In addition to being able to capture incredibly detailed low-light photography, sensor technology featured in the RX10 II and RX100 IV cameras also allows photographers, hobbyist and professionals alike, to capture moments not always visible to the human eye, with 40X super slow motion video capture at up to 1000fps.

Wednesday 25th November 2015, Vatnajökull national park, Iceland: Photographer Mikael Buck with assistance from renowned local Icelandic guide Einar Runar Sigurdsson, explored the frozen world of Vatnajökull glacier in Iceland using Sony’s world first back-illuminated full-frame sensor – which features in the ?7R II camera. His images were taken without use of a tripod or any image stitching techniques in photoshop. This was made possible through Sony’s new sensor technology, allowing incredibly detailed low-light hand held photography. Previously images this detailed would have required carrying bulky equipment to the caves, some of which can require hiking and climbing over a glacier for up to two hours to to access. This picture: On top of the Vatnajökull glacier PR Handout - editorial usage only. Photographer's details not to be removed from metadata or byline. For further information please contact Rochelle Collison at Hope & Glory PR on 020 7014 5306 or rochelle.collison@hopeandglorypr.com Copyright: © Mikael Buck / Sony 07828 201 042 / mikaelbuck@gmail.com

On top of the Vatnajökull glacier. Copyright: © Mikael Buck / Sony

Wednesday 25th November 2015, Vatnajökull national park, Iceland: Photographer Mikael Buck with assistance from renowned local Icelandic guide Einar Runar Sigurdsson, explored the frozen world of Vatnajökull glacier in Iceland using Sony’s world first back-illuminated full-frame sensor – which features in the ?7R II camera. His images were taken without use of a tripod or any image stitching techniques in photoshop. This was made possible through Sony’s new sensor technology, allowing incredibly detailed low-light hand held photography. Previously images this detailed would have required carrying bulky equipment to the caves, some of which can require hiking and climbing over a glacier for up to two hours to to access. This picture: Inside the 'ABC cave' - which stands for Amazing Blue Cave. For further information please contact Rochelle Collison at Hope & Glory PR on 020 7014 5306 or rochelle.collison@hopeandglorypr.com Copyright: © Mikael Buck / Sony 07828 201 042 / mikaelbuck@gmail.com

Amazing Blue Cave. Copyright: © Mikael Buck / Sony
To enquire about other uses, reproduction rights or prints email [email protected]

Capturing Autumn colour better

nopolariser-vs-polariserandprofile-web

Upper: unprofiled (Standard) raw conversion. Lower: using a tunsgten-light generated custom camera profile, combined with a polarising filter, gives a more vivid impression.

Most Alpha system users know that some – not all – cameras have a special JPEG mode for Autumn Colours. They’ll also know that if you shoot raw, with no JPEG in camera, only Sony software replicates this. The choice of picture looks or camera profiles in Lightroom and other programs ranges from none (one default) to good (a full basic range similar to Canon settings). However, you can go way beyond the default look your camera will produce from the Autumn colours we are seeing right now (UK) if you profile your camera using the X-Rite Color Checker Passport and the free downloadable software which goes with it. You can also use this software with any standard MacBeth Color Checker card.

You still need to create a .dng file from your original raw, as you also do for Adobe’s free camera profile generator. The X-Rite software creates much smaller profile files but they are no less effective.

Here’s my tip – normally, you calibrate by daylight and the Adobe Camera Profile (.dcp) includes automatic adjustment for tungsten. You can also take two test shots, one under each lighting condition. Experimenting with the X-Rite software, I found that if you only use tungsten to create your profile, all the daylight ‘landscape’ colours (especially green foliage and the sky) really pop out. The greatest change is in the sky blue, which can be very disappointing if you use Adobe Standard as your camera profile for raw conversion.

A7RIIprofiles

The zip file you can download from above contains some .dcp profiles for the A7R II which I’ve produced (the names are more or less self-explanatory). They should be unzipped and placed in the CameraProfiles folder of Camera Raw in Application Support>Adobe. You can find the software, instructions for PC and Mac, at:

http://xritephoto.com/ph_product_overview.aspx?ID=1257&Action=Support&SoftwareID=986

Using the stock Lightroom/ACR A7RII camera profiles you’ll find that the Landscape flavour tends, if anything, to make sky blue lighter. My tungsten-generated profile has most of the overall ‘snap’ of Landscape plus very much richer sky tones.

The second tip with Autumn/Fall colours is, of course, to use a polariser. I’d say this makes the single greatest difference to all Autumn colours even if you can’t see it clearly when composing. The individual leaves reflect light, and the polariser cuts through this to reveal the full colour. Because it also darkens the sky, the often fairly dark colours of Autumn trees come to life better. You don’t need to study the trees, just set the polariser for the best results with the sky. The leaves are at such random angles all positions tend to work equally well. It can however be worth trying a few different rotated positions of the polariser especially if there is also water in the shot. What deepens the sky may also reduce the strength of reflections in water. Experiment!

– David Kilpatrick

If you are considering buying a Color Checker, Color Checker Passport on Amazon can benefit this site.


1 2 3 5