Cameracraft magazine – Taking your practical photography further
Author: David Kilpatrick
Professional photographer and journalist, founder and editor of magazines PHOTOpro, Photon, Freelance Photographer, f2 and Cameracraft. For 25 years director of the Minolta Club. Fellow of the BIPP and Hon. Fellow of the MPA.
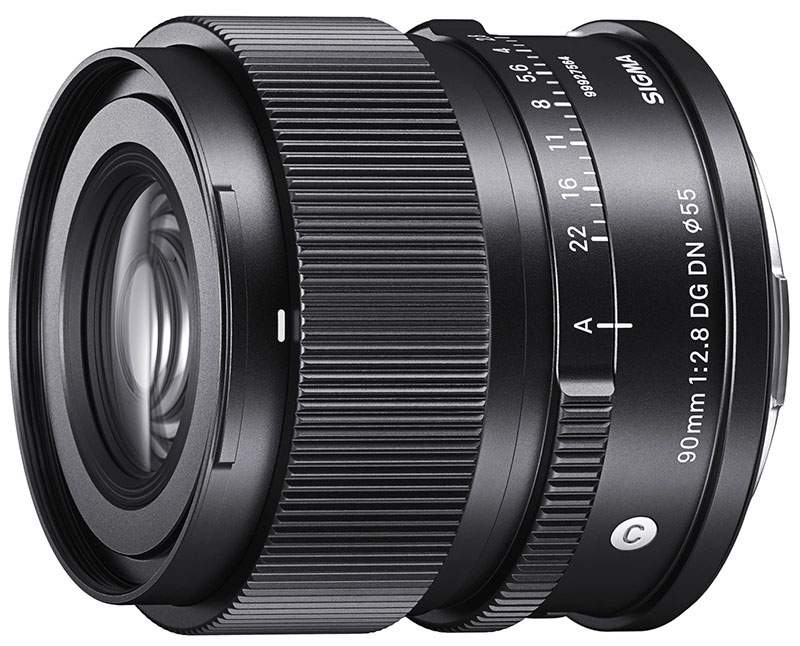
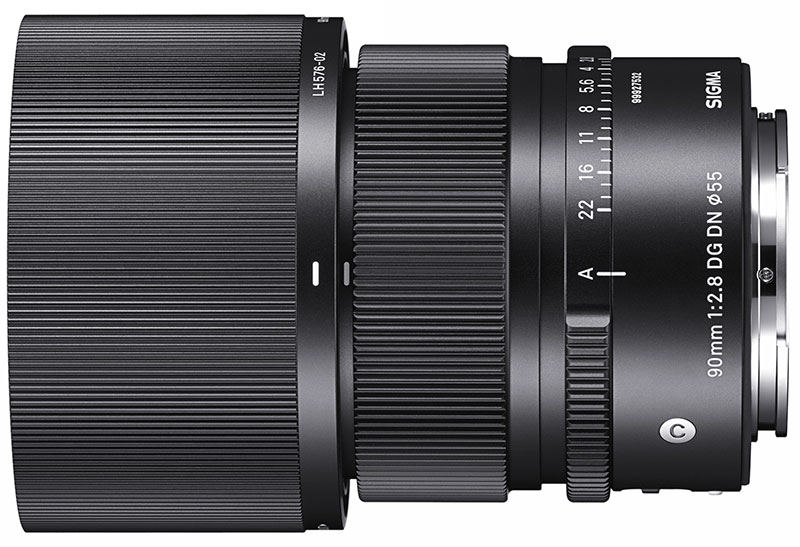
With the introduction of a super-compact 90mm f/2.8, Sigma has made the I-series of high performance full frame mirrorless system lenses match the very best classic kits of the rangefinder era.
The I-series lenses are all fixed focal length (primes) and feature aperture control rings as well as fast autofocus with MF/DMF via the lens focusing barrel. The construction is solid metal, not a thin skin of metal over plastics as found in some earlier primes from makers like Zeiss, Samyang, Tamron and the Sony and Panasonic camera brands themselves. Every component in the lens is metal down to the stepper motor focusing carriage and the mounting of the glass elements.
It’s a return to the standard of Leica rangefinder – or Contax G autofocus – lenses updated for users of the Sony E (FE) and Sigma, Leica and Panasonic L mounts.
We’ve only tried the 60mm f/2 in this series so far, but the performance supported the company’s claim to be delivering very high resolution suitable for 60 megapixel or higher sensors. The 90mm f/2.8 has special attention to chromatic aberration in its design which uses no fewer than five SLD (super low dispersion) elements. We expect to see foreground and background blur unaffected by colour-bokeh shifts, made very smooth by a nine-bladed aperture and aided by third-stop f-stop setting on the lens or via the camera. The closest focus of 50cm compares with a typical figure around 85cm for most 90mm lenses, and yields a 0.2X (1:5) close-up.
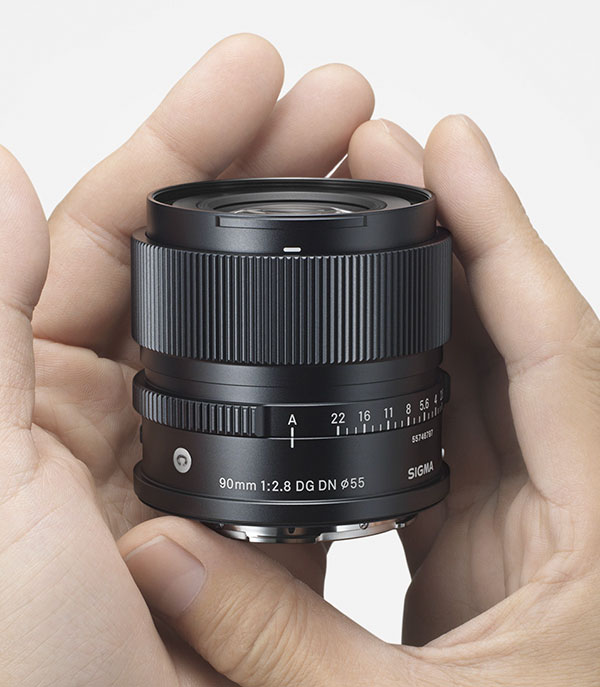
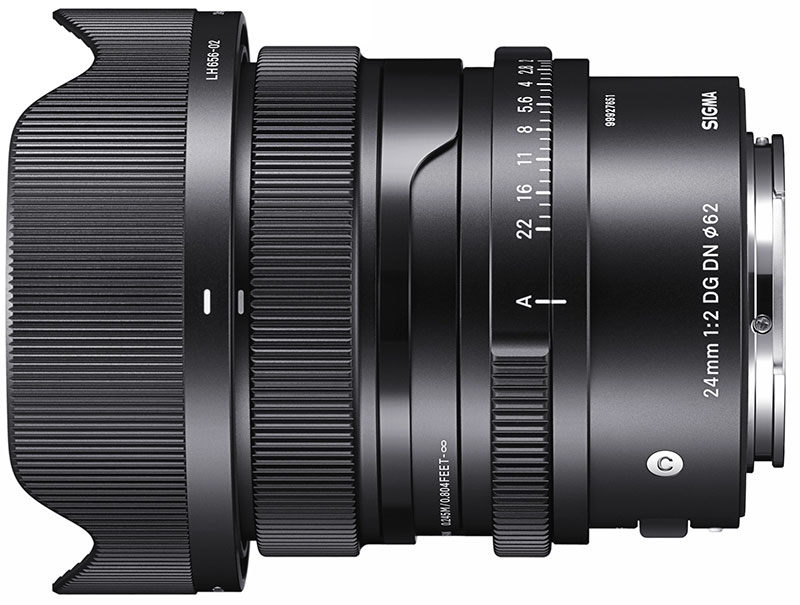
This lens accepts 55mm filters and weighs only 295g – you can see the size ‘in hand’. It can be teamed up with the 24mm f/3.5 and 45mm f/2.8 in the same range weighing in at less than 750g overall. Combined with a lightweight smaller body like the Sony A7C it’s the closest a digital shooter can get to have a Leica with autofocus.
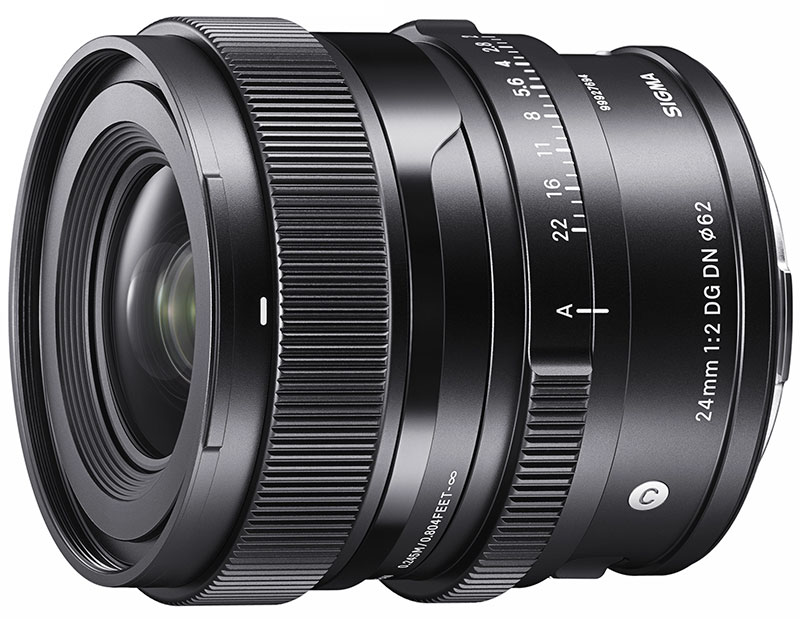
Alongside the 90mm, also available from September 24th will be a faster version of the 24mm at f/2. It’s sure to attract buyers at the same £549.99 RRP UK ($669 USA) as the 90mm and although it takes 62mm filters and is a little bigger, weighing in at 365g, but it’s really part of the f/2 I-series which now includes the 35mm and 65mm so well matched there. Focus is down to 24.5cm, 1:6.7 scale, which is not exceptional when some 24mms achieve 1:2 but entirely practical.
As for cost, it’s less than Sony’s 24mm f/2.8 G as well as a stop faster and much less than the Zeiss Batis 25mm f/2 or the APS-C only Sony Zeiss 24mm f/1.8.
Both these lenses, and the whole I-series, are compatible with Sony’s high-speed autofocus and they’re all made in Japan. The standard now set by Sigma are well-known and they seem to be the only maker left producing new lenses with dust and splash resistant all-metal barrel and mechanical design, brass mounts, and resolution to match the most demanding sensors.
If it rains, these photo locations just get better…
On our doorstep (writes publisher David Kilpatrick) or just a short drive away there are many rivers and burns coming down from the Cheviots, the Lammermuirs, the Southern Uplands and Tweedsmuir. Some pass through steep small ravines or cleughs (similar to ghylls in north-west England). In both Northumberland and southern Scotland, they are called linns. Some just get called waterfalls, like the Grey Mare’s Tail on the road between Selkirk and Moffat, because they are big enough. Some are very hard to reach or don’t offer potential for photography; some are easy to get to but almost local secrets, without very clear footpaths or signs. If you visit Kelso, Jedburgh or Coldstream here are three which you can easily visit by car with normal walking footwear in the course of a day. The first is just a few minutes from Kelso.
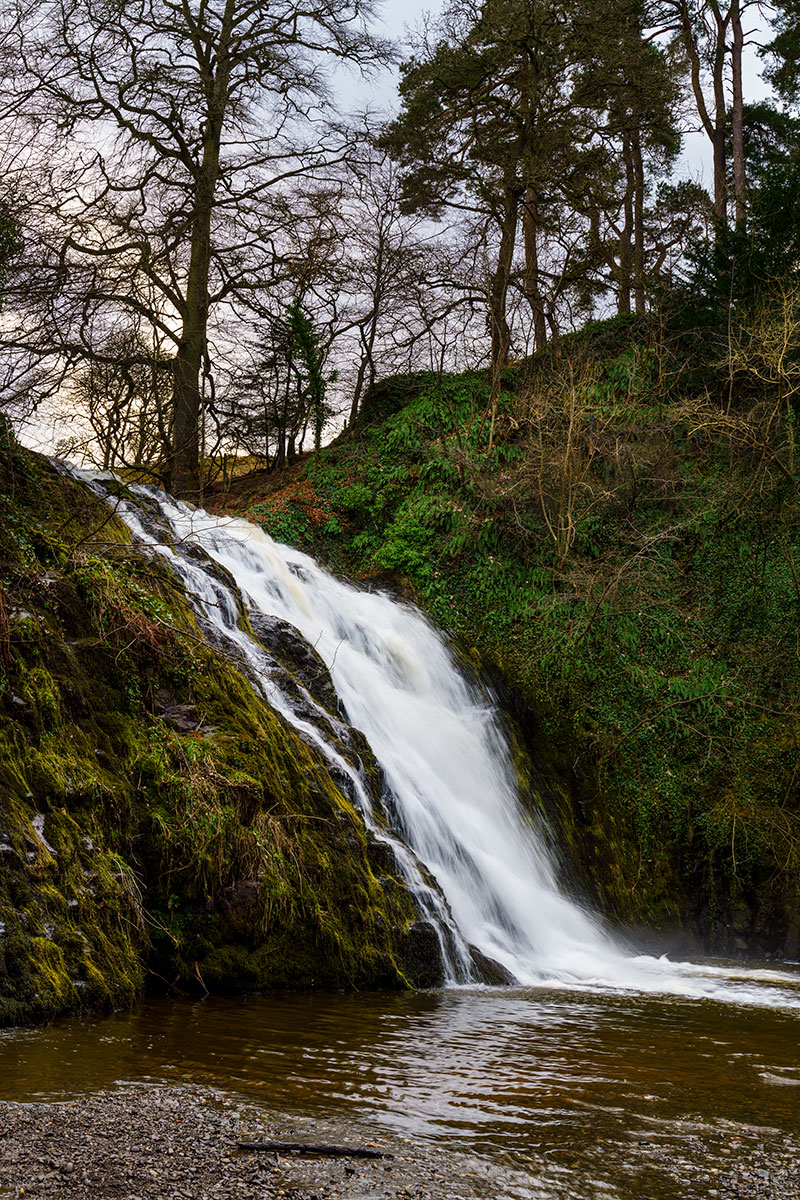
Stichill Linn is at the site of a former mill and later pioneering hydro-electric on the Eden Water, in the grounds of the Newton Don estate. During the winter of 2020/21 the estate put a big effort into making the riverside, woodlands and the linn accessible after many years of neglect which had made it hard to reach and at time impossible to photograph without obstructions. Though you need to know which minor road (from Ednam) to park on and then where to find the start of the signposted footpaths, once you are on the trail it is an easy walk with occasional boggy spots where small streams cross the path. Wellies are advised, and also help if you plan to cross the river and find positions for a tripod. It is lovely in autumn as the woodlands are mostly deciduous. This usually means the last week in October and first in November. This spot is good for taking your dog as there’s no livestock to encounter and it is very safe to be off the lead.
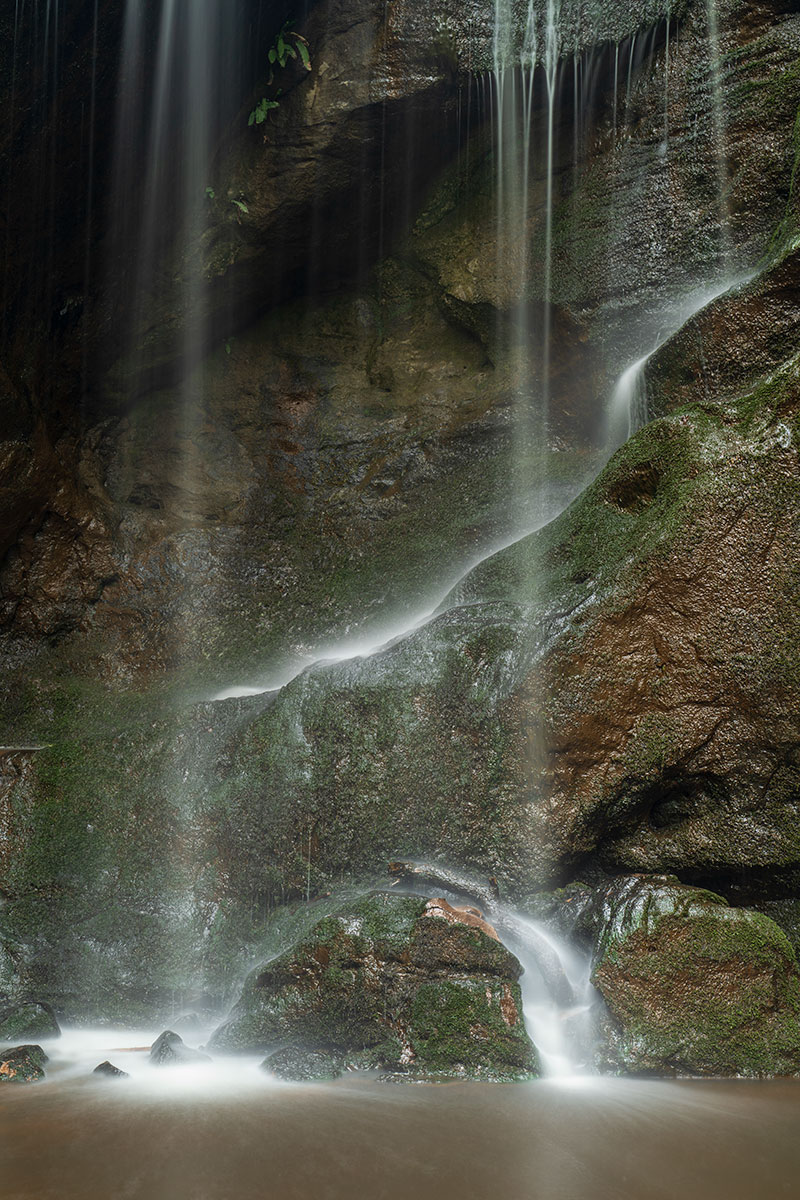
My next one is Roughting Linn, 20 miles away over the border in England. It can be reached from the village of Ford, or from the A1 side via Lowick. Although the farm estate the woodlands and linn are located on allows access, the paths alongside the stream are not maintained in the same way as Stichill. It’s best to wear shoes or boots suitable for moor or mountain and be prepared to use a stick (or a tripod) to deal with slippery or sloping sections often close to sharp drops into the burn. Wellies are essential to get to the classic position for photography. Sadly some of the moss on the boulders has sheared away and as normal some woodland debris has landed. It’s tempting to go in with help and remove the tree limb which is new feature. The area round the waterfall has some fascinating rock faces, caves, twisted trees and countless interplays of stones, water and light. When I took this in mid-May 2021 the woods were also full of bluebells. There is no phone signal here, there are few visitors and after negotiating a steep scramble back to the path I realise you should really do this in company, not alone. Again, this location does not involve crossing farmland so dogs are OK, but the stream at certain points would not be a welcome invitation!
My final one here is Hethpool Linn, near the farm of Hethpool which is south of the Yetholm to Wooler road, on the College Valley road closed to vehicles except by permit (limited numbers). It’s national park, and also just off St Cuthbert’s Way. There is a car park at the end of the public vehicle access. Beyond it you can walk miles up the College Valley, or turn back a bit and go right down a track leading from the big farm as if following the well-known walking route. Looking at a map you might think the linn could be reached from the east side of the College Burn, but that’s a mistake. Before you reach the crossing, a permissive footpath (without signs to the waterfalls) crosses farm fields, over a stile on the left of the track. This takes you between the farm woodland plantation, and the wooded banks of the river. A couple of stiles or gates later the sound of the water can be heard and small paths through scrub take you to the edge of the ravine. At some points you can climb down and where the path crosses a wooden footbridge the flow is shallow.
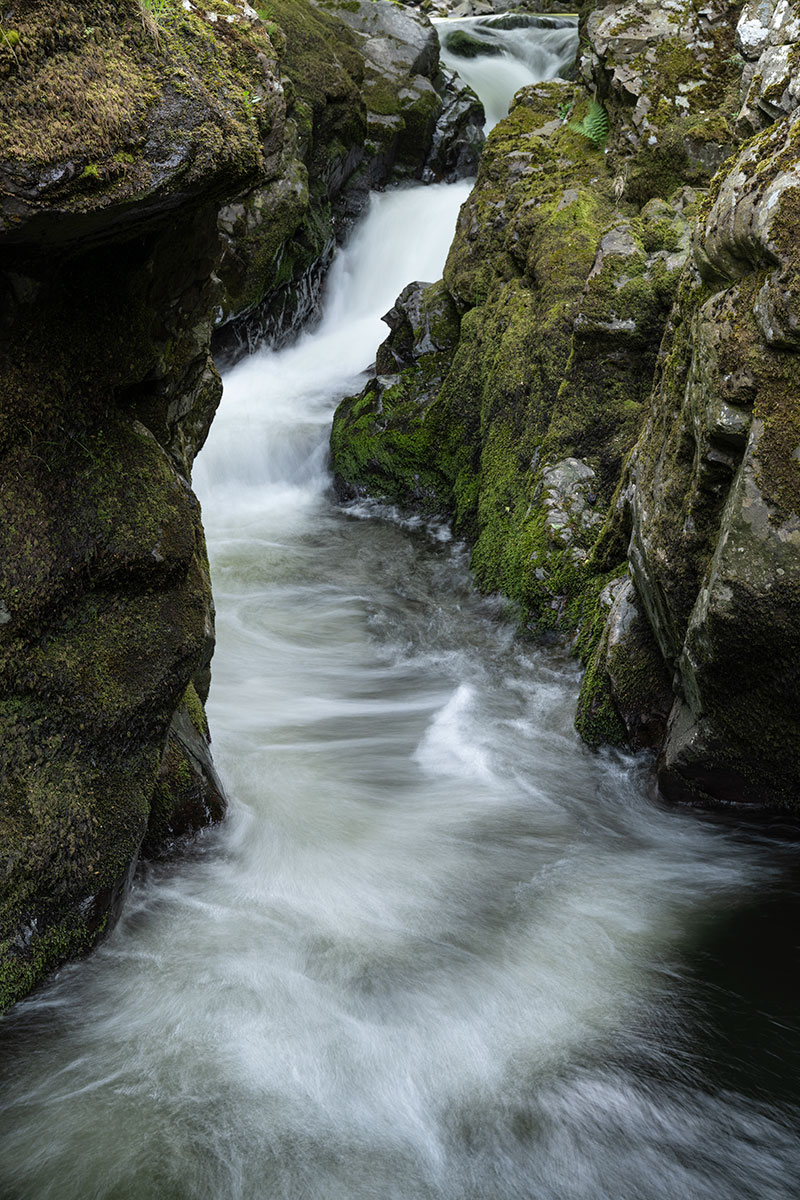
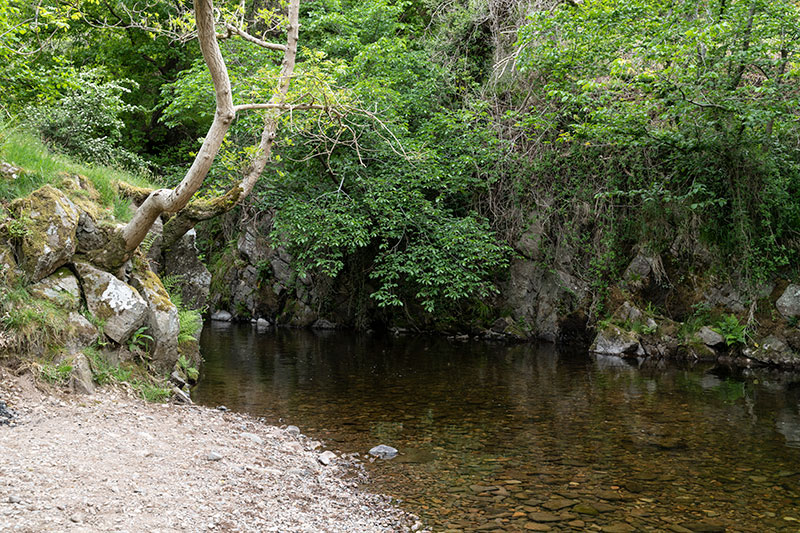
However, below the bridge the river enters a narrow deep mini-gorge, the linn itself. You take a footpath to the left after crossing the bridge and soon enough encounter the more dramatic stretch. The path then drops down, an easy enough scramble to a calm shallow pool of clear water with a pebble beach. The fast-flowing gorge above is not a tripod time exposure – it’s me clinging on to rocks right over the water, holding camera in contact with contours of the stone able to give it a stable support. Again, there is no phone signal and I realised it wasn’t that clever to be balancing (with £4k of camera and lens!) over a deep fast-flowing turbulent plunge a couple of metres below. I had left my camera bag and tripod (useless on the ledge) near the path high above and lowered myself down the rocks to the viewpoint I wanted. It’s something which people clearly do but safer in company.
As for the pool just round the bend after the narrow gorge ends, it’s not all that photogenic but you could bring your own naiad along. Maybe with a wetsuit… this water looks inviting and in the heat of summer it would be fine, but it’s a cold mountain stream nevertheless. Hethpool is very definitely farm land and lambs were everywhere on the walk, so taking a dog to enjoy this very dog-friendly pool would require care and control.
These three linns were photographed on separate sorties, with Stichill Linn in early March a mid-day venture, and both Roughting Linn and Hethpool Linn early evenings in June. Winter can be different but the bare trees let in more light and heavy rainfall transforms any of these. – David Kilpatrick
I now offer an AirBnB in Kelso – the former offices of PHOTOpro, Photon, Freelance Photographer, f2, Master Photography and Cameracraft converted to a flat by my daughter and son-in-law who sailed the Caribbean for a yea, and set it up so it would be suitable for visitors and for their return while buying a home nearby. Everyone loves the town and it’s great to welcome them. I am happy to give pointers to help visiting photographers and the flat has 50+Mbps fibre broadband (from a 900Mpbs service). After returning they converted the opposite wing of the house so in addition to East Wing there’s also West Wing AirBnB – two three-bedroom wings of the house, with their own entrances, licensed to accommodate 10 guests between them or six in any one wing.
For many years we have published PDF editions of Cameracraft and our earlier magazines using YUDU, ISSUU and a number of other hosting page-turn providers. We will be moving future PDF editions to be hosted on this website.
Our May/June edition reached printed copy readers from April 30th on.
NX Studio (version.1.0) – new software that enables the seamless viewing, processing and editing of still images and video. Nikon digital camera users can download the software, free of charge, from today.
The intuitive software integrates the functions of Nikon’s current image viewing software, ViewNX-i*, and its image-processing and editing software, Capture NX-D*, allowing users to view, process and edit images in a single application.
NX Studio inherits a wide range of existing functions from ViewNX-i and Capture NX-D, including detailed editing functions such as Picture Control and White Balance settings, and Exposure Compensation for RAW data. In addition, it includes Colour Control Points that allow users to adjust colours within a specified area, and a Retouch Brush feature for advanced correction. Its intuitive menu structure is organised by workflow, which improves the overall response speed for each function and provides a smoother editing process for both stills and video.
The software will enable users to transfer images to Nikon’s image sharing and storage service, NIKON IMAGE SPACE, and will be continually updated to ensure compatibility with new camera models.
Forgive me, Ron, wherever you are, for breaking my word and letting the world know about this story. I found the negatives by chance, on the eve of the 25 years before the writings are due to be revealed. I do not know where they are, but perhaps I was meant to photograph the box and to be told what was inside it – otherwise it might be that it has all been forgotten, and the people who set this in motion are all now dead. At least by telling this story, and showing the evidence of the pictures, I may set things in motion to ensure that what was originally intended does happen.
The few of you who know me through my photographic magazines will know that I have no politics but tend to be assumed to be coming from the left, and have no religion though people mistakenly assign me some concern with affairs of the spirit. Similar assumptions are often made in matters of money, or education. The truth is I have very little of any of these things.
Over twenty-five years ago, I made the acquaintance of a man called Ron Wilkinson who had the ability to carve wood unusually finely, in the style and perhaps even to the standard of Grinling Gibbons. Having the above-mentioned lack of education I promptly wrote an article about him in which Grinling (Chatsworth House, et al) was transmuted to Orlando (more at home with the lute than the chisel). Ron forgave me, and I photographed his work over a period of two or three years.
One day in 1975, he called me urgently to his home and workshop. He thought I might have an interest in some writings. An elderly – and apparently uneducated – lady in the nearby village had produced a huge volume of automatic writing. She believed this to be the work of St John the Divine (the topical one – Revelations). I had a brief opportunity to read some of this; it had a metre and verse structure, though not in rhyme, and a quality which seemed unlikely to come from the conscious mind of the ‘channel’ herself, whom I met. Ron then swore me to secrecy about what he was going to ask me to do – I was to photograph a chest, which a ‘group of people’ had paid for to hold these works until the new Millennium.
The chest was to be held securely in a chamber inside a mountain in Scotland, and against the express wishes of his sponsors, Ron wanted a photographic record before it was lost for ever. I set up two flash heads, and shot the chest in cramped conditions using a 35mm camera on Agfachrome film, which I had been using regularly and always had processed by A H Leach of Brighouse, the main professional Agfa lab in my area. Ron was to have the entire roll of slides, so that no copies would exist outside his keeping, even for me.
This film, however, was not be a triumph of process control. I was told that the Agfachrome had been processed, and fixed, in black and white negative chemicals. By this time the chest had been filled with the manuscripts and sent on its journey north. I could not believe the misfortune and I wondered, at the time, whether ‘darkroom forces’ had been at work Leach’s then worked miracles (figuratively; I should watch my words). Somehow they recovered some of the colour into a few of the extremely grainy, dense frames. They made hand C-type 12 x 15s, and their artists carefully retouched them to restore apparently natural colours. They then made 5 x 4 copy negatives and final 10 x 8 prints, which showed the details Ron had wanted to keep on record.
I filed those copy negs and thought little more of it – 25 years seemed so far away then that I never considered it likely I would be there to see the end of the Year 2000. Ron, rather suddenly, gained the (deserved) patronage of the Duke of Devonshire. He left his south Yorkshire village cottage, and the next time I saw him he and his wife Eda had a lovely farmhouse looking across the Chatsworth estate. He had become, however, very reserved. I could no longer photograph his carvings; he was busy restoring the Gibbons work in Chatsworth House. When I visited him, I could feel the tension, and I think he was not in the best of health. I am not sure when Ron died, or if Eda is still with us, or would remember me if she was; I am sure that someone will tell me.
I found the copy negatives by chance, when looking for another photograph from 1975. I had not forgotten, but I had consigned the story to the backroom of memory. I scanned the 24-year-old negatives. Modern digital techniques made far superior ‘prints’ emerge, even if the crossed curves which had once made half the print almost blue could not be eliminated entirely. Had those negatives been the intended 35mm slides, they would have been handed over; and all my commercial ‘packshots’ of that date were long ago consigned to the bin. The 5 x 4 copy negs had survived because they were kept separately.
If I feel sure of anything, it is that the Duke of Devonshire himself had some part in the encystment of the automatic writings – of the ‘songs of angels’, and ‘pearls of wisdom’, as the old lady identifed them. I may be wrong with the first name; I did not take notes. I do not know who else will have been privy to the location of the chest, whether they are still alive, whether their plans and intentions have been forgotten or kept alive. If the writings are of any importance they must be published either in the Year 2000 (which the public see as the start of the new Millennium) or preferably on January 1st, 2001. The year 2000 is merely the final year of the second millennium, just the same way that the year 100 was the last year of the first century. Regards of our calendar errors and arbitrary dating, it is in 2001 that we should be celebrating the future.
Everything is in place – the Internet is complete and globally functioning, we have the fingers and the keyboards to transcribe the manuscripts, and we have the scanners or digital cameras to record each page in evidence. It is only necessary now to start the work – if it has not already been started – and to open Ron’s locked and vaulted box to the world, electronically, in the single moment of a new server going live on World Wide Web.
Whether I believe in any of this does not matter one bit; it is a certainty that many millions of people in the world will read, study, translate and absorb the words. From what I saw and read myself, I believe this will do nothing but good. Words, whether written or spoken, can be magic bullets as indeed can photographs.
If we are to witness a battle between Good (with a capital G) and Evil (likewise) then it will be fought on Internet between words and images and much though I regret to have to say this, you probably all know very well where my beloved photography takes its place vis-a-vis God vs Auld Nick.
If there are two things you can be sure the Devil has in his museum of triumphs over mankind, they’ll be a five-string banjo and a Leica.
The second coming won’t need the Word to be made Flesh, nor even into a book. Our computers, our satellites, our cables and our TV screens are all the flesh that words need now.
And as for Lucifer? Well, with a name like that he must have dominion over the realms of lens and light if not the darkroom!
We popped printed January/February 2021 issues in the mail on December 30th for everyone – UK and worldwide – and now the edition can be found on Apple, Android, Kindle, Windows, PDF download here:
We kick off the year with a fascinating UV-flash hair fashion cover and portfolio, meet the homeless of the Home Counties, examine the case (or not) for bothering to shoot stock photos, see flowers frozen in time, profile the Camera Crazy lady, test the new Sigma 105mm macro and Tamron 28-200mm and the Sony A7C.
Received from the organisers today – and we don’t honestly see that it will return in the same form, ever. Perhaps some other technology show, as it already encompassed digital comms, design, film-making, 3D printing and many other non-photo things. Or perhaps – is it too much to hope? – a show once again mostly about photography:
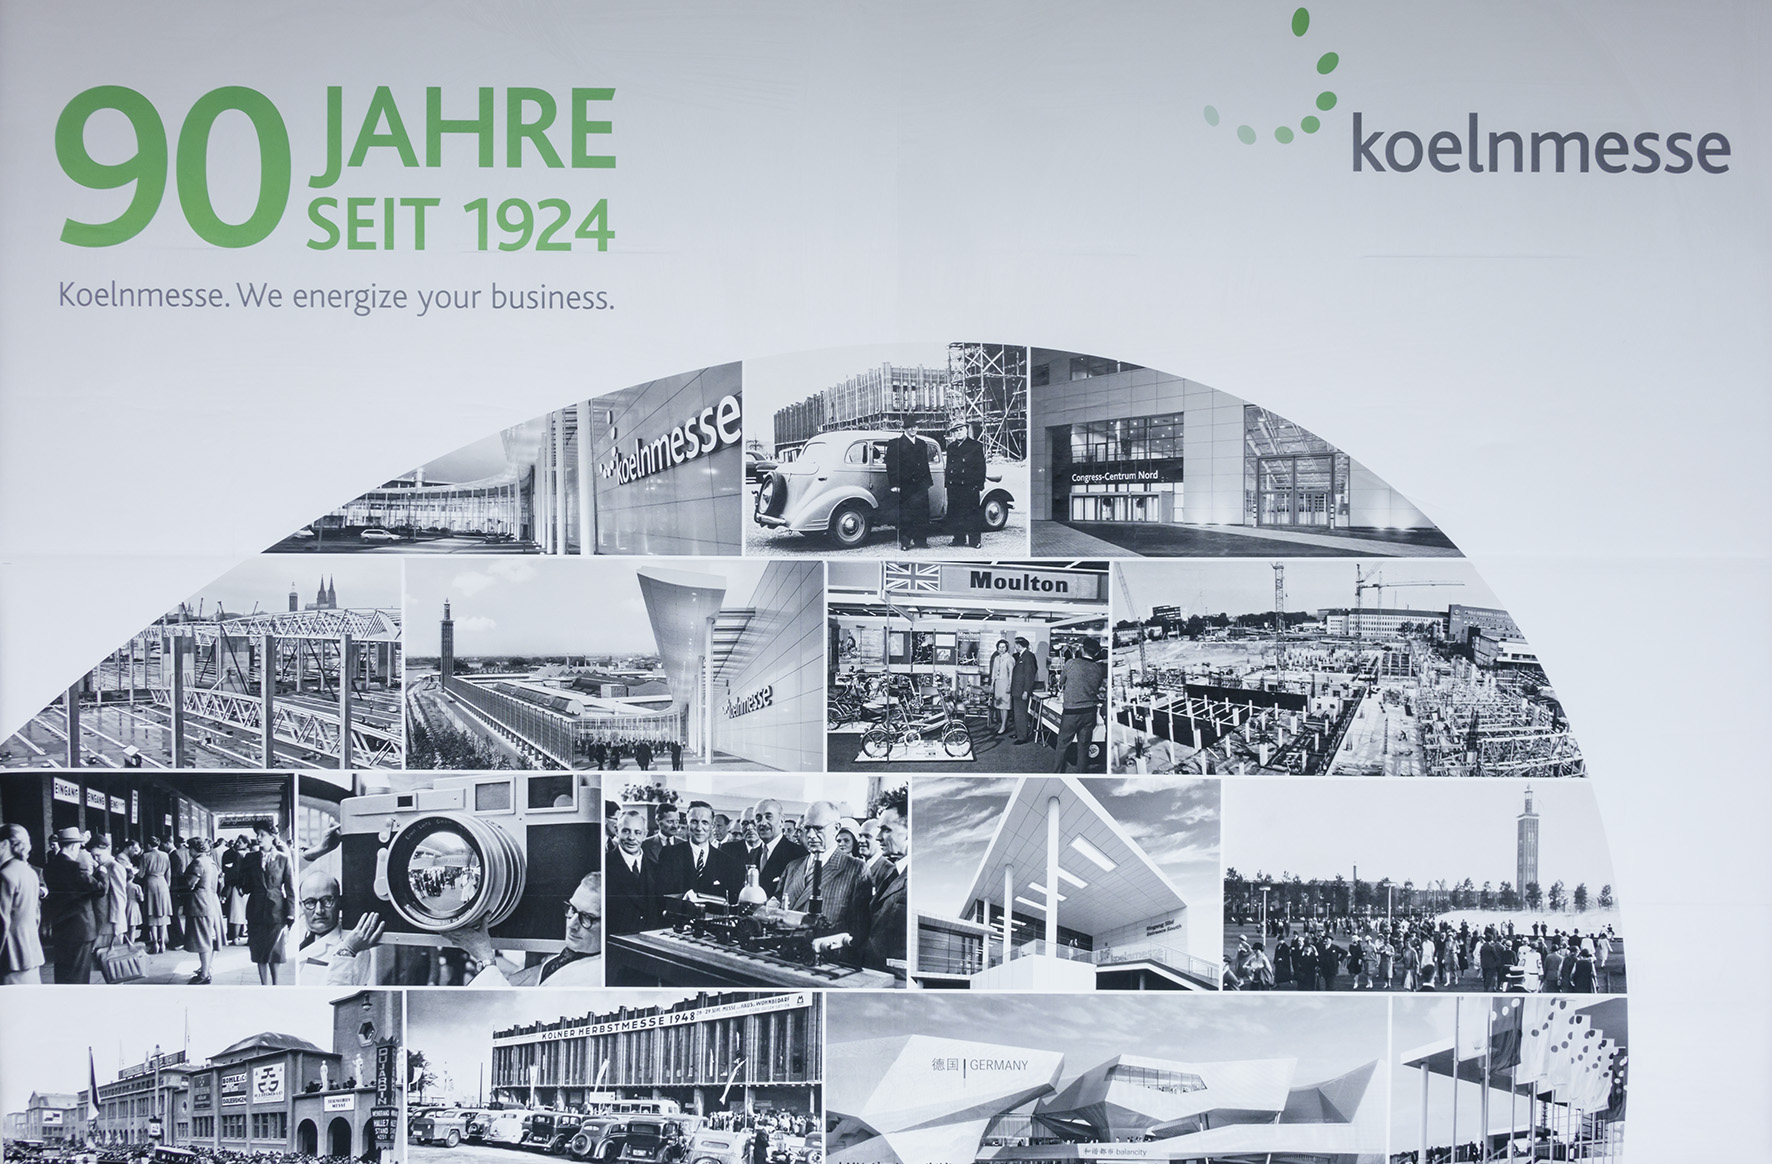
90 years of photokina – 1924 to 2014. The final one was in 2018.
photokina will be suspended until further notice
After 70 years, decreases in the imaging market force a hard cut
In view of the further massive decline in markets for imaging products, Koelnmesse has decided to discontinue organising photokina at its Cologne location for the time being. “Unfortunately, at present the framework conditions in the industry do not provide a viable basis for the leading international trade fair for photography, video and imaging,” according to Gerald Böse, President and Chief Executive Officer of Koelnmesse. “This hard cut after a 70-year shared history was very difficult for us. The trend in this industry, with which we have always had a close and trusting partnership, is very painful for us to witness. But we are facing the situation with a clear, honest decision against continuing this event, a decision to which, unfortunately, we have no alternative.”
Even before the coronavirus pandemic began, the imaging market was already subject to strong upheaval, with annual declines in the double digits. The momentum in this direction intensified massively in 2020, most recently reporting a decline in the 50-percent range. Recently, these developments have had a profound effect on photokina, which – in Cologne since 1950 – for generations has been the top address for the imaging industry and ranks among the most favourably and emotionally charged brands in the trade fair world.
Since 2014, Koelnmesse, together with the German Photo Industry Association, has taken its cue from downward market trends, responding with adjustments to the underlying concept of the trade fair as well as considerable investment in new exhibitor and visitor segments. “These changes in conceptual design, along with a shift in intervals and a change of dates, did not fundamentally improve the situation of the event,” says Oliver Frese, Management Board member and Chief Operating Officer of Koelnmesse. “While there are more photographs taken today than ever before, the integration of smartphone photography and videography, together with image-based communication, e.g. via social media, was not able to cushion the elimination of large segments of the classic market. As a result, the overall situation is not compatible with the quality standards of photokina as a globally renowned brand representing the highest quality and professionalism in the international imaging market.”
Koelnmesse has made its decision in close coordination with the German Photo Industry Association. Kai Hillebrandt, Chairman of that association, remarked: “Our partners in Cologne have done everything in their power to maintain photokina as the leading global trade fair. Nonetheless, an event held in 2022 could not have met the expectations of the entire imaging community that those efforts were intended to serve. That is why we, on behalf of our association, are joining them in taking this regrettably unavoidable step. We would like to take this opportunity to thank the team in Cologne for a tremendous 70 years together!”
Your contact:
Guido Gudat Vice President Corporate Communications
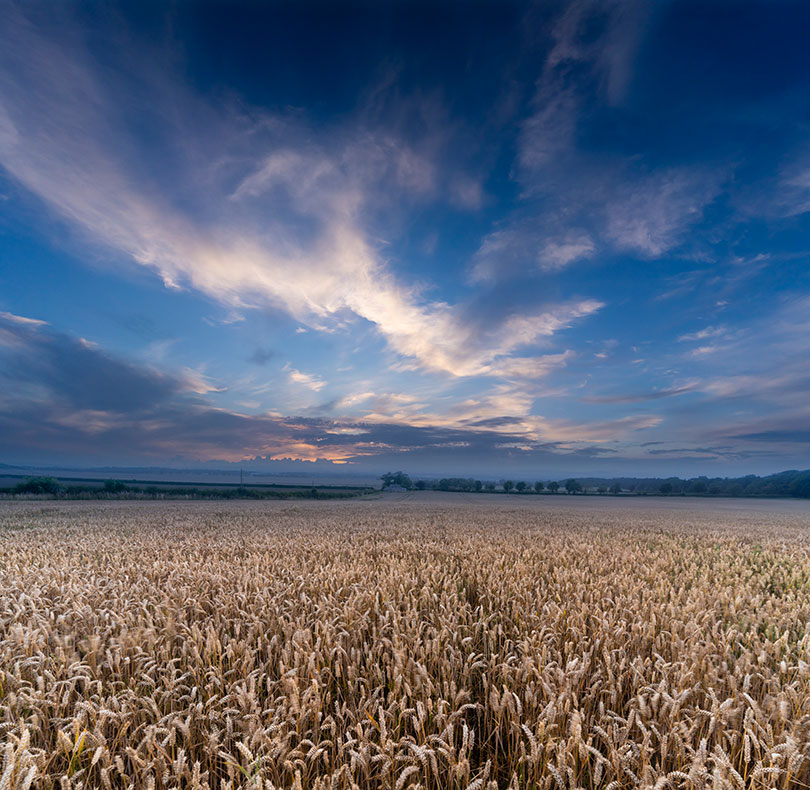
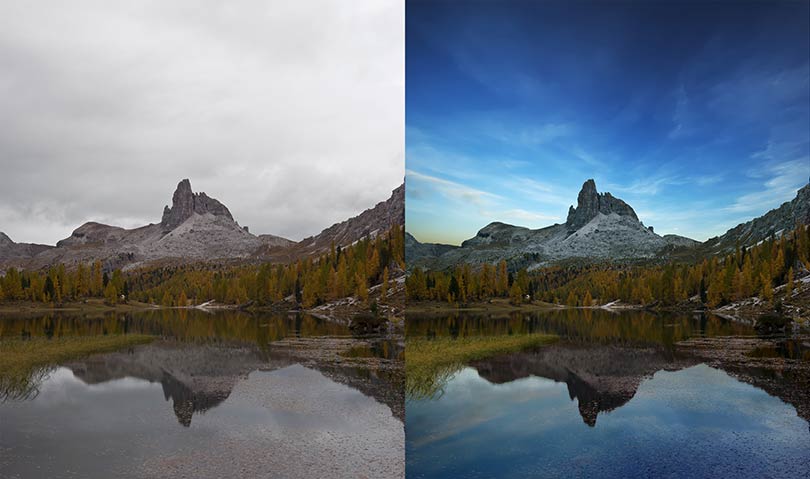
With cloud covering much of Britain and our own home territory in near the North Sea coast shrouded in featureless white for days, remember that post-processing can transform landscapes
This was just a few days ago when the promise of a sunset disappeared. The sky was taken ten minutes before I expected the best sunset, and shot without any ground – it had potential for use as a stock sky to compose into other shots. The ground, a field of wheat taken from the highest point looking north-west a short distance from our office, was shot hand-held with a 1/5th exposure, stabilisation providing a sharp image from the 17-28mm Tamron FE Sony lens – but the wind blowing the crop selectively, so some ears show contrasting movement.
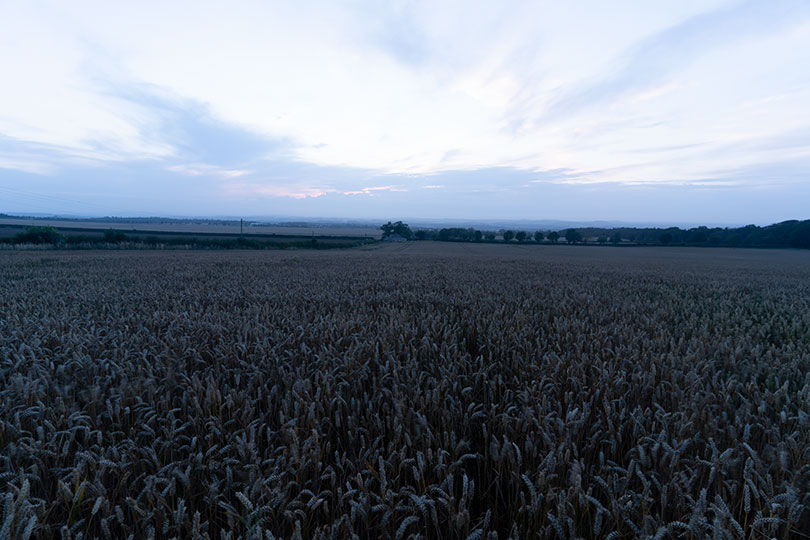
And that, above, is what a straight conversion from the raw capture looked like (you can also see how the sky had not morphed into a lovely sunset but instead lost any colour and became a neutral dusk). The point is that even a shot like this, in conditions like this, can be turned round by adjustment from raw and combining two frames. The almost square result is also a 170MB file, big enough for an acceptable print the size of some living room walls.
Landscape Pro as a solution when the weather lets you down
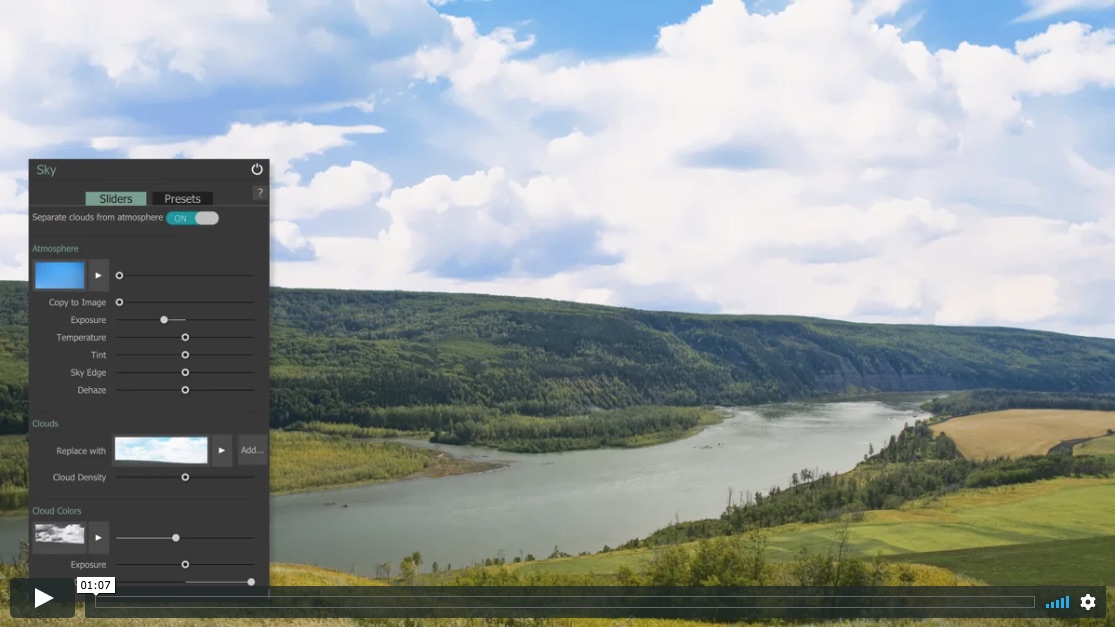
We used Photoshop for this but if you don’t have a full Mac or PC editing program, Anthropics’ Landscape Pro is purpose-designed for even more complex fixing-up and comes with its own library of royalty-free sky images (you can add your own). Here’s an example from Anthropics:
This one uses the masking functions of Landscape Pro to fit the sky to the shape of the rocks, and its controls to define water, mountain and trees as separately adjustable zones. There is also an intelligent function to create reflections in water with a realistic density. Notice that the water-weed in the foreground remains intact in the processed image and the sky reflection has been very accurately masked at the left hand side.
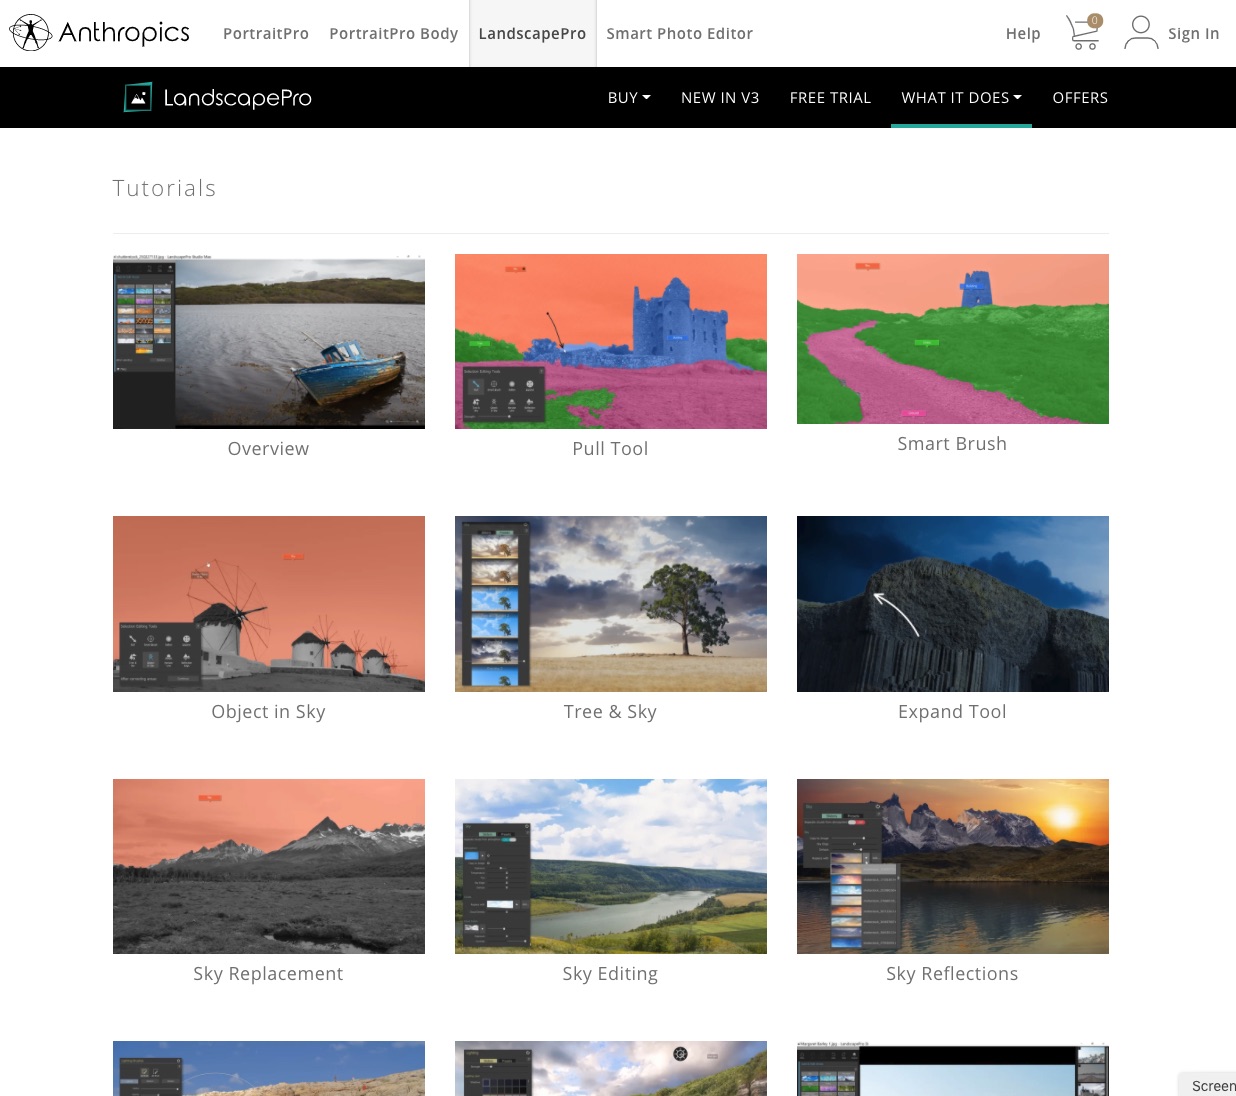
Using the program is well explained in a series of short videos on the Landscape Pro website. These are not the tedious kind of how-to vids you tend to find on YouTube which seem to aim to take several minutes to get to the point, maybe to enable advertising to appear. They are short and very clear in their message, and there’s a good selection (screen shot below).
There is a discount offer of 50% at the moment and an additional 20% off with our code CC8L – this code was not working when this post went out on August 16th due to a technical glitch, it is now working and can be used up to Sunday August 23rd.
Save on Landscape Pro & Portrait Pro using Cameracraft code CC8L
Code valid on any Anthropics software (PortraitPro, PortraitPro Body, LandscapePro or Smart Photo Editor), new editions, upgrades, or bundles. Download your free trial today! 50% OFF sale now on + for an EXTRA 20% OFFuse the code CC8L.