Sony A7R II review by David Kilpatrick
Sony’s A7R II has a unique position in the mirrorless ILC world, creating the largest image files at over 42 megapixels from an in-body five axis stabilised sensor with exceptional performance given by backside illuminated CMOS.
My reviews in print of the Sony A7R II have now appeared, in the British Journal of Photography, f2 Cameracraft and Master Photography magazines. All three make slightly different points, and reflect growing experience of the camera which I bought from WEX as one of the first despatched on July 28th. The UK best body-only price then fell from their £2,695 to just over £2,000 from one main Sony dealer (at an event promotion) in under three months.
Despite finding bargain deals or importing directly, since the introduction of the A99 only three years ago I have lost about £3,500 keeping up with Sony full frame camera bodies. I’ve also spent around £2,000 buying other Sony models like the NEX-6, RX100, RX100 MkIII, RX10, and A6000 to cover the shortcomings of every different full frame model – and £2,000 or more updating my lenses.
So why invest in the A7R II when experience tells me the Sony system loses value faster than any other, yet so often falls short of performing as required?
One body for all lenses
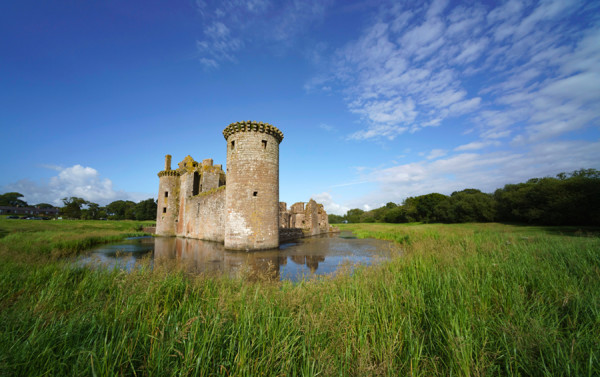
The A7R II almost matches medium format digital, and gives great results with rangefinder (Leica) fit wide-angles. It has enabled me to add a 12mm f/5.6 Voigtländer Ultra Wide-Heliar to my kit for sharp, tint and vignette free 120° architectural and creative work. I write about lenses, and with current and future adaptors, this body lets me focus and make test shots with all lenses from Canon, Nikon, Pentax, Leica and many others. Click the Heliar image below for a link to a full size (slightly cropped and straightened from 42 megapixels) file. It’s actually shot at f/11 though the pBase data says f/5.6, that how the camera’s Lens Correction app works.
There’s no lens made which disagrees with the 42 megapixel sensor as far as I can tell. My kit includes the 12mm mentioned above, the 16-35mm f/4 Carl Zeiss OSS, the 24-240mm f/3.5-6.3 Sony OSS, the 28mm f/2 Sony OSS FE (look out for individual reviews shortly); a 40mm Canon f/2.8 STM pancake, a 24mm Samyang tilt-shift, 85mm Sony SAM f/2.8, Sigma 70-300mm OS and a whole bunch of interesting older stuff used on adaptors.
With the Lens Correction App configured for SS with each manual lens, the very high resolution of the A7R II sensor allows a stable view for precision magnified focus well beyond the ability of any AF method or reliance on focus peaking alone. Doing this at working aperture ensures no focus shift on stop down. The results show me quickly which lenses are excellent performers without needing an optical bench or test charts (give me a single LED light and a darkened room, and I can find out what I need to know about any lens very quickly).
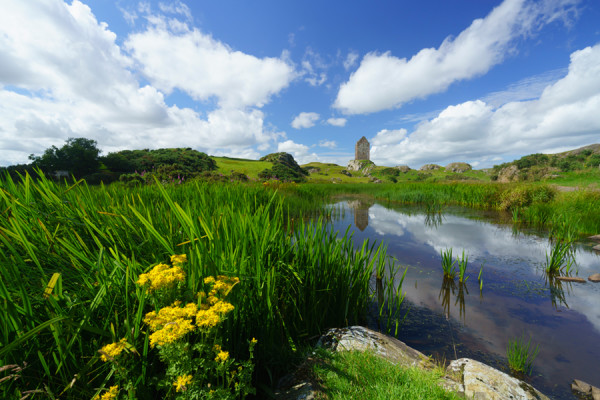
Most Sony and Sony Carl Zeiss zooms do yield good sharp images on 42 megapixels but it’s easy to exceed their best by fitting something like my 1970-ish SMC Takumar 50mm macro (used for the shot above), or even my Russian 50mm f/2 tilt-adapted Zenitar. I found the 28-70mm f/3.5-5.6 OSS which was fine on A7 II inadequate for critical quality on the A7R II and after tests concluded the 24-240mm was the best option to replace it. To learn why FE/E mount zooms and OSS lenses are never likely to blow away fixed focal length unstabilised types like the Zeiss Loxia or adapted classic RF and SLR optics, wait for my 24-240mm review.
Having said size matters, I downsize many of my final images to as small as 9 megapixels. I don’t need 42 megapixels (7952 x 5304) for every image and for some it’s ridiculous. I’m still selling thousands of stock images* taken with DSLRs from six megapixels up. So for general ‘field’ use, most lenses are more than OK, as I can reduce the file size right down 3600 x 2400 pixels when noise needs cutting, depth of field is a problem, or general sharpness is poor.
One sensor for all image shapes and sizes
With the A7R II, unlike the A7R, all the APS-C E-mount lenses work properly (they never have their OSS forcibly disabled). The auto cropped image is 5168 x 3448, 17.8 megapixels, and that’s a perfectly useful size for all personal and most professional work. The 0.78X EVF is, of course, completely filled to exactly the same visual quality as when a full frame lens is used – the user experience with an APS-C lens is identical to that with full frame.
As with downsizing or lens based cropping, I can crop full frame captures right down to less than a quarter of the A7R II image and have a file acceptable to Alamy for stock library use, or to a client directly for almost any reasonable editorial use. That same crop can go full page in a wedding album, or make a fine A3/16×12 print. It’s like using 120 rollfilm again, you can find pictures within pictures.
A 240mm shot clearly not close enough…
This is a 3600 x 2400 crop. That is, an image large enough for full page publication or a 12 x 18″ photo/inkjet print (click to view full size)
With many lenses which don’t cover full frame, a 24 x 24mm crop is perfect. The Sigma prime lens ART trio (19mm, 30mm and 60mm f/2.8 AF without stabilisation) all do well on this basis. I had a 16 megapixel square format digital back on Hasselblad V and the square format is a favourite. Unlike Olympus, who offer a 1:1 ratio capture, Sony only includes 3:2 (35mm shape) and 16:9 (HD widescreen) – I’d love them to add a proper 1:1 square image seen in the EVF and on screen, a perfect 28 megapixel crop.
The high resolution FF image also means there’s less need to stitch panoramas or use shift lenses. Canon’s 17mm f/4 TS-E tilt shift lens was introduced in 2009 when their full frame 12 megapixel 5D has just been upgraded to the 21 megapixel 5D MkII. On the A7R II, using its maximum 12mm shift reveals serious loss of outer field sharpness even at apertures like f/10, f/11 and f/13 which are optimum on other ways. It’s not a sensor cover glass problem as the Canon 5DS R revealed exactly the same weakness. Downsize the image to 12 megapixels, which the lens was probably first designed for, at everything looks sharp. But here’s where 42 megapixels can pay off – I just need to use a 12mm Voigtlander or a Sigma 12-24mm, crop a 14 x 21mm area from any part of the 24 x 36mm frame, and I have a 14 megapixel image allowing even more effective ‘shift’ than the Canon. And I can, of course, use the Canon via an adaptor if needed.
The same kind of strong cropping works for telephoto wildlife shots (300mm lens, better than 500mm on 14 megapixels) and for macro work (1:1 on full frame, 2.2:1 at 14 megapixels). You need to remember all the time that traditional depth of field calculations just don’t work well with sensors of 36 megapixels and over. When you view a full size A7R II image at 100% on a non-Retina iMac or HP 27″ monitor, you are looking at part of a six foot wide ‘print’. Depth of field tables, still used today, were based on viewing a 10 x 8″ print from a similar distance! This problem is reduced by higher resolution screens but sometimes, you simply need a smaller image size.
Canon 5DS/R (in proportion with earlier models) have useful M-RAW and S-RAW formats, allowing the cameras to become full frame 28 or 12 megapixels with a single menu change. This function is missing from Sony raw files and would be a great firmware enhancement, if it was possible. Edit: with the Sony A7RV and its even larger 61 megapixel sensor, Sony addressed this with M and S raw files of 26MP and 15MP, which are downsampled from a full capture so do not offer faster continuous (etc) but do bring noise control and sharpness benefits.
Reasons to buy the A7R II
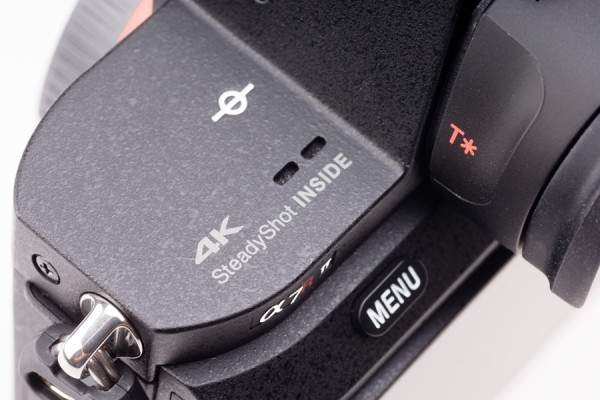
Having used two other A7 series bodies, and started the transition to the FE lens series with some mix of adapted glass on the way, why didn’t I stick with the far more realistic and practical A7 II, or the A7R which was paid for and at 36 megapixels just as useful a large file size?
- Internally or externally recorded 4K video though not a commercial offering from my side might well be a request from a future client. I don’t make videos though many years ago I did made 16mm films and many 35mm slide based dual and multi projector AV programs. However, I know many still photographers who have found sufficiently high-end clients for video to invest the time. I wouldn’t touch any video production, even a brief 20-second ad clip, for under four figures. It’s fun to experiment with until any serious use emerges. Also, excellent Super-35 crop format video.

- Completely silent operation when needed – though not compatible with any kind of flash, the fully electronic shutter is an option for wedding ceremonies and I’ve used that function already. It is also useful for shooting stills when someone is making a video, or during quiet concerts, in meetings, or when you simply don’t want the sound of a shutter to be heard. When silent is not needed, electronic first curtain (not provided on the A7R) improves shutter lag time and cuts vibration
.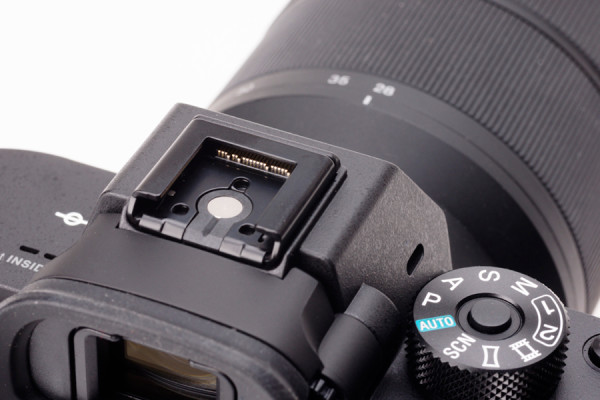
- It’s also got a 500,000 actuation life shutter built to more than pro specification and a superior 0.78X electronic viewfinder, a slightly improved body flange for the lens mount (now common to all the II models, tighter and more precise than the original machining), no light leaks. And the mode dial is improved with a locking button, the Multi Function Accessory shoe is further improved in contact reliability, the ocular is T* coated and gives better eye relief.
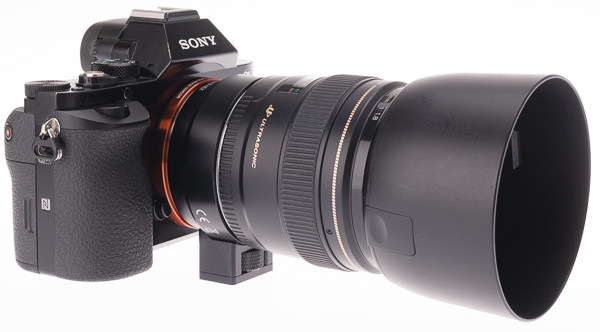
- It will perform well with all kinds of lenses and the 399-point wide area phase detection AF array built in to the sensor functions partly, or completely, with more native Sony and converted Canon lenses than ever before. It betters the A7R and A7 II in this respect, though I sold the Canon 85mm f/1.8 USM above as it didn’t work with the II having worked well on the A7R. Metabones have now fixed this, but my adaptor is a cheaper non-programmable type… you get what you pay for!

This is what you get from the Canon 5DS at ISO 6400, default, for shadow detail and noise (click to enlarge a 100% view of this section from a much larger file)
Compare the separation of the black ribbon, and the shadow detail in general, from a similar shot ISO 6400 A7R II file, using the same lens and settings (click to view enlarged).
- The back-illuminated CMOS sensor has a dynamic range – and a contrast curve or gamma function through controlled A to D conversion – which provides an ideal raw file for subsequent adjustment at lower ISO settings. Here, the difference seen above between the Canon 51MP sensor and the Sony 42MP is striking. The Sony images may often look softer and lack punch, but they reveal two stops more detail in the tones close to deep shadow. It’s probably been designed this way to allow s-Log gamma settings for professional video, producing flat neutral results ideal for grading to match from take to take. This happens to be very flattering to skin tones and it’s no surprise the A7R II is rivalling Fuji’s X-Trans sensor amongst fans of the flesh.
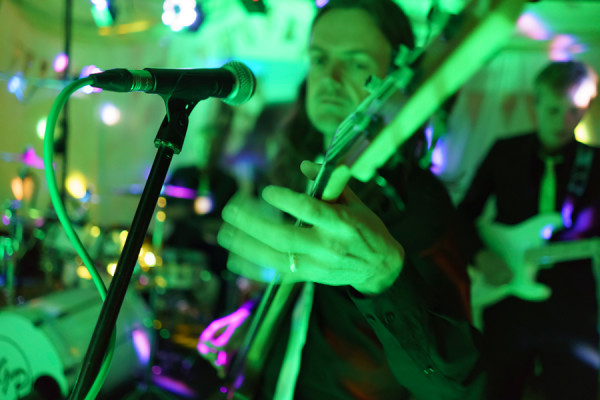
- The same sensor has awesome practical performance in low light without sacrificing resolution, and noise levels which allow surprisingly high ISO settings for critical subjects like wildlife where fur and feather textures are easily damaged by noise (or noise reduction). Properly processed from raw, or shot as JPEG in camera, ISO 800 can be used as an everyday setting and 1600 will not even harm landscape detail. Up to 6400 an effectively noise-free full size image can be extracted, and at 12,800 to 25,600 some downscaling is all that’s needed to clean up. Admittedly, it’s never going to match the 12 megapixel A7S or A7S II at 51,200 and has a limit at 102,400 rather than marching on to an insane 409,600 EI as that body does.
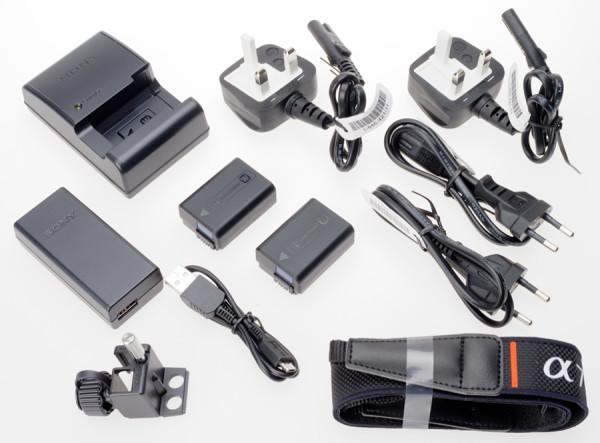
- Compared to buying an A7 II, remember that with the A7R II you get two Sony batteries and an external charger (about £150 in official value) as well as the ability to operate the camera from any 5v 1.5A USB source (not just to charge the battery internally, but to shoot using USB power)
.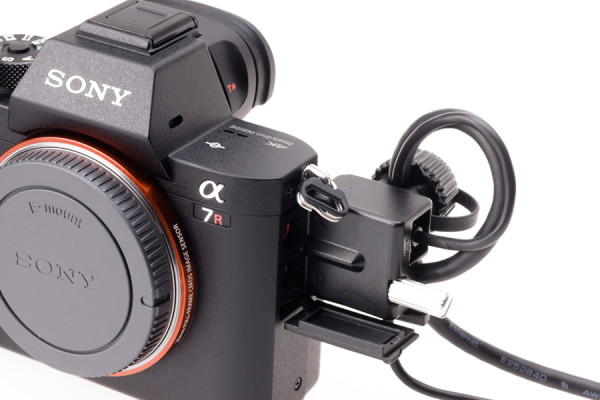
You also get a neat tether-trap locking cage which screws into the camera side and can secure your USB and HDMI cables against accidental disconnection or strain on the connectors. - Final reason – going beyond the A7R II specification does not seem to offer further compelling advantages. It doesn’t have any major flaws or shortcomings except perhaps the single card slot and some doubts about the durability of the body, weatherproofing, and the quality of the lens mount (see below). I’m not in need of more than 5fps and 22 continuous raws before slowing down, and if I am the smaller Sony models like the A6000 and my RX10 do some pretty neat extra high speed sequences. So, for the first time since the sale of my A900 to get the A99, I feel I have a long-term camera no matter what Sony does in six months to make it hopelessly out of date.
What’s could be wrong?
First up, the poorly specified and designed lens mount and low precision body/lens relationship. Where Minolta A, Fuji X, Pentax, Leica and nearly all good makes secure the body and lens bayonet mounts using six screws, the E-mount uses only four even for the top end bodies which may have to support lenses approaching 1 kilo in weight. The four-screw fitting creates two axes of potential tilt restrained only by diametrically opposed screws, six-screw design is better but actually a five screw design beats both as you can’t draw a diameter across any two screws and create a tilt axis. Edit: after publication of this post and my articles in print in the British Journal, Cameracraft and f2 Freelance Photographer, Sony changed the design and A7/9/1 series bodies from the A7IIIR onwards have a six screw mount with screw positions reducing symmetry and the potential to rock.
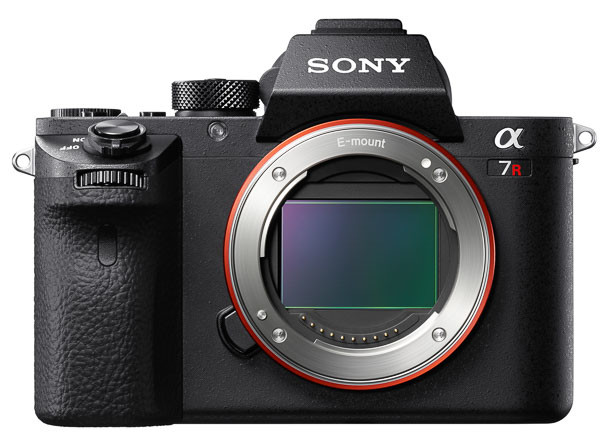
The E/FE lens-body system is built round a concept of achieving final accuracy in alignment and focus without needing precision in every component. The nominal 18mm mount to sensor register doesn’t have to be perfect (and seems to vary by at least ±0.1mm). All Sony E and FE mount lenses compensate for variations and use free-floating magnetic focus often combined with floating OSS – they don’t have fixed infinity stops. Just as the bodies don’t have to be all that precise, the lenses themselves don’t need to be. As long as both work with the sensor to AF perfectly, the overall system is self-correcting.
You soon find out the limits of E-mount precision when buying adaptors for older manual lenses or modern Canon EF lenses. I’m sure Zeiss makes due allowance in the design of manual focus Loxia lenses, and Voigtlander has specifically allowed the new E-mount range planned for 2016 (10mm, 12mm and 15mm) to focus past infinity because they are aware of the variable register of the system. I have measured many adaptors and the only safe decision for the engineer is to fall short of the target register. Some very expensive adaptors turn out to be 0.3mm thicker than others for the same mount (I’ve found this in Leica M, Canon FD and Canon EF adaptors). The lenses being adapted often have a fixed infinity stop and are designed to hit this precisely. Combine a 0.1mm ‘plus thickness’ Sony body with a 0.2mm plus adaptor, and your manual wide angle lens won’t focus on infinity.
So, one overall issue is that despite the high cost, the Sony FE/A7 series range of bodies and lenses lacks the precision engineering of past systems and it’s designed that way. When you find one side of your pictures always seems soft with wide-angle, wide zoom or very fast lenses you have encountered the limitations of Sony precision and quality control. Edit: see new body mount comment above, Sony greatly improved the precision and accuracy of the entire body/lens system from 2016 onwards.
Secondly, the A7R II has such large files and a slow overworked processor relative to those files and the massive task of running a high resolution, high frequency EVF and many clever software functions. Any kind of systematic ‘chimping’ to check each shot after taking may leave you frustrated. Depending on your choice of card and some unknown spin of the CPU’s internal dice, you will sometimes encounter long file writing times and a brief lockout from playback.
Install the 14-bit (in 16-bit container) raw uncompressed format introduced in October 2015 through a firmware update, and the situation may improve. With Firmware V2.0 I’ve seen typical write to card times halved but identical shots could take varying times and the worst case remains close to 10 seconds for the light to go off on a single shot. Most of time it’s clearing about 1 second after 2 second auto review, and disabling auto review has no apparent effect on this, or the time the camera takes to respond to a fresh shutter actuation.
Secret solutions
Since you’ve been patient, and listened to why the A7 system in general has a few failings, here’s how to get the best optical performance and general response from it.
First of all, for the best optical performance use lenses where OSS can be disabled but in-body SS allowed to operate. The internal 5-axis sensor based stabilisation of the A7II/RII/SII is awesome. In-lens OSS is impressive but by its design will always lose you some resolution, often more towards one side or corner of the image than centrally. Amended paragraph, see comments: To see how good your stabilised lens really is, turn off stabilisation and shoot something using flash or at a high shutter speed.
But… if you turn off Steady Shot or OSS on the A7R II, you disable it in the body and the lens. You can not turn it off for the lens, but keep it working in the body. The 90mm f/2.8 Sony G OSS Macro, the 70-200mm f/4 Sony G OSS (above) and the 28-135mm f/4 Sony G PZ OSS and several newer OSS higher end (G and GM) offer the on-lens switch. But if you want stabilisation, you can’t choose to have it provided by the body with these lenses. You can do so with Canon, Sigma and Tamron lenses used on a Canon EF adaptor – their IS, OS or VC will operate normally when the SS in the body is disabled. In fact you must never use these lenses with both methods turned on together, or the result will be unsharp. This is a problem we first noticed with the Olympus system, where their lens and body stabilisation do not communicate and it’s possible to us none, just body, just lens or ruin shots by turning on both together. The Sony body used with third party lenses does allow this; used with Sony lenses, it prevents it.
The A7R II will switch between internal SS, lens OSS and a combination depending on settings. But it won’t tell you what it is doing, which makes this intelligent function something of a handicap. As a rule, if you can lock the camera down (tripod) or use a very fast exposure (studio flash, shutter speed 4X the focal length of the lens) shooting with no stabilisation at all will offer the best results.
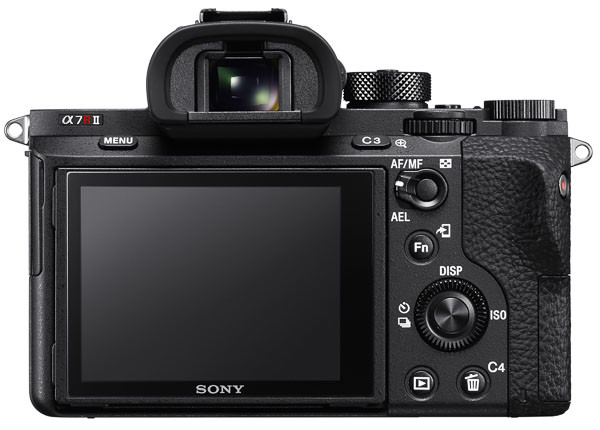
Secondly, don’t use ‘AF With Shutter’ all the time. It’s convenient sometimes, but every time you take first pressure on the shutter, your E-mount AF lens will initialise a short routine involving focus position recalibration followed by AF. It costs you a variable extra lag before the shutter fires, maybe 1/15th to as long as 1/4 second. Instead, turn this off and AF will default to the centre button of the rear controller (you can change this assignment). You then use this to AF for each change of subject, composition or distance but if nothing’s changed you do not touch it and you do not re-AF. You save battery life, and you eliminate the whole shutter-button-AF delay cycle. You can now capture pictures, using electronic first curtain shutter or silent mode, within 1/20s of pressing the shutter.
Thirdly, for action shots prefer stops close to full aperture on E-mount lenses for the same reason – the aperture closing action involves a delay you can clearly identify and it’s longer with apertures like f/16. But for maximum reaction speed, use a purely manual lens. The camera knows there’s no aperture to be closed so it misses out that stage. It knows there’s no AF. You can get down to a mere 1/50s shutter lag, faster than most photographers can think. If you are used to older DSLRs which typically fire the shutter between 1/15s and 1/8s after you have pressed the button, you’ll anticipate and fire too early for action shots. Beware the LA-EA adaptors for A-mount lenses as you can’t turn off the aperture lever actuation. These adaptors will always add a delay even if you fit a manual lens.
I’m not going to delve into how you use focus peaking, magnification, setting the slowest shutter speed to be used by the Auto ISO function and so on. You can find out about this from countless videos and blogs, not all of which feature grandmothers, sucking and eggs. Nor will I recommend JPEG noise reduction and image settings in camera, since I don’t use JPEGs. Remember that your picture style and adjustments, like extra sharpening or contrast, will be reflected in the view you see through the EVF and on-screen. They will affect focus peaking, the histogram and what the image looks like when you use magnified manual focus, too. My tip is ‘stay neutral’ for the best EVF experience and ability to judge and control your results, especially if shooting raw. Camera Standard – boring but it won’t fool you into making adjustments which are not needed.
A 16mm landscape with careful focus checking, and only just enough depth of field even at f/16 if the end result is going to be a 1m wide print
Read the manual, think about all the functions of the camera, assign your custom buttons, set your parameters. My set-up includes (routinely) Auto ISO 200-1600 because within that range the A7R II files have low noise and good textural sharpness and there’s no great benefit in dropping to 100; AWB; 1/250th slowest shutter speed because the world moves and I’m very happy with 1/250th at ISO 800 rather than 1/125 at ISO 400 for nearly all my walkabout shots; AdobeRGB because I need that but actually sRGB is better matched to the EVF and rear screen, and will give you a more accurate histogram; no JPEGs because I don’t need them; Airplane Mode on; compressed raw unless there’s a really good reason; AF-S and Centre point focus; no face recognition, no smile shutter, no tracking, nothing clever with AF; single shot; generally Aperture Priority but sometimes P, M or very rarely S; Date Format file folders; SS on; electronic first curtain; setting effect on; finder and screen at default brightness and colour; grid lines 3 x 3; focus peaking low, yellow; lens correction enabled; 2 secs review, or none.
– David Kilpatrick, all images except front and rear views of A7R II body and 70-200mm lens are ©David Kilpatrick/Icon Publications Ltd; please do not link directly to images or copy
* You need thousands on offer to sell dozens…



I would buy into the Sony system if they had touch screens. Why on earth no touch screen?
My old Canon 70d with dual pixel and touch screen which was able to pull very cinematic focus changes. 1080 max video res though. Another wonderful feature for stills: touch a point of interest and the very moment the camera attains focus it captures the image.
Then I bought a Samsung NX1 for mostly shooting 4K to a PIX-E5H also capable of cinematic focus by touch. Again this camera allows you to touch a point of interest and capture the still image the moment it achieves focus.
Now I’m shooting the Panasonic AG-DVX200 and a PIX-E5H still very happily taking advantage of cinematic touch to focus capabilities.
I sounds as if the a7R II would be awesome in terms of face tracking etc but it is HOBBLED by not having a touch screen. How do you change faces (or point of interest) for focus, in mid-take, while shooting video? Abandon the camera’s intelligence and focus manually. Wait, what?
After shooting video with several cameras capable of cinematic focus pulls by simply touching the screen I will NEVER go back to another focus method for run-n-gun documentary type shooting. The touch to focus during video significantly increases the % of good takes while allowing me more time to think about composition, and point of view and less time thinking about focus.
Before anyone comments about how they prefer physical buttons (the non-smartphone users among us I assume), please realize that all three of these cameras offer full normal functionality through button pressing, and they also allow important (imho) additional features which can’t be accomplished with button pushing.
Hey Sony… anybody listening? Why no touchscreen?
Fully agree, having worked with Olympus and Panasonic with touch screens, and been amazed by the almost zero lag for shooting this way – and the accuracy with difficult subjects if you get the tap-shoot exactly positioned. I guess the reason is that the focus travel and minimal depth of field of so many full frame lenses does not go all that well with touch screen. Sony has done it in APS-C E-mount but never for full frame. Since it can not be retrofitted, maybe this is the upgrade they will roll out in 2016 to trash the value of the entire latest generation of A7 series cameras – that is, after all, the way Sony works and thinks.
I hate touch screens. If I had a camera with that feature I would turn it off. If I couldn’t turn it off I wouldn’t buy the camera.
Hello David,
When you turn off the OSS on the lens, you will also turn off the IBIS on the camera. I don’t think you can turn off the lens OSS but keep the IBIS on. Can you double check that?
V.
I think you’re right, and that is a failing of the system – I do not have any Sony lenses with the switch to test it, but I recall this from the press conference where a few people were checking functions of this type. With non-Sony lenses, you can definitely turn VC/IS/OS on or off on the lens and it doesn’t affect the setting on the camera, just checked that with the new Tamron VC 45mm and 35mm lenses. Bad results if both are ON… but either the camera IS, or the lens VC, can work separately and produce sharp results. The lens VC only activates with first shutter pressure too, it’s not draining power all the time. This has applied to all my Sigma and Tamron lenses with stabilisation.
I am not sure you are correct here again. I don’t think anyone can expect two different proprietary VC/IS/OS/IBIS can work together. Are you aware of a system that allows that? When these non-Sony lenses perform VC, they expect the sensors stay still. Now you are adding a floating sensor….
For a long lens, the lens OS/VC is usually more effective than the Sony camera’s IBIS. You really want to turn off IBIS in that case.
I have amended the article, but I’m correct with Canon/Sigma/Tamron in Canon mount. You can indeed have in-lens IS with no in-body SS. Just to check up, I also tried a Sigma OS on an LA-EA3 – you might expect the Sony adaptor to ‘see’ the OS and disable SS. But it doesn’t, you can use either or both, or neither (so error is possible). Regret I do not have any Sony or Minolta OSS A-mount lenses as no such thing exists, and it’s only by luck that we have a couple of Sigma lenses which for once included OS in the Sony version. No Tamron lenses do, but I’ve tested those using a Commlite adaptor. It is possible that the Metabones IV adaptor has chip functions to communicate between the Canon IS (etc) and IBIS but I can’t check that.
Thanks for amending the article. For non-Sony lenses, you do want to turn off the IBIS if you want to use the lens’ OS/IS for the reason I stated previously. For Sony OSS lenses, the in-camera IBIS is supposed to improve the steady shot capability. There is no reason to keep OSS on but IBIS off. Hope this clears the confusion.
Pingback: New Sony A7rII reviews( Photoclubalpha, Popphoto, Ronmartblog). | sonyalpharumors