Tamron’s super value 70-300mm USD on the A7RII

SONY DSC

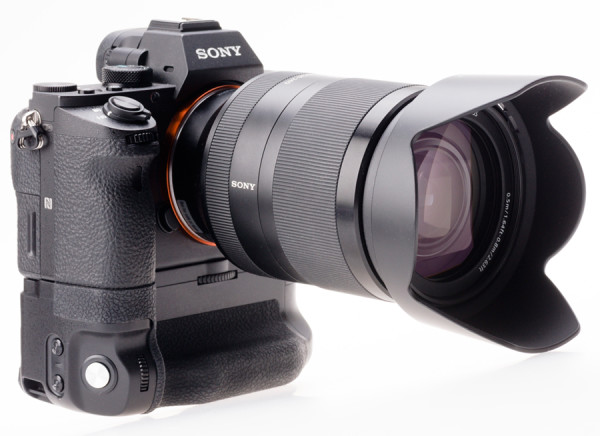
If you want to get a 70-300mm which works on the Sony A7RII, the A7 series body with the best on-sensor phase detection/contrast detection mix, your first choice should be the new Sony FE 70-300mm f/4-5.6 G OSS. But that demands a wallet opened with £1,150 (UK SRP) in it. In return you get a rare specification mix including focusing down to under one metre and almost a one-third life size image scale, without needing any special macro range.

For those who own either an LA-EA3 or LA-EA4 Sony adaptor, there’s a choice of A-mount lenses. The older Sony 70-300mm f/4-5.6 SSM G will work OK, but the current SSM II version is tuned for the on-sensor focusing system. Both work on the LA-EA3 with its SLT-mirror free design, and focus to a decent 1.2m. The low-cost Sony body-drive AF f/4.5-5.6 75-300mm will only AF on the LA-EA4 and is probably best ruled out.

The same goes for Tamron’s body-drive focus Di Macro, about the lowest cost such lens you can buy, and Sigma’s standard and non-APO Macro designs. For the LA-EA4 only, the Sigma 70-300mm f/4-5.6 APO Macro DG is actually worth buying as a good example can usually out-resolve any other lens of this range, but it’s slow and clunky. It focuses to under 1m and half life size scale but like the Tamron Di Macro does this using a separate close-up range you have to switch in to, only usable between 200mm and 300mm zoom setting.

This leaves two 70-300mm independent lenses with in-lens focus motors. The Sigma 70-300mm f/4-5.6 OS DG is again very good optically (a fair match for the Sony G original) but it doesn’t use an HSM focus motor. Instead it has a motor more like a Sony SAM drive. As a result, it will only focus quickly on the LA-EA4. It can’t handle on-sensor PDAF.

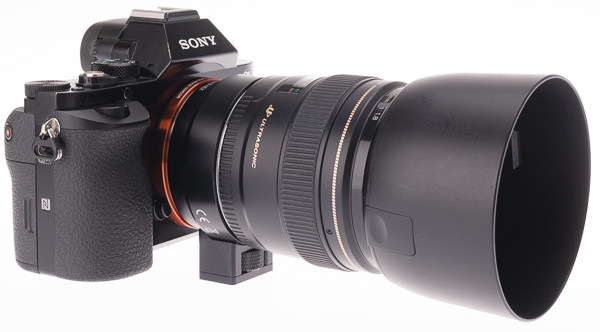
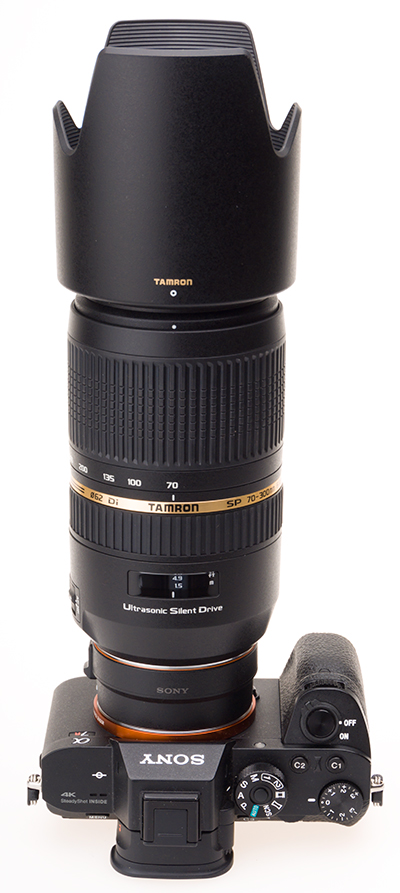
The Tamron SP 70-300mm f/4-5.6 Di USD can. It has an Ultrasonic Silent Drive, and this is very close in design to the Sony G SSM. Because the lens dates from 2009, most test reports have been based on DSLRs and not many Sony A7 system owners have bothered to consider it. At the current price in the UK – even the official SRP is only £275 but normally discount to a pre-VAT price of under £200, or if you like, $280 – it’s an unprecedented bargain for an advanced lens using low and extra-low dispersion elements.

SONY DSC

You should not be surprised at its size, because it’s almost identical to the Sony G. Same weight (within 5g), same 62mm filter thread, same rear internal focus with plastic window for the scale, same forward zoom ring and single barrel extension. It has one more element, being a 17/12 design rather than 16/11 like the Sony, and it lacks the control buttons and focus range limiter controls. It’s also a quarter to a third of the price.

SONY DSC

For me its major shortcoming is the 1.5m close focus, just too far away (nearly fell down stairs trying to get far enough away to focus when testing it, I’m just not used to lenses which force you back this way).

SONY DSC

What counts I guess is the optical performance, and here the Tamron still does not let you down despite being a seven-year-old design. Like the Sigma OS, it is a step above any of the previous 70-300mms including Nikon’s VR and the Canon IS design and when I tested it back in 2009 it matched the Sony G SSM even wide open at 300m. What it did not do was focus accurately on my DSLR bodies, needing AF calibration adjustment on the A900 and missing the mark on the A700 and A580. It was fine on the A55.

SONY DSC

The lens coating is pretty effective and the lens front rim, like Sony’s G, has no lettering to reflect off filters. It also has an effectively black-out inner baffle and zoom mechanism. Combined with the super-deep lens hood (very much like the monster you get with the Sony G) the result is a flare-free optic you can use in almost any light.

SONY DSC

The rear mount is a high quality metal A-mount as expected, and on my LA-EA3 the whole assembly was firm and felt unstressed.

Tamron kindly sent me a lens to update my earlier testing when this design was new. I wanted to see one thing – did the USD drive allow PDAF on the A7RII with the LA-EA3? If it did, this bargain price but advanced lens would be a possible 300mm range solution (and also, though I can’t test this, on the A7II and A7SII – I’m pretty sure it will not play well with pure contrast detection on the A7R, as on my A7 it will focus at all focal lengths and in low light but can take several seconds of hunting and fine tuning in small steps).

Fitted to the A7RII+LA-EA3 I found it snaps into focus really fast, able to use either wide area or centre AF with much the same speed as native E-mount lenses, and activating the ‘green square’ focus point display. It was very poor using moveable Spot AF (unusable in low light), and the Zone AF option is greyed out. So, it can’t access all areas, but for regular shooting it’s good.

At focal lengths over 150mm, it can be spooked by starting completely out of focus. However, once the lens is not extremely defocused it acquires and tracks rapidly. The full time manual focus over-ride can help set it up before you use AF. In very low light with low contrast targets, at 200-300mm, even prefocusing manually may not prevent a long searching process or AF failure. However, in normal daylight with regular 3D subject matter it’s useable.

Since owners report that even Sony’s own lenses encounter similar issues – the 90mm f/2.8 G OSS Macro is known for hunting and taking time to lock on – it’s an issue more to do with the way the on-sensor focus works than anything else. It’s also much better than, for example, the Canon 70-300mm f/4-5.6 L used on the Sigma MC-11 or Commlite adaptors. That just gives up towards 300mm.

The Tamron has variable bokeh qualities. Foreground bokeh can be untidy and contours just beyond the plane of focus can be harsh. Totally defocused detail in both foreground and background can look very smooth. It has a nine-blade circular aperture, just like the Sony G A-mount, and I’d say overall image look was uncannily similar. The exact look depends on the focal length, working distance, aperture and placing of the foreground and background detail.

rhododerndron-300mm-6p3

Purple rhody at f/6.3 and 300mm – not too bad overall!

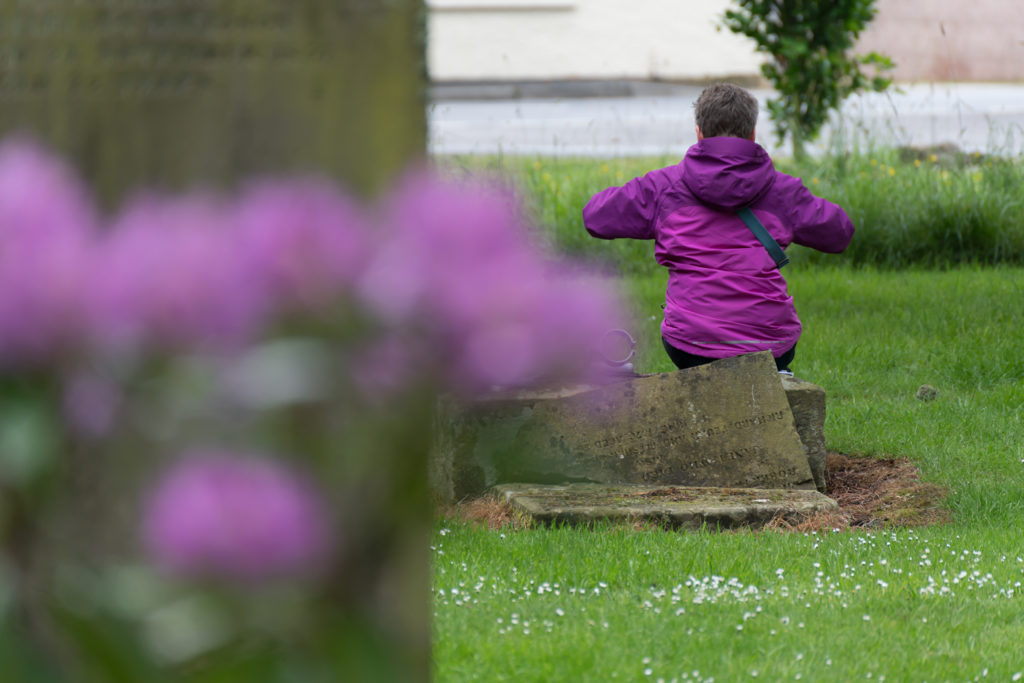
colourmatch-300mm-f6p3-300mm

Matching person in the distance – again, not bad, with a pleasant three-dimensional look. Maybe I should do a version in black and white…

As for this lens not having VC (Tamron’s OS/OSS) I can only say it doesn’t need it when Sony’s 5-axis sensor stabilisation does so well. Here you can see 1/30s wide open at 300mm indoors at ISO 3200. Note also what CA or fringe occurs. It’s pretty good.

300mm-iso3200-30th-wideopen-SSI

As for handling 42 megapixels, which didn’t exist when the Tamron was designed, there doesn’t seem to be a serious problem. Here’s a quick shot of Scotland’s relationship with the USA and Europe…

saltire-300mm

And here, frozen by 1/500s shutter speed at the realistic aperture of f/7.1 and ISO of 200, is a detail at 100% size. I’m generally happy with a 70-300mm lens if you can see the weave and the stitching on our town hall flags at 300m, 2/3rds of a stop down from full aperture, reproduced on a 1.5m wide print.

300mm-detail

I’ll test the lens further and add a gallery of images and any other comments, but I think that this is the only non-Sony lens of this range which really works well with the LA-EA3 (and of course, extremely well too with the LA-EA4 given AF calibration).

The only slight incompatibility is that the camera/adaptor gives the lens the identity of the Sony 70-300mm f/4-5.6 G SSM, this is what appears in the EXIF. This also means that the camera will invoke an auto profile for the Sony lens, and handle the focusing as if this was the Sony lens. It also loads the built-in profile for the SSM G lens in Lightroom/Adobe Camera Raw. This seems to work just fine. Without the profile enabled, the flag shot for example shows a stop or more of vignetting which is a relative weakness of the design – exactly as it is with the Sony. The new FE G lens with its 72mm front element as opposed to the 62mm of the Sony G, Sigma OS and Tamron SP designs can be expected to have much less full aperture vignetting.

Please note that this report refers specifically to the A7RII as a host body – as stated, it’s not useful on the A7 and I also found it’s not good enough to use on the A6000 with LA-EA3 (fine with LA-EA2 or LA-EA4). It will eventually focus but with too much hunting and missing.

– David Kilpatrick

If you’d like to check availability or order the lens, here are my affiliate links (may help pay for the site, don’t cost you anything):

Wex Photographic, UK – £239

B&H, USA & World – $449 ($100 rebate to June 30th)

Amazon UK – £239 at time of publication

The best 50mm for A7RII

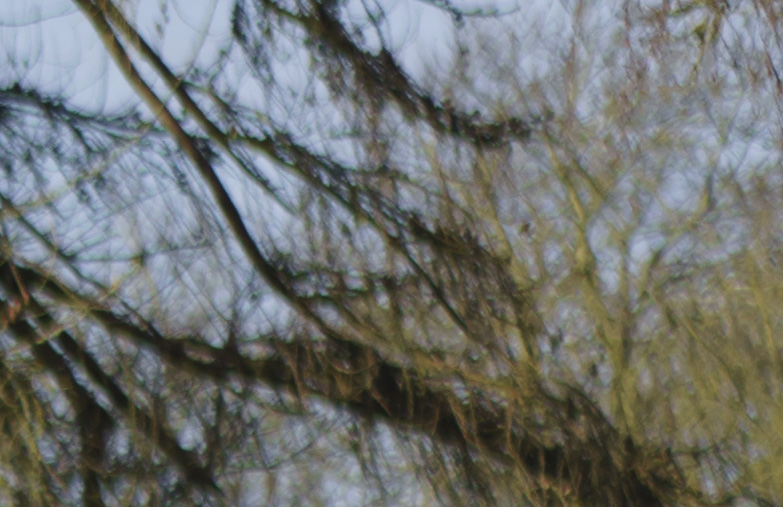
After testing the Sony Carl Zeiss 55mm f/1.8 FE in 2014, I was less than impressed. I may have had a decentred example (it happened to dPreview and at least one photographer I trust to know his lens performance expectations). It was, certainly, pin-sharp on a test chart or a brick wall but the moment three-dimensional subjects were involved at wide aperture the defocused detail could be very untidy. The clip below from trees behind a building which was sharply focused is at f/1.8 and 1/2500th (a suggestion that it could be caused by camera shake is easily ruled out). See my additional notes at the end!

cz55mm1p8distance

It’s worth saying that when I had this lens I made some tests of the bokeh using very strong defocus which looked good. Many examples I’ve seen, which true believers put forward, show a figure (from full length to portrait) centre of a horizontal frame at f/1.8 with a pleasant enough looking distant background. My gripe has been with what happens when your subject is further away, or the background is not all very distant. This is an expensive lens but it seems to me to have fussy bokeh with too much CA fringe and also more focus-related colour shift than desirable.

Here is a full size example with EXIF. Honestly, the best standard lens around? //www.pbase.com/davidkilpatrick/image/162847304

Now I’ve got a fair collection of 50, 55 and 58mm lenses and also the little Canon 40mm f/2.8 STM which is my alternative to having a 35mm and a 55mm. No matter what the lens – Pentax, Minolta, Sony 50mm f/1.4, Helios, Zenitar, Nikon, CZ Jena – the full aperture between f/2 and f/1.4 always proves to be a touch soft. They all have residual aberrations that the CZ 55mm f/1.8 design has eliminated. While they can have a smoother bokeh, they also have marked colour shifts and uncorrected CA. Generally, they also all perform extremely well once stopped down to f/8 and most designs are great by f/4.

Despite the advantage of full AF functions, the CZ 55mm does not have a particularly good close focus or maximum image scale. In use I often found myself framing up closer than 50cm. That’s half a metre – it’s even further than the old 55 and 58mm lenses of the 1960s, which generally manage 45cm. I find this limitation hard to understand. 50 years ago CZ Jena started to put helicoids on their standard 50mm lenses which enabled focus down to 35cm. We have gone backwards since then.

And then I realised I’ve already got a lens which is free from all vices, gives me AF and manual focus options using adaptors I already own, which cost me about a third of the price of a CZ 55mm – and I was not being used on my A7RII. We bought a good used example of the Sony SAL 50mm f/2.8 Macro to use with our Alpha DSLR.

First of all, I compared this with the idea of buying a Zeiss Loxia 50mm f/2, by fitting it to the LA-EA3. Although the focusing ring does not communicate to the camera to invoke magnified manual focus, the lens has a Focus Hold button which can be set to this. The focusing throw is steep but in practice very accurate focus is easily set. At f/2.8, the lens is already perfectly sharp with some contrast improvement at f/4. The lack of vignetting and distortion, the flatness of field and generally very attractive smooth defocusing without CA issues make the lens better than typical fast standard designs.

On the LA-EA4 with autofocus, a limited set of AF functions ends up activated and there’s always the issue of the slight delay and sound caused by mechanical aperture operation. AF-C is of limited use, along with this video functions. However, I don’t generally use this type of lens for action or for video.

I made plenty of non-image tests by defocusing bright edges, both ways, and could find no hint of colour problems. I then set up a small food shot using the close focus – exactly the reason I find a lack of close focus restricting – and made tests at f/2.8, f/5.6, f/11 and f/22 to look at the bokeh. My conclusion is that I will be hard pressed to find anything technically better, or with a more pleasant character to the background defocus, in the c.50mm focal length. The series covers all four apertures.

I am aware that one comment will be that f/2.8 simply isn’t wide enough. There’s no significant differential focus and you’d need 50mm f/1.0 to get what many photographers want. However, this is all to do with viewing size. We all tend to see pictures on smartphone screens, on Facebook, or even on our own camera three-inch screens. In fact, at f/2.8 there isn’t enough depth of field for a typical real-world use of a full page reproduction and f/5.6 is just about right. For a poster, f/11 would be good. At f/22 the whole image is slightly softened as expected and it’s just there to complete the set.

For the moment – at least until a Batis version of the 50mm f/2 Makro Planar appears and answers all my demands perfectly – I think this Minolta-derived 50mm macro will do fine as my ‘standard’ lens.

David Kilpatrick, aka ‘some random blogger’ (©SAR comments March 2016)

Added August 30th 2016: Sony has announced an E-mount 50mm f/2.8 Macro focusing to 1:1 with a stated RRP of $500 – really, they must have read this article in March. In the meantime, during the Brexit fiasco I caved in and bought a 55mm f/1.8 CZ, suspecting the price would be 20% higher soon enough (and sure, it was). My new example is no better than those I originally tested but it has its uses and in a flat plane – no defocused image to screw the results up with an ugly mess – it’s the sharpest 50-55mm I have used. I’m still using the 50mm macro and recently spend a month using the Samyang 50mm f/1.4, which is not as sharp as the CZ but handles blur and bokeh more elegantly. Both lenses don’t really excel at suppressing Longitudinal CA, one of the strengths of the A-mount macro. Hopefully the new SEL FE 50mm macro will also give clean, colour-shift free foreground and background bokeh.

Added July 29th 2017: I have now bought the 50mm f/2.8 Sony FE Macro, and put my A-mount macro lenses up for sale. The E-mount focuses to 1:1 rather closer than I would like, at 16cm which indicates its internal focusing changes the focal length to something more like 37mm to 1:1 (16cm is a pure 40mm at 1:1 assuming no optical thickness to the lens). It’s an extremely sharp lens with bokeh as good as the A-mount 50mm and no trace of CA.

Sony A7R II review by David Kilpatrick

Sony’s A7R II has a unique position in the mirrorless ILC world, creating the largest image files at over 42 megapixels from an in-body five axis stabilised sensor with exceptional performance given by backside illuminated CMOS.

My reviews in print of the Sony A7R II have now appeared, in the British Journal of Photography, f2 Cameracraft and Master Photography magazines. All three make slightly different points, and reflect growing experience of the camera which I bought from WEX as one of the first despatched on July 28th. The UK best body-only price then fell from their £2,695 to just over £2,000 from one main Sony dealer (at an event promotion) in under three months.

Despite finding bargain deals or importing directly, since the introduction of the A99 only three years ago I have lost about £3,500 keeping up with Sony full frame camera bodies. I’ve also spent around £2,000 buying other Sony models like the NEX-6, RX100, RX100 MkIII, RX10, and A6000 to cover the shortcomings of every different full frame model – and £2,000 or more updating my lenses.

So why invest in the A7R II when experience tells me the Sony system loses value faster than any other, yet so often falls short of performing as required?

One body for all lenses

The A7R II almost matches medium format digital, and gives great results with rangefinder (Leica) fit wide-angles. It has enabled me to add a 12mm f/5.6 Voigtländer Ultra Wide-Heliar to my kit for sharp, tint and vignette free 120° architectural and creative work. I write about lenses, and with current and future adaptors, this body lets me focus and make test shots with all lenses from Canon, Nikon, Pentax, Leica and many others. Click the Heliar image below for a link to a full size (slightly cropped and straightened from 42 megapixels) file. It’s actually shot at f/11 though the pBase data says f/5.6, that how the camera’s Lens Correction app works.
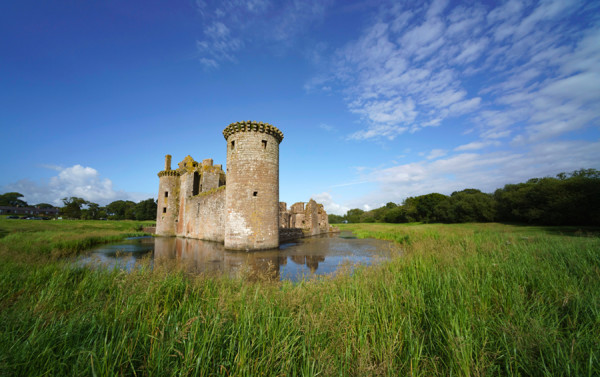
Caerlaverock Castle

There’s no lens made which disagrees with the 42 megapixel sensor as far as I can tell. My kit includes the 12mm mentioned above, the 16-35mm f/4 Carl Zeiss OSS, the 24-240mm f/3.5-6.3 Sony OSS, the 28mm f/2 Sony OSS FE (look out for individual reviews shortly); a 40mm Canon f/2.8 STM pancake, a 24mm Samyang tilt-shift, 85mm Sony SAM f/2.8, Sigma 70-300mm OS and a whole bunch of interesting older stuff used on adaptors.

With the Lens Correction App configured for SS with each manual lens, the very high resolution of the A7R II sensor allows a stable view for precision magnified focus well beyond the ability of any AF method or reliance on focus peaking alone. Doing this at working aperture ensures no focus shift on stop down. The results show me quickly which lenses are excellent performers without needing an optical bench or test charts (give me a single LED light and a darkened room, and I can find out what I need to know about any lens very quickly).

driedflowers-A7RII-web

Most Sony and Sony Carl Zeiss zooms do yield good sharp images on 42 megapixels but it’s easy to exceed their best by fitting something like my 1970-ish SMC Takumar 50mm macro (used for the shot above), or even my Russian 50mm f/2 tilt-adapted Zenitar. I found the 28-70mm f/3.5-5.6 OSS which was fine on A7 II inadequate for critical quality on the A7R II and after tests concluded the 24-240mm was the best option to replace it. To learn why FE/E mount zooms and OSS lenses are never likely to blow away fixed focal length unstabilised types like the Zeiss Loxia or adapted classic RF and SLR optics, wait for my 24-240mm review.

Having said size matters, I downsize many of my final images to as small as 9 megapixels. I don’t need 42 megapixels (7952 x 5304) for every image and for some it’s ridiculous. I’m still selling thousands of stock images* taken with DSLRs from six megapixels up. So for general ‘field’ use, most lenses are more than OK, as I can reduce the file size right down 3600 x 2400 pixels when noise needs cutting, depth of field is a problem, or general sharpness is poor.

One sensor for all image shapes and sizes

With the A7R II, unlike the A7R, all the APS-C E-mount lenses work properly (they never have their OSS forcibly disabled). The auto cropped image is 5168 x 3448, 17.8 megapixels, and that’s a perfectly useful size for all personal and most professional work. The 0.78X EVF is, of course, completely filled to exactly the same visual quality as when a full frame lens is used – the user experience with an APS-C lens is identical to that with full frame.

As with downsizing or lens based cropping, I can crop full frame captures right down to less than a quarter of the A7R II image and have a file acceptable to Alamy for stock library use, or to a client directly for almost any reasonable editorial use. That same crop can go full page in a wedding album, or make a fine A3/16×12 print. It’s like using 120 rollfilm again, you can find pictures within pictures.

lemurs-fullframe

A 240mm shot clearly not close enough…

lemurs-240mmf9-iso400-crop

This is a 3600 x 2400 crop. That is, an image large enough for full page publication or a 12 x 18″ photo/inkjet print (click to view full size)

With many lenses which don’t cover full frame, a 24 x 24mm crop is perfect. The Sigma prime lens ART trio (19mm, 30mm and 60mm f/2.8 AF without stabilisation) all do well on this basis. I had a 16 megapixel square format digital back on Hasselblad V and the square format is a favourite. Unlike Olympus, who offer a 1:1 ratio capture, Sony only includes 3:2 (35mm shape) and 16:9 (HD widescreen) – I’d love them to add a proper 1:1 square image seen in the EVF and on screen, a perfect 28 megapixel crop.

The high resolution FF image also means there’s less need to stitch panoramas or use shift lenses. Canon’s 17mm f/4 TS-E tilt shift lens was introduced in 2009 when their full frame 12 megapixel 5D has just been upgraded to the 21 megapixel 5D MkII. On the A7R II, using its maximum 12mm shift reveals serious loss of outer field sharpness even at apertures like f/10, f/11 and f/13 which are optimum on other ways. It’s not a sensor cover glass problem as the Canon 5DS R revealed exactly the same weakness. Downsize the image to 12 megapixels, which the lens was probably first designed for, at everything looks sharp. But here’s where 42 megapixels can pay off – I just need to use a 12mm Voigtlander or a Sigma 12-24mm, crop a 14 x 21mm area from any part of the 24 x 36mm frame, and I have a 14 megapixel image allowing even more effective ‘shift’ than the Canon. And I can, of course, use the Canon via an adaptor if needed.

The same kind of strong cropping works for telephoto wildlife shots (300mm lens, better than 500mm on 14 megapixels) and for macro work (1:1 on full frame, 2.2:1 at 14 megapixels). You need to remember all the time that traditional depth of field calculations just don’t work well with sensors of 36 megapixels and over. When you view a full size A7R II image at 100% on a non-Retina iMac or HP 27″ monitor, you are looking at part of a six foot wide ‘print’. Depth of field tables, still used today, were based on viewing a 10 x 8″ print from a similar distance! This problem is reduced by higher resolution screens but sometimes, you simply need a smaller image size.

Canon 5DS/R (in proportion with earlier models) have useful M-RAW and S-RAW formats, allowing the cameras to become full frame 28 or 12 megapixels with a single menu change. This function is missing from Sony raw files and would be a great firmware enhancement, if it was possible. Edit: with the Sony A7RV and its even larger 61 megapixel sensor, Sony addressed this with M and S raw files of 26MP and 15MP, which are downsampled from a full capture so do not offer faster continuous (etc) but do bring noise control and sharpness benefits.

Reasons to buy the A7R II
SONY DSC

Having used two other A7 series bodies, and started the transition to the FE lens series with some mix of adapted glass on the way, why didn’t I stick with the far more realistic and practical A7 II, or the A7R which was paid for and at 36 megapixels just as useful a large file size?

  • Internally or externally recorded 4K video though not a commercial offering from my side might well be a request from a future client. I don’t make videos though many years ago I did made 16mm films and many 35mm slide based dual and multi projector AV programs. However, I know many still photographers who have found sufficiently high-end clients for video to invest the time. I wouldn’t touch any video production, even a brief 20-second ad clip, for under four figures. It’s fun to experiment with until any serious use emerges. Also, excellent Super-35 crop format video.jamesgem-1371-web
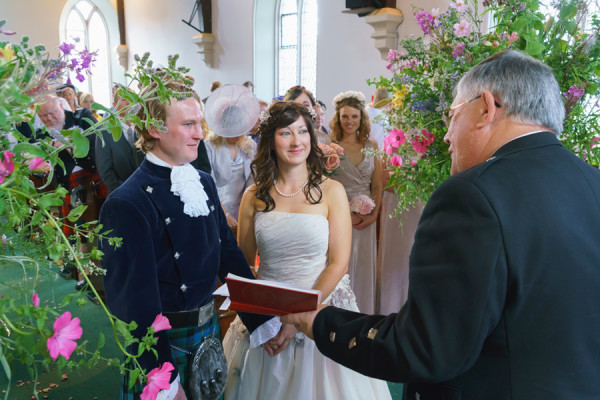
  • Completely silent operation when needed – though not compatible with any kind of flash, the fully electronic shutter is an option for wedding ceremonies and I’ve used that function already. It is also useful for shooting stills when someone is making a video, or during quiet concerts, in meetings, or when you simply don’t want the sound of a shutter to be heard. When silent is not needed, electronic first curtain (not provided on the A7R) improves shutter lag time and cuts vibration
    .SONY DSC
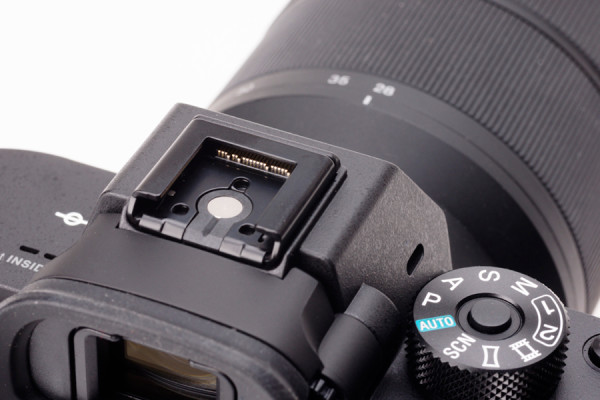
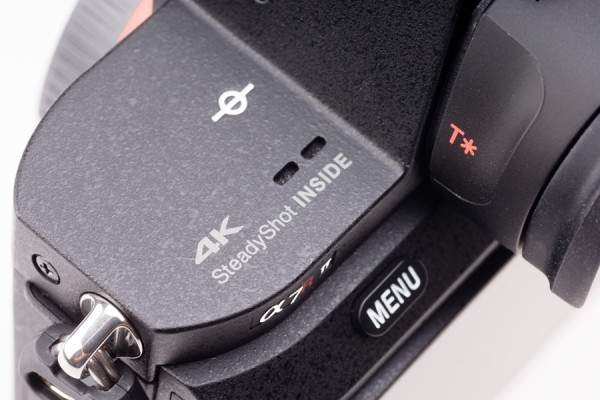
  • It’s also got a 500,000 actuation life shutter built to more than pro specification and a superior 0.78X electronic viewfinder, a slightly improved body flange for the lens mount (now common to all the II models, tighter and more precise than the original machining), no light leaks. And the mode dial is improved with a locking button, the Multi Function Accessory shoe is further improved in contact reliability, the ocular is T* coated and gives better eye relief.SONY DSC
  • It will perform well with all kinds of lenses and the 399-point wide area phase detection AF array built in to the sensor functions partly, or completely, with more native Sony and converted Canon lenses than ever before. It betters the A7R and A7 II in this respect, though I sold the Canon 85mm f/1.8 USM above as it didn’t work with the II having worked well on the A7R. Metabones have now fixed this, but my adaptor is a cheaper non-programmable type… you get what you pay for!

    Canon5DS-6400-web
    This is what you get from the Canon 5DS at ISO 6400, default, for shadow detail and noise (click to enlarge a 100% view of this section from a much larger file)

    Compare the separation of the black ribbon, and the shadow detail in general, from a similar shot ISO 6400 A7R II file, using the same lens and settings (click to view enlarged).

  • The back-illuminated CMOS sensor has a dynamic range – and a contrast curve or gamma function through controlled A to D conversion – which provides an ideal raw file for subsequent adjustment at lower ISO settings. Here, the difference seen above between the Canon 51MP sensor and the Sony 42MP is striking. The Sony images may often look softer and lack punch, but they reveal two stops more detail in the tones close to deep shadow. It’s probably been designed this way to allow s-Log gamma settings for professional video, producing flat neutral results ideal for grading to match from take to take. This happens to be very flattering to skin tones and it’s no surprise the A7R II is rivalling Fuji’s X-Trans sensor amongst fans of the flesh.jamesgem-1685-web
  • The same sensor has awesome practical performance in low light without sacrificing resolution, and noise levels which allow surprisingly high ISO settings for critical subjects like wildlife where fur and feather textures are easily damaged by noise (or noise reduction). Properly processed from raw, or shot as JPEG in camera, ISO 800 can be used as an everyday setting and 1600 will not even harm landscape detail. Up to 6400 an effectively noise-free full size image can be extracted, and at 12,800 to 25,600 some downscaling is all that’s needed to clean up. Admittedly, it’s never going to match the 12 megapixel A7S or A7S II at 51,200 and has a limit at 102,400 rather than marching on to an insane 409,600 EI as that body does.SONY DSC
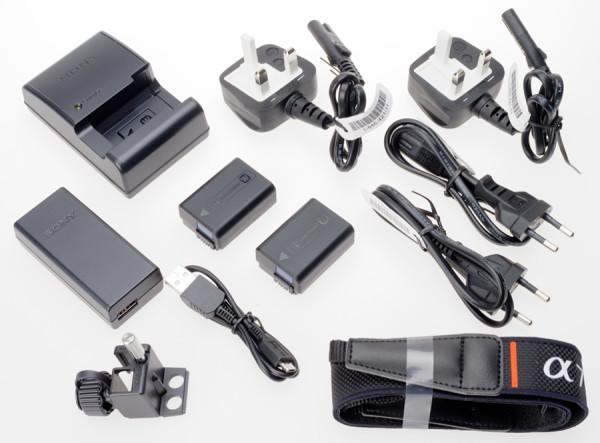
  • Compared to buying an A7 II, remember that with the A7R II you get two Sony batteries and an external charger (about £150 in official value) as well as the ability to operate the camera from any 5v 1.5A USB source (not just to charge the battery internally, but to shoot using USB power)
    .SONY DSC
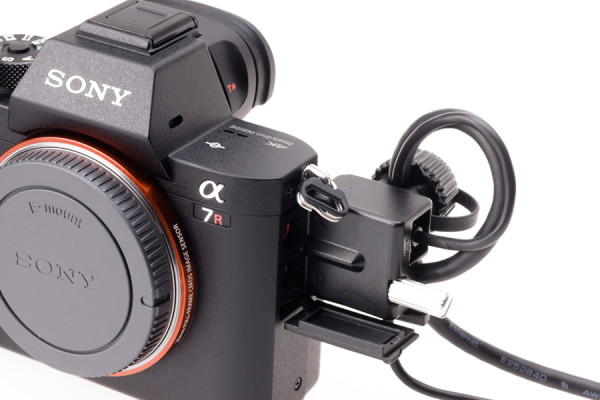
    You also get a neat tether-trap locking cage which screws into the camera side and can secure your USB and HDMI cables against accidental disconnection or strain on the connectors.
  • Final reason – going beyond the A7R II specification does not seem to offer further compelling advantages. It doesn’t have any major flaws or shortcomings except perhaps the single card slot and some doubts about the durability of the body, weatherproofing, and the quality of the lens mount (see below). I’m not in need of more than 5fps and 22 continuous raws before slowing down, and if I am the smaller Sony models like the A6000 and my RX10 do some pretty neat extra high speed sequences. So, for the first time since the sale of my A900 to get the A99, I feel I have a long-term camera no matter what Sony does in six months to make it hopelessly out of date.

What’s could be wrong?

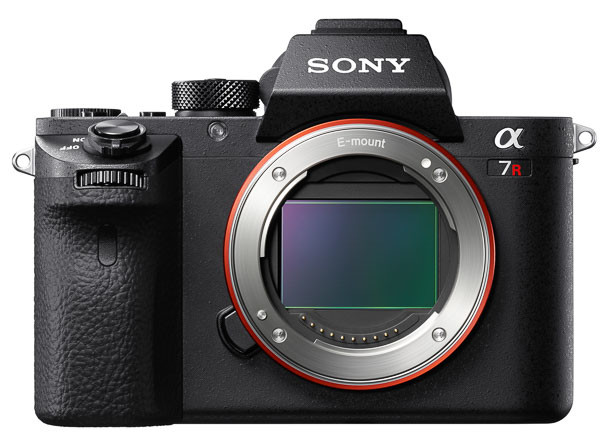
First up, the poorly specified and designed lens mount and low precision body/lens relationship. Where Minolta A, Fuji X, Pentax, Leica and nearly all good makes secure the body and lens bayonet mounts using six screws, the E-mount uses only four even for the top end bodies which may have to support lenses approaching 1 kilo in weight. The four-screw fitting creates two axes of potential tilt restrained only by diametrically opposed screws, six-screw design is better but actually a five screw design beats both as you can’t draw a diameter across any two screws and create a tilt axis. Edit: after publication of this post and my articles in print in the British Journal, Cameracraft and f2 Freelance Photographer, Sony changed the design and A7/9/1 series bodies from the A7IIIR onwards have a six screw mount with screw positions reducing symmetry and the potential to rock.
sonyjune1526

The E/FE lens-body system is built round a concept of achieving final accuracy in alignment and focus without needing precision in every component. The nominal 18mm mount to sensor register doesn’t have to be perfect (and seems to vary by at least ±0.1mm). All Sony E and FE mount lenses compensate for variations and use free-floating magnetic focus often combined with floating OSS – they don’t have fixed infinity stops. Just as the bodies don’t have to be all that precise, the lenses themselves don’t need to be. As long as both work with the sensor to AF perfectly, the overall system is self-correcting.

You soon find out the limits of E-mount precision when buying adaptors for older manual lenses or modern Canon EF lenses. I’m sure Zeiss makes due allowance in the design of manual focus Loxia lenses, and Voigtlander has specifically allowed the new E-mount range planned for 2016 (10mm, 12mm and 15mm) to focus past infinity because they are aware of the variable register of the system. I have measured many adaptors and the only safe decision for the engineer is to fall short of the target register. Some very expensive adaptors turn out to be 0.3mm thicker than others for the same mount (I’ve found this in Leica M, Canon FD and Canon EF adaptors). The lenses being adapted often have a fixed infinity stop and are designed to hit this precisely. Combine a 0.1mm ‘plus thickness’ Sony body with a 0.2mm plus adaptor, and your manual wide angle lens won’t focus on infinity.

So, one overall issue is that despite the high cost, the Sony FE/A7 series range of bodies and lenses lacks the precision engineering of past systems and it’s designed that way. When you find one side of your pictures always seems soft with wide-angle, wide zoom or very fast lenses you have encountered the limitations of Sony precision and quality control. Edit: see new body mount comment above, Sony greatly improved the precision and accuracy of the entire body/lens system from 2016 onwards.

Secondly, the A7R II has such large files and a slow overworked processor relative to those files and the massive task of running a high resolution, high frequency EVF and many clever software functions. Any kind of systematic ‘chimping’ to check each shot after taking may leave you frustrated. Depending on your choice of card and some unknown spin of the CPU’s internal dice, you will sometimes encounter long file writing times and a brief lockout from playback.

Install the 14-bit (in 16-bit container) raw uncompressed format introduced in October 2015 through a firmware update, and the situation may improve. With Firmware V2.0 I’ve seen typical write to card times halved but identical shots could take varying times and the worst case remains close to 10 seconds for the light to go off on a single shot. Most of time it’s clearing about 1 second after 2 second auto review, and disabling auto review has no apparent effect on this, or the time the camera takes to respond to a fresh shutter actuation.

Secret solutions

Since you’ve been patient, and listened to why the A7 system in general has a few failings, here’s how to get the best optical performance and general response from it.

SEL70200G_A-1200

First of all, for the best optical performance use lenses where OSS can be disabled but in-body SS allowed to operate. The internal 5-axis sensor based stabilisation of the A7II/RII/SII is awesome. In-lens OSS is impressive but by its design will always lose you some resolution, often more towards one side or corner of the image than centrally. Amended paragraph, see comments: To see how good your stabilised lens really is, turn off stabilisation and shoot something using flash or at a high shutter speed.

But… if you turn off Steady Shot or OSS on the A7R II, you disable it in the body and the lens. You can not turn it off for the lens, but keep it working in the body. The 90mm f/2.8 Sony G OSS Macro, the 70-200mm f/4 Sony G OSS (above) and the 28-135mm f/4 Sony G PZ OSS and several newer OSS higher end (G and GM) offer the on-lens switch. But if you want stabilisation, you can’t choose to have it provided by the body with these lenses. You can do so with Canon, Sigma and Tamron lenses used on a Canon EF adaptor – their IS, OS or VC will operate normally when the SS in the body is disabled. In fact you must never use these lenses with both methods turned on together, or the result will be unsharp. This is a problem we first noticed with the Olympus system, where their lens and body stabilisation do not communicate and it’s possible to us none, just body, just lens or ruin shots by turning on both together. The Sony body used with third party lenses does allow this; used with Sony lenses, it prevents it.

The A7R II will switch between internal SS, lens OSS and a combination depending on settings. But it won’t tell you what it is doing, which makes this intelligent function something of a handicap. As a rule, if you can lock the camera down (tripod) or use a very fast exposure (studio flash, shutter speed 4X the focal length of the lens) shooting with no stabilisation at all will offer the best results.
sonyjune1527

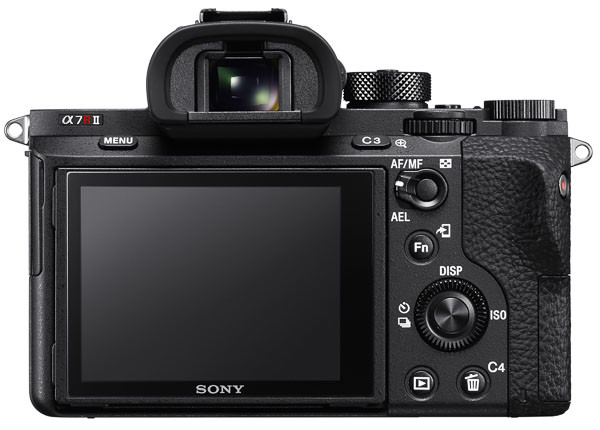
Secondly, don’t use ‘AF With Shutter’ all the time. It’s convenient sometimes, but every time you take first pressure on the shutter, your E-mount AF lens will initialise a short routine involving focus position recalibration followed by AF. It costs you a variable extra lag before the shutter fires, maybe 1/15th to as long as 1/4 second. Instead, turn this off and AF will default to the centre button of the rear controller (you can change this assignment). You then use this to AF for each change of subject, composition or distance but if nothing’s changed you do not touch it and you do not re-AF. You save battery life, and you eliminate the whole shutter-button-AF delay cycle. You can now capture pictures, using electronic first curtain shutter or silent mode, within 1/20s of pressing the shutter.

Thirdly, for action shots prefer stops close to full aperture on E-mount lenses for the same reason – the aperture closing action involves a delay you can clearly identify and it’s longer with apertures like f/16. But for maximum reaction speed, use a purely manual lens. The camera knows there’s no aperture to be closed so it misses out that stage. It knows there’s no AF. You can get down to a mere 1/50s shutter lag, faster than most photographers can think. If you are used to older DSLRs which typically fire the shutter between 1/15s and 1/8s after you have pressed the button, you’ll anticipate and fire too early for action shots. Beware the LA-EA adaptors for A-mount lenses as you can’t turn off the aperture lever actuation. These adaptors will always add a delay even if you fit a manual lens.

I’m not going to delve into how you use focus peaking, magnification, setting the slowest shutter speed to be used by the Auto ISO function and so on. You can find out about this from countless videos and blogs, not all of which feature grandmothers, sucking and eggs. Nor will I recommend JPEG noise reduction and image settings in camera, since I don’t use JPEGs. Remember that your picture style and adjustments, like extra sharpening or contrast, will be reflected in the view you see through the EVF and on-screen. They will affect focus peaking, the histogram and what the image looks like when you use magnified manual focus, too. My tip is ‘stay neutral’ for the best EVF experience and ability to judge and control your results, especially if shooting raw. Camera Standard – boring but it won’t fool you into making adjustments which are not needed.
smailhomsony16-16-p-h-srgb-web

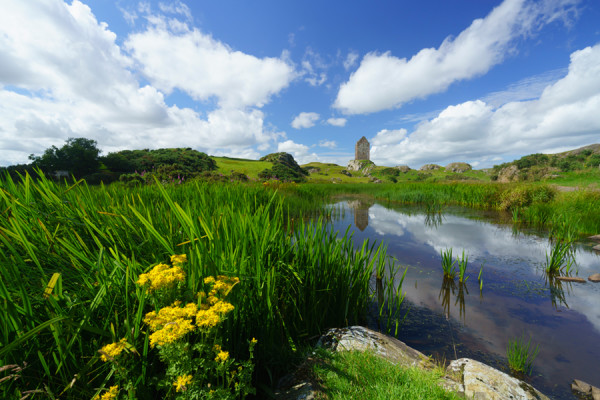
A 16mm landscape with careful focus checking, and only just enough depth of field even at f/16 if the end result is going to be a 1m wide print

Read the manual, think about all the functions of the camera, assign your custom buttons, set your parameters. My set-up includes (routinely) Auto ISO 200-1600 because within that range the A7R II files have low noise and good textural sharpness and there’s no great benefit in dropping to 100; AWB; 1/250th slowest shutter speed because the world moves and I’m very happy with 1/250th at ISO 800 rather than 1/125 at ISO 400 for nearly all my walkabout shots; AdobeRGB because I need that but actually sRGB is better matched to the EVF and rear screen, and will give you a more accurate histogram; no JPEGs because I don’t need them; Airplane Mode on; compressed raw unless there’s a really good reason; AF-S and Centre point focus; no face recognition, no smile shutter, no tracking, nothing clever with AF; single shot; generally Aperture Priority but sometimes P, M or very rarely S; Date Format file folders; SS on; electronic first curtain; setting effect on; finder and screen at default brightness and colour; grid lines 3 x 3; focus peaking low, yellow; lens correction enabled; 2 secs review, or none.

– David Kilpatrick, all images except front and rear views of A7R II body and 70-200mm lens are ©David Kilpatrick/Icon Publications Ltd; please do not link directly to images or copy

* You need thousands on offer to sell dozens…

Sony Alpha 900 and Nikon D3X raw file noise comparison

Like Mike Johnston writing in The On-Line Photographer, I’m aware that any attempt to line up one or more cameras and show comparison images or make judgements is on to a loser from the start. And any webmaster who puts an external link in the first half dozen words of a new post is losing the plot too! But here, for what it’s worth, is the first line-up of results processed using the same software from A900 and D3X uncompressed raw files converted without sharpening or noise reduction.

Continue reading »

Alpha 900 and photokina: Part 1

OUR final production Alpha 900 body arrived on Saturday September 20th, and went along to photokina 2008 on Monday 22nd where it was used in a routine way – without flash – to take whatever pictures were needed for magazine reports. Sometimes it can be better just to use a camera on whatever difficult or poor subjects the world throws at you, than to devise impressive test situations.

We arrived in time to register with the press office, discover that our hotel had sold our room (and have a complimentary beer while they unsold it!), and head off into the woods beyond Cologne’s suburbs for a dinner organised by Nikon UK. The presence of an Alpha 900 was not an embarrassment and Nikon execs were interested to see it; they all visit each other stands and have a thorough look at the opposition offerings during photokina anyway!

At ISO 800 the A900 isn’t even having to struggle with strange lighting conditions like this (bright enough to see your food) but later on, when the UK press party had thanked Miwa-san and his colleagues for an enjoyable evening, we hit Papa Joe’s in the Alter Markt. This bar is famous as the meeting place for the international photo press during photokina – but it’s also very dark, crowded and full of musical automata and illuminated signs. If there’s any place which would be destroyed by on-camera flash, impossible with bounce flash, it’s Papa Joe’s at night – short of filmset style multiple head lighting, ambient light is the only way to get a record. So the Alpha 900 had to be set to ISO 3200 and +1 over-ride to cope with the bright parts of the extremely contrasty scene fooling the meter.

An 11.2 megapixel version of this shot can be opened by clicking the picture. Why 11.2 megapixels? It is processed from a cRAW file using ACR 4.6 RC, and this is one of the downsized options you get. The Alpha 900 native resolution is the maximum size in the list of exported sizes now. While ISO 3200 is not going to beat a Nikon D3 (etc) when viewed pixel for pixel, 24.5 megapixels versus 12.2, when you reduce the size of the A900 image to closely match the D3 size results in similar conditions give the A900 an edge in detail resolution – and slightly less mushy noise.

So, what I’ve done to make real comparison possible with the A700/D300/D3/D700 and similar +/-12 megapixel models is to resize all the photokina shots on the A900 to 11.2 megapixels export.

Here is one of Papa Joe’s musical automata during playing. If you think the skin looks a bit plastic – it is!

For the full sized image (again, accessible by clicking the in-line image) some sharpening, some luminance and chroma NR were all applied because it could take this without getting rough. Here is a section of the image seen at 100% (of the 11.2 megapixel export) with no sharpening, and no luminance NR – just a colour NR setting of 50 in ACR. Check out the eyelashes:

Is this good for an ISO 3200 image processed using these parameters? I believe it is. I have used the Nikon D3 and D700 in similarly low light conditions, but mainly the D3. I know what the noise of the D3 looks like, and have praised its high ISO performance particularly at 6400 and above – at the time of its launch, nothing else went above 6400 or did 6400 as well. But that the D3 is ‘noise free’ is a myth even at ISO 400.

Here is a similar 100% section of a D3 ISO 3200 shot taken in a very similar level and quality of light, with some similar colours, and at the same aperture – though my photokina shot used an inexpensive KM 17-35mm D lens at f5.6 and 30mm, while the D3 shot uses a very expensive 24-70mm Nikkor at f5.6 and 24mm:

Now in my book, at the very similar 11/12 megapixel size the D3 has a much softer resolution and shows a more distinct (but film-like, and evenly distributed) noise grain. I think the A900 downsized to 12 megapixels will display higher detail resolution, and less noise before post-processing, than a similar Nikon D3 processed from raw. JPEGs are a different matter; the Alpha 900 ‘Fine’ JPEGs are not pleasant, and get worse as you increase the ISO setting. That is why, after experimenting with Extra Fine JPEG (much bigger than a cRAW!) and RAW+JPEG, I shot everything using cRAW.

In the morning – with just a single day to spend at the show – I found myself on the wrong S-Bahn train, and had to return from the next stop to get the right one. Travel is free throughout Cologne public transport when you buy a Messe fair ticket (or at least, a photokina ticket) or have a press card. By luck, the train which arrived to return me was branded Sony Alpha!

Now if you doubt just how extremely sharp the Alpha 900 gets using normal ISO speeds, and exporting to 11.2 megapixel size, click this one and view full size. Look at the structure of the ‘foam’ below the Alpha camera and you’ll see moiré patterns. The camera, here, is outresolving the subject. The Alpha 900 has a unique AA filter, which is positioned well to the front of the CMOS imaging sensor. There is a big gap. This has two effects – first, it places all dust further from the image plane, meaning that most minor sensor dust will never be seen at all.

Secondly (though Sony do not say this) when you move an AA filter further from the sensor, it must be weaker. The diffraction pattern which softens the image has a strength linked to the distance between sensor and filter – try putting a soft focus filter on a printed page, then lifting it up slowly, to see why this is so. The weaker filter, further from the sensor, has a much less destructive effect on micro detail contrast and is especially friendly to wide angle lenses.

I was shooting very quickly – these were barely planned, I just had time to register the Sony branding, shoot, and jump on the train. Inside, I had to lean over between people to get the right angle for a Cologne view – no time to alter the camera settings, or do anything except focus-lock on the Alpha symbol and recompose:

The man whose arm can be seen near the Alpha was surprised by my sudden invasion of his space but spotted the camera and the symbol and realised what I was doing. Again, click the pic to blow it up!

Approaching the Messe halls, Sony had large posters up:

And in the flowerbeds beside walkways and roads, more flexible displays:

During the day, it began to rain heavily meaning we didn’t even do our usual walking back over the bridge into the city centre, and finding our way back to the attractive Heumarkt square ‘Albergo XII Apostel’ hotel through the old town. A taxi was the only way to keep dry. So, I have no idea if Sony ‘owned’ Cologne the way Nikon and Canon (and others) have in past years.

Shirley and I have been visiting photokina now for 35 years – our first was in 1973, as guests of Praktica staying in their chartered Rhine hotel boat. From 1974 onwards, photokina became biennial in even years only. We started with an ‘odd one’!

In the next part of this report, I’ll show some of the stands and products and visit the Sony stand itself. Don’t worry, they didn’t launch anything new – it was all unveiled two weeks before and on sale, like my own Alpha 900, before the event started.

– David Kilpatrick