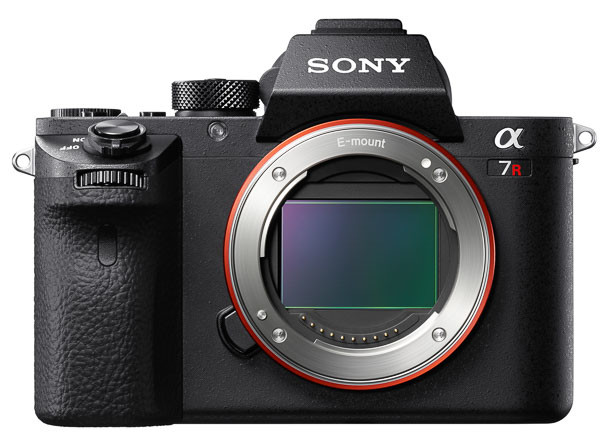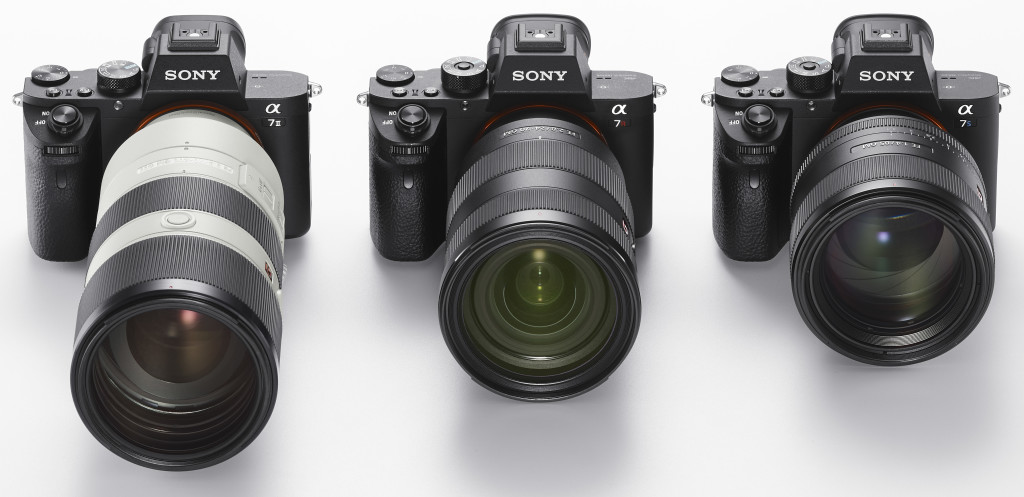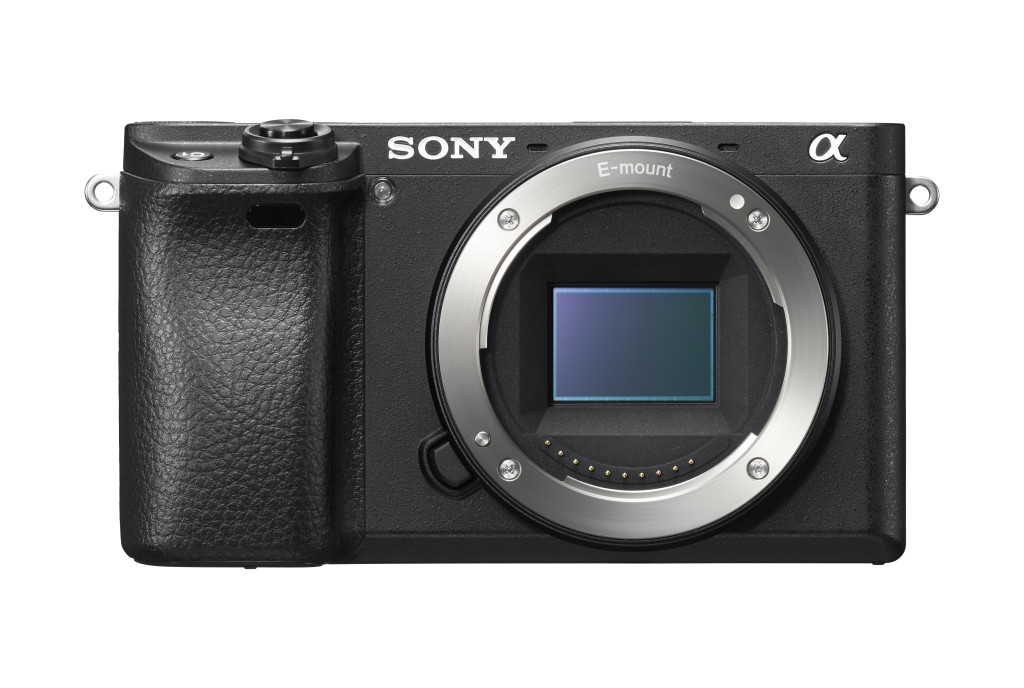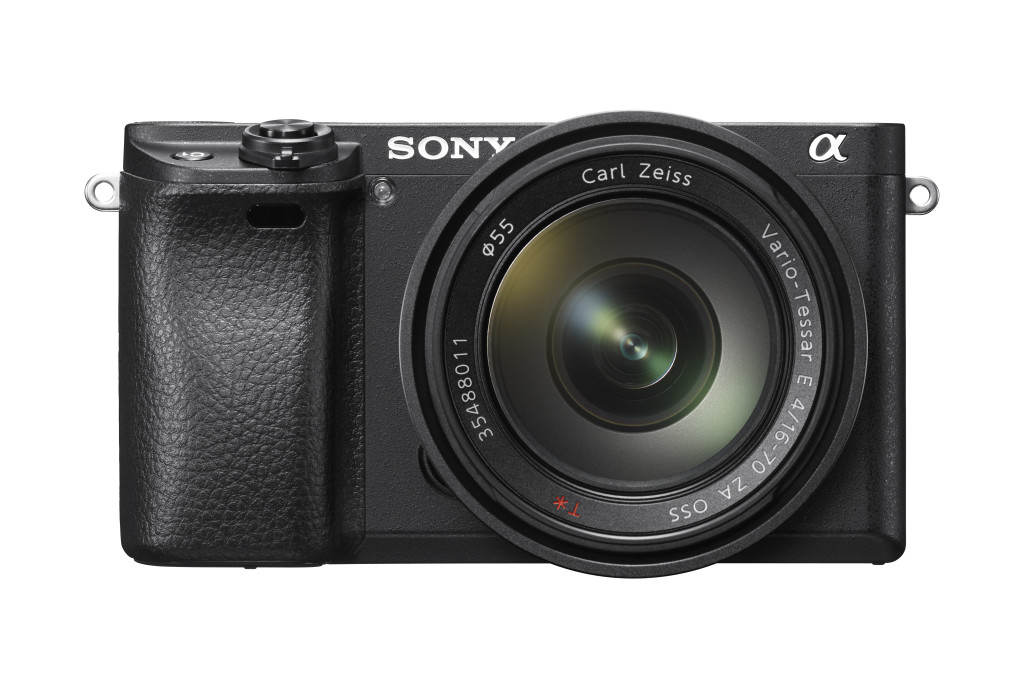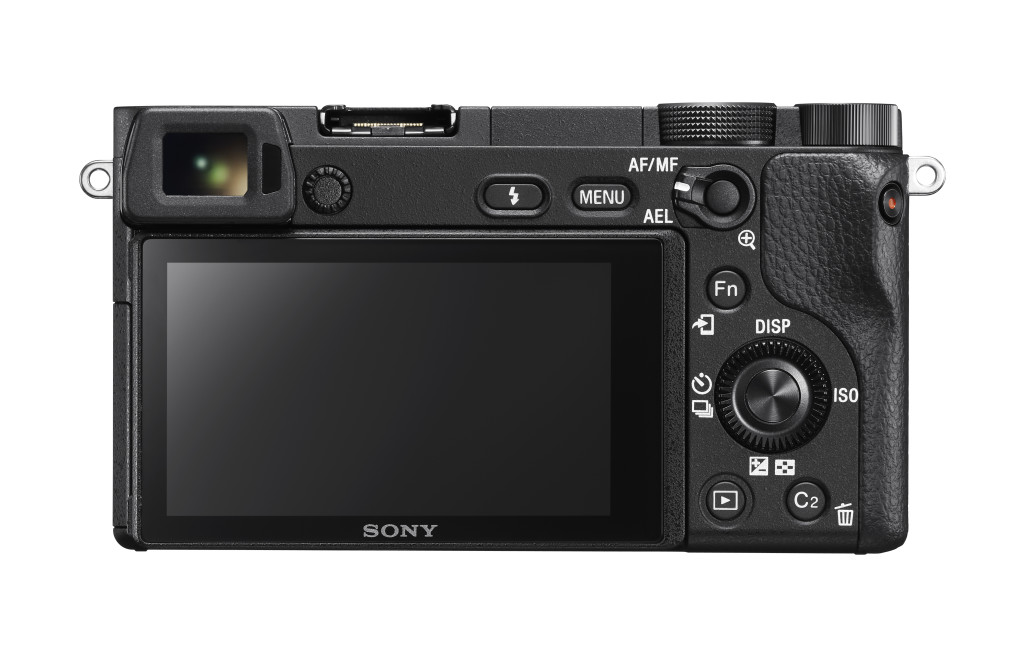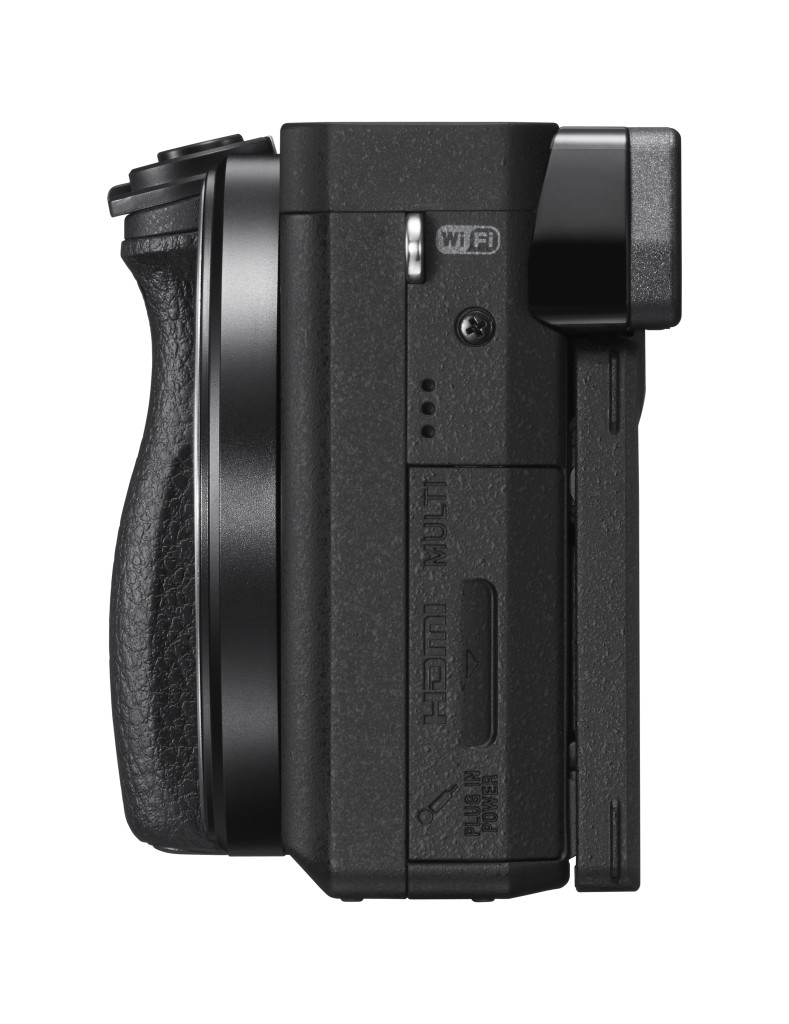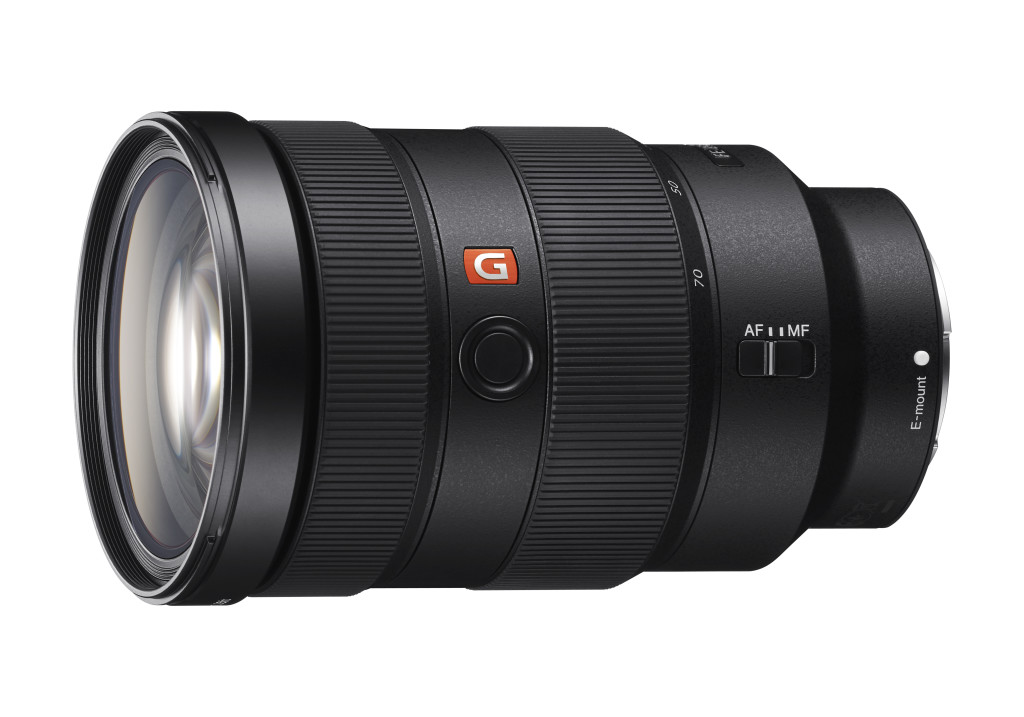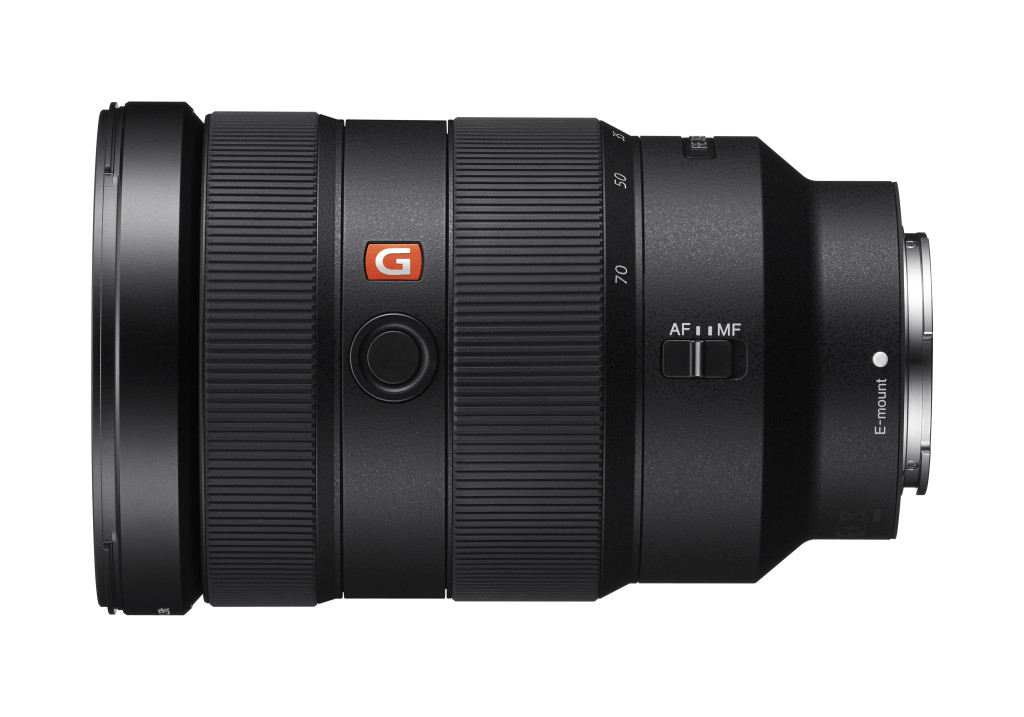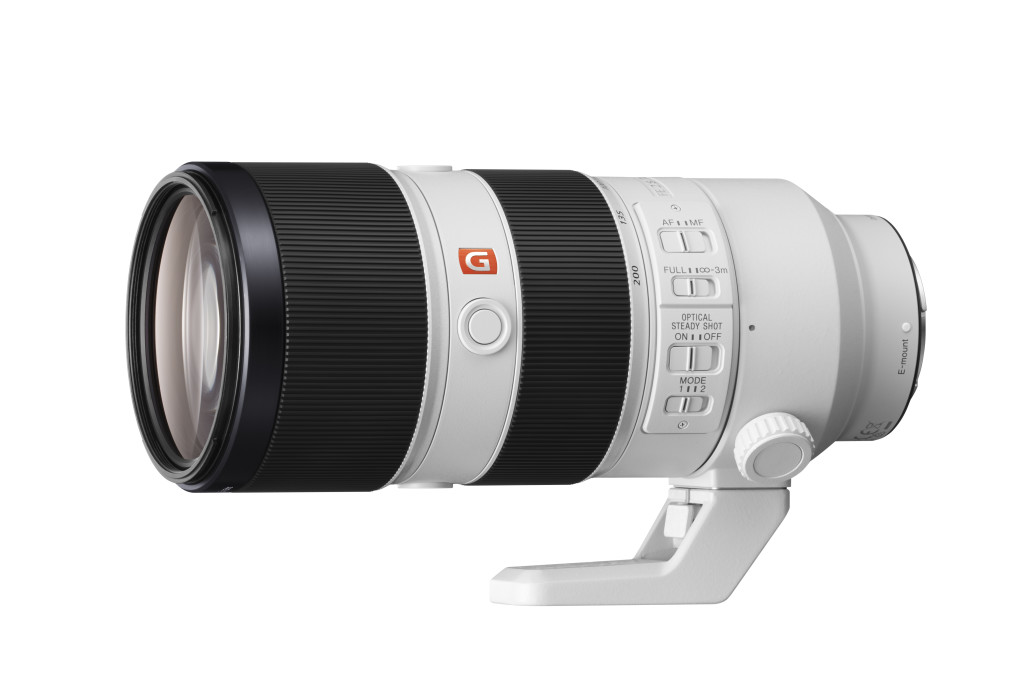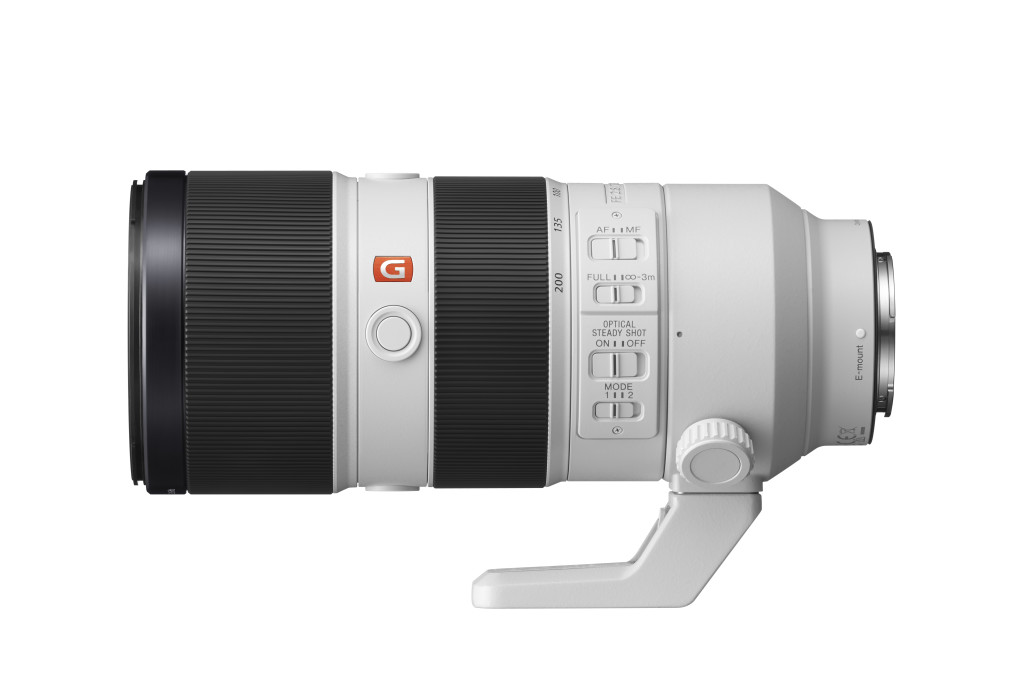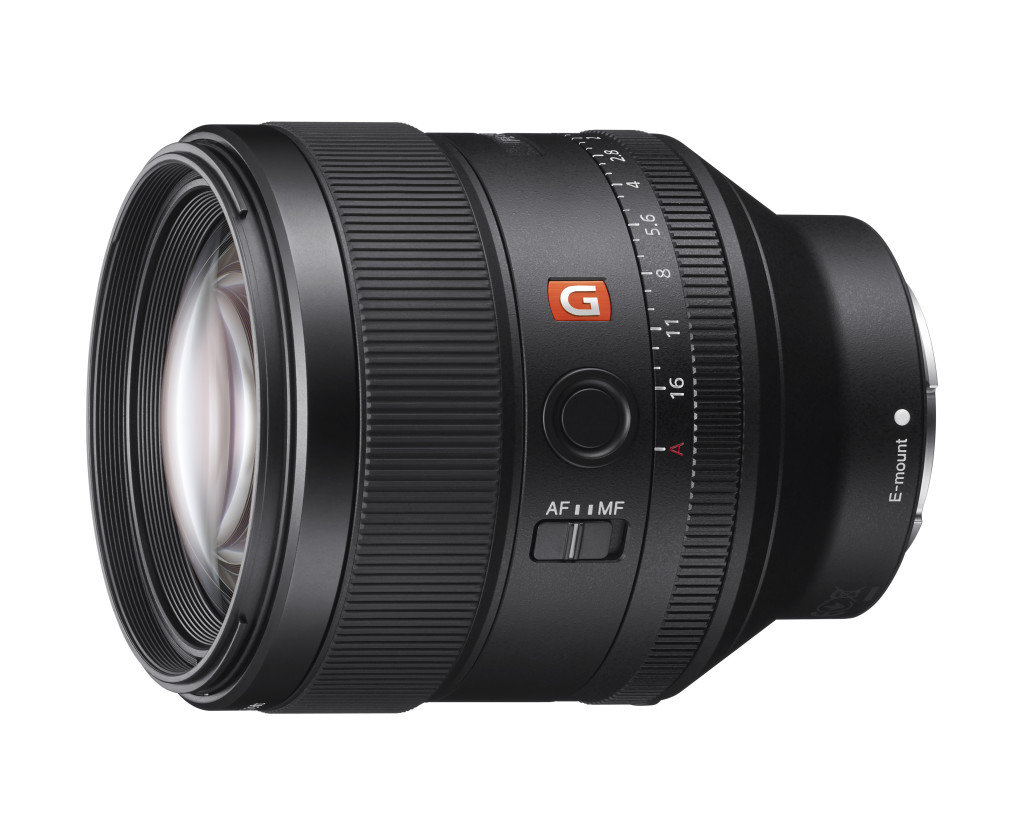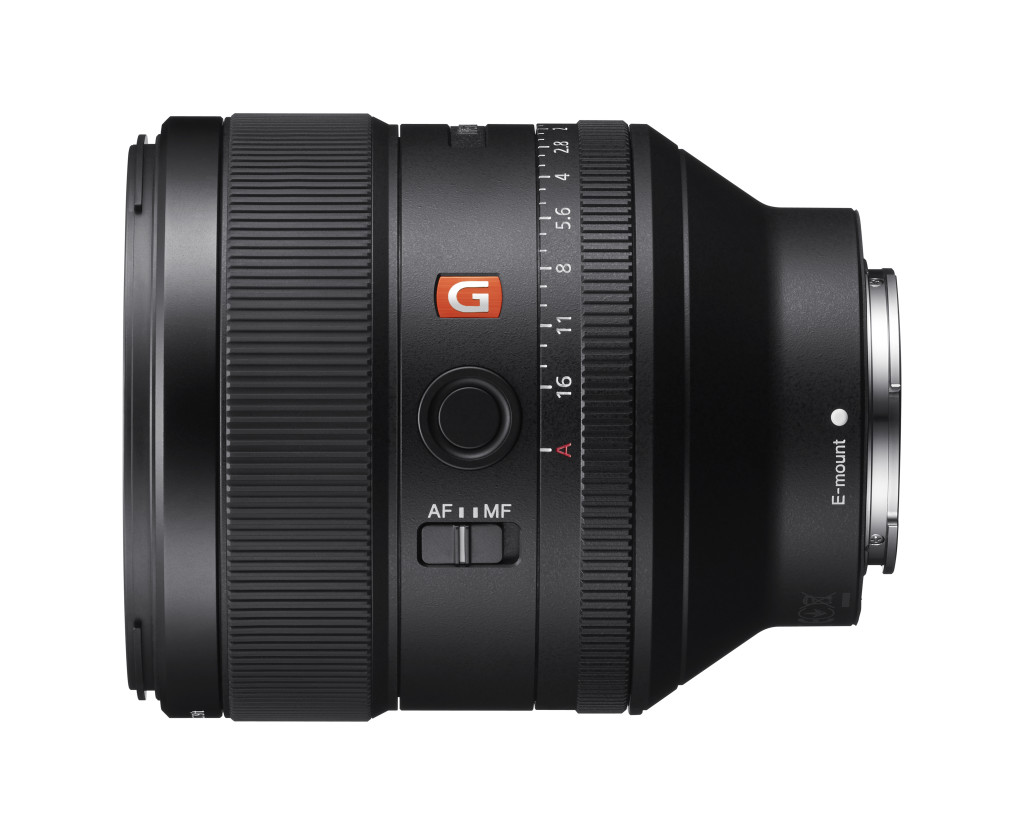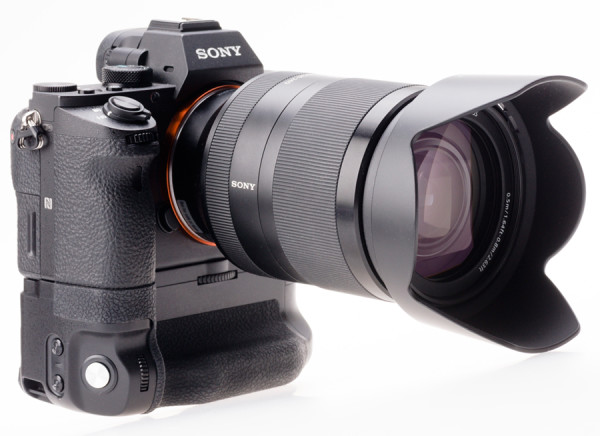
Lenses For Hire (UK) adds Sony FE range

Sony reaches a Hire level 

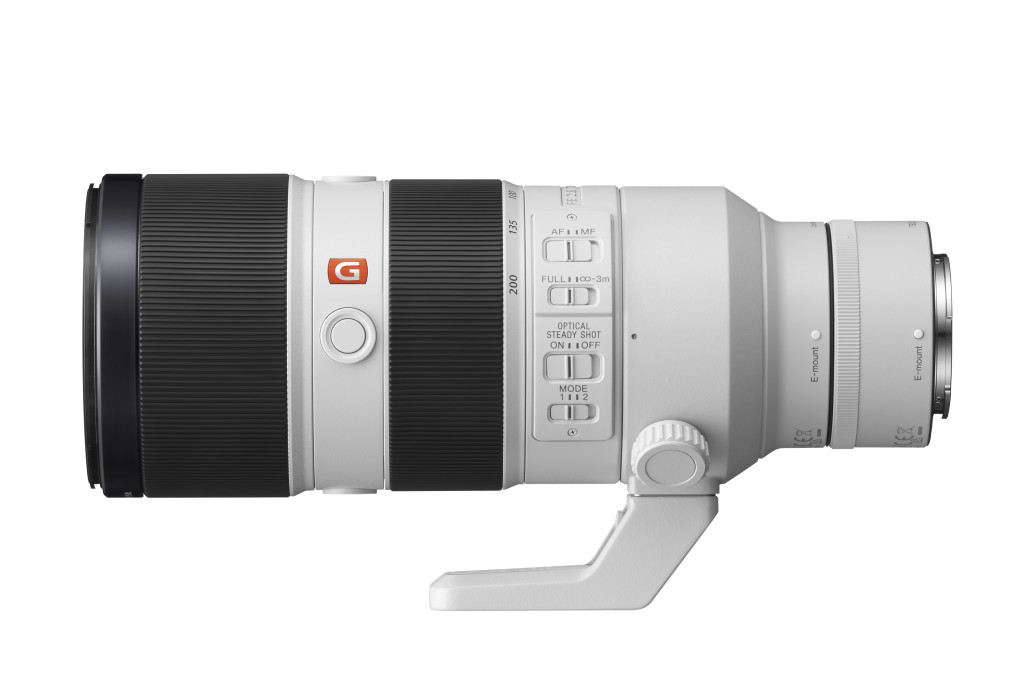
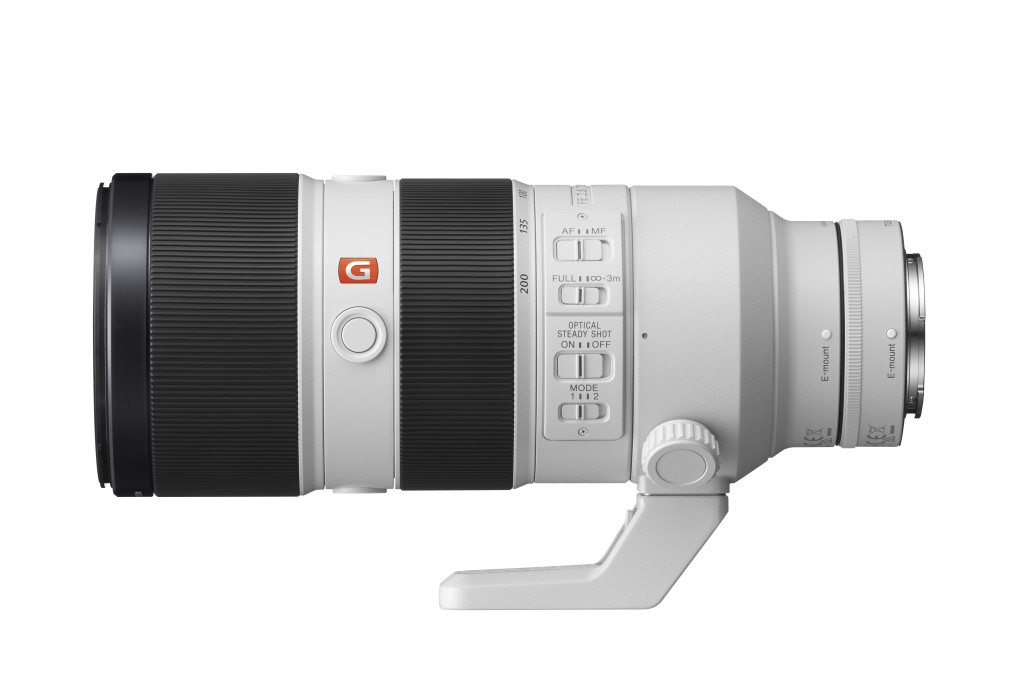
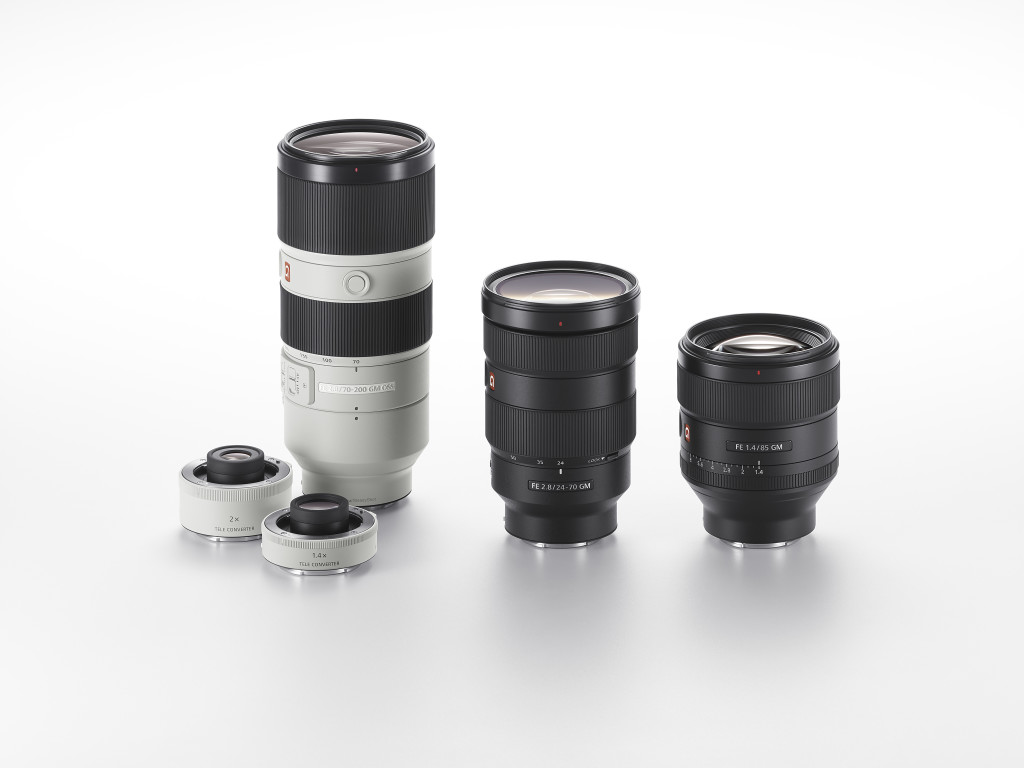
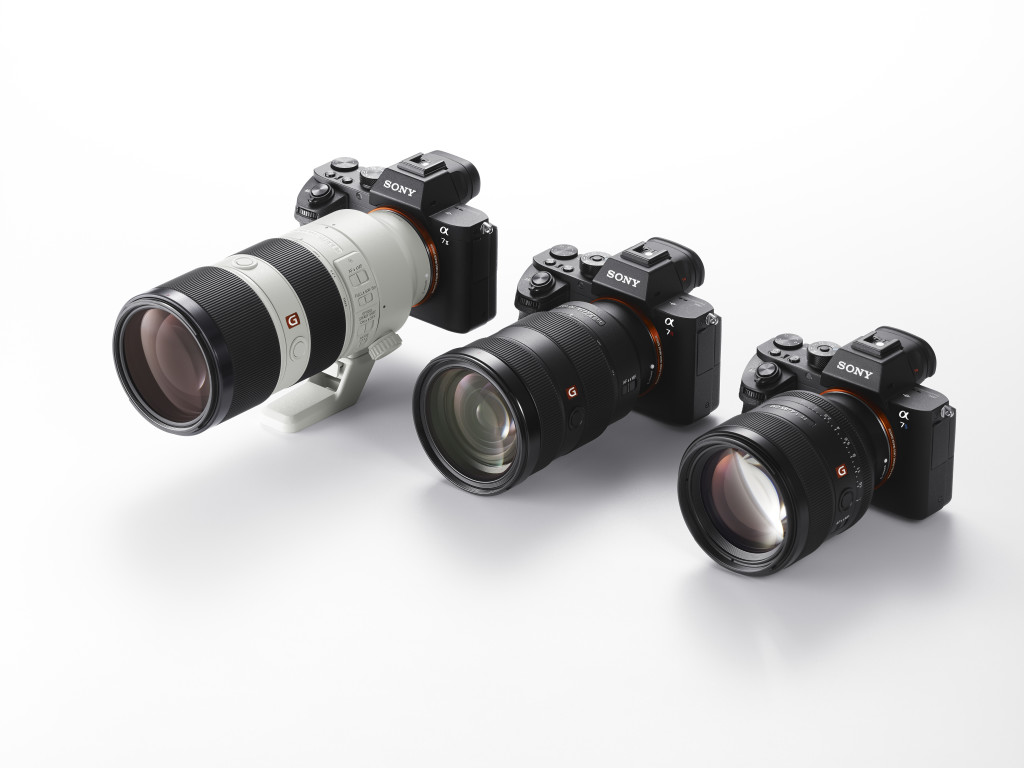
Sony full-frame mirrorless system owners keen to find out how good the fast Sony GM lenses are can now hire from Lenses For Hire for as little as £69. The hire service has been evaluating the demand and quality of the Sony offering, and recently decided to add the system alongside their regular Canon and Nikon professional stock.

A three-day shoot with the 24-70mm f/2.8 FE GM OSS, delivered on a Thursday and picked up on the Monday by courier, would cost under £100 including insurance and carriage both ways and only £69 direct from the Maidenhead hire specialists. 

System lenses stocked include the new 12-24mm f/4 G, 16-35mm f/2.8 GM, 24-105mm G OSS, 90mm f/21.8 OSS macro, 70-20mm f/2.8 GM OSS, new GM 100-400mm f/4.5-5.6 OSS and the versatile travel-friendly 24-240mm. 

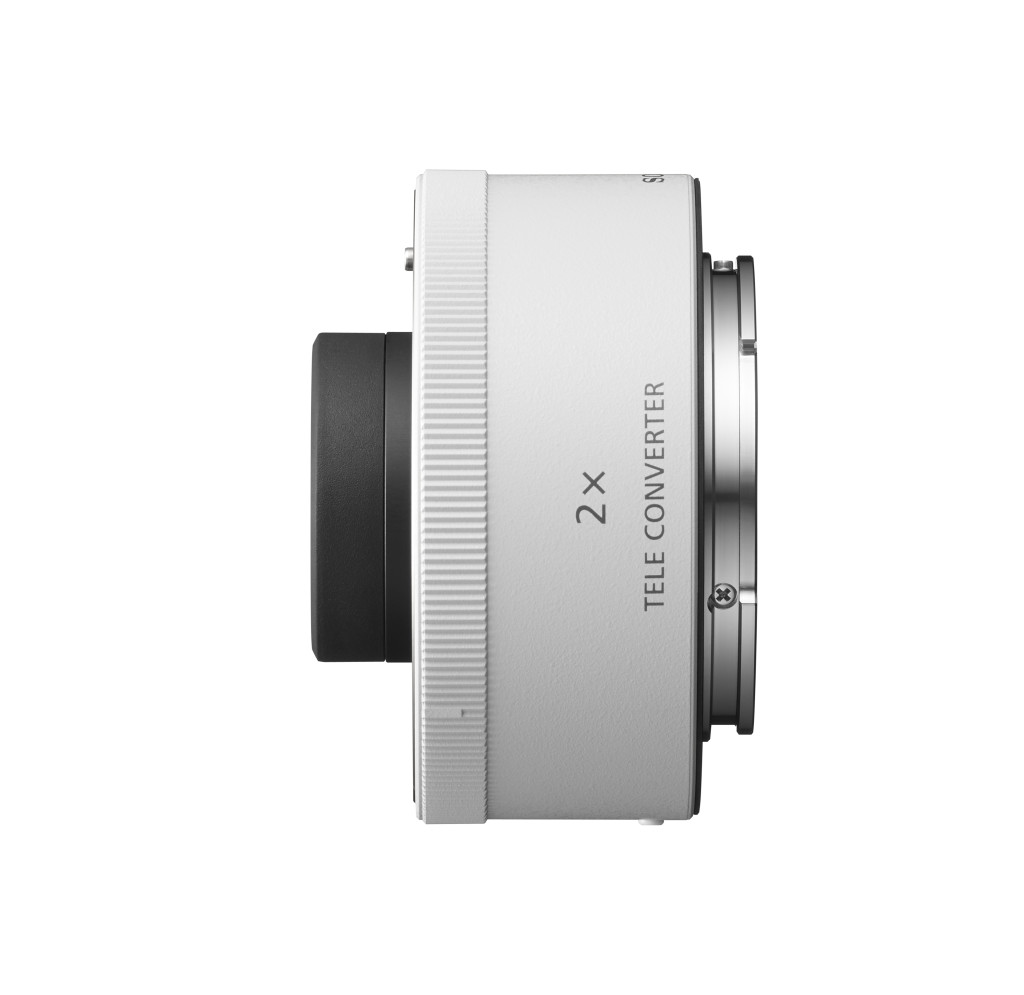
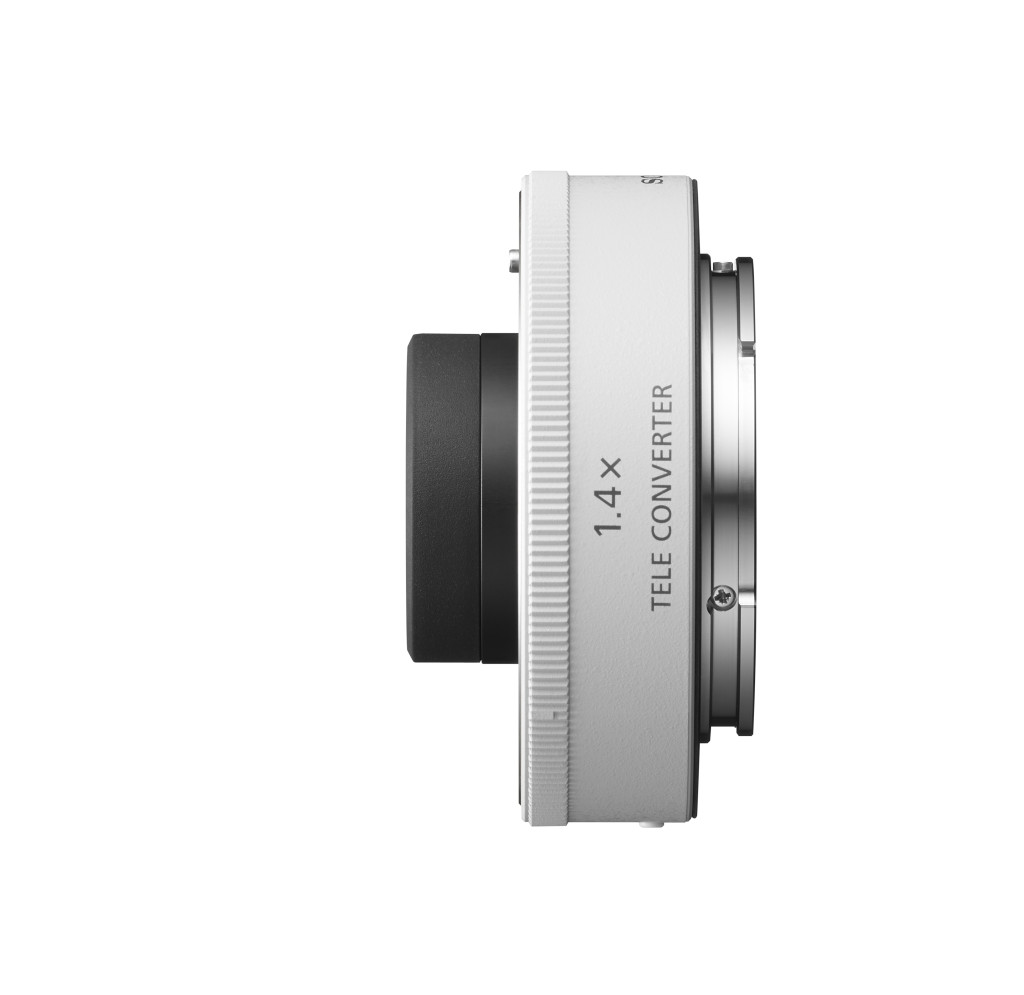
Tele converters, the latest Metabones Mark V Canon EF adaptor and accessories are offered. Sony A7II, A7RIII, A7SII and A9 bodies can be hired from £94. 

With GM lenses costing from £2,269 upwards an affordable hire period helps you make the right buying decision, saves you money and gives you the best choice for your work. 

Contact: 

Lenses For Hire Ltd 

www.lensesforhire.co.uk 

[email protected] 

+44(0)1628 639941 – or UK only 0800 61 272 61 

WEX add 10% off all Sony E-mount lenses

With large UK cashback offers running at the moment – example, if you buy separate A6500 and 16-70mm lenses you get £150 off the body, £80 off the lens – UK retailer WEX, one of our affiliate partners for Photoclubalpha, has added 10% off all E-mount lenses up to August 10th.

We know the UK cashbacks work as we had our cashback paid into our account just three days after buying the A6500 and 16-70mm this month. The cashbacks are selective and for example you won’t find one on the new 12-24mm f/4 FE or 16-35mm f/2.8 FE, but they still cover many choices of lenses and bodies. The 10% offer covers all Sony E-mount lenses.

For the WEX 10% discount, which they claim is exclusive to them, enter the code EMOUNT10 on any lens purchases from this Photoclubalpha affiliate URL – http://tidd.ly/7ab0de0d

Sony’s precision aspherics

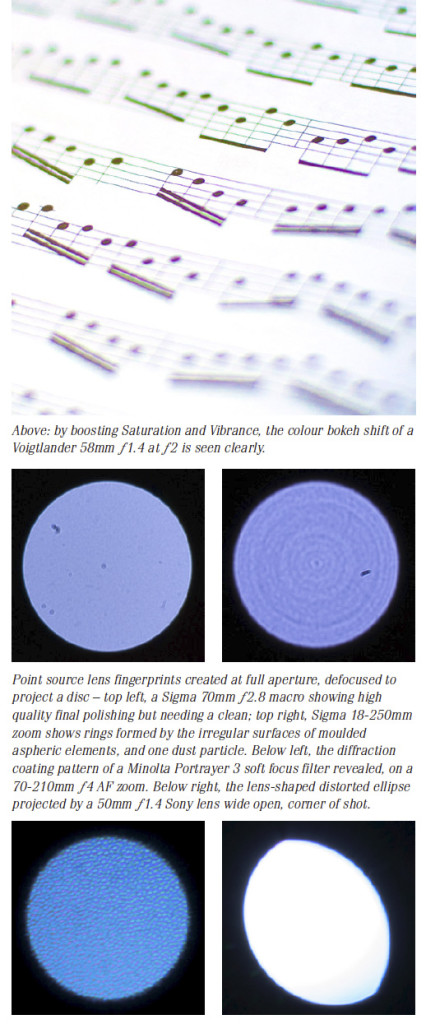
In interviews about the new micron-accurate aspheric lens element moulding process used to increase the resolution of the latest Sony G Master lenses, a visual has appeared which shows the ‘onion ring’ effect that coarser mould machining causes in lens elements.

Working independently, I’ve been aware of this for years – and I have used a point-source photography technique to study lenses. I’m not an optical engineer or scientist, indeed I don’t even have a degree in anything. I came into photography through Victorian books and teenage years experimenting with lenses, developer formulae, building my own equipment and using observation, corollary and deduction to understand how things work. It’s helped me explain difficult technical stuff to many thousands of readers through books and magazines, without using maths or formulae, and very few diagrams.

In the Cameracraft back in 2013 I published a home-brewed rendering of aspheric moulding visual analysis.

Here’s Sony’s visual showing the difference between traditional aspheric moulding (pressed glass aspheric, as pioneered by Leica and Sigma) and their new refined pressing with better engineering.

onion

And here is my home-brewed visual from Cameracraft when I explained the bokeh and resolution issues created by pressed elements (and also, some other aspects of bokeh, which I’ll refer to below the image):

onion-ours

This is the clip from a 2013 article in Cameracraft dealing with broader aspects of bokeh, depth of field, aberrations and how images are rendered. You can download the two-page article here. Nine years after we launched Cameracraft the magazine is going strong, it’s a bit thicker and does have the occasional advert unlike our original, but it is still one of the best ‘never knew that before’ reads a photographer can have drop through the letterbox. You can arrange that easily enough here!

Here is the full article as a downloadable PDF.

Sony’s new superlens was not any better than the Sigma 70mm f/2.8 macro which I still use. My reasons for choosing this macro are simple – it is optically excellent and traditionally made without any aspheric or other special elements, and it uses simple focal extension for focusing, not rear or internal group movement. This means it’s a true 70mm lens even when used at 1:1 and gives the maximum lens to subject distance, for its focal length.

However, it’s MUCH better than the Voigtländer 50mm f/1.4 used for the colour bokeh shift example at the top. Sony’s information makes it clear that the new more precise aspheric moulding allows new surface profiles and the elimination of chromatic aberrations which cause this magenta-green foreground to background shift in so many otherwise excellent lenses. I’ve said that to do so, the new lenses must be what would once have been called Apochromatic, though that term has only ever meant that all wavelengths focused to the same plane and at the same scale. Even past Apo lenses can show poor colour bokeh. It’s interesting that Sigma, after years of plugging the APO (capitals not actually needed, folks!) label chose not to label some new lenses this way even through their performance matched or exceeded earlier APO models. Sony seems to be taking the same view – G Master will be sufficient label to imply very high resolution, elimination of bad colour bokeh shifts, and by implication an apochromatic performance on RGB sensors.

So will I be buying these amazingly expensive, large, E-mount dedicated lenses? Probably not. My unscientific observations tell me there are smaller, lighter, far less expensive lenses which will serve me better. Mirrorless digital camera bodies with high quality EVF and high magnification focusing allow me to  do things I could never have done over 40 years ago when I took my first position as a Technical Editor (of the UK monthly Photography published by Fountain Press and edited by John Sanders). Geoffrey Crawley, editor of the British Journal of Photography, showed me how to evaluate any lens quickly with the help of a light bulb, a darkened studio, a roll of background paper and a sharp pencil. Back then you had to expose film, now you can just look through the finder. In a photo store, any LED spotlight will do for a quick check. Focus centre, magnified to max, at full aperture. Move to all corners in turn without refocusing, magnify each time. Refocus each corner in turn when magnified, examine change in rendering of point source. Buy the lens which shows symmetrical, balanced results and the best sharpness of the corners when the centre is correctly focused. Do this with a light source at least 3m/10ft away and if you can, even further. Repeat one stop down, two stops down, with zooms repeat at three or four focal lengths across the range. Never do it at close distance (hint: lens test chart results are only good for the distance you photograph the chart from, which is why Imatest, DxO and other labs have test targets the size of a wall and industrial sized space to work in).

And, if you have a single LED bulb or miniature LED torch, you can examine any of your lenses in a darkened room and produce a ‘bump map’ which will reveal its moulding defects, scratches or fungus, blemishes, and population of dust and microfauna.

– David Kilpatrick

dk-cameracraft-bokeh

For our PDF and App editions, go to Pocketmags where you’ll find Apple iOS, Android and all the usual choices to subscribe or buy individual editions.

And if you really want a trip back in time – there were huge changes between 2012 and 2015. Cameracraft documents the rise of mirrorless, the growth of hipster retro, and the discovery of older manual lenses as it happened. You can read a full set of the 12 issues via this one-off YUDU subscription:

Click to view the full digital publication online
Read Cameracraft 2012-15
Self Publishing with YUDU

Sony’s Master plan – new 85, 24-70, 70-200 and more

15H_GM_lens_image_04

On Tuesday, February 2nd 2016, Sony UK held a press event to which I was invited. Well, I’m in a different country and about 400 miles from their Weybridge offices, so as usual my trusted English office editor at large (and son) Richard made the still substantial journey from Leicester. The result was a completely wasted day, his time and our company’s money, looking at a mixed bag of TVs, camcorders, headphones and all the Alpha and RX gear we already had seen long before.

Then on February 3rd, mid-afternoon, the same PR agency which had extended this generous invitation to come and gather ZERO editorial content for our magazines announced the new G-Master series 24-70mm f/2.8 FE, 70-200mm f/2.8 FE and 85mm f/1.4 FE, 1.4X and2X extenders, and upgraded A6000 successor A6300.

I was attending an excellent event with Graphistudio on the road in Edinburgh (they do try to cover the whole of our surprisingly large and still united kingdom) and returned to see the news. Talk about mixed emotions! I was furious that they should cost me a very real £300 or so (that’s what it costs, whether I do it, or Richard, or a hired freelance) to cover yet another of their red herring events just 24 hours before a major announcement like this. We get nothing free from Sony, they don’t advertise in our magazines, and unlike Minolta they don’t offer pre-launch access to pre-production samples.

And that’s why I should not even be writing this. In the past, I would never – as a responsible journalist and technical editor – have made any comment on equipment I had not been allowed to handle and preferably use if only for an hour or two. But these days a thousand bloggers try to drive traffic to their sites by doing exactly that.

Here are my thoughts, anyway.

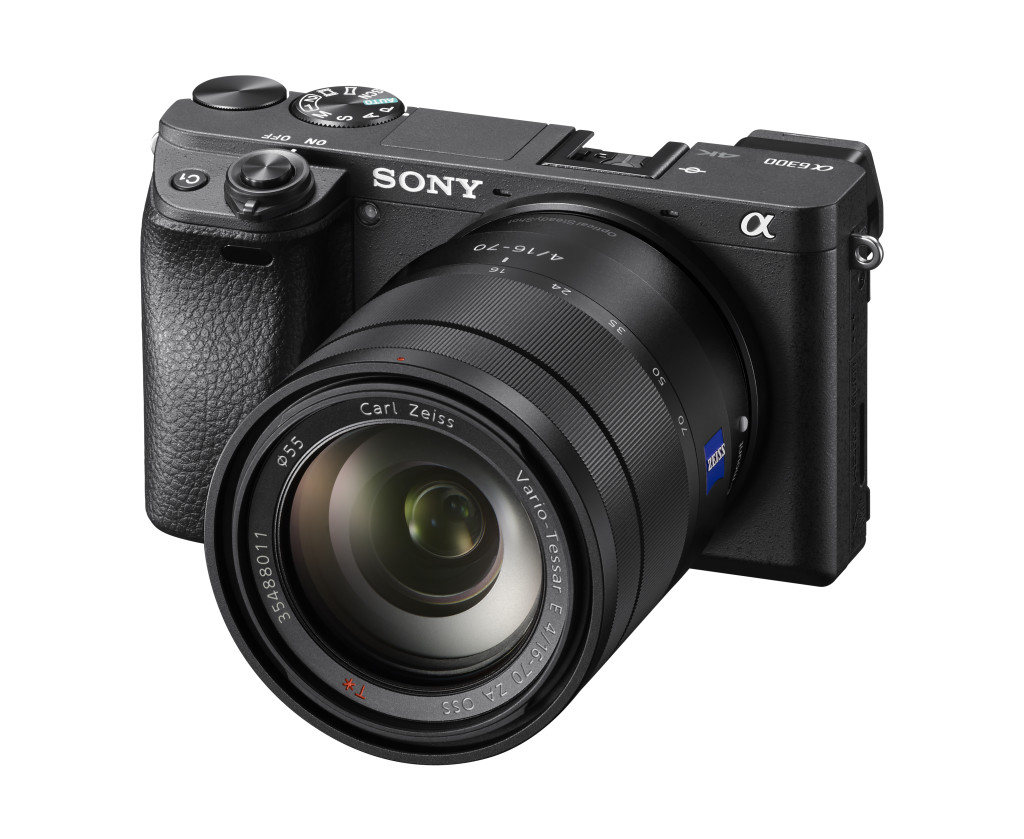
a6300_N_wSEL1670Z_right

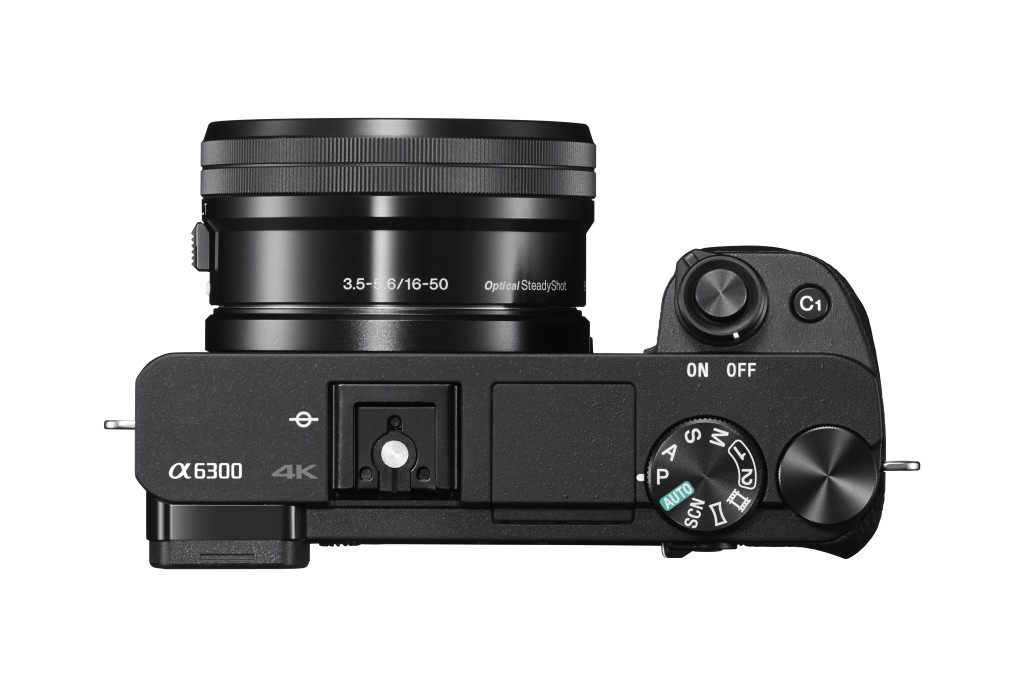
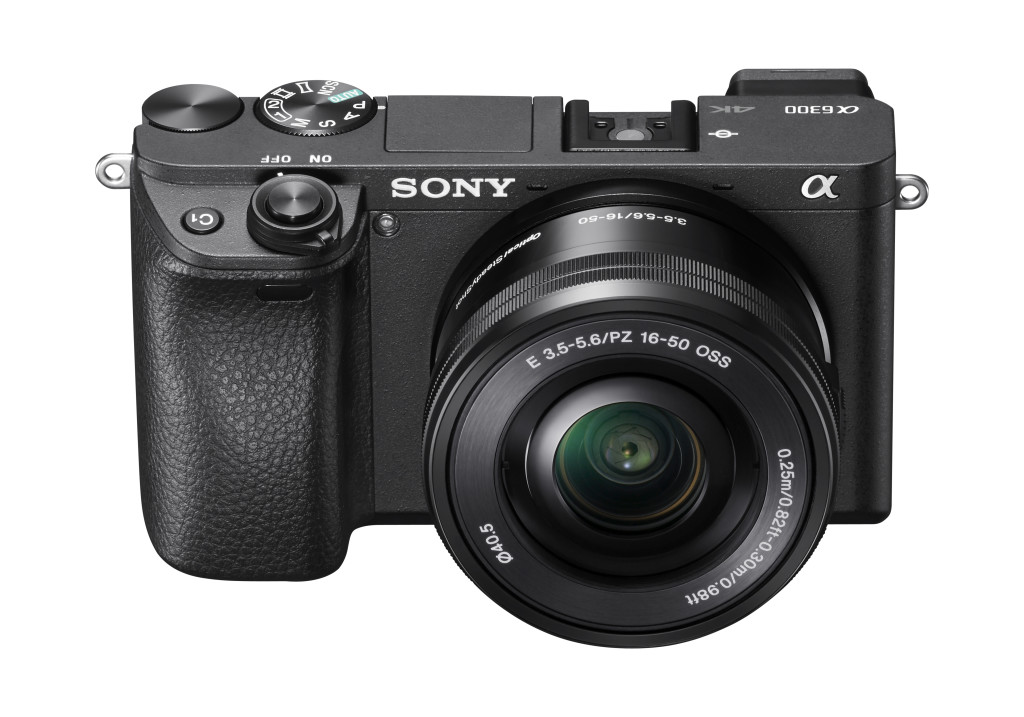
a6300_N_wSELP1650_topa6300_N_wSELP1650_tilt_downa6300_N_wSELP1650_front_topa6300_N_front

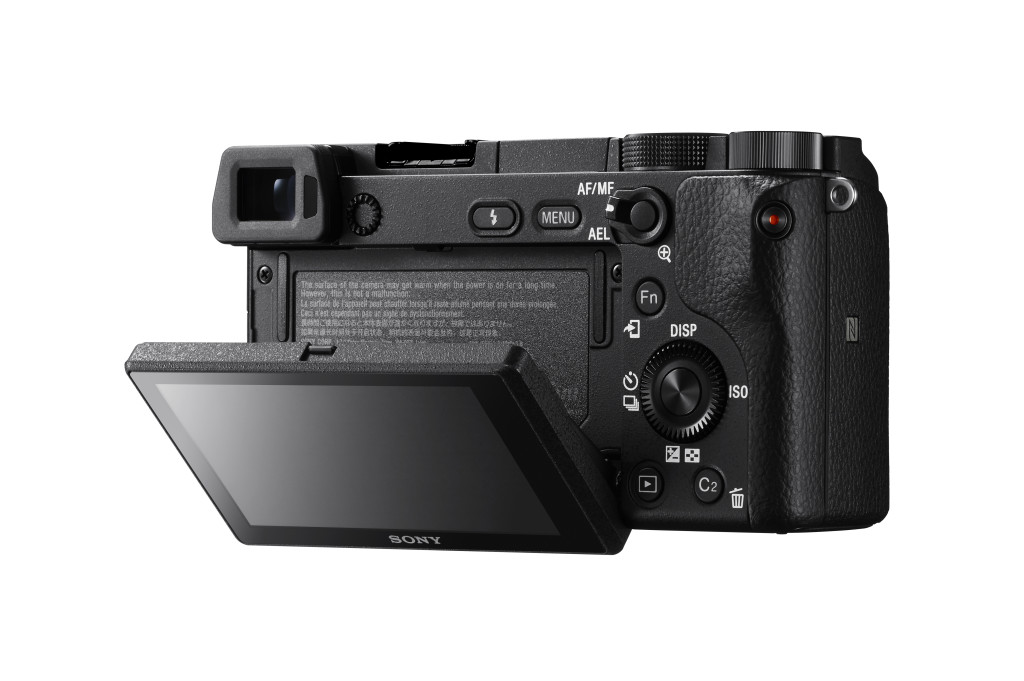
a6300_N_wSEL1670Z_fronta6300_N_reara6300_N_lefttside   Click to open full size official images!

The A6300

It’s 24 megapixels like the A6000 and does claim a slightly faster and wider zone AF. But the A6000 is already close to perfect and I normally shoot with centre point focus, not any of the wide zone modes. I really don’t want the collar on a dog sharp and its face out of focus just because the collar is the more contrasty target which the wide area focus finds first. It’s also twice as much as I paid for my A6000, which happens to have been selling for a market-beating price. I have a great set of lenses – 10-18mm, 16-50mm, 35mm f/1.8, 50mm f/1.8 and 55-210mm. All except the 10-18mm cost about half the official retail because Sony did some great deals. Basically anyone like me who has invested in a decent A6000 (or NEX-6, even) kit and already own an A7S, SII, or RII can take the A6300 or leave it. In fact my now-outdated RX10 and RX100 MkIII do pretty neat silent shooting, one of the main upgrades over the A6000.

If you need the very fast (120fps) refresh of the new EVF, 4K video and the improved audio functions (whether using jack plug mic or the MFAccessory shoe mic choices) then it’s easy – it will cost you less to get these than any other comparable route. Even the RX10 MkII no longer looks so attractive. As others have commented, it’s partly a matter of waiting for the body price to fall by the end of the year. In the meantime my A7RII actually does all the movie stuff I need (its APS-C 4K is superior to its full frame, and makes full use of line-up of lenses above).

However, if they manage to lend me a test sample and the new sensor turns out to kill the already wonderful noise/ISO ratio of the 6000 I could be won over early at a high price. Had this been a 36 megapixel body I would be thinking very differently, and perhaps even considering a switch from full frame to APS-C.

The 24-70mm f/2.8  and 70-200mm f/2.8 G-Master FE

SEL2470GM_A

With a 77mm thread and an overall size not far removed from the A-mount equivalents, the weatherproofing and generally improved design of the AF system will win buyers. The longer lens has the 0.96m close focus I’ve been campaigning for now for several years, and it’s disarmingly simple. If you study lenses, you’ll have realised that SSM, stepper or linear motor type AF (silent, no gears) has caused the increased and restrictive focus distances I’ve covered in Cameracraft and elsewhere. It has just been unable to provide enough movement. As an example, compare the old screw-drive 28-75mm Konica Minolta with the ‘identical’ Sony 28-75mm SAM. The 24-70mm f/2.8 A-mount models are actually amongst the better in this respect, managing the magic quarter life-size to important for many subjects. The 24-70mm f/4 FE is not as good though you would have though it easier to make close focusing with a simpler, slower lens – only 0.20X. At least the 24-70mm f/2.8 FE matches up to its A-mount equivalent.

SEL2470GM_B

In these new fast FE zooms Sony has improved performance by using more accurate asphericals, designated as XA (extra aspherical, presumably meaning a curve which was out of reach before). Combined with expensive glass types (low and extra-low dispersion) and complex design (23 elements in 18 groups for the 70-200mm) this enables apochromatic correction although they do not use the term. This removes ugly colour bokeh effects. A ‘floating’ internal focus action for the rear unit gives a wider fully corrected focus range, affecting both the focused distance and the flatness of field. An SSM (ring) motor drives the heavy, larger forward group focusing and a linear (rail) movement shifts the rear assembly but the whole focus action is internal.

SEL70200GM_A

I welcome the 96cm close focus (I trust it applies across the whole zoom range and with AF all the way). This lens achieves 0.25X scale at 96cm. Compare that to the Tamron Di VC USD 70-200mm which can only manage 0.125X, half the subject size, at 1.3m and that’s by switching to manual focus – it forces you back to 1.4m from the subject if you use AF.

It’s also worth comparing size; most new 70-200mm DSLR lenses are around 185mm long, the Sony is 200mm long. But it’s really ‘smaller’ than the original Sony A-mount 70-200mm’s 197mm. That 15mm extra length is almost entirely dead space, a kind of extension to the barrel in order to handle the 18mm register of the E-mount, and also enable the use of the 1.4X and 2X extenders. This extension falls behind a fixed, not removable, rotating tripod mount collar which has a removable foot instead.

SEL70200GM_C

I’m sure that the dual focusing will be fast, with two simultaneous actions combined, and ideal for contrast detection  as well as on-sensor PDAF. My reservations are simple enough though – these are lenses for one-system users, dedicated to mirrorless. There really is no saving over the latest A-mount versions in weight and size, and many photographers (like me) may want to use both A and E mount bodies. I’ve been considering investing in another A99 even though I sold mine. That’s because it is so much more comfortable and complete with my longer lenses than the A7RII with LA-EA4 or 3, both of which I have. If I did so the 24-70mm and 70-200mm A mount would be on the shopping list, and what reason would I have for buying even more expensive new FE versions which could never, ever be used on a A-mount body?

The 85mm f/1.4 G-Master FE

SEL85F14GM_A

One guide to acceptable minimum focus distance is the simplest formula imaginable. A lens should be able to focus – at the least – to the same centimetre distance as its millimetre focal length. So, a 50mm lens should manage 50cm, a 100mm lens 1m, a 200mm lens 2m or closer. But that’s the least you need. The ideal is HALF the mm in cm. A 50mm focusing to 25cm is brilliant, a 200mm focusing to 1m is amazing (Vivitar once made one, with a bright f/3 maximum aperture too).

So, for me the 85mm f/1.4 with its substantial 82mm filter thread, 850g weight and focusing down to 80cm (some data tables say 85cm) with 0.12X image scale is just acceptable. A Samyang 85mm won’t go so close and most 85mms don’t break the 1m barrier. But an ideal new, modern 85mm would focus to 50cm. It’s just pretty hard to enable this using SSM or linear AF drive. Even the Carl Zeiss Batis 85mm f/1.8 is the familiar 80cm, 0.126X scale.

SEL85F14GM_B

What I actually use right now is an 85mm f/2.8 SAM lens on LA-EA3. It’s not 100% free from CA and colour bokeh issues, but it is exceptionally sharp and it focuses right down to 60cm with 0.20X scale. Above all it is very small and light, and for me that is most of the point of the A7RII and all the A7 series bodies. It focuses perfectly on my LA-EA3. I can use it with A-mount extension tubes or my Meike metal full frame FE extension tubes, but that’s a bit of a crude solution.

Results from the MG 85mm so far seen, disregarding some fairly cheesy portraits, show that its 11-blade iris and apochromatic XA correction do deliver more than you will ever get from an 85mm f/1.2 Canon or a Samyang or a Sony 85mm f/1.4 ZA. The manual 1/3rd stop clicked or click-free aperture ring combined with the absence of magenta-green bokeh shift mean this lens will be massive for vids, whether creative porno or music promo. It should be on the same level as Zeiss/Arri ciné lenses if the claims stand up, and I would not be surprised to see a dedicated cinema version.

It’s a long way from the 85mm SLR lenses of Minolta’s past – six iris blades!

The extenders

Sorry, but most FE and E lenses can never (ever) use a a tele extender. That’s why you have not seen any. It’s also why I use that 85mm SAM… it makes a neat 170mm f/5.6 wth my Teleplus 2X MC-7. Way back, one of my favourite travel outfits including the Minolta XD-7 with 85mm f/2 and a 2X converter, 170mm f/4 was a sweet spot in every respect.

SEL20TC_BSEL14TC_B

These two converters can only be used with the new 70-200mm f/2.8 G-Master FE. When you look at how far the converter unit extends into the lens barrel,  you’ll see that this is a combination designed from the start. The rear element of the FE lens is deeply recessed, midway between a typical E-mount design (18mm register) and an A-mount (rear element no closer than 42mm to the sensor).

SEL70200GM_SEL20TCSEL70200GM_SEL14TC

The extenders add less length than an A-mount variant would, and the back focus of the FE lens is shorter. But it’s a mid-way compromise. Extenders are easy to make for DSLR back focus register, they are difficult or impossible to design for 18mm register mirrorless like Sony or Fuji unless the host lens is matched exactly to the extender. And the 70-200mm f/4, for example, is not…

The compromise

And, having mentioned compromise, I should explain the great compromise which has made the entire Sony E/FE system much larger than it needs to be.

It’s all down to the A7R 36 megapixel sensor. This sensor, more so than the 24 megapixel full frame, requires a very telecentric lens design. That is, more like a DSLR lens, despite the slim A7 series body. In order to perform acceptably with this sensor, the FE lens range could not be designed to be as small as a rangefinder system equivalent, or to take full advantage of the 18mm mount to sensor distance. Brian Smith, whose images are great (not cheesy portraits) but whose technical info clearly comes via Sony PR, says this: “Mirrorless camera design has allowed Sony’s lens designers to place larger than normal lens element close to the body”. Actually, they don’t, as the design of the extenders will tell you. They’ve used a stronger degree of telephoto construction in the long zoom, allowing a smaller than normal rear element and they have taken measures to move it further away from the body – and this is a general trend. If you want to see what a properly small 85mm f/1.4 looks like try a Carl Zeiss Planar 85mm f/1.4 ZE in Canon mount – 72mm filters not 82mm, 570g versus 850g and really solid all-metal manual focus. The mirrorless bodies do provide a zone from around 16mm to 42mm from the sensor surface which can accommodate the rear of the lens, and can’t ever be used on a DSLR. But Sony does not make full use of that and can not do so because of the microlens, filter layer and structural characteristics of the A7R sensor.

15H_GM_lens_image_06

All Sony FE lenses and all CZ independent FE lenses have been designed to work well with the A7R. The 28-70mm kit lens was not, but most owners find it acceptable. They could have made some of the lenses a fair amount smaller and lighter if the A7R had never existed. The A7RII is so tolerant towards short back focus, oblique ray angle imaging, that a whole different range of lenses could be designed for it… but never will be.

The system has to remain compatible with its earlier components, especially the first ‘flagship’ body A7R. And that is going to constrain design and increase costs for ever into the future. In contrast, see the Fujfilm X system. We have yet to find whether the new 24 megapixel Fujifilm sensor disagrees with any older lenses, but all new lenses no matter how fast, small or clever have full compatibility with all the earlier bodies and don’t seem to have any compromises in design.

15H_GM_lens_image_03

Here’s my view, after doing a lot of digging around over the last two days (Sony PR does not supply any of the technical data for the released lenses – all that had to be found, and cross-checked, from Sony corporate and various dealer sites). I have found some interesting historic lenses like the 50mm f/1.5 and 85mm f/1.5 Zeiss Biotar. They are simple and perform poorly by today’s standards but they are very small. I am familiar with many excellent lenses I’ve used in the past like the Minolta MC/D 45mm f/2, the MD 85mm f/2 and of course the ‘beercan’ 70-210mm f/4 AF. I loved my first serious freelancing kit, Pentax Spotmatics with 20mm f/4.5, 35mm f/3.5, 50mm f/1.4 and 105mm f/2.8. I’ve used some good lenses which have been perfect with all A7 series bodies, such as the Voigtlander 21mm f/1.8, the Canon 40mm f/2.8 STM, and several rangefinder 35mm f/2 or f/1.4 lenses. All of these have been small and perfectly in keeping with the A7 series mirrorless bodies. I think Sony’s inspiration for new lenses should have come from classic rangefinder and compact pre-digital SLR glass, rather than from the bloated f/2.8 zooms of professional digital SLRs.

In 1999, with a multi-state road trip in the USA to enjoy, I left the SLR kit at home because I was using two Minolta CLE bodies, a 20mm Russar, 28/40/90mm Minolta set and a Leitz Elmar 135mm f/4.5. SLRs in the AF era had started to became big, plastic and clumsy with fairly poor zoom lenses. I opted for the NEX/A/A7 system because I thought we were heading back to light, elegant, unobtrusive little jewels of lenses. Ah well, not so. We’re going to be sold lenses built like a Kardashian ass and learn to live with it!

– David Kilpatrick

????

A zoom specification comparison

  • Sony Carl Zeiss 24-70mm f/2.8 ZA SSM II – focuses to 34cm, 0.25X, 77mm filters, 975g
  • Sony Carl Zeiss 24-70mm f/2.8 ZA SSM – 34cm, 0.25X, 77mm filters, 955g
  • Sony Carl Zeiss 24-70mm f/4 ZA FE SSM OSS – 40cm, 0.20X, 67mm filters, 430g
  • Sony GM 24-70mm f/2.8 FE SSM OSS – 38cm, 0.24X, 82mm filters, 885g
  • Sony G 70-200mm f/2.8 SSM II – focuses to 1.2m, 0.21X, 77mm filters, 188mm long, 1300g
  • Sony G 70-200mm f/2.8 SSM – 1.2m, 0.21X, 77mm filters, 197mm long, 1500g
  • Sony G 70-200mm f/4 FE SSM OSS – 1-1.3m*, 0.13X, 72mm filters, 175mm long, 840g
  • Sony GM 70-200mm f/2.8 FE SSM OSS – 0.96m, 0.25X, 77mm filters, 1480g, 200mm long, 11-blade aperture

*Focus to 1.3m at 200mm, 1m when set to 190mm or shorter focal length. 0.13X at 1m and 190mm.

All the pictures used here have, linked to them, the full sized unwatermarked official Sony PR images except the first image which we have cropped a load of useless white space from – Sony likes useless white space, as the others show. Web and magazine editors hate it and constantly have to crop product shots…


Sony A7R II review by David Kilpatrick

Sony’s A7R II has a unique position in the mirrorless ILC world, creating the largest image files at over 42 megapixels from an in-body five axis stabilised sensor with exceptional performance given by backside illuminated CMOS.

My reviews in print of the Sony A7R II have now appeared, in the British Journal of Photography, f2 Cameracraft and Master Photography magazines. All three make slightly different points, and reflect growing experience of the camera which I bought from WEX as one of the first despatched on July 28th. The UK best body-only price then fell from their £2,695 to just over £2,000 from one main Sony dealer (at an event promotion) in under three months.

Despite finding bargain deals or importing directly, since the introduction of the A99 only three years ago I have lost about £3,500 keeping up with Sony full frame camera bodies. I’ve also spent around £2,000 buying other Sony models like the NEX-6, RX100, RX100 MkIII, RX10, and A6000 to cover the shortcomings of every different full frame model – and £2,000 or more updating my lenses.

So why invest in the A7R II when experience tells me the Sony system loses value faster than any other, yet so often falls short of performing as required?

One body for all lenses

The A7R II almost matches medium format digital, and gives great results with rangefinder (Leica) fit wide-angles. It has enabled me to add a 12mm f/5.6 Voigtländer Ultra Wide-Heliar to my kit for sharp, tint and vignette free 120° architectural and creative work. I write about lenses, and with current and future adaptors, this body lets me focus and make test shots with all lenses from Canon, Nikon, Pentax, Leica and many others. Click the Heliar image below for a link to a full size (slightly cropped and straightened from 42 megapixels) file. It’s actually shot at f/11 though the pBase data says f/5.6, that how the camera’s Lens Correction app works.
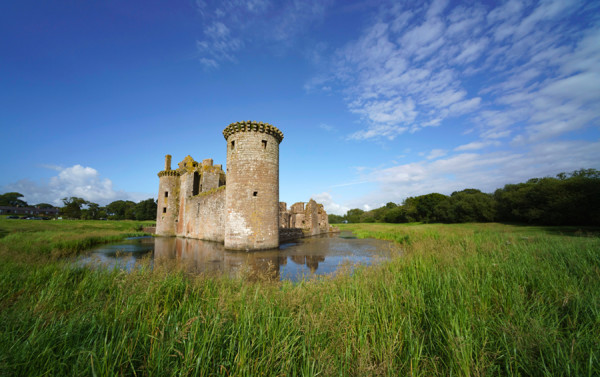
Caerlaverock Castle

There’s no lens made which disagrees with the 42 megapixel sensor as far as I can tell. My kit includes the 12mm mentioned above, the 16-35mm f/4 Carl Zeiss OSS, the 24-240mm f/3.5-6.3 Sony OSS, the 28mm f/2 Sony OSS FE (look out for individual reviews shortly); a 40mm Canon f/2.8 STM pancake, a 24mm Samyang tilt-shift, 85mm Sony SAM f/2.8, Sigma 70-300mm OS and a whole bunch of interesting older stuff used on adaptors.

With the Lens Correction App configured for SS with each manual lens, the very high resolution of the A7R II sensor allows a stable view for precision magnified focus well beyond the ability of any AF method or reliance on focus peaking alone. Doing this at working aperture ensures no focus shift on stop down. The results show me quickly which lenses are excellent performers without needing an optical bench or test charts (give me a single LED light and a darkened room, and I can find out what I need to know about any lens very quickly).

driedflowers-A7RII-web

Most Sony and Sony Carl Zeiss zooms do yield good sharp images on 42 megapixels but it’s easy to exceed their best by fitting something like my 1970-ish SMC Takumar 50mm macro (used for the shot above), or even my Russian 50mm f/2 tilt-adapted Zenitar. I found the 28-70mm f/3.5-5.6 OSS which was fine on A7 II inadequate for critical quality on the A7R II and after tests concluded the 24-240mm was the best option to replace it. To learn why FE/E mount zooms and OSS lenses are never likely to blow away fixed focal length unstabilised types like the Zeiss Loxia or adapted classic RF and SLR optics, wait for my 24-240mm review.

Having said size matters, I downsize many of my final images to as small as 9 megapixels. I don’t need 42 megapixels (7952 x 5304) for every image and for some it’s ridiculous. I’m still selling thousands of stock images* taken with DSLRs from six megapixels up. So for general ‘field’ use, most lenses are more than OK, as I can reduce the file size right down 3600 x 2400 pixels when noise needs cutting, depth of field is a problem, or general sharpness is poor.

One sensor for all image shapes and sizes

With the A7R II, unlike the A7R, all the APS-C E-mount lenses work properly (they never have their OSS forcibly disabled). The auto cropped image is 5168 x 3448, 17.8 megapixels, and that’s a perfectly useful size for all personal and most professional work. The 0.78X EVF is, of course, completely filled to exactly the same visual quality as when a full frame lens is used – the user experience with an APS-C lens is identical to that with full frame.

As with downsizing or lens based cropping, I can crop full frame captures right down to less than a quarter of the A7R II image and have a file acceptable to Alamy for stock library use, or to a client directly for almost any reasonable editorial use. That same crop can go full page in a wedding album, or make a fine A3/16×12 print. It’s like using 120 rollfilm again, you can find pictures within pictures.

lemurs-fullframe

A 240mm shot clearly not close enough…

lemurs-240mmf9-iso400-crop

This is a 3600 x 2400 crop. That is, an image large enough for full page publication or a 12 x 18″ photo/inkjet print (click to view full size)

With many lenses which don’t cover full frame, a 24 x 24mm crop is perfect. The Sigma prime lens ART trio (19mm, 30mm and 60mm f/2.8 AF without stabilisation) all do well on this basis. I had a 16 megapixel square format digital back on Hasselblad V and the square format is a favourite. Unlike Olympus, who offer a 1:1 ratio capture, Sony only includes 3:2 (35mm shape) and 16:9 (HD widescreen) – I’d love them to add a proper 1:1 square image seen in the EVF and on screen, a perfect 28 megapixel crop.

The high resolution FF image also means there’s less need to stitch panoramas or use shift lenses. Canon’s 17mm f/4 TS-E tilt shift lens was introduced in 2009 when their full frame 12 megapixel 5D has just been upgraded to the 21 megapixel 5D MkII. On the A7R II, using its maximum 12mm shift reveals serious loss of outer field sharpness even at apertures like f/10, f/11 and f/13 which are optimum on other ways. It’s not a sensor cover glass problem as the Canon 5DS R revealed exactly the same weakness. Downsize the image to 12 megapixels, which the lens was probably first designed for, at everything looks sharp. But here’s where 42 megapixels can pay off – I just need to use a 12mm Voigtlander or a Sigma 12-24mm, crop a 14 x 21mm area from any part of the 24 x 36mm frame, and I have a 14 megapixel image allowing even more effective ‘shift’ than the Canon. And I can, of course, use the Canon via an adaptor if needed.

The same kind of strong cropping works for telephoto wildlife shots (300mm lens, better than 500mm on 14 megapixels) and for macro work (1:1 on full frame, 2.2:1 at 14 megapixels). You need to remember all the time that traditional depth of field calculations just don’t work well with sensors of 36 megapixels and over. When you view a full size A7R II image at 100% on a non-Retina iMac or HP 27″ monitor, you are looking at part of a six foot wide ‘print’. Depth of field tables, still used today, were based on viewing a 10 x 8″ print from a similar distance! This problem is reduced by higher resolution screens but sometimes, you simply need a smaller image size.

Canon 5DS/R (in proportion with earlier models) have useful M-RAW and S-RAW formats, allowing the cameras to become full frame 28 or 12 megapixels with a single menu change. This function is missing from Sony raw files and would be a great firmware enhancement, if it was possible.

Reasons to buy the A7R II

SONY DSC

Having used two other A7 series bodies, and started the transition to the FE lens series with some mix of adapted glass on the way, why didn’t I stick with the far more realistic and practical A7 II, or the A7R which was paid for and at 36 megapixels just as useful a large file size?

  • Internally or externally recorded 4K video though not a commercial offering from my side might well be a request from a future client. I don’t make videos though many years ago I did made 16mm films and many 35mm slide based dual and multi projector AV programs. However, I know many still photographers who have found sufficiently high-end clients for video to invest the time. I wouldn’t touch any video production, even a brief 20-second ad clip, for under four figures. It’s fun to experiment with until any serious use emerges. Also, excellent Super-35 crop format video.jamesgem-1371-web
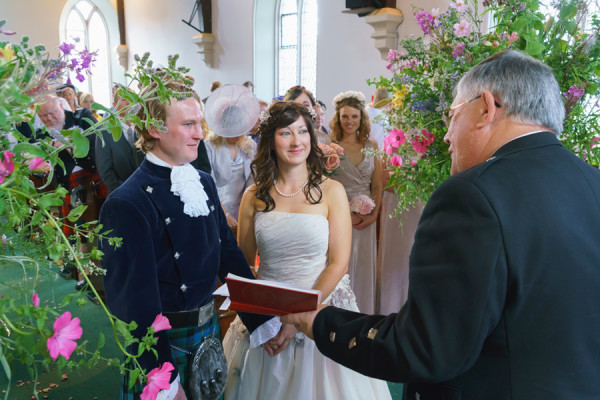
  • Completely silent operation when needed – though not compatible with any kind of flash, the fully electronic shutter is an option for wedding ceremonies and I’ve used that function already. It is also useful for shooting stills when someone is making a video, or during quiet concerts, in meetings, or when you simply don’t want the sound of a shutter to be heard. When silent is not needed, electronic first curtain (not provided on the A7R) improves shutter lag time and cuts vibration
    .SONY DSC
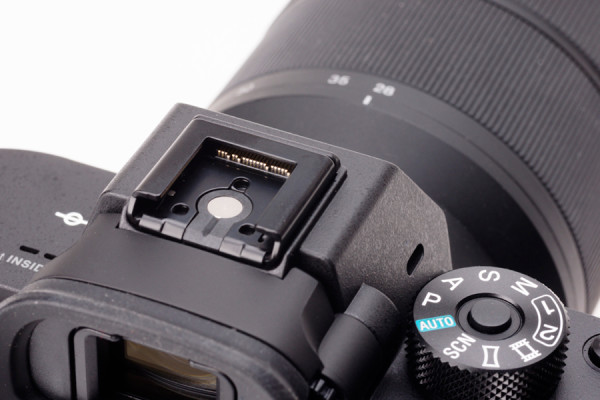
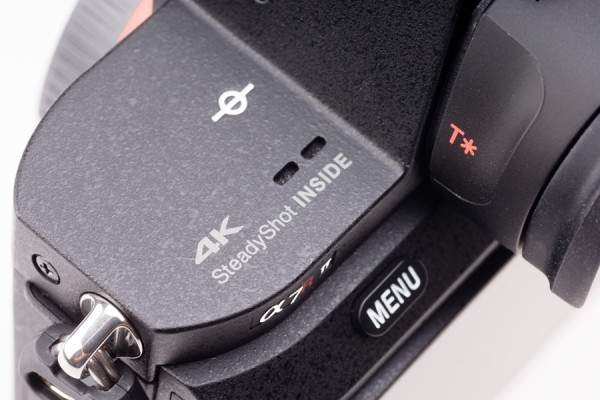
  • It’s also got a 500,000 actuation life shutter built to more than pro specification and a superior 0.78X electronic viewfinder, a slightly improved body flange for the lens mount (now common to all the II models, tighter and more precise than the original machining), no light leaks. And the mode dial is improved with a locking button, the Multi Function Accessory shoe is further improved in contact reliability, the ocular is T* coated and gives better eye relief.SONY DSC
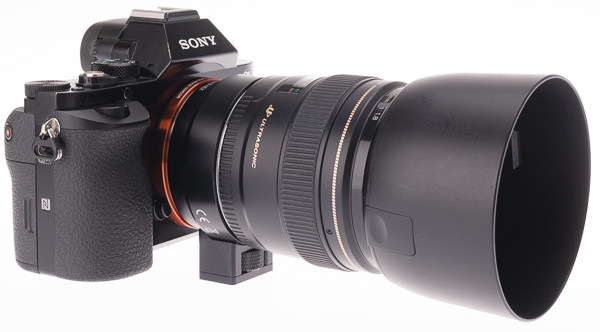
  • It will perform well with all kinds of lenses and the 399-point wide area phase detection AF array built in to the sensor functions partly, or completely, with more native Sony and converted Canon lenses than ever before. It betters the A7R and A7 II in this respect, though I sold the Canon 85mm f/1.8 USM above as it didn’t work with the II having worked well on the A7R. Metabones have now fixed this, but my adaptor is a cheaper non-programmable type… you get what you pay for!
    Canon5DS-6400-web
    This is what you get from the Canon 5DS at ISO 6400, default, for shadow detail and noise (click to enlarge a 100% view of this section from a much larger file)


    Compare the separation of the black ribbon, and the shadow detail in general, from a similar shot ISO 6400 A7R II file, using the same lens and settings (click to view enlarged).

  • The back-illuminated CMOS sensor has a dynamic range – and a contrast curve or gamma function through controlled A to D conversion – which provides an ideal raw file for subsequent adjustment at lower ISO settings. Here, the difference seen above between the Canon 51MP sensor and the Sony 42MP is striking. The Sony images may often look softer and lack punch, but they reveal two stops more detail in the tones close to deep shadow. It’s probably been designed this way to allow s-Log gamma settings for professional video, producing flat neutral results ideal for grading to match from take to take. This happens to be very flattering to skin tones and it’s no surprise the A7R II is rivalling Fuji’s X-Trans sensor amongst fans of the flesh.jamesgem-1685-web
  • The same sensor has awesome practical performance in low light without sacrificing resolution, and noise levels which allow surprisingly high ISO settings for critical subjects like wildlife where fur and feather textures are easily damaged by noise (or noise reduction). Properly processed from raw, or shot as JPEG in camera, ISO 800 can be used as an everyday setting and 1600 will not even harm landscape detail. Up to 6400 an effectively noise-free full size image can be extracted, and at 12,800 to 25,600 some downscaling is all that’s needed to clean up. Admittedly, it’s never going to match the 12 megapixel A7S or A7S II at 51,200 and has a limit at 102,400 rather than marching on to an insane 409,600 EI as that body does.SONY DSC
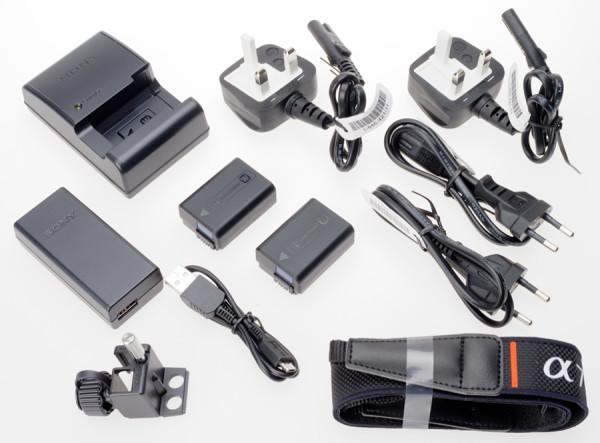
  • Compared to buying an A7 II, remember that with the A7R II you get two Sony batteries and an external charger (about £150 in official value) as well as the ability to operate the camera from any 5v 1.5A USB source (not just to charge the battery internally, but to shoot using USB power)
    .SONY DSC
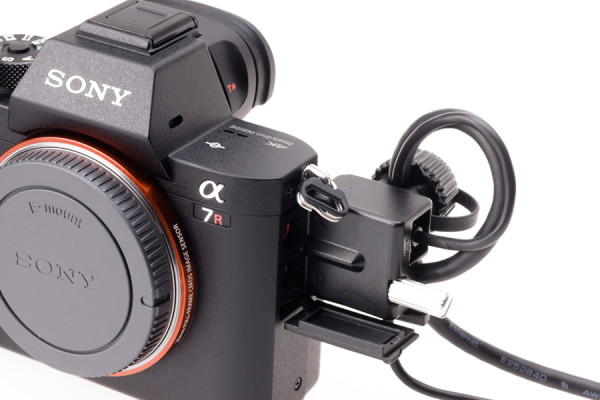
    You also get a neat tether-trap locking cage which screws into the camera side and can secure your USB and HDMI cables against accidental disconnection or strain on the connectors.
  • Final reason – going beyond the A7R II specification does not seem to offer further compelling advantages. It doesn’t have any major flaws or shortcomings except perhaps the single card slot and some doubts about the durability of the body, weatherproofing, and the quality of the lens mount (see below). I’m not in need of more than 5fps and 22 continuous raws before slowing down, and if I am the smaller Sony models like the A6000 and my RX10 do some pretty neat extra high speed sequences. So, for the first time since the sale of my A900 to get the A99, I feel I have a long-term camera no matter what Sony does in six months to make it hopelessly out of date.

What’s could be wrong?

First up, the poorly specified and designed lens mount and low precision body/lens relationship. Where Minolta A, Fuji X, Pentax, Leica and nearly all good makes secure the body and lens bayonet mounts using six screws, the E-mount uses only four even for the top end bodies which may have to support lenses approaching 1 kilo in weight. The four-screw fitting creates two axes of potential tilt restrained only by diametrically opposed screws, six-screw design is better but actually a five screw design beats both as you can’t draw a diameter across any two screws and create a tilt axis.

sonyjune1526

The E/FE lens-body system is built round a concept of achieving final accuracy in alignment and focus without needing precision in every component. The nominal 18mm mount to sensor register doesn’t have to be perfect (and seems to vary by at least ±0.1mm). All Sony E and FE mount lenses compensate for variations and use free-floating magnetic focus often combined with floating OSS – they don’t have fixed infinity stops. Just as the bodies don’t have to be all that precise, the lenses themselves don’t need to be. As long as both work with the sensor to AF perfectly, the overall system is self-correcting.

You soon find out the limits of E-mount precision when buying adaptors for older manual lenses or modern Canon EF lenses. I’m sure Zeiss makes due allowance in the design of manual focus Loxia lenses, and Voigtlander has specifically allowed the new E-mount range planned for 2016 (10mm, 12mm and 15mm) to focus past infinity because they are aware of the variable register of the system. I have measured many adaptors and the only safe decision for the engineer is to fall short of the target register. Some very expensive adaptors turn out to be 0.3mm thicker than others for the same mount (I’ve found this in Leica M, Canon FD and Canon EF adaptors). The lenses being adapted often have a fixed infinity stop and are designed to hit this precisely. Combine a 0.1mm ‘plus thickness’ Sony body with a 0.2mm plus adaptor, and your manual wide angle lens won’t focus on infinity.

So, one overall issue is that despite the high cost, the Sony FE/A7 series range of bodies and lenses lacks the precision engineering of past systems and it’s designed that way. When you find one side of your pictures always seems soft with wide-angle, wide zoom or very fast lenses you have encountered the limitations of Sony precision and quality control.

Secondly, the A7R II has such large files and a slow overworked processor relative to those files and the massive task of running a high resolution, high frequency EVF and many clever software functions. Any kind of systematic ‘chimping’ to check each shot after taking may leave you frustrated. Depending on your choice of card and some unknown spin of the CPU’s internal dice, you will sometimes encounter long file writing times and a brief lockout from playback.

Install the 14-bit (in 16-bit container) raw uncompressed format introduced in October 2015 through a firmware update, and the situation may improve. With Firmware V2.0 I’ve seen typical write to card times halved but identical shots could take varying times and the worst case remains close to 10 seconds for the light to go off on a single shot. Most of time it’s clearing about 1 second after 2 second auto review, and disabling auto review has no apparent effect on this, or the time the camera takes to respond to a fresh shutter actuation.

Secret solutions

Since you’ve been patient, and listened to why the A7 system in general has a few failings, here’s how to get the best optical performance and general response from it.

SEL70200G_A-1200

First of all, for the best optical performance use lenses where OSS can be disabled but in-body SS allowed to operate. The internal 5-axis sensor based stabilisation of the A7II/RII/SII is awesome. In-lens OSS is impressive but by its design will always lose you some resolution, often more towards one side or corner of the image than centrally. Amended paragraph, see comments: To see how good your stabilised lens really is, turn off stabilisation and shoot something using flash or at a high shutter speed.

But… if you turn off Steady Shot or OSS on the A7R II, you disable it in the body and the lens. You can not turn it off for the lens, but keep it working in the body. Only the 90mm f/2.8 Sony G OSS Macro, the 70-200mm f/4 Sony G OSS (above) and the 28-135mm f/4 Sony G PZ OSS offer the on-lens switch. So if you want stabilisation, you can’t choose to have it provided by the body with these lenses. You can do so with Canon, Sigma and Tamron lenses used on a Canon EF adaptor – their IS, OS or VC will operate normally when the SS in the body is disabled. In fact you must never use these lenses with both methods turned on together, or the result will be unsharp. This is a problem we first noticed with the Olympus system, where their lens and body stabilisation do not communicate and it’s possible to us none, just body, just lens or ruin shots by turning on both together. The Sony body used with third party lenses does allow this; used with Sony lenses, it prevents it.

The A7R II will switch between internal SS, lens OSS and a combination depending on settings. But it won’t tell you what it is doing, which makes this intelligent function something of a handicap. As a rule, if you can lock the camera down (tripod) or use a very fast exposure (studio flash, shutter speed 4X the focal length of the lens) shooting with no stabilisation at all will offer the best results.
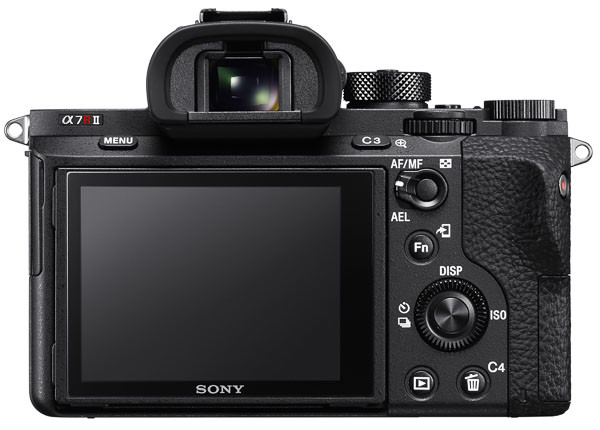
sonyjune1527

Secondly, don’t use ‘AF With Shutter’ all the time. It’s convenient sometimes, but every time you take first pressure on the shutter, your E-mount AF lens will initialise a short routine involving focus position recalibration followed by AF. It costs you a variable extra lag before the shutter fires, maybe 1/15th to as long as 1/4 second. Instead, turn this off and AF will default to the centre button of the rear controller (you can change this assignment). You then use this to AF for each change of subject, composition or distance but if nothing’s changed you do not touch it and you do not re-AF. You save battery life, and you eliminate the whole shutter-button-AF delay cycle. You can now capture pictures, using electronic first curtain shutter or silent mode, within 1/20s of pressing the shutter.

Thirdly, for action shots prefer stops close to full aperture on E-mount lenses for the same reason – the aperture closing action involves a delay you can clearly identify and it’s longer with apertures like f/16. But for maximum reaction speed, use a purely manual lens. The camera knows there’s no aperture to be closed so it misses out that stage. It knows there’s no AF. You can get down to a mere 1/50s shutter lag, faster than most photographers can think. If you are used to older DSLRs which typically fire the shutter between 1/15s and 1/8s after you have pressed the button, you’ll anticipate and fire too early for action shots. Beware the LA-EA adaptors for A-mount lenses as you can’t turn off the aperture lever actuation. These adaptors will always add a delay even if you fit a manual lens.

I’m not going to delve into how you use focus peaking, magnification, setting the slowest shutter speed to be used by the Auto ISO function and so on. You can find out about this from countless videos and blogs, not all of which feature grandmothers, sucking and eggs. Nor will I recommend JPEG noise reduction and image settings in camera, since I don’t use JPEGs. Remember that your picture style and adjustments, like extra sharpening or contrast, will be reflected in the view you see through the EVF and on-screen. They will affect focus peaking, the histogram and what the image looks like when you use magnified manual focus, too. My tip is ‘stay neutral’ for the best EVF experience and ability to judge and control your results, especially if shooting raw. Camera Standard – boring but it won’t fool you into making adjustments which are not needed.
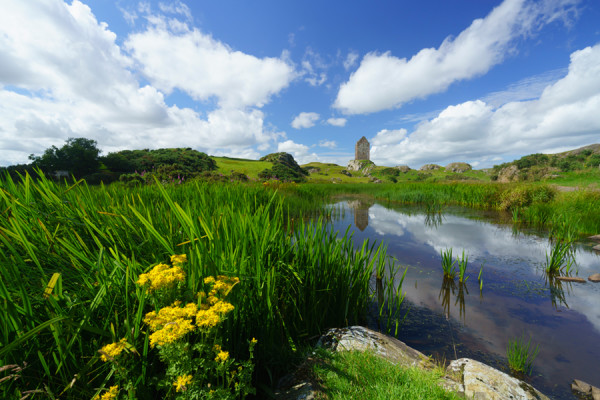
smailhomsony16-16-p-h-srgb-web

A 16mm landscape with careful focus checking, and only just enough depth of field even at f/16 if the end result is going to be a 1m wide print

Read the manual, think about all the functions of the camera, assign your custom buttons, set your parameters. My set-up includes (routinely) Auto ISO 200-1600 because within that range the A7R II files have low noise and good textural sharpness and there’s no great benefit in dropping to 100; AWB; 1/250th slowest shutter speed because the world moves and I’m very happy with 1/250th at ISO 800 rather than 1/125 at ISO 400 for nearly all my walkabout shots; AdobeRGB because I need that but actually sRGB is better matched to the EVF and rear screen, and will give you a more accurate histogram; no JPEGs because I don’t need them; Airplane Mode on; compressed raw unless there’s a really good reason; AF-S and Centre point focus; no face recognition, no smile shutter, no tracking, nothing clever with AF; single shot; generally Aperture Priority but sometimes P, M or very rarely S; Date Format file folders; SS on; electronic first curtain; setting effect on; finder and screen at default brightness and colour; grid lines 3 x 3; focus peaking low, yellow; lens correction enabled; 2 secs review, or none.

– David Kilpatrick, all images except front and rear views of A7R II body and 70-200mm lens are ©David Kilpatrick/Icon Publications Ltd; please do not link directly to images or copy

* You need thousands on offer to sell dozens…


Low-cost macro for the A7 series

It’s been a while since my last review of Sony products here, and not because I have been inactive. The truth is that I’ve spent so much on Sony kit 24/7 working has been necessary, including a good few reviews and tests of the A7RII and lenses appearing elsewhere. It’s a real issue, I now lose so much value with the lightning-fast depreciation of Sony’s products within a few months of launch that my old tactic of buying, reviewing and selling no longer works. For one thing, no media in the world will readily pay a fee which even matches the amount you might lose on a camera body in the A7 series over its first two months of retail life. Sony have been good enough to lend me a few items for brief periods but you really can’t form any useful opinions on such radical and new hardware on that basis.

However, my A7R II report is shortly on the way, and the extra time spent using the camera and suffering the damage to my credit card does not harm the process. It helps put the gear in context. I’ve resisted the anti-social pricing policies of the UK camera retail environment for some time, even buying one grey import from Panamoz. So it’s appropriate that my first article for a fair while should be intended to help you save money and get great results from any A7 full frame FE mount camera, while also supporting a company whose UK pricing policies are entirely reasonable – Sigma.

The Sigma 60mm f/2.8 ART DN lens

The butterfly above is one example of what this lens can do on uncropped full frame, in this case adding a single 16mm extension tube, which we’ll come to later as the exact type of tube you buy matters a great deal!

The neat, low-cost 60mm f/2.8 is the portrait lens in Sigma’s Art DN lens trio for APS-C and MicroFourThirds mirrorless systems. I’ve used the 19mm f/2.8 and 30mm f/2.8 as well, but the 60mm is my favourite. Originally, I tested it on Olympus MFT and the 50cm close focus with their 2X factor made it almost feel like a macro. It’s actually just 1:7.2X scale, but 1:3.6X relative to full frame on that smaller sensor. That’s a really good working distance and subject scale.

I was curious to see how much of the full frame the 60mm would cover. All these Sigma lenses are just £129.99-£139.99 retail at most UK dealers right now. They are beautifully designed and made, very light, use 46mm filters and have advanced optical design giving high contrast and first-class full aperture sharpness. Well, the answer is easy enough; you’ll get more than APS-C, with a 24 x 24mm square format crop working well, but not anything like full frame at any aperture from the 60mm.

This is the closest focus of the Sigma ART DN 60mm on the A7R II, uncropped.

Sigma call it a telephoto, with its rear nodal point much closer than 60mm to the focal plane. But its design signalled it would probably perform well as a macro lens too.

Meike extension tubes

So, we add extension tubes between the A7-series body and the lens. There’s one prominent make, Meike, and a couple of years ago I bought their very low-cost fully electronically coupled plastic 10 and 16mm twin tube set. 26mm of extension is not much. It won’t even make the E-mount 35mm f/1.8 focus to 1:1, and does even less with a 60mm. However, what it does is worthwhile combined with the lens’s own focusing range.


I found my plastic Meike tubes have a narrow circular throat and cut the image off all round. But, you say, the image was cut off all round already, so what could be done?

When you mount an APS-C lens on tubes, it covers more than APS-C. Put it on tubes adding about 1.4X to its focal length – like using 26mm of tubes on a 60mm lens – and it will cover full frame. You are moving the lens further from the focused plane, and as you do so, its fixed angle field of sharp coverage grows (it more or less follows the inverse square law, as does the effective working aperture of the lens when you use tubes). So a lens made for the NEX sensors, c.16 x 24mm, can cover 24 x 36mm when used on tubes for close-ups. The 60mm on 26mm of tubes would cover 24 x 36mm even with no leeway. Since the lens already has a good image circle, it turns out that it covers 24 x 36mm when used on the 16mm tube alone, and shows just a hint of corner cutoff with the 10mm tube alone. With both, it covers the full frame easily.

This is the result of using a 10mm metal extension tube – not the plastic set. The plastic design cuts off even more than the lens used on its own.

Meike understand this. They have a newer, metal-mount extension tube set costing about twice as much as the original plastic one. To get it, you must search for Meike metal extension tubes – and they are not easy to identify for certain. There’s very little explanation on-line. These tubes have a full width throat with baffles top and bottom, more or less matching the 24 x 36mm frame shape. Some black flock paper is glued in to prevent light reflection at the sides, but none is fitted top and bottom, and this is the main weakness of the design (you can obtain flock paper and fix this yourself).

Twin set, no pearls

Used alone, the metal Meike tubes turn the Sigma 60mm into a very good close-range long standard lens for the A7 series. I found that you can add the plastic tubes next to the lens, not next to the camera, and suffer no cut-off. This combination of four tubes adds 52mm and makes the Sigma 60mm able to do 1:1 with the addition of its own AF range.

You need to understand sensor-based stabilisation before using any manual lens on tubes (which these are equally suitable for, with adaptors). The A7 II series bodies use the focal length and focus distance of the lens as transmitted to the camera to control the Steady Shot Inside function. As far as I can tell from practical tests, the Meike tubes do not transmit any change to the information reaching the CPU, but SS seems to be OK with such relatively minimal extra focus extension.

This shot was taken at 1/15th hand-held with the 16mm tube on the A7R II, ISO 800, 14-bit uncompressed raw, f/8 on the Sigma 60mm lens. There’s no significant corner vignetting with 16mm of extra extension to the lens.

This is a 100% clip from the shot.

When I mount my 50mm Macro SMC Takumar on the A7R II I use either the SSI menu control, or the Lens Compensation App, to tell the SSI system I’m using a lens with an extension in place. It focuses to 1:2 size, and for this I tell the camera I’m using a 75mm lens not a 50mm. If I add 26mm of tubes, it will focus to 1:1 and I need to tell the camera I’m using a 100mm lens. That’s because a 50mm lens extended to 1:1 focus has the same camera shake characteristics as a 100mm lens used on a distant scene. Be careful, as this relationship only holds good for simple lenses (Tessar, Sonnar etc) and not for any zoom lenses, or any macro lens which uses internal focusing. If you mount a Tamron 60mm f/2 macro on your Sony body using a dumb adaptor, just tell the camera it’s got a 60mm attached. The Tamron changes focal length to focus, but the effect for anti-shake purposes is that it remains a 60mm. Its angle of view remains unchanged as you focus, while my 60mm Sigma when used at 1:1 repro covers half the angle of view it does at infinity.

I am not entirely sure whether the Meike tubes work properly with SS Inside, or if the system simply has enough latitude to function with my degree of unsteady hand-holding. Those contacts just seem to make a connection, with no chip to add information. The EXIF data does show the focal length correctly, and the set aperture (which will be a reduced effective aperture at closer range, 26mm of tubes turns 60mm f/2.8 into a working f/4-ish). But the focus distance is shown as whatever the lens focus function chip confirms – a range of 50cm to infinity. That’s obviously incorrect when tubes are added, in contrast to using a dedicated lens like the Sony 90mm f/2.8 FE G OSS Macro, which will show the true focused distance in the viewfinder and also pass correct data to the CPU.

So, a warning – the 60mm plus tubes is not technically perfect but seems to work well enough.

When you use a tripod or flash, or a fast shutter speed, and turn off Steady Shot none of this applies. In practice with shutter speeds fast enough to stop subject action or wind vibration, it all goes well. The Sigma is very sharp even though not designed for macro range work, but that’s typical of this type of lens – even if 8 elements in 6 groups with several low-dispersion elements is not basic.

sigma60mm-26mmtubes-iso800-A7RII

Here’s an example with 26mm of tubes plus some lens focus range. The ISO 800 14-bit uncompressed file has allowed some work on the bee’s back which lacked contrast. Click to open a 2048 pixel wide version.

sigma60mmf9on20mmtube-iso800-A7RII

Here’s an example which clicks through to a full size A7R II AdobeRGB JPEG (no doubt much crunched by WordPress image storage) taken at f/9 on the 16mm tube. If any of my image files have 20mm in the filename it was the 16mm tube – I’m so used to the lengths used by regular SLR mounts! The 60mm has a seven-blade aperture and gives pleasantly neutral defocused quality behind the subject. You can call it bokeh if you want to. Thank you, Scottish weather, for keeping a few flowers in this condition and giving me some sunshine just after the 14-bit uncompressed raw upgrade for the A7R II arrived.

The Metal Meike extension tubes have the same essential benefit over the plastic version with all FE and E mount, and legacy, lenses used of the A7 series full frame bodies. You can use them on the 28-70mm, 24-70mm, 55mm f/1.8, 28mm f/2 and most lenses though they have little use with the 70-200mm and I would not recommend hanging a 24-240mm off a tube.

Footnote July 2017: I now have the 50mm f/2.8 FE Sony macro. It’s a very nice lens, indeed, but the internal focusing means it’s really more like a 40 to 35mm as you get the subject bigger, and you end up just millimetres away. I compared using this lens on 26mm of tubes to focus on a target 7.5cm wide with the lens itself set to infinity (and therefore, 50mm). Working distance from the lens rim to subject – 11cm. Then I took the tubes out, and focused the lens using its own range, on the same target. The clear distance was reduced to 7.5cm. Now you know why you need tubes and probably don’t really need a macro lens.

– David Kilpatrick

If you have found this article useful, you can support Photoclubalpha by using affiliate buying links (we are not sponsored or paid in any other way, except by selling subscriptions to f2 Cameracraft).

Sigma 60mm at B&H

Vello metal mount extension tubes at B&H (similar to Meike)

Sigma 60mm F2.8 DN for Sony E – Silver from Amazon UK, no idea why they have none in black

Neewer metal extension tubes – much better price than Vello! on Amazon

Visit Wex Photographic and search for any items (UK)

B&H double Zeiss Touit lens deal for NEX

I guess that Zeiss must be working right now on full frame Touit lenses, because this is unprecedented value for those able to buy in dollars without steep shipping charges, duties or taxes – however, the links they emailed out today led to a wrong page on their USED section, and after a lot of digging to get the right URL, the offer is needless to say on back order – and B&H are taking a Jewish holiday from June 3rd to 5th so you’d better jump in quickly before close of biz on June 2nd.

touit2lenses

BOTH the Carl Zeoss Touit 12mm f/2.8 and 32mm f/1.8 lenses for the E-mount for only $919 from B&H with free US expedited shipping (they do not cover full frame and I’ve tested them and found a fairly tight image circle). They are stunningly good for NEX-7, NEX-6, A6000, A3000,  A5000.

http://www.bhphotovideo.com/c/buy/0/Ntt/Zeiss+Touit+Lens

Here are the actual image circles of the three Touit lenses (12mm, 32mm and 50mm f/2.8 macro which is not in this deal) on A7R, without applying any distortion or vignetting correction. All the lenses have an Adobe profile and in the case of the 12mm this enlarges the image circle substantially. Normally, this means the lens is a true 12mm equivalent with the profile applied and the actual focal lenth could be closer to 10.5mm.

touit12mmf2p8-imagecircleonFF

First, the Touit 12mm without lens profile

touit12mmf2p8-imagecircleLensProfiled

Now, the Touit same shot but converted from raw applying the built-in lens profile (conclusion – the profile applies to an APS-C frame and does little good to the outer field on full frame – you are better off using the lens without the profile, including on APS-C, if you want maximum wide-angle coverage)

touit32mmf1p8-imagecircleonFF

Then the 32mm f/1.8 on the A7R (like the shot above, at full aperture – image circles generally do not get larger when you stop down, if the edge is as well-defined as these Zeiss lenses)

touit50mmf2p8-imagecircleonFF

Finally, the 50mm f/2.8 macro to complete the reference. All pictures taken from behind the counter of the Carl Zeiss stand at The Photography Show – hence the great lighting and subject-matter…

– DK

Sony firmware updates roll out

With new firmware for the Alpha 77 and 99 and most current models now up for download, the promised rush of new firmware is probably complete. The Alpha 77 firmware has errors in the web page for Europe, referring to the Alpha 57 and showing pictures of the 57. This is probably because the page has been based on another used as a template. The firmware, we can confirm, is for A77 and updates correctly.

Note that when using a Windows PC, 64-bit doesn’t work with Windows 8. You have to read the asterisk info carefully to see this. Mac OSX 10.8.x Mountain Lion does work in 64-bit and there is no need to reboot to do the upgrades; older Mac systems must be in 32-bit mode.

The firmware is specified as updating the on-board lens correction list, and for the A99 (v1.01) the ability to use sensor assisted PDAF with some lenses:
Provides support for the following ”Dual AF” function compliant lenses:
SAL24F20Z, SAL85F14Z, SAL135F18Z, SAL70300G, SAL70200G, SAL35F14G, SAL1635Z, SAL100M28, SAL50M28, SAL85F28, SAL300F28G
Provides support for the following automatic compensation compliant lenses:
SAL100M28, SAL50M28, SAL85F28, SAL18200, SAL20F28, SAL28F28

You can find the A77, 99 updates and some other software via these links:

http://www.sony.co.uk/support/en/product/SLT-A77/updates

http://www.sony.co.uk/support/en/product/SLT-A99/updates

To find the updates for other cameras change the URLs to include SLT-A57 (to version 1.04), SLT-A65 (to version 1.07), SLT-A37 (to 1.04). There are no updates for the A33, A35, or A37 and no updates for DSLR models such as the A580.

There are also firmware updates for the NEX series, including the 5N:

http://www.sony.co.uk/support/en/product/NEX-5N/updates

The benefits for the 5N are considerable especially if you want to buy the pancake 16-50mm lens. Here is Sony’s list:

  • Applies automatic compensation to “SELP1650”
  • Updates RAW data format version
    *After this update, distortion correction of RAW data will be available with Image Data Converter Ver.4.2 or later. The latest version of Image Data Converter is available on the following site: http://support.d-imaging.sony.co.jp/imsoft/Mac/idc/us.html
  • Adds bracket shooting exposure settings (three frames / 1.0EV, 2.0EV, 3.0EV)
  • Makes “SELP1650” retract immediately after turning off the camera
  • Improves autofocus operation stability
  • Enhancement of AF response: When subject distance changes enormously.
  • Improved stability in certain camera operations:
    • When setting [Lens Compensation: Distortion] “Auto” and [Picture Effect] “Miniature” at the same time.
    • When setting [Exposure Compensation], [Intelligent AF] operation improves.

Again, to find your updates, just change the model number – there are updates for the NEX-F3, NEX-5R, NEX-6, NEX-7 but not for the NEX-3, NEX-C3 or NEX-5. Improvements are given in the instructions and include correction for the 16-50mm on all cameras.

There is one software update – Alpha 99 compatible Remote Control 3 (USB control, shooting and image transfer from PC or Mac) is now released:

For Windows: http://www.sony.co.jp/imsoft/Win/

For Mac OS: http://www.sony.co.jp/imsoft/Mac/

The same software can also be used as before (RC2) with Alpha 700, 900 and 850, reinforcing the value of these excellent DSLRs which were Sony’s three most professionally specified optical viewfinder models in their time (2007-2009) and remain so. The Alpha 77 is not supported. Settings can be changed on your computer, the camera can be triggered, and the resulting files stored on the computer.

RC3 is a stand-alone program now and does not require to be part of the Image Data Suite. It is Mac OS 10.8 (Mountain Lion, on Intel systems) and Windows 8 compatible (but not 64-bit Windows 8).

There is also a NEX lens firmware update, which can only be installed using an updated NEX-6 or NEX-5R (not a 7, or any other model).

Lens Firmware Ver.02: SEL1855, SEL18200, SEL55210, SEL24F18Z, SEL30M35, SEL50F18 (Windows computers procedure)
Firmware update , 05/02/2013

Lens Firmware Ver.02: SEL1855, SEL18200, SEL55210, SEL24F18Z, SEL30M35, SEL50F18 (Macintosh computers procedure)
Firmware update , 05/02/2013

Each lens is a separate updater so you need a well-charged battery and a little patience in order to update all your lenses. At the time of checking, there are no firmware updates for the LA-EA1, LA-EA2 or LA-EA3 Alpha lens adaptors for NEX.


Photokina new matte box, 55-300mm

Made by Sony according to girl on photokina stand after asking bloke. But closer examination matte box/rig says Genius as the maker so pretty sure it’s third party. Similar shown on other cameras.

55-300mm SAM DT.

We were allowed to take test shots briefly with the Alpha 99 and 28-75mm SAM lens. The camera is just a little bigger than the A77 but feels much the same. The viewfinder seems slightly improved, maybe it’s just the optics used and not the OLED display – coatings or details of the assembly.

This is an ISO6400 in-camera JPEG, click it for full size. Shots with face out of focus look awful, the noise/NR on skin tones is not as good as on the dress made of flowers. Colour is excellent under tungsten with AWB, as usual.

Here’s an ISO 25600 image, same in-camera output. Not bad at all considering the ISO. In both cases, you can click on the image to get a full size version (5-6MB).

This is a 100% crop (click for full size) slightly overexposed, at iSO 400. The A99 showed a green face recognition square in this case, and focused at full f/2.8 aperture of the 28-75mm lens – sharp image core, but lots of softness glowing round it. Exposure was too generous for the dress, so I’ve cropped that out and just taken an 1800 pixel wide detail to show the quality at 400.

We were able to handle the RX1, it’s wonderfully smoothly engineered and feels great, but no pictures were allowed. They have no pre-production models able to produce an image they are happy to share. We saw a thumbrest which slots into the hot shoe (below the optical finder only, improves ergonomics; and an EVF for the RX1 –

Apart from that there was a great launch from Panasonic for a GH3 capable of 78Mbps video, waterproof, dustproof, magnesium body, new X-series lenses f/2.8 constant 24-70mm and 70-200mm equivalents; a funky new XF camera from Fuji which might appear a bit retro-consumer but actually is good to hold and use; and Samsung’s quite amazing Galaxy Camera, which has the biggest rear screen (and one of the best) ever seen plus a 21X zoom but won’t make phone calls. Yet…

-D&SK


Sigma ultrawide zooms – old and new 12-24s versus 8-16mm

For almost a decade the Sigma 12-24mm full frame ultra wide angle zoom has been unrivalled by any other makers – not Nikon, not Canon, not Tamron, not Tokina, not Sony. No maker has ventured where Sigma went, to the extremes of over 120° coverage combined with well corrected straight line geometry.

Today, the original 12-24mm is in its fourth incarnation, having progressed through EX to EX DG (digital) and then with added HSM hypersonic motor focusing, which never arrived for Alpha mount in the original design. The fourth version is an entirely new design, and does have HSM for Alpha. It is very similar to the new 8-16mm design, introduced three years ago for APS-C cameras, which also offers HSM focusing in Alpha mount.

Update five years later, 2017: there is now a constant aperture 12-24mm f/4 ART lens. This is a completely new design and has an almost-perfect performance, especially in terms of corner detail wide open. I’ve tested it in Cameracraft magzine. However, I did not have the various older models to make direct comparisons. The MkII remains available as the current non-ART, lower priced Sigma option.

Here you can see, from left to right, the EX DG 12-24mm f/4.5-56, the DC 8-16mm f/4.5-5.6, and the DG HSM II 12-24mm f/4.5-5.6. Don’t be fooled into thinking the original is wider in diameter, it actually shares exactly the same lens cap module as the new design; it’s smaller and around 100 grams lighter. Both the 8-16mm and new 12-24mm are surprisingly solid items.

First, we’ll look at the difference between old and new 12-24mms. I have used the old one in several versions on several different camera makes. and I’ve never had one which was truly sharp at all point across the frame wide open. The field is not perfectly flat, and autofocus modules are very bad at getting an exact focus at 12mm. Combined with lens mount tolerances, sensor flatness problems (mostly in Canon full-frame, which historically have not had very ‘plane’ sensors), sensor parallelism problems (all makes, Sony not excepted)… it was always a good idea to stop this lens down to f/11.

How bad is that? Perfectly normal for any lens covering over 85°. Even the best large format lenses, single focal lengths like Super Angulons, have always been used in the awareness that full aperture is for focusing and you stop down to between f/11 and f/32 for the actual shot. On 35mm format digital, using anything much below f/16 is counter productive for sharpness and my normal choices on the Alpha 900 have been f/10, f/11, or f/13.

The good news is that the latest version has a different kind of field flatness. The old one tended to have a zone, like a doughnut, of closer effective focus surrounding a sharp middle. At 24mm, where this older lens performed at its worst, this zone was pushed out to the far edges and could result in the corners looking softer than they do at 12mm. The new one has a simple barrel distortion in place of a wave-form distortion, and along with this goes a simple curvature of field.

The bad news is that the overall level of distortion is much higher than the old design. At 12mm, it’s close to needing the fingers of two hands. Adobe Camera Raw had a correction profile for this lens from Sigma almost the day it became available. That profile fixed the distortion perfectly but leaves you slightly less of a 12mm than you’ve paid for, because it reduces the angle of view.

Here are some comparative views. First of all, I’ve used only 10 megapixels of the Alpha 900 frame, cropping from the top of a vertical shot, to get this architecturally correct view. This is like using the 12-24mm as an extreme 12mm shift lens on an APS-C camera. As and when we get a 36 megapixel Alpha full framer, the crop to do so will be more  like 16 megapixels. This is the full frame:

Below you can see the crop used to 10 megapixels, and by rolling your cursor over the image, the change between a profiled conversion and a raw conversion with no lens corrections. On this crop it does not look extreme.

But this is a relatively kind way to use the new lens. Here is an example pushing straight lines into places where extreme wide angles don’t like ’em:

This is an uncorrected 12-24mm DG II HSM shot out of the Alpha 900 at 12mm. It’s not exactly what you want, and in fact, it’s not as ‘good’ as the old design despite being sharper. Hovering your cursor over the image shows the same raw file with the Adobe Camera Raw Sigma-generated Lens Profile (also works in Lightroom) applied. As you will see, straight lines have been restored along with even illumination. But – how much of that 12mm, 122° angle has been lost? Is it now really only a 12.5mm?

In practice, the new 12-24mm gives you a great range of creative choices when confronted with a building. Here is a revisit to the first subject, taken at different focal lengths, getting closer to the building with each shot:

24mm

20mm

17mm

15mm

12mm

When it comes to comparisons with the older design, the new one is much sharper at the edges. It does not need stopping down to f/16 to pull in the worst aberrations, though it does still display some around f/8 to f/11. Here’s an original 12-24mm EX DG design shot (12mm, f/9, vignetting corrected but distortion not corrected):

And here’s the new 12-24mm under the same conditions (small exposure difference due to changing light) processed similarly, without any geometric corrections:

On this shot, the corrugated barn sides have clean ribbing to the extreme ends, with some softening; on the old design, they begin to look a bit of a mess in the outer quarter of the frame.

Trying the 8-16mm extreme

But when doing these tests, I decided to throw a novelty into the mix. What if I put my 8-16m APS-C format Sigma DC HSM zoom on to the Alpha 900? Because it is not an Alpha lens, the 900 does not automatically crop the full frame. This is what I actually got with the lens set to 8mm:

And in Adobe Camera Raw, I just dialled up the Scale in Lens Correction to 146%, which blew up the central 12 or so megapixels of the frame to become a full 24 megapixel image:

And here, for comparison, is what the 12-24mm set to 12mm could produce:

This is a little tighter than the 8mm using the maximum I could get (including some extra image height), so the 8-16mm used this way can produce something closer to an 11.5mm full frame lens. However, I have not yet done the obvious – to get an engineer to remove the petal lens shade from the 8-16mm (it appears to be part of the front element assembly). This would enable even more angle without shading, and the possibility of square or 10 x 8 shape format crops.

What was particularly interesting about this experiment was the quality of the 24 megapixel file extracted from a smaller section of the Alpha 900 sensor by Adobe Camera Raw upscaling. Full size files are available to download for subscribers to Photoclubalpha – it’s well worth the $10 for a full year of access to any of the extras we provide. See the download links at the end of the article, which will become visible if you are a registered subscriber to the site.

The 8-16mm also achieves full frame coverage on the Alpha 900 when set to 16mm, though with fairly marked vignetting:

Here are some more samples from the 12-24mm DG II HSM: first, 17mm at f/8 – no geometry correction:

Next, at 12mm at f/13 which on the A900 seems to be the limit for good detail sharpness without extra effort in processing:

And 17mm at f/22 – beyond the diffraction limit, but processed carefully for detail:

And 12mm at f/9, an optimum setting for detail with plenty of depth of field for this subject:

So, what was my own decision? I own the 8-16mm and an Alpha 77. That’s what I use for travel and general work. I own an original EX DG 12-24mm. I decided not to buy the new 12-24mm because I concluded that the 8-16mm used on APS-C was effectively as good. The angle is not quite a match for the 12-24mm on full frame, as APS-C is not a true 16 x 24mm. For those occasions where a 12-24mm on full frame is needed, I’m nearly always able to work on a tripod at f/13 and focus manually (which overcomes most of the issues with the earlier lens). Since it needs less drastic geometric correction, it offers a very small angle of view advantage over the new lens in return for the risk of poor sharpness if not used well stopped down. I have no doubt the new lens is better, but it’s not £400 better which is what the ‘trade-up’ would cost – and the old lens is lighter and smaller, which I appreciate.

The test made me even happier with the 8-16mm, especially with the thought that some modification could make it a unique lens to use on the Alpha 900 or a future full frame EVF model (A99). After doing these tests, I decided it was not necessary to take the Alpha 900 and a 12-24mm despite the investment in two weeks’ shooting in the Sierras and Pacific Coast of California – the A77 and 8-16mm would do everything I needed.

But for those buying a 12-24mm, for full frame on any system, the new Sigma represents even better performance than the 8-16mm (better edge and corner sharpness at one stop down from wide open) and has none of the failings of the older lens even if it does need more post-process geometry correction.

Download full size images [private] 24 megapixels 12-24mm EX DG at 12mm f/9 Download Link
Download full size image 24 megapixels 12-24mm DGII HSM same as above Download Link
Download full size image 24 megapixels 8-16mm lens scaled to 24 megapixels from A900 ‘crop’ Download Link
Download full size image 24 megapixels 12-24mm DGII at 12mm compared to 8-16mm at 8mm cropped Download Link
Download full size image 24 megapixels 8-16mm at 16mm filling full A900 sensor Download Link
Download full size image 24 megapixels 17mm f/8 fence example shot boat Download Link
Download full size image 24 megapixels 12mm f/13 sequoia tree example shot Download Link
Download full size image24 megapixels 17mm f/22 boat Download Link
Download full size image24 megapixels 12mm f/9 riverside tree Download Link [/private]

To check the weight, specifications and other details of these three lenses we suggest you visit Sigma’s own site – for the new 12-24mm, here’s the UK site info. And here is the 8-16mm, which they oddly don’t class under wide zooms, but under DC lenses.

You can check worldwide shipped prices from B&H Photo in New York.

– David Kilpatrick

1 2