My new Sony 85mm…

With extremely expensive Sony-fit 85mm lenses in abundance and beyond my (economically sensible) reach, I’ve done good commercial work last year on the Canon 85mm f/1.8 USM and later the Sony 85mm f/2.8 SAM on A7RII. Some of my work relies on showing close-up details with strong differential focus, and hardly any lenses are free from ‘colour bokeh’ issues, so it’s needed some care to process the files and avoid that typical magenta tinge to the background and greenish hue to foreground blur.

detailshot6

This is a typical example. It’s on the Canon 85mm f/1.8, and although this is a fairly clean lens, the background at f/4 needed some post-process work to avoid a magenta colour shift.

longwhitecloud-glass

In contrast, absolutely no work is ever needed on my Sigma 70mm f/2.8 macro. It shows no chromatic effects in defocused areas. But this is a studio shot at f/10 – and, like many commercial shots, the extreme f/1.4 or f/2 apertures which are so highly valued by the bloggerati simply don’t enter the equation. Differential focus here is precisely balanced against the legibility of the bottle wording at web size (these shots are for a 1440 pixel wide template).

I like to have a choice of wider aperture and macro lenses for this kind of work as they all produce different effects. My 70-210mm f/4 Minolta AF classic, for example, has about the cleanest foreground blur wide open on 0.25X scale 210mm close ups. My 85mm SAM is ‘dirty’ by comparison (but its 60cm 0.20X minimum focus distance still makes it the best 85mm for close work unless you use a macro or a zoom with good close range). Then, we get the Zeiss Batis 85mm f/1.8 popping up followed now by the costly Sony G-Master 85mm f/1.4 FE. In both cases you get 80cm minimum focus and around 0.12X image scale (rather like the 70-200mm f/4 Sony G FE lens used at 190mm and 1m focus).

I really like, on a full-frame camera, to reach one quarter life size on the sensor. One-eighth, the 0.12-0.125X type of scale, means a full A4 magazine page fills the frame. One-quarter, 0.25X, means a quarter of that page or a postcard size fills the frame. There are so many things in the world, from a kitten’s face to a lily in bloom or a perfect cup cake, which are about this size. When I photograph food I often want to avoid including the edges of the plate completely. Those lenses which push me back too far prevent that. I know many users will be puzzled by my preference and see no reason to want to get any closer. Well, that’s just me. I have always done well creatively and commercially from surprisingly tightly cropped, close-up work.

And, being more critical of these new hyper-expensive lenses, we’ve had 80cm focus 85mm lenses for SLR focusing for 70 years now. Really, any new lens in this focal length should focus to 60cm or ideally 50cm without calling itself a macro. That suits the way we live, in our cars, at desks, at home, at tables, in small spaces, giving other people space. I really like to be able to place an item in front of me, or even hold it in my hand, and focus on it. I can’t do that at all with 1m minimum focus (the old rangefinder Leica standard!) and only just with 60cm.

Then I started seeing some work taken on an interesting old lens. It’s small, taking 49mm filters. It is fast, at f/2. It was originally designed by Carl Zeiss and if you were really lucky you might find an 85mm f/2 Sonnar. But for around £100/$150 or a little more for guaranteed condition you can buy the Russian Jupiter 9 85mm f/2 manual preset lens in M42 screw (Pentax/Praktica). And since it’s a screw mount SLR lens, you can add an extra layer of focus extension for very low cost between the E-mount body and the lens.

SONY DSC

Above: my Jupiter-9 with Camdiox helical Pentax screw E-mount adaptor fully extended and with a vital lens hood fitted; top, the mount and lens set for infinity focus, lens hood removed.

So last week I assembled a relatively low-cost eBay rig to enable even closer focus than the 60cm of the SAM . This is partly just experimental, our of curiosity to see how well a 1930s Sonnar type design made in 1980s Russia with 1950s technology and coatings can peform. The 85mm f/2 Jupiter-9 is often used to get an attractive f/2 soft-focus with core sharpness, gradually cleaning up until around f/3.5 the softness is gone. It is also used to get neat circular bubbles from strongly out of focus light sources beyond the subject, or a generally very attractive focus transition at any aperture since the 19-blade mechanical iris forms an almost perfect circle at all settings. It focuses slightly closer than 80cm.

With the well-made Camdiox helical adaptor costing under £28 delivered, this is extended in a continuous range to 35cm from the film plane and 0.51X. Obvously, it takes up no more space than my plain M42 adaptor as it is exactly the same thickness at infinity setting – and it does allow true infinity focus. Being solid metal, the combination is not all that light, a dense 490g in its 88mm long by 63mm maximum diameter, 20g more than the Batis. But it feels good. The aperture mechanism is crude and difficult to see and use, but would normally be set first to a chosen aperture such as f/2.8 for the best sharpness with a shallow depth of field, or f/8 for landscapes. It would not be much fun for anyone who likes taking a range of shots from f/2 to f/16, or for anyone wanting accurate half or third stops.

First of all, is this lens even remotely sharp, and can the Sony A7? bodies use it well? Both answers must be yes. Just set the focal length for normal distances to 85mm and the in-body SSS of the A7SII, A7II and A7RII will give amazingly effective stabilisation. Work between f/4 and f/11 and this simple old lens design outresolves the A7R. I was just checking the focus on some calendar text in very dim room light, using ISO 1600 on my A7RII, when I pressed the shutter with 1/40th hand-held –

85mmJ9-f4-1600-40thA7RII

This was never intended to be seen, just a casual target. These pictures open out to Facebook size, by the way, when clicked – 2048 pixels. Here’s a 100% pixel friendly section from this. I was surprised. The lens was at f/4 and focus was done at max magnification, at the taking aperture.

85mmJ9-f4-1600-40thA7RII-100%

You need to check this JPEG out by clicking to open/view at 100%. It’s like this right across the frame, corner to corner. There’s a pleasant dimensional quality to the rendering this old lens gives, but it has one massive failing – it flares up dramatically if any light at all reaches the front glass. The only solution is a very deep lens hood indeed.

Making more considered tests, I headed for a target I had set up to explore colour bokeh, that unpleasant magenta to green shift in defocused areas. With this set-up, my 85mm SAM is not bad at all and does benefit from a proper lens profile. As you can see, the music doesn’t seem to change much in colour from front to back though in the full size 42 megapixel file, especially without lens CA corrections, some funky colours do appear.

85mmSAMf2p8-corrected

Here’s how the Jupiter-9 worked out – first of all, it’s one of a number of shots at different distances and angles, not identical to the SAM shots, and this one takes advantage of the closer focus combination of adaptor and lens:

fiddlemusicJ9f2p8close-facebook

The colour shifts are different, with a bit of a rainbow including red and cyan fringes as well as magenta and green, and the contrast is lower. However, the detail in the very limited f/2.8 focus zone is very fine and over a range of tests the blurring (from the circular aperture) just looks better. No doubt I need to take many more shots with this lens (once the deep 200mm lens hood I’ve found arrives…) but it seems like a worthwhile creative option alongside a number of older manual lenses.

What really interests me is that this same design, with a few refinements of modern manufacture, would surely be worth having. Tamron’s forthcoming 85mm f/1.8 will focus close – it is the special feature of this new lens series – and maybe along with the 35mm and 45mm f/1.8 designs will one day appear in native E-mount. I’d love to see a half-price Batis, a Sonnar f/2 variant instead of f/1.8, with a decent close focus limit around 50cm. Until then I’ll use the SAM on LA-EA3 or LA-EA4 (works well with either) and my assortment of manual set-ups including this Jupiter-9.

Here’s a revision to the post, got some sunshine this morning (day after writing the original post) and with focus peaking and f/5.6 even a little moving target comes out whisker-sharp!

theexplorer-fb

– David Kilpatrick

Sony A7R II review by David Kilpatrick

Sony’s A7R II has a unique position in the mirrorless ILC world, creating the largest image files at over 42 megapixels from an in-body five axis stabilised sensor with exceptional performance given by backside illuminated CMOS.

My reviews in print of the Sony A7R II have now appeared, in the British Journal of Photography, f2 Cameracraft and Master Photography magazines. All three make slightly different points, and reflect growing experience of the camera which I bought from WEX as one of the first despatched on July 28th. The UK best body-only price then fell from their £2,695 to just over £2,000 from one main Sony dealer (at an event promotion) in under three months.

Despite finding bargain deals or importing directly, since the introduction of the A99 only three years ago I have lost about £3,500 keeping up with Sony full frame camera bodies. I’ve also spent around £2,000 buying other Sony models like the NEX-6, RX100, RX100 MkIII, RX10, and A6000 to cover the shortcomings of every different full frame model – and £2,000 or more updating my lenses.

So why invest in the A7R II when experience tells me the Sony system loses value faster than any other, yet so often falls short of performing as required?

One body for all lenses

The A7R II almost matches medium format digital, and gives great results with rangefinder (Leica) fit wide-angles. It has enabled me to add a 12mm f/5.6 Voigtländer Ultra Wide-Heliar to my kit for sharp, tint and vignette free 120° architectural and creative work. I write about lenses, and with current and future adaptors, this body lets me focus and make test shots with all lenses from Canon, Nikon, Pentax, Leica and many others. Click the Heliar image below for a link to a full size (slightly cropped and straightened from 42 megapixels) file. It’s actually shot at f/11 though the pBase data says f/5.6, that how the camera’s Lens Correction app works.

Caerlaverock Castle

There’s no lens made which disagrees with the 42 megapixel sensor as far as I can tell. My kit includes the 12mm mentioned above, the 16-35mm f/4 Carl Zeiss OSS, the 24-240mm f/3.5-6.3 Sony OSS, the 28mm f/2 Sony OSS FE (look out for individual reviews shortly); a 40mm Canon f/2.8 STM pancake, a 24mm Samyang tilt-shift, 85mm Sony SAM f/2.8, Sigma 70-300mm OS and a whole bunch of interesting older stuff used on adaptors.

With the Lens Correction App configured for SS with each manual lens, the very high resolution of the A7R II sensor allows a stable view for precision magnified focus well beyond the ability of any AF method or reliance on focus peaking alone. Doing this at working aperture ensures no focus shift on stop down. The results show me quickly which lenses are excellent performers without needing an optical bench or test charts (give me a single LED light and a darkened room, and I can find out what I need to know about any lens very quickly).

driedflowers-A7RII-web

Most Sony and Sony Carl Zeiss zooms do yield good sharp images on 42 megapixels but it’s easy to exceed their best by fitting something like my 1970-ish SMC Takumar 50mm macro (used for the shot above), or even my Russian 50mm f/2 tilt-adapted Zenitar. I found the 28-70mm f/3.5-5.6 OSS which was fine on A7 II inadequate for critical quality on the A7R II and after tests concluded the 24-240mm was the best option to replace it. To learn why FE/E mount zooms and OSS lenses are never likely to blow away fixed focal length unstabilised types like the Zeiss Loxia or adapted classic RF and SLR optics, wait for my 24-240mm review.

Having said size matters, I downsize many of my final images to as small as 9 megapixels. I don’t need 42 megapixels (7952 x 5304) for every image and for some it’s ridiculous. I’m still selling thousands of stock images* taken with DSLRs from six megapixels up. So for general ‘field’ use, most lenses are more than OK, as I can reduce the file size right down 3600 x 2400 pixels when noise needs cutting, depth of field is a problem, or general sharpness is poor.

One sensor for all image shapes and sizes

With the A7R II, unlike the A7R, all the APS-C E-mount lenses work properly (they never have their OSS forcibly disabled). The auto cropped image is 5168 x 3448, 17.8 megapixels, and that’s a perfectly useful size for all personal and most professional work. The 0.78X EVF is, of course, completely filled to exactly the same visual quality as when a full frame lens is used – the user experience with an APS-C lens is identical to that with full frame.

As with downsizing or lens based cropping, I can crop full frame captures right down to less than a quarter of the A7R II image and have a file acceptable to Alamy for stock library use, or to a client directly for almost any reasonable editorial use. That same crop can go full page in a wedding album, or make a fine A3/16×12 print. It’s like using 120 rollfilm again, you can find pictures within pictures.

lemurs-fullframe

A 240mm shot clearly not close enough…

lemurs-240mmf9-iso400-crop

This is a 3600 x 2400 crop. That is, an image large enough for full page publication or a 12 x 18″ photo/inkjet print (click to view full size)

With many lenses which don’t cover full frame, a 24 x 24mm crop is perfect. The Sigma prime lens ART trio (19mm, 30mm and 60mm f/2.8 AF without stabilisation) all do well on this basis. I had a 16 megapixel square format digital back on Hasselblad V and the square format is a favourite. Unlike Olympus, who offer a 1:1 ratio capture, Sony only includes 3:2 (35mm shape) and 16:9 (HD widescreen) – I’d love them to add a proper 1:1 square image seen in the EVF and on screen, a perfect 28 megapixel crop.

The high resolution FF image also means there’s less need to stitch panoramas or use shift lenses. Canon’s 17mm f/4 TS-E tilt shift lens was introduced in 2009 when their full frame 12 megapixel 5D has just been upgraded to the 21 megapixel 5D MkII. On the A7R II, using its maximum 12mm shift reveals serious loss of outer field sharpness even at apertures like f/10, f/11 and f/13 which are optimum on other ways. It’s not a sensor cover glass problem as the Canon 5DS R revealed exactly the same weakness. Downsize the image to 12 megapixels, which the lens was probably first designed for, at everything looks sharp. But here’s where 42 megapixels can pay off – I just need to use a 12mm Voigtlander or a Sigma 12-24mm, crop a 14 x 21mm area from any part of the 24 x 36mm frame, and I have a 14 megapixel image allowing even more effective ‘shift’ than the Canon. And I can, of course, use the Canon via an adaptor if needed.

The same kind of strong cropping works for telephoto wildlife shots (300mm lens, better than 500mm on 14 megapixels) and for macro work (1:1 on full frame, 2.2:1 at 14 megapixels). You need to remember all the time that traditional depth of field calculations just don’t work well with sensors of 36 megapixels and over. When you view a full size A7R II image at 100% on a non-Retina iMac or HP 27″ monitor, you are looking at part of a six foot wide ‘print’. Depth of field tables, still used today, were based on viewing a 10 x 8″ print from a similar distance! This problem is reduced by higher resolution screens but sometimes, you simply need a smaller image size.

Canon 5DS/R (in proportion with earlier models) have useful M-RAW and S-RAW formats, allowing the cameras to become full frame 28 or 12 megapixels with a single menu change. This function is missing from Sony raw files and would be a great firmware enhancement, if it was possible. Edit: with the Sony A7RV and its even larger 61 megapixel sensor, Sony addressed this with M and S raw files of 26MP and 15MP, which are downsampled from a full capture so do not offer faster continuous (etc) but do bring noise control and sharpness benefits.

Reasons to buy the A7R II

SONY DSC

Having used two other A7 series bodies, and started the transition to the FE lens series with some mix of adapted glass on the way, why didn’t I stick with the far more realistic and practical A7 II, or the A7R which was paid for and at 36 megapixels just as useful a large file size?

  • Internally or externally recorded 4K video though not a commercial offering from my side might well be a request from a future client. I don’t make videos though many years ago I did made 16mm films and many 35mm slide based dual and multi projector AV programs. However, I know many still photographers who have found sufficiently high-end clients for video to invest the time. I wouldn’t touch any video production, even a brief 20-second ad clip, for under four figures. It’s fun to experiment with until any serious use emerges. Also, excellent Super-35 crop format video.jamesgem-1371-web
  • Completely silent operation when needed – though not compatible with any kind of flash, the fully electronic shutter is an option for wedding ceremonies and I’ve used that function already. It is also useful for shooting stills when someone is making a video, or during quiet concerts, in meetings, or when you simply don’t want the sound of a shutter to be heard. When silent is not needed, electronic first curtain (not provided on the A7R) improves shutter lag time and cuts vibration
    .SONY DSC
  • It’s also got a 500,000 actuation life shutter built to more than pro specification and a superior 0.78X electronic viewfinder, a slightly improved body flange for the lens mount (now common to all the II models, tighter and more precise than the original machining), no light leaks. And the mode dial is improved with a locking button, the Multi Function Accessory shoe is further improved in contact reliability, the ocular is T* coated and gives better eye relief.SONY DSC
  • It will perform well with all kinds of lenses and the 399-point wide area phase detection AF array built in to the sensor functions partly, or completely, with more native Sony and converted Canon lenses than ever before. It betters the A7R and A7 II in this respect, though I sold the Canon 85mm f/1.8 USM above as it didn’t work with the II having worked well on the A7R. Metabones have now fixed this, but my adaptor is a cheaper non-programmable type… you get what you pay for!
    Canon5DS-6400-web
    This is what you get from the Canon 5DS at ISO 6400, default, for shadow detail and noise (click to enlarge a 100% view of this section from a much larger file)

    Compare the separation of the black ribbon, and the shadow detail in general, from a similar shot ISO 6400 A7R II file, using the same lens and settings (click to view enlarged).

  • The back-illuminated CMOS sensor has a dynamic range – and a contrast curve or gamma function through controlled A to D conversion – which provides an ideal raw file for subsequent adjustment at lower ISO settings. Here, the difference seen above between the Canon 51MP sensor and the Sony 42MP is striking. The Sony images may often look softer and lack punch, but they reveal two stops more detail in the tones close to deep shadow. It’s probably been designed this way to allow s-Log gamma settings for professional video, producing flat neutral results ideal for grading to match from take to take. This happens to be very flattering to skin tones and it’s no surprise the A7R II is rivalling Fuji’s X-Trans sensor amongst fans of the flesh.jamesgem-1685-web
  • The same sensor has awesome practical performance in low light without sacrificing resolution, and noise levels which allow surprisingly high ISO settings for critical subjects like wildlife where fur and feather textures are easily damaged by noise (or noise reduction). Properly processed from raw, or shot as JPEG in camera, ISO 800 can be used as an everyday setting and 1600 will not even harm landscape detail. Up to 6400 an effectively noise-free full size image can be extracted, and at 12,800 to 25,600 some downscaling is all that’s needed to clean up. Admittedly, it’s never going to match the 12 megapixel A7S or A7S II at 51,200 and has a limit at 102,400 rather than marching on to an insane 409,600 EI as that body does.SONY DSC
  • Compared to buying an A7 II, remember that with the A7R II you get two Sony batteries and an external charger (about £150 in official value) as well as the ability to operate the camera from any 5v 1.5A USB source (not just to charge the battery internally, but to shoot using USB power)
    .SONY DSC

    You also get a neat tether-trap locking cage which screws into the camera side and can secure your USB and HDMI cables against accidental disconnection or strain on the connectors.
  • Final reason – going beyond the A7R II specification does not seem to offer further compelling advantages. It doesn’t have any major flaws or shortcomings except perhaps the single card slot and some doubts about the durability of the body, weatherproofing, and the quality of the lens mount (see below). I’m not in need of more than 5fps and 22 continuous raws before slowing down, and if I am the smaller Sony models like the A6000 and my RX10 do some pretty neat extra high speed sequences. So, for the first time since the sale of my A900 to get the A99, I feel I have a long-term camera no matter what Sony does in six months to make it hopelessly out of date.

What’s could be wrong?

First up, the poorly specified and designed lens mount and low precision body/lens relationship. Where Minolta A, Fuji X, Pentax, Leica and nearly all good makes secure the body and lens bayonet mounts using six screws, the E-mount uses only four even for the top end bodies which may have to support lenses approaching 1 kilo in weight. The four-screw fitting creates two axes of potential tilt restrained only by diametrically opposed screws, six-screw design is better but actually a five screw design beats both as you can’t draw a diameter across any two screws and create a tilt axis. Edit: after publication of this post and my articles in print in the British Journal, Cameracraft and f2 Freelance Photographer, Sony changed the design and A7/9/1 series bodies from the A7IIIR onwards have a six screw mount with screw positions reducing symmetry and the potential to rock.

sonyjune1526

The E/FE lens-body system is built round a concept of achieving final accuracy in alignment and focus without needing precision in every component. The nominal 18mm mount to sensor register doesn’t have to be perfect (and seems to vary by at least ±0.1mm). All Sony E and FE mount lenses compensate for variations and use free-floating magnetic focus often combined with floating OSS – they don’t have fixed infinity stops. Just as the bodies don’t have to be all that precise, the lenses themselves don’t need to be. As long as both work with the sensor to AF perfectly, the overall system is self-correcting.

You soon find out the limits of E-mount precision when buying adaptors for older manual lenses or modern Canon EF lenses. I’m sure Zeiss makes due allowance in the design of manual focus Loxia lenses, and Voigtlander has specifically allowed the new E-mount range planned for 2016 (10mm, 12mm and 15mm) to focus past infinity because they are aware of the variable register of the system. I have measured many adaptors and the only safe decision for the engineer is to fall short of the target register. Some very expensive adaptors turn out to be 0.3mm thicker than others for the same mount (I’ve found this in Leica M, Canon FD and Canon EF adaptors). The lenses being adapted often have a fixed infinity stop and are designed to hit this precisely. Combine a 0.1mm ‘plus thickness’ Sony body with a 0.2mm plus adaptor, and your manual wide angle lens won’t focus on infinity.

So, one overall issue is that despite the high cost, the Sony FE/A7 series range of bodies and lenses lacks the precision engineering of past systems and it’s designed that way. When you find one side of your pictures always seems soft with wide-angle, wide zoom or very fast lenses you have encountered the limitations of Sony precision and quality control. Edit: see new body mount comment above, Sony greatly improved the precision and accuracy of the entire body/lens system from 2016 onwards.

Secondly, the A7R II has such large files and a slow overworked processor relative to those files and the massive task of running a high resolution, high frequency EVF and many clever software functions. Any kind of systematic ‘chimping’ to check each shot after taking may leave you frustrated. Depending on your choice of card and some unknown spin of the CPU’s internal dice, you will sometimes encounter long file writing times and a brief lockout from playback.

Install the 14-bit (in 16-bit container) raw uncompressed format introduced in October 2015 through a firmware update, and the situation may improve. With Firmware V2.0 I’ve seen typical write to card times halved but identical shots could take varying times and the worst case remains close to 10 seconds for the light to go off on a single shot. Most of time it’s clearing about 1 second after 2 second auto review, and disabling auto review has no apparent effect on this, or the time the camera takes to respond to a fresh shutter actuation.

Secret solutions

Since you’ve been patient, and listened to why the A7 system in general has a few failings, here’s how to get the best optical performance and general response from it.

SEL70200G_A-1200

First of all, for the best optical performance use lenses where OSS can be disabled but in-body SS allowed to operate. The internal 5-axis sensor based stabilisation of the A7II/RII/SII is awesome. In-lens OSS is impressive but by its design will always lose you some resolution, often more towards one side or corner of the image than centrally. Amended paragraph, see comments: To see how good your stabilised lens really is, turn off stabilisation and shoot something using flash or at a high shutter speed.

But… if you turn off Steady Shot or OSS on the A7R II, you disable it in the body and the lens. You can not turn it off for the lens, but keep it working in the body. The 90mm f/2.8 Sony G OSS Macro, the 70-200mm f/4 Sony G OSS (above) and the 28-135mm f/4 Sony G PZ OSS and several newer OSS higher end (G and GM) offer the on-lens switch. But if you want stabilisation, you can’t choose to have it provided by the body with these lenses. You can do so with Canon, Sigma and Tamron lenses used on a Canon EF adaptor – their IS, OS or VC will operate normally when the SS in the body is disabled. In fact you must never use these lenses with both methods turned on together, or the result will be unsharp. This is a problem we first noticed with the Olympus system, where their lens and body stabilisation do not communicate and it’s possible to us none, just body, just lens or ruin shots by turning on both together. The Sony body used with third party lenses does allow this; used with Sony lenses, it prevents it.

The A7R II will switch between internal SS, lens OSS and a combination depending on settings. But it won’t tell you what it is doing, which makes this intelligent function something of a handicap. As a rule, if you can lock the camera down (tripod) or use a very fast exposure (studio flash, shutter speed 4X the focal length of the lens) shooting with no stabilisation at all will offer the best results.

sonyjune1527

Secondly, don’t use ‘AF With Shutter’ all the time. It’s convenient sometimes, but every time you take first pressure on the shutter, your E-mount AF lens will initialise a short routine involving focus position recalibration followed by AF. It costs you a variable extra lag before the shutter fires, maybe 1/15th to as long as 1/4 second. Instead, turn this off and AF will default to the centre button of the rear controller (you can change this assignment). You then use this to AF for each change of subject, composition or distance but if nothing’s changed you do not touch it and you do not re-AF. You save battery life, and you eliminate the whole shutter-button-AF delay cycle. You can now capture pictures, using electronic first curtain shutter or silent mode, within 1/20s of pressing the shutter.

Thirdly, for action shots prefer stops close to full aperture on E-mount lenses for the same reason – the aperture closing action involves a delay you can clearly identify and it’s longer with apertures like f/16. But for maximum reaction speed, use a purely manual lens. The camera knows there’s no aperture to be closed so it misses out that stage. It knows there’s no AF. You can get down to a mere 1/50s shutter lag, faster than most photographers can think. If you are used to older DSLRs which typically fire the shutter between 1/15s and 1/8s after you have pressed the button, you’ll anticipate and fire too early for action shots. Beware the LA-EA adaptors for A-mount lenses as you can’t turn off the aperture lever actuation. These adaptors will always add a delay even if you fit a manual lens.

I’m not going to delve into how you use focus peaking, magnification, setting the slowest shutter speed to be used by the Auto ISO function and so on. You can find out about this from countless videos and blogs, not all of which feature grandmothers, sucking and eggs. Nor will I recommend JPEG noise reduction and image settings in camera, since I don’t use JPEGs. Remember that your picture style and adjustments, like extra sharpening or contrast, will be reflected in the view you see through the EVF and on-screen. They will affect focus peaking, the histogram and what the image looks like when you use magnified manual focus, too. My tip is ‘stay neutral’ for the best EVF experience and ability to judge and control your results, especially if shooting raw. Camera Standard – boring but it won’t fool you into making adjustments which are not needed.

smailhomsony16-16-p-h-srgb-web

A 16mm landscape with careful focus checking, and only just enough depth of field even at f/16 if the end result is going to be a 1m wide print

Read the manual, think about all the functions of the camera, assign your custom buttons, set your parameters. My set-up includes (routinely) Auto ISO 200-1600 because within that range the A7R II files have low noise and good textural sharpness and there’s no great benefit in dropping to 100; AWB; 1/250th slowest shutter speed because the world moves and I’m very happy with 1/250th at ISO 800 rather than 1/125 at ISO 400 for nearly all my walkabout shots; AdobeRGB because I need that but actually sRGB is better matched to the EVF and rear screen, and will give you a more accurate histogram; no JPEGs because I don’t need them; Airplane Mode on; compressed raw unless there’s a really good reason; AF-S and Centre point focus; no face recognition, no smile shutter, no tracking, nothing clever with AF; single shot; generally Aperture Priority but sometimes P, M or very rarely S; Date Format file folders; SS on; electronic first curtain; setting effect on; finder and screen at default brightness and colour; grid lines 3 x 3; focus peaking low, yellow; lens correction enabled; 2 secs review, or none.

– David Kilpatrick, all images except front and rear views of A7R II body and 70-200mm lens are ©David Kilpatrick/Icon Publications Ltd; please do not link directly to images or copy

* You need thousands on offer to sell dozens…

Low-cost macro for the A7 series

It’s been a while since my last review of Sony products here, and not because I have been inactive. The truth is that I’ve spent so much on Sony kit 24/7 working has been necessary, including a good few reviews and tests of the A7RII and lenses appearing elsewhere. It’s a real issue, I now lose so much value with the lightning-fast depreciation of Sony’s products within a few months of launch that my old tactic of buying, reviewing and selling no longer works. For one thing, no media in the world will readily pay a fee which even matches the amount you might lose on a camera body in the A7 series over its first two months of retail life. Sony have been good enough to lend me a few items for brief periods but you really can’t form any useful opinions on such radical and new hardware on that basis.

However, my A7R II report is shortly on the way, and the extra time spent using the camera and suffering the damage to my credit card does not harm the process. It helps put the gear in context. I’ve resisted the anti-social pricing policies of the UK camera retail environment for some time, even buying one grey import from Panamoz. So it’s appropriate that my first article for a fair while should be intended to help you save money and get great results from any A7 full frame FE mount camera, while also supporting a company whose UK pricing policies are entirely reasonable – Sigma.

The Sigma 60mm f/2.8 ART DN lens

The butterfly above is one example of what this lens can do on uncropped full frame, in this case adding a single 16mm extension tube, which we’ll come to later as the exact type of tube you buy matters a great deal!

The neat, low-cost 60mm f/2.8 is the portrait lens in Sigma’s Art DN lens trio for APS-C and MicroFourThirds mirrorless systems. I’ve used the 19mm f/2.8 and 30mm f/2.8 as well, but the 60mm is my favourite. Originally, I tested it on Olympus MFT and the 50cm close focus with their 2X factor made it almost feel like a macro. It’s actually just 1:7.2X scale, but 1:3.6X relative to full frame on that smaller sensor. That’s a really good working distance and subject scale.

I was curious to see how much of the full frame the 60mm would cover. All these Sigma lenses are just £129.99-£139.99 retail at most UK dealers right now. They are beautifully designed and made, very light, use 46mm filters and have advanced optical design giving high contrast and first-class full aperture sharpness. Well, the answer is easy enough; you’ll get more than APS-C, with a 24 x 24mm square format crop working well, but not anything like full frame at any aperture from the 60mm.

This is the closest focus of the Sigma ART DN 60mm on the A7R II, uncropped.

Sigma call it a telephoto, with its rear nodal point much closer than 60mm to the focal plane. But its design signalled it would probably perform well as a macro lens too.

Meike extension tubes

So, we add extension tubes between the A7-series body and the lens. There’s one prominent make, Meike, and a couple of years ago I bought their very low-cost fully electronically coupled plastic 10 and 16mm twin tube set. 26mm of extension is not much. It won’t even make the E-mount 35mm f/1.8 focus to 1:1, and does even less with a 60mm. However, what it does is worthwhile combined with the lens’s own focusing range.


I found my plastic Meike tubes have a narrow circular throat and cut the image off all round. But, you say, the image was cut off all round already, so what could be done?

When you mount an APS-C lens on tubes, it covers more than APS-C. Put it on tubes adding about 1.4X to its focal length – like using 26mm of tubes on a 60mm lens – and it will cover full frame. You are moving the lens further from the focused plane, and as you do so, its fixed angle field of sharp coverage grows (it more or less follows the inverse square law, as does the effective working aperture of the lens when you use tubes). So a lens made for the NEX sensors, c.16 x 24mm, can cover 24 x 36mm when used on tubes for close-ups. The 60mm on 26mm of tubes would cover 24 x 36mm even with no leeway. Since the lens already has a good image circle, it turns out that it covers 24 x 36mm when used on the 16mm tube alone, and shows just a hint of corner cutoff with the 10mm tube alone. With both, it covers the full frame easily.

This is the result of using a 10mm metal extension tube – not the plastic set. The plastic design cuts off even more than the lens used on its own.

Meike understand this. They have a newer, metal-mount extension tube set costing about twice as much as the original plastic one. To get it, you must search for Meike metal extension tubes – and they are not easy to identify for certain. There’s very little explanation on-line. These tubes have a full width throat with baffles top and bottom, more or less matching the 24 x 36mm frame shape. Some black flock paper is glued in to prevent light reflection at the sides, but none is fitted top and bottom, and this is the main weakness of the design (you can obtain flock paper and fix this yourself).

Twin set, no pearls

Used alone, the metal Meike tubes turn the Sigma 60mm into a very good close-range long standard lens for the A7 series. I found that you can add the plastic tubes next to the lens, not next to the camera, and suffer no cut-off. This combination of four tubes adds 52mm and makes the Sigma 60mm able to do 1:1 with the addition of its own AF range.

You need to understand sensor-based stabilisation before using any manual lens on tubes (which these are equally suitable for, with adaptors). The A7 II series bodies use the focal length and focus distance of the lens as transmitted to the camera to control the Steady Shot Inside function. As far as I can tell from practical tests, the Meike tubes do not transmit any change to the information reaching the CPU, but SS seems to be OK with such relatively minimal extra focus extension.

This shot was taken at 1/15th hand-held with the 16mm tube on the A7R II, ISO 800, 14-bit uncompressed raw, f/8 on the Sigma 60mm lens. There’s no significant corner vignetting with 16mm of extra extension to the lens.

This is a 100% clip from the shot.

When I mount my 50mm Macro SMC Takumar on the A7R II I use either the SSI menu control, or the Lens Compensation App, to tell the SSI system I’m using a lens with an extension in place. It focuses to 1:2 size, and for this I tell the camera I’m using a 75mm lens not a 50mm. If I add 26mm of tubes, it will focus to 1:1 and I need to tell the camera I’m using a 100mm lens. That’s because a 50mm lens extended to 1:1 focus has the same camera shake characteristics as a 100mm lens used on a distant scene. Be careful, as this relationship only holds good for simple lenses (Tessar, Sonnar etc) and not for any zoom lenses, or any macro lens which uses internal focusing. If you mount a Tamron 60mm f/2 macro on your Sony body using a dumb adaptor, just tell the camera it’s got a 60mm attached. The Tamron changes focal length to focus, but the effect for anti-shake purposes is that it remains a 60mm. Its angle of view remains unchanged as you focus, while my 60mm Sigma when used at 1:1 repro covers half the angle of view it does at infinity.

I am not entirely sure whether the Meike tubes work properly with SS Inside, or if the system simply has enough latitude to function with my degree of unsteady hand-holding. Those contacts just seem to make a connection, with no chip to add information. The EXIF data does show the focal length correctly, and the set aperture (which will be a reduced effective aperture at closer range, 26mm of tubes turns 60mm f/2.8 into a working f/4-ish). But the focus distance is shown as whatever the lens focus function chip confirms – a range of 50cm to infinity. That’s obviously incorrect when tubes are added, in contrast to using a dedicated lens like the Sony 90mm f/2.8 FE G OSS Macro, which will show the true focused distance in the viewfinder and also pass correct data to the CPU.

So, a warning – the 60mm plus tubes is not technically perfect but seems to work well enough.

When you use a tripod or flash, or a fast shutter speed, and turn off Steady Shot none of this applies. In practice with shutter speeds fast enough to stop subject action or wind vibration, it all goes well. The Sigma is very sharp even though not designed for macro range work, but that’s typical of this type of lens – even if 8 elements in 6 groups with several low-dispersion elements is not basic.

sigma60mm-26mmtubes-iso800-A7RII

Here’s an example with 26mm of tubes plus some lens focus range. The ISO 800 14-bit uncompressed file has allowed some work on the bee’s back which lacked contrast. Click to open a 2048 pixel wide version.

sigma60mmf9on20mmtube-iso800-A7RII

Here’s an example which clicks through to a full size A7R II AdobeRGB JPEG (no doubt much crunched by WordPress image storage) taken at f/9 on the 16mm tube. If any of my image files have 20mm in the filename it was the 16mm tube – I’m so used to the lengths used by regular SLR mounts! The 60mm has a seven-blade aperture and gives pleasantly neutral defocused quality behind the subject. You can call it bokeh if you want to. Thank you, Scottish weather, for keeping a few flowers in this condition and giving me some sunshine just after the 14-bit uncompressed raw upgrade for the A7R II arrived.

The Metal Meike extension tubes have the same essential benefit over the plastic version with all FE and E mount, and legacy, lenses used of the A7 series full frame bodies. You can use them on the 28-70mm, 24-70mm, 55mm f/1.8, 28mm f/2 and most lenses though they have little use with the 70-200mm and I would not recommend hanging a 24-240mm off a tube.

Footnote July 2017: I now have the 50mm f/2.8 FE Sony macro. It’s a very nice lens, indeed, but the internal focusing means it’s really more like a 40 to 35mm as you get the subject bigger, and you end up just millimetres away. I compared using this lens on 26mm of tubes to focus on a target 7.5cm wide with the lens itself set to infinity (and therefore, 50mm). Working distance from the lens rim to subject – 11cm. Then I took the tubes out, and focused the lens using its own range, on the same target. The clear distance was reduced to 7.5cm. Now you know why you need tubes and probably don’t really need a macro lens.

– David Kilpatrick

If you have found this article useful, you can support Photoclubalpha by using affiliate buying links (we are not sponsored or paid in any other way, except by selling subscriptions to f2 Cameracraft).

Sigma 60mm at B&H

Vello metal mount extension tubes at B&H (similar to Meike)

Sigma 60mm F2.8 DN for Sony E – Silver from Amazon UK, no idea why they have none in black

Neewer metal extension tubes – much better price than Vello! on Amazon

Visit Wex Photographic and search for any items (UK)

A7R II – universal solution, lens challenge

I’m under pressure to take endless pictures with the A7R II which arrived from WEX (Warehouse Express) on Thursday superbly packed. I am also finishing off f2 Freelance Photographer magazine to go to print over the weekend and have many hours of work to do – and despite having the camera, I won’t be removing some other article to rush a scoop into print.

It’s actually pointless to attempt to review any camera until you have used it for a few days at the minimum, with deliberate testing in mind, or several weeks with normal unplanned uses to confront it. Nothing tests a camera (and photographer) quite like real world pictures which are not hunted down as test subjects.

But of course I have gone out and taken a few shots during a brief period of sunshine which has returned after days of rain, and replicated a set-up I shot few weeks ago on the A7R, also to test a new type of combined LED and flash lighting head (Bowens IC12).

First of all, the £2695 UK price has to be compared against the A7S, A7II, or A7R with due accounting for its useful bonus – this camera body comes with the usual USB charger block and a battery, and then a further Sony external battery charger (remember them?) and a second battery. At Sony RRP this is £76 (battery) and unavailable (charger) but surprisingly expensive when it was. It’s definitely £100-worth of extras. There is also a screw in, not clip in, screw clamp grip twin USB/HDMI tethering lock device which could also securely grip mic and headphone leads.

Unboxing should hold no surprises now, but firing up the A7R II was a familiar experience as so many of setting customisations turned out to be factory preset to my own preferences. It still needed the image size and filetype setting up, AdobeRGB, Date Form folders and a few other things I used. And then, at last, the entry of copyright and byline information to be embedded into every image!

The A7R II takes the same GGS screen protector as the A7II and the RX100 series, not the same as the A7. First job was to stick a temporary protector on, and order one of these. All my cameras have GGS glass on them from day 1.

kelsotownhousejul30-16-web

I used the CZ 16-35mm f/4 lens for a few outdoor shots and also for a test or two I will not release (too many tripods, cat trays and empty boxes in shot!) indoors at up to ISO 6400. Basically… you can use Auto 100 to 6400 and as long as you set Luminance NR to 25 from 400 up and increase it gradually to 50 at 6400 (LR/ACR) the images will be smooth and noise free as well as sharp. I also enter NR 10 even at 100, because it helps keep sky blues smooth.

You can view or download and examine, as you wish, a full size 120 megapixel from this from my pBase library – http://www.pbase.com/davidkilpatrick/image/160888201

You can view at ‘large’ which is really small… select ‘Original’ to see the original, of course. Or a tiny corner of it! If you think the 16-35mm is at the edge of its performance at f/9 in this shot, you are right. Anything wider and the corners and ends of the shot become visibly soft at 16mm. This test shows me that where f/9 was fine for 24 megapixels, I’m probably going to go for f/11 or even f/13 as a standard setting with the A7R II.

driedflowers-A7RII-web

This is not a fair test even yet, but it says a few things. It’s taken on a late 1960s Asahi Pentax SMC Macro Takumar 50mm lens (I enter 75mm in the App data on the camera to ensure correct SSS) set to f/11, which is actually around f/14 at this working distance/extension. The camera is hand-held, with a Sony mini flashgun on top bounced to trigger two Bowens IC12 heads set to flash mode, after first doing the lighting and subject adjustments in LED Video mode. With these unique heads, the flash and the video modes are 100% identical in terms of how they cast shadows. The flash was set to 1/1 power at 1/1000th for a bare fresnel spot on the left, and 1/2 power at 1/1000th in a small Apollo softbox above and to the right. Focusing was done using the magnify function by moving the camera (or head and hands, in effect) over the subject.

Again, you can view a 100% 120 megapixel version of this: http://www.pbase.com/davidkilpatrick/image/160888192

Because this is very low power LED burst flash I need to set the ISO to 800, which would never be chosen for detail. NR is at Luminance 25 in Adobe Camera Raw (adjusting only that top slider). There is a full dynamic range with deep shadows and brightly caught surfaces. No adjustments have been made to the raw file in conversion for contrast, colour or exposure. I think it represents a very highly quality for ISO 800 and to see the level of microcontrast and detail, you need to examine the lowest contrast surfaces – the rounded bodies of the poppy heads. Throughout the image you will find areas of sharp focus and softer focus and it’s easy to tell the maximum sharpness zones. I also made an exposure at f/16 and this is significant softened by diffraction as you would expect. At f/8 this macro lens is likely to be sharper but with a file size like this, depth of field rules go out of the window. You need to use the same technique as would be employed when planning to make a 20 x 30″ print from a 35mm negative!

I will have more images soon enough. My initial impression is that the A7II really fixed the ergonomics of this camera type, the A7R II is identical; its functions cover all the functions found on every different A7 series body sufficiently well to make it one camera for all purposes.

– David Kilpatrick

The link to Warehouse Express is an affiliate link and purchases made through this link benefit the publisher


The Fotodiox Tough E-Mount

Machined from brass and chrome-plated, in the tradition of lens mounts from 50 years ago and not necessarily the best solution for precision or lifetime wear, Fotodiox’s TOUGH E-mount is a replacement body mount bayonet which you can fit to your existing A7R, A7, NEX-7, A6000 or any other metal-mount E-mount body in a few minutes. You need a clean well lit work table, a small engineer’s or large jeweller’s crosshead screwdriver, and a similar flathead screwdriver or old credit card.

The NEX/A bodies are fitted with a three-part lens mount. Here’s what a bonded, single piece, original Alpha lens mount looks like when removed from an old Minolta 7000 –

originalminoltaamount

This mount is stainless steel, which would be prohibitively expensive for a small shop engineering replacement on the E-mount. It’s in two parts, a front surface and the inside with a bonded bayonet spring pressure action, a thin shim with bent ‘arms’ forming three pressure points to hold the lens tight to the mount.

From Fotodiox comes this neat box taking 10 days to the UK from USA –

fotodioxpackage

Since I also ordered a focusing Leica M to E adaptor, my overall value was marked as $80 and I had an £8 admin charge and a little over £7 in VAT to pay.

Inside, the TOUGH E-Mount is boxed and bagged without instructions. For these, you visit the Fotodiox site and watch a video:

http://www.fotodioxpro.com/tough-emount-from-fotodiox-pro-replacement-lens-mount-for-sony-nex-emount-camera.html

Here’s the rear face of the Fotodiox mount, which does not have any second layer of spring metal to grip the lens:

toughemount

However, as we will see, this component (fixed to the mount for the A-mount design) is a separate loose item which sits in the camera body mount recess on the E-mount, and performs exactly the same function. You could probably remove it and bond it to the new mount.

So, why replace the E-mount on a £1200+ camera body like the A7R, which has a magnesium body casting into which the lens mount is anchored by four screws? The reason given by Fotodiox is that an intermediate plastic moulding is used behind a simple unprofiled mount face, so two parts make up the overall thickness. The tensioning ring sits behind the plastic ring, forming a three-part sandwich to make up the mount. The front mount is a relatively soft, crudely CNC lathed alloy.

oneyearemount

Here’s my camera after 10 months of use. This camera has shown signs of light leaks, and has not been sent back for a fix. The mount flange is a completely flat item, relatively thin, and the leaks may be partly down to slight distortion of the front plane face, as shown by uneven wear from lens mounting.

emountwear-closeup

Here’s a detail. You can see the lathe circles on the mount face, and you can see where the metal has abraded and either collected plastic from a plastic lens mount (most likely my MEIKE extension tubes) or paint from a cheap adaptor (my Novoflex and Fotodiox adaptors don’t use paint, they are anodised).

The mount is very simple indeed. It can be removed from all the cameras without disturbing the electronic contacts or the lens release mechanism.

removingmount

Fotodiox video shows the camera on its back and warns about dropped screws etc. I just prefer to unscrew each screw in turn with the camera held vertically on my table, so that if the screw drops it won’t go inside the camera. Care is taken not to allow the spring loaded lens changing pin to disassemble itself, but that’s really very easy.

toughtversusoriginal

One removed, you can compare the Sony ‘washer’ (which is really more or less is!) with the Fotodiox mount – a much thicker unit, stepped to fit the recess on the camera body. A point worth noting is that the original mount has no recesses at all to fit over the four threaded posts on the camera body. Its position is maintained by two pins (at 9 and 3 o’clock) which engage in two holes on the otherwise plain flat rear face of the mount. The Fotodiox mount not only engages with these pins, as it replaces the plastic secondary mount shown below, but also has holes into which the threaded posts fit. It is better proofed against rotation.

plasticnbayonet

You now see the plastic middle part of the sandwich. This is secured by a very thin double-sided tape in places. A flat blade screwdriver or a suitable cut piece of old credit card (or indeed a guitar pick!) pushed gently under the plastic at various point all round will free it. It lifts out easily. Unless you are amazingly clumsy you are not going to go anywhere near the sensor but if you have a clean 40.5mm filter or lens cap around, you can pop it in to cover the sensor safely. I used a 62mm filter to place over the whole mount when checking instructions and looking at the parts, as I don’t want to risk hairs and dust covering the upturned unit.

plasticremoved

Underneath the plastic component you’ll find the third part of the mount, the thin flexible stainless steel tensioning ring which acts to pull the lens tight against the front face of the mount. You may note that if your lenses ever begin to seem slack, it would be easy to re-tension this ring by a gentle bend to the three arms. The four screw holes are in metal posts mounted directly into the magnesium body. The plastic ring can be argued to have no effect on precision, as the original mount rests on these posts, leaving the plastic and the stainless tension ring more as a ‘lubricated’ assembly with a little ‘give’, affecting only the tightness of the lens to the body. The plastic has no sacrificial role, as it does in many lenses (Sigma, Tamron, Nikon, and Canon all use plastic to create weak points where the lens will break on hard impact rather than having it shear the body mount off the camera – not sure about Sony).

fittingnewmount

The final step is to place the new mount, aligned with its white dot and cut-outs and screw holes, in the only position it will fit. Please note that the TOUGH wording goes inside and is not shown on the camera front! Again, I don’t place the camera on its back, and prefer the control given by holding both the camera and the screwdriver (which if properly chosen will support the screw). No pressure is needed to locate the screws for a few turns. I rotated the camera so that the screw hole being worked on was always below the sensor. Finally, when tightening up each screw in turn to a firm fit, the camera was laid on its back and my 62mm filter was placed to cover the mount opening, held firmly. You can also just place a finger against the screwdriver on the ‘inside’ while tightening up, so that if for any reason it slips, you block it from entering camera.

mountfitted

Once fitted, there’s little more to say. It looks a touch classier than the cheaply machined soft metal Sony original, it is a snug and perfect fit, and lens mounting has a slightly more solid feel without resistance or any scraping sensation. Fotodiox may be taking the mickey by suggeting you give the old mount to the cat to play with, of course you should keep it carefully. While doing this I discovered that the original old Minolta SR bayonet shares the screwhole locations and almost perfectly matches the overall size of the E-mount. I could actually take a Minolta SR bayonet off the front of some old extension tubes and fit an E-mount in place. This would serve no purpose but it’s a fascinating hint at the pedigree of the new system – it has a three-flange bayonet so similar to the SR mount, introduced 52 years after Minolta’s SLR debut!

Everything worked perfectly as expected once fitted (see notes below). Cost – $39.95 plus shipping. I consider it a good upgrade.

Notes on infinity focus, fit, and light leak issues

While Sony native E mount lenses seem fine, some of my third party adaptors are not fitting well, and very short focal length lenses show that the infinity focus may be affected. If you use lenses 12mm to 20mm on adaptors, proceed with caution. I am not able to get the Kipon tilt shift adaptor to mount without a forceful twist, though a similar age Kipon shift-only adaptor is happy enough (just no longer able to hit infinity with my chosen 20mm lens).

Infinity collimation after tests and measurements – I’ve now checked infinity focus using stars. I’m just OK on all but one lens and adaptor combination, and all Sony E or FE lenses are fine, as they have loads of spare adjustment (no hard infinity stop – they will all focus way beyond infinity and can handle big differences in camera assembly accuracy). Same with LA-EA3 and LA-EA4 adaptors and Min/Sony A lenses, the worst case lenses hit infinity at exactly infinity, most focus just past.

Kipon Nikon Tilt-Shift – extremely tight fit, so tight it has to pulled off the camera physically. Here I’m thinking that some very gently polishing or ultra fine emery (the sort I use for polishing guitar frets) might ease the adaptor.

Novoflex Leica M adaptor – will not bayonet-lock with the new mount, can’t work out if the flanges are obstructing the full turn or the locking pin hole is slightly off position. Fotodiox helical M adaptor locks perfectly. All other adaptors fit and lock comfortably.

Checked my Kipon shift adaptor for Canon and it’s 21.34mm from rear to front flange, and the lens won’t focus on infinity. My plain cheap Canon FD adaptor is 21.16mm and the lens will hit infinity perfectly. On the original mount, the shift adaptor was just OK to infinity – not for stars, but for landscape. So maybe 0.1mm actual difference in front face register to sensor on the Fotodiox Tough mount, compared to the Sony original.

Light leak issue – a day later I had bright full sunshine and was able to position the camera with the mount getting direct sun, and give exposures of 30 seconds to 1 minute with the lens completely stopped down and blocked off, and the ISO set to 1600. The results proved that it’s not the camera mount assembly which has most effect –

40mmon2875mm

The pure black exposure above is from the 28-70mm kit zoom set to 40mm, at f/25, with the lens cap on.

40mmonLeicaadaptor

This result is from a Voigtlander 40mm f/1.4 mounted using a Novoflex Leica M adaptor, at f/22, with the lens cap on. Simply swapping the Voigtlander adaptor for a Fotodiox helical focusing Leica M adaptor, which has a far wider flange and double the ‘bearing surface’ on the mount and it also a much firmer overall fit, produced the same solid black as the 28-70mm. The 10-18mm also produced a solid black though it was clear that the lens cap lets in a bit of light at the spring clip positions.

To double check, I fitted a disc of Rosco Black Cinéfoil (totally lightproof heavy metal foil you can cut with scissors) into another mount so it sat behind the back of a 50mm lens. This was a Ukrainian shift mount and Zenitar lens. This mount also has a large, black anodised rear surface. No light was admitted. I found that most of my third party adaptors let in light, usually the small angled line/crescent top right, and so did the Sony LA-EA3 and 4. The Novoflex has me surprised and baffled as it let light in over a wider pattern, and it seems to be the best engineered adaptor I have, but the well for the bayonet locking pin is shallow and perhaps too precise as the pin does now not engage (you can feel it just begin to hit the lock position).

(don’t read beyond this point if you don’t like seeing measurements…)

This adaptor works perfectly on other NEX/E bodies and worked perfectly before changing the mount. Relaxing and re-tightening the mount fitting screws, to be doubly sure of correct seating, did not solve the problem. The pin recess in the Novoflex adaptor is 2.30mm wide, and in all the other adaptors measured and also on Sony lenses, from 2.36mm to 2.5mm. The slight wiggle present on Sony lenses when fitted seems to be down to approx 0.07mm tolerance allowed for the locking pin to engage, as this is the part of the mount which limits or fixed the position of the mounted lens. Lenses and adaptors tested, when mounted with the locking pin depressed, can move around 0.5 to 1mm beyond the optimal mounting position.

It looks as if the locking pin mechanism is one area identified as a source of light leaks, and that if the pin is not allowed to engage fully (recess too shallow or not accepting the pin) more light will be admitted. All my manual adaptors varied in the depth and exact design of the locking pin well – 1.1mm deep on Kipon, 0.69mm deep on Fotodiox, 1.23mm on Novoflex, 1.1mm on Sony G 10-18mm, 1.18mm on Sony 16-50mm PZ. The 28-70mm which had perfect light sealing also has an unusual locking pin hole, almost perfectly circular not an elongated oval like all the other lenses. This was 1.2mm deep and with a 2.5mm radius. It is obviously perfectly placed and very precise despite this being a non-G, non-CZ, cheap Sony kit lens.

Anyway, 10 seconds with a Dremel and the Novoflex adaptor is now a perfect locking fit ready for another test if the sun comes out again this year.

Sony did say, back in 2010, they would make the E-mount specifications public for all to use. If anyone has information on what tolerances were specified, please let us know!

Update 30/10/14: using a high intensity single LED torch, the Novoflex adaptor problem was eventually narrowed down to light leaking through the mount between high-grade Leica mounts (Cosina Voigtlander, and Carl Zeiss) and the adaptor. Tightening the flange pressure did not cure the fault. No leak is present when using a low-cost Chinese M adaptor on a screw thread lens, which is a firmer fit. The Nokton and Tele-Tessar lenses also show no leak with the Fotodiox adaptor. It’s just an issue with these mounts – probably from the same source, as Cosina assembles CZ Leica mount lenses – and the Novoflex.

Absolutely no light leak can be identified on the A7R body with the new mount fitted. All leaks turn out to have been down to third party adaptors. The LA-EA3 and LA-EA4 give no light leaks, same for all E/FE mount Sony lenses. The Kipon Tilt-Shift (Nikon, $200+) has so many light leaks I can’t map them – every stage of the unit from the lens mount to the body mount, and all the moving parts, admit light; unit dangerously tight on Tought-E mount. Kipon Shift adaptor (Canon FD) admits light freely, especially when shifted. Canon FD plain adaptor, low cost – leaks at body mount. Cheap Minolta MD adaptor – no leaks. Cheap Nikon adaptor – OK at the body mount, lens release catch admits light freely (repaired using black putty compound but ineffective, still leaks light). Cheap tilt MD to Nex adaptor – one strong light leak in mount between some lenses (chrome flanges) and the adaptor, but otherwise light-tight to the body and in its tilt mechanism. Low-cost L39 to NEX adaptor – no problems at all. Ukraine/Kiev/Zenitar 50mm tilt combo – perfect, no leaks in any position. Samyang 12mm f/2 – small local leak at mount (top right crescent issue). 28-70mm FE – absolutely light-tight, no issues. 10-18mm Sony G – ditto, no light leak at all. 16-50mm Sony PZ – no light leak. Tamron 18-200mm – top right crescent issue. Fotodiox Leica M helical, with any lens, no problems. Focus brand Canon EF to FE mount AF adaptor – no leaks. Original 1st gen Kipon 42mm tilt device – no leaks at all.

– David Kilpatrick

Sony Alpha 7R – the Swiss Army Knife camera

I guess it’s time to publish another field test review of the Alpha 7R despite rarely having used the camera in anger, or in any state other than anger. It arrived in late November and caught me at a time when I was not going anywhere or doing anything, nothing was happening and the weather was just plain ordinary. We didn’t have floods, or snow, or anything else like the rest of the country. It also came with a set of problems to be solved some of which turned out to frustrate any affordable solution.

I started writing this page in February 2014. It may give you some idea of my issues with the whole current Sony system that I’ve taken almost until May to publish it. Additions have been made on December 2nd 2014.

SONY DSC

When you’ve got a wonderful new tool to work with, it doesn’t help to have no work to do which requires that tool. This really is the Swiss Army Knife camera, a strapline I used on the first issue of the new-look f2 Freelance Photographer magazine which I took back into ownership at the end of January. The A7R has the potential to fit in my pocket and replace every single other camera I own, to use all the lenses I have bought for all other systems and formats, and to remove stones from horses’ hooves.

SONY DSC

But, and here’s the problem, it also replaces nothing at all as well as it could. There are maybe no more than half a dozen reasons why, but they are critical reasons and any one of these reasons will limit the use of the A7R.

  • No in-body stabilisation and not all lenses are stabilised
  • No electronic first curtain means the shutter cycle is noisy and causes vibration see later comments
  • The sensor design prevents optimum use of rangefinder type lenses under 35mm focal length
  • No native full frame wide-angle lens under 24mm is likely to be available before September 2014
  • Any Sony FE-mount lens with a performance matched to the sensor is going to cost double its true value
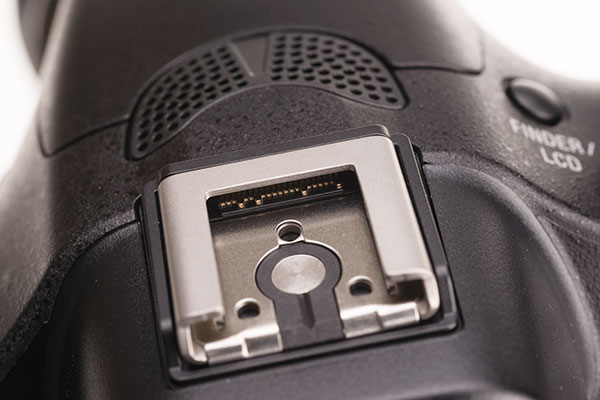
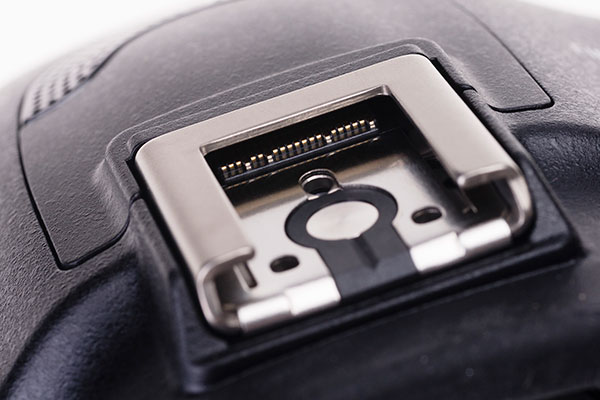
  • No on-board GPS and (to date) no multi-function shoe GPS module to add
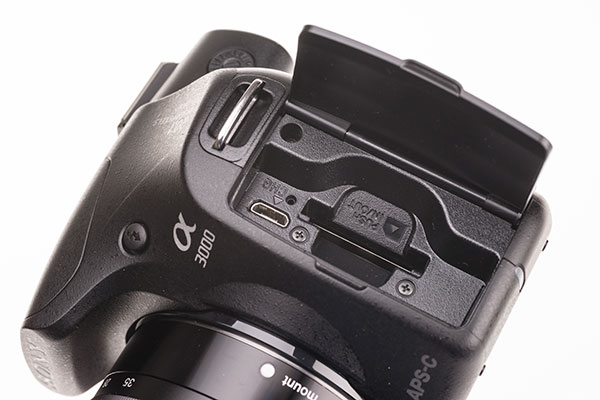
  • Single card slot only and consumer size lith-ion battery
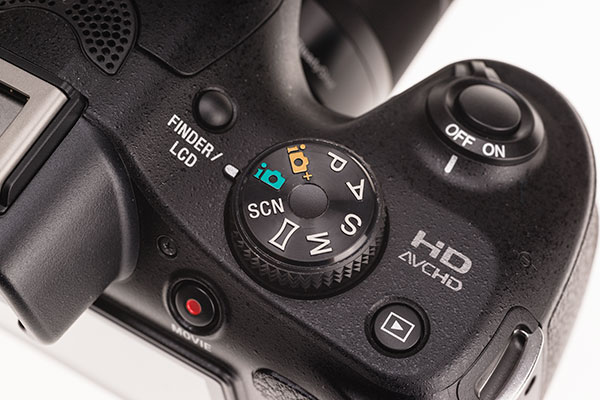
  • Very slow start-up and wake up from sleep especially when not using Program, Manual or intelligent fully auto modes
  • Slow optimal AF/AE performance continuous shooting
  • Slow laminar shutter blade transit speed and flash synchronisation limit
  • Firmware compatibility problems with some existing E-mount OSS lenses
  • No provision for IPTC copyright information entry
  • Custom lens app can be used with manual adapted lenses but does not embed metadata in EXIF
  • User memory settings don’t cover functions from some menus
  • Apps are charged at additional cost for functions which would reasonably be free or included in a camera body with a price-tag of £1,800
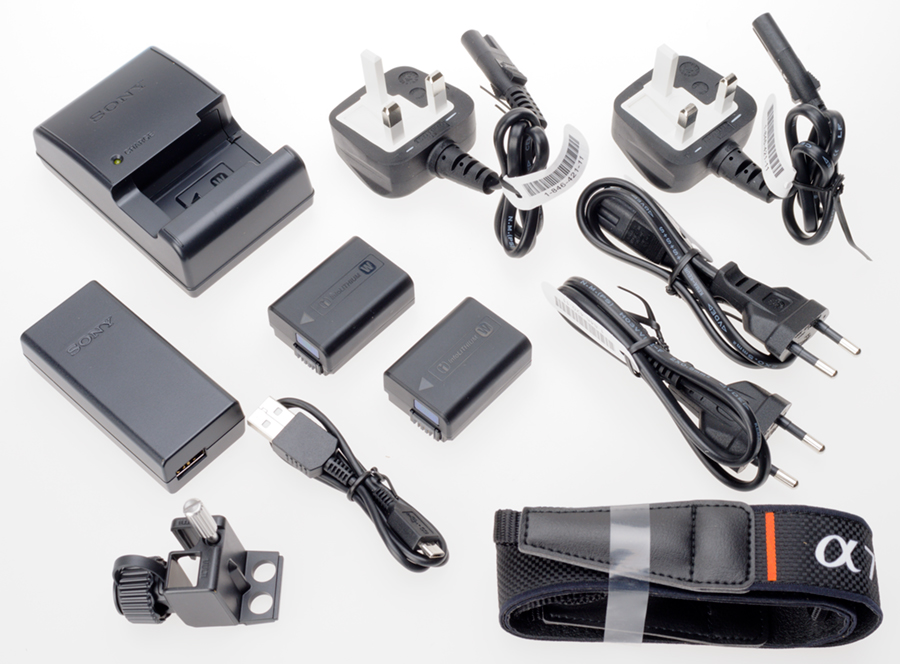
  • No battery charger is supplied and default charging method is by micro USB cable
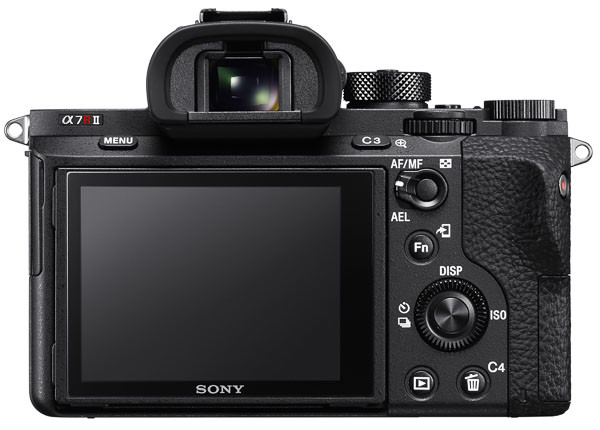
  • The rear LCD screen can only be tilted and is not reversible to face the body
  • The EVF even at its brightest is not up to tropical or desert viewing conditions
  • Auto switching EVF to rear screen is unreliable
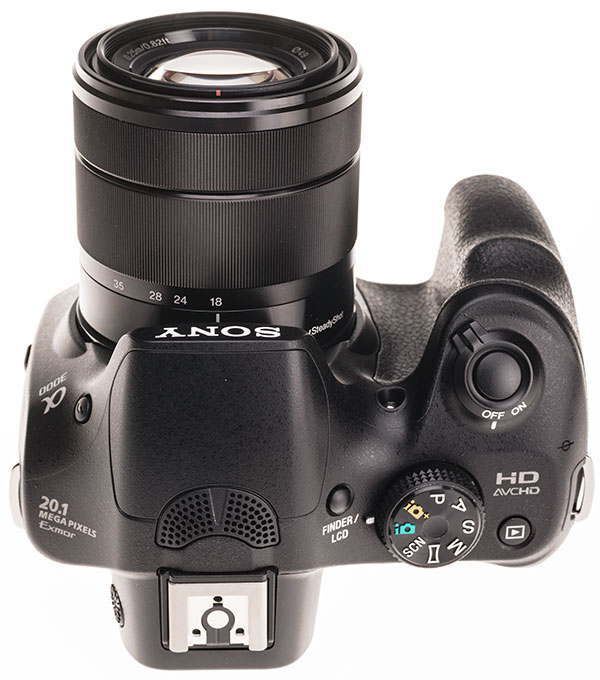
  • As I have now found after five months’ use, not as durable as it looks (I have repaired the worn metal showing through the sharp edges on the ‘prism’ and body with a black Sharpie pen, but I’m tempted to use a guitar fret polishing sheet to make all the sharp edges into bright silver… just rub that thin black coating off!)

In case you’re thinking this is a completely unfair list of negative points to start a review with, well, you may be right. It’s here to make up for the usual lists of star features which *end* reviews. I’m also going to need to explain all these points. Here, to balance the negatives, are the positives.

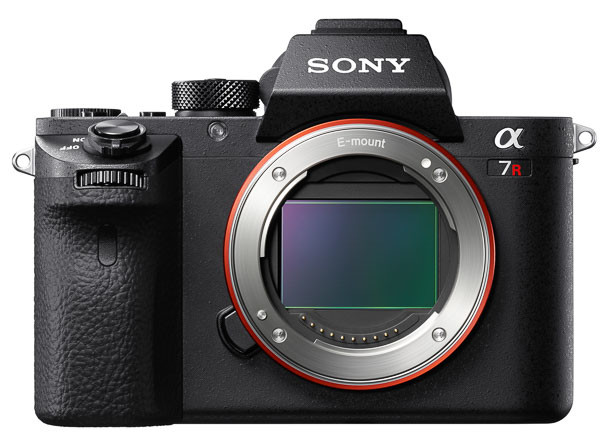
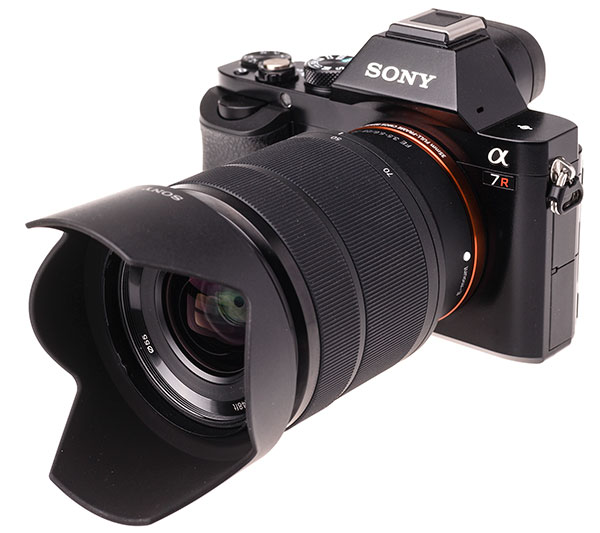
  • The highest resolution full-frame sensor (24 x 36mm) currently made
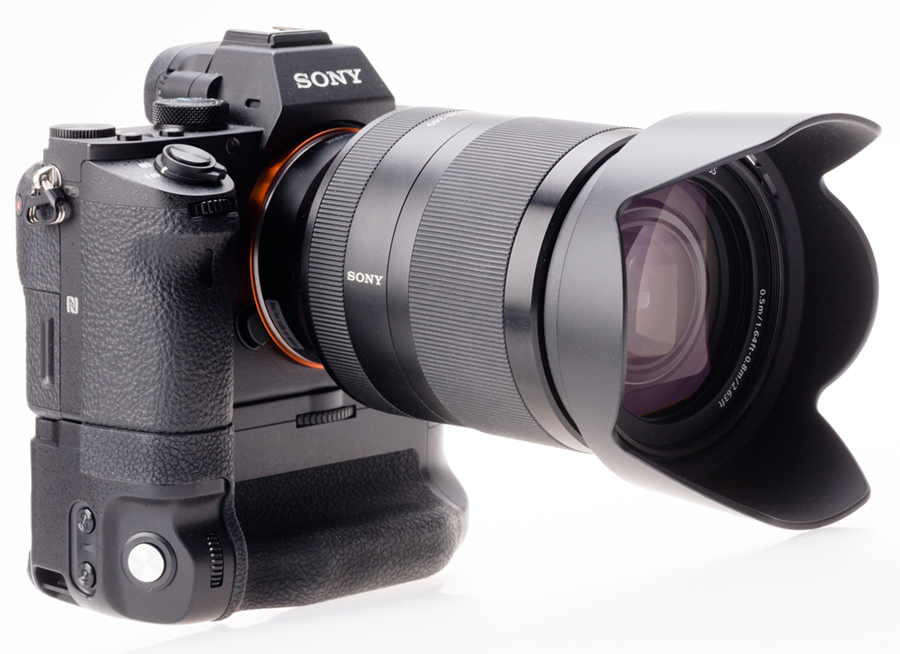
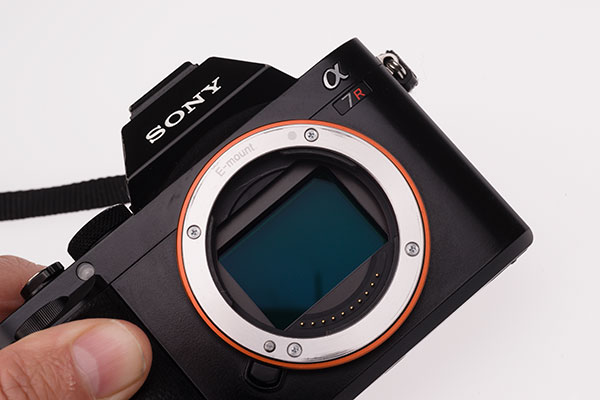
  • The smallest full-frame system camera body
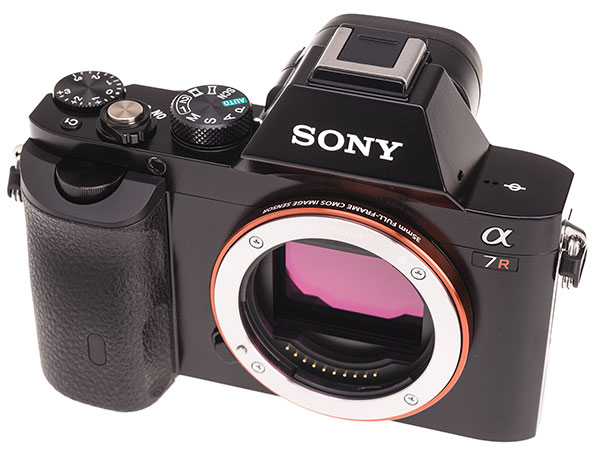
  • No moving mirror, no SLT mirror, and no optical low-pass (anti-aliasing) filter
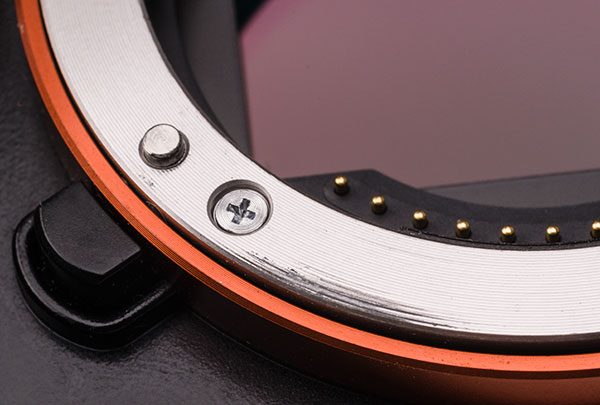
  • 18mm lens mount register allows the use with adaptors of all current and past lenses from all systems designed to cover 24 x 36mm except those which used fixed rear assemblies and front groups
  • Custom lens app allows corrections for any lens, while built-in function auto corrects E and FE mount lenses
  • WiFi and Nearfield Connection transfer file to mobile devices or other hosts with automatic small JPEG creation even when full size JPEG or RAW is the selected shooting format
  • Sony PlayMemories Mobile Apps downloadable to camera and devices add functions such as remote control and intervalometer, lens corrections, sensor shading and colour shift compensation
  • The shutter is a professional specification speeded to 1/8,000th with motorized actuation
  • The body is reasonably rugged, very light magnesium with some composite surface panels and is sealed against everyday dust and moisture ingress
  • Although you can’t hear any sound, it has an Olympus-style ultrasonic vibration dust removal process and it is stunningly effective – no big buzz, no vibrational you can feel, but it really works
  • A full set of buttons can be customised for functions, and there are three adjustment controllers plus a dedicated exposure compensation dial
  • The electronic viewfinder with 2.3 million pixels and a 0.70X virtual view is only beaten by Fuji’s X-T1
  • Triggered or manual magnified manual focus allows exceptional focusing accuracy when needed
  • The high cost of Sony dedicated lenses is offset by the quality of many low-cost, older manual lenses and the option of two adaptors for Sony A-mount lenses, SLT mirror type or mirrorless
  • The interface allows manual selection of most functions, including APS-C format crop or using full frame with non-FF lenses, movie audio gain, finder/screen exposure simulation, and lens corrections

This last point may seem a bit vague but it’s actually what makes the A7R usable at all in many circumstances. The APS-C crop on/off has saved the camera from having zero real wide-angle choice during its first three months of release, as our December 2013 article on the use of the Sony E 10-18mm lens showed.

Although electronic viewfinder cameras are not ideal for studio work, the high resolution of the A7R makes it an alternative to medium format for the highest quality. It can be set to ISO 50 or 100, with 14-bit raw files using a compression method which is comparable to Nikon’s lossless option. If ‘Setting Effect Off’ is selected, the EVF or screen will always show a bright auto white balanced image allowing modelling lights to be used for composing and focusing even when the actual shot will be taken by flash with a fixed preset WB. The professional or advanced user will want to have all the settings for such work stored as a custom memory preset, but Sony puts the ‘Setting Effect’ outside the saved functions. This is most frustrating as getting to it requires menu-diving.

The same applies to stabilisation, which is a function of the lenses not the camera. It is turned on or off through a menu setting or by assigning a Custom button for direct access, making occasional tripod work need an excursion into the menus before and after, unless you are to end up with OSS enabled or disabled inappropriately. The E/FE lenses have no OSS switch, the body has no switch, and there’s no one-press shortcut. Sony’s decision to omit M/AF and OSS on-off switches from the FE lenses makes the system just that little bit harder to work with. Buy a Canon or Nikon and even the cheapest lens has a stabilisation switch you can use easily every time you mount the camera on a tripod, work with flash, or use a fast shutter speed and want the optimum lens performance (achieved, almost invariably, with stabilisation off).

SONY DSC

No in-body stabilisation is going to handle this anyway – luck, flash, a tripod or a very fast shutter speed provide the answers

Working speed

How much does ANY of this matter, if you simply fit the appropriate kit lens or prime, and just get out and use the camera? Not a great deal if you use the camera like a point-and-shoot and your objective is a small print or posting on Facebook. Given the remarks I’ve seen on-line from people buying an A7R with a view to catching their ‘toddler running around’, plenty of new owners fall into this category. They are lucky because no matter what camera they buy, from a £50 supermarket offer to a Canon EOS 1DX, they will be happy with the results and only criticise them when the family pet outpaces the autofocus in the ideal photographic conditions of their living room.

The main issue which will hit any user of the A7R is its overall operating response and speed. Acquiring focus, by contrast detection, normally seems to take around 1/4 second with an FE or E lens, but can take half to one second in low light or with a low contrast subject. It can also fail but confirm positive occasionally, and this is a little frustrating as we are not used to getting defocused snaps today. Even one fail in a hundred is a surprise. If you try the LA-EA3 adaptor, which provides a mirror-free light path and supports AF with SAM and SSM lenses, half to one second is normal in good light. You may find it worth disabling the ‘AF with shutter’ option and using only the AF button to set the focus, so the shutter release does not keep resetting it with each shot. However, after doing this I found it more than inconvenient NOT to have the familiar AF on half-pressure.

The shutter cycle

Having acquired focus, you complete the shutter release action. The A7R then executes a pre-exposure shutter action which involves closing the shutter with a movement of both blinds. This takes 250ms, or one-quarter of a second. That is longer than the mirror lift timing of a DSLR. After the exposure is made (a minimum period of about 6ms) there is short blackout dwell and the shutter re-opens to restore live view. The complete cycle is between 375 and 385ms as timed using audio and video recording and analysis.

This is not so very much worse overall than the Alpha 99 full frame SLT used with mechanical first curtain, but more of the cycle happens before the exposure, creating a surprisingly long shutter release lag. The A99, like the A77 and NEX-7, NEX-6, A6000 and indeed most other new Sony models including the A7, can use Electronic First Curtain. This means no mechanical action happens before the exposure at all. By the time you see any blackout or hear any noise, the image has already been captured, silently; the second shutter curtain closes to end the exposure and allow electronic readout. The shutter lag with an Alpha 99 or A7 in this mode is 20ms, or 1/50th. The shutter lag with the A7R can not be reduced to less than 1/4 in single shot mode.

This is also why the regular continuous shooting offers only 1.5fps, with AF and AE supported for each individual frame and 14-bit raw data. If you set Speed Priority mode, you can get between 4 and 5fps at the most with the exposure locked but AF active – however, you don’t get a real time viewfinder display, and you also get 12-bit recording instead of 14. This lowers JPEG quality in-camera as well as the headroom and dynamic range of the raw file. You’ll only get this performance by using the best SD cards. Some which claim 90-95Mbps speed only write are half or less, and are quoting their read speed.

The A7R will often remain in a card-writing state for several seconds (as long as 16 seconds if a raw sequence has been shot and buffering is queuing the images). Playback or review is not always possible without a brief wait. Since turning off auto review (which is not subject to this wait) greatly improves EVF performance for rapid fire shooting, you may have no clear idea of your shots until well after they are captured.

The simple fact is that where many competitors including Sony’s own A7 have fast responses, the A7R has an operating speed closer to a 1970s film SLR with ‘auto winder’ (the slow alternative to a motor drive), or being more charitable, to a Mamiya 645 with a power winder. It’s essentially medium format operating speed. This is in contrast to the Nikon D800/E, which offers the same file quality without a speed penalty.

Sensor shading and lenses

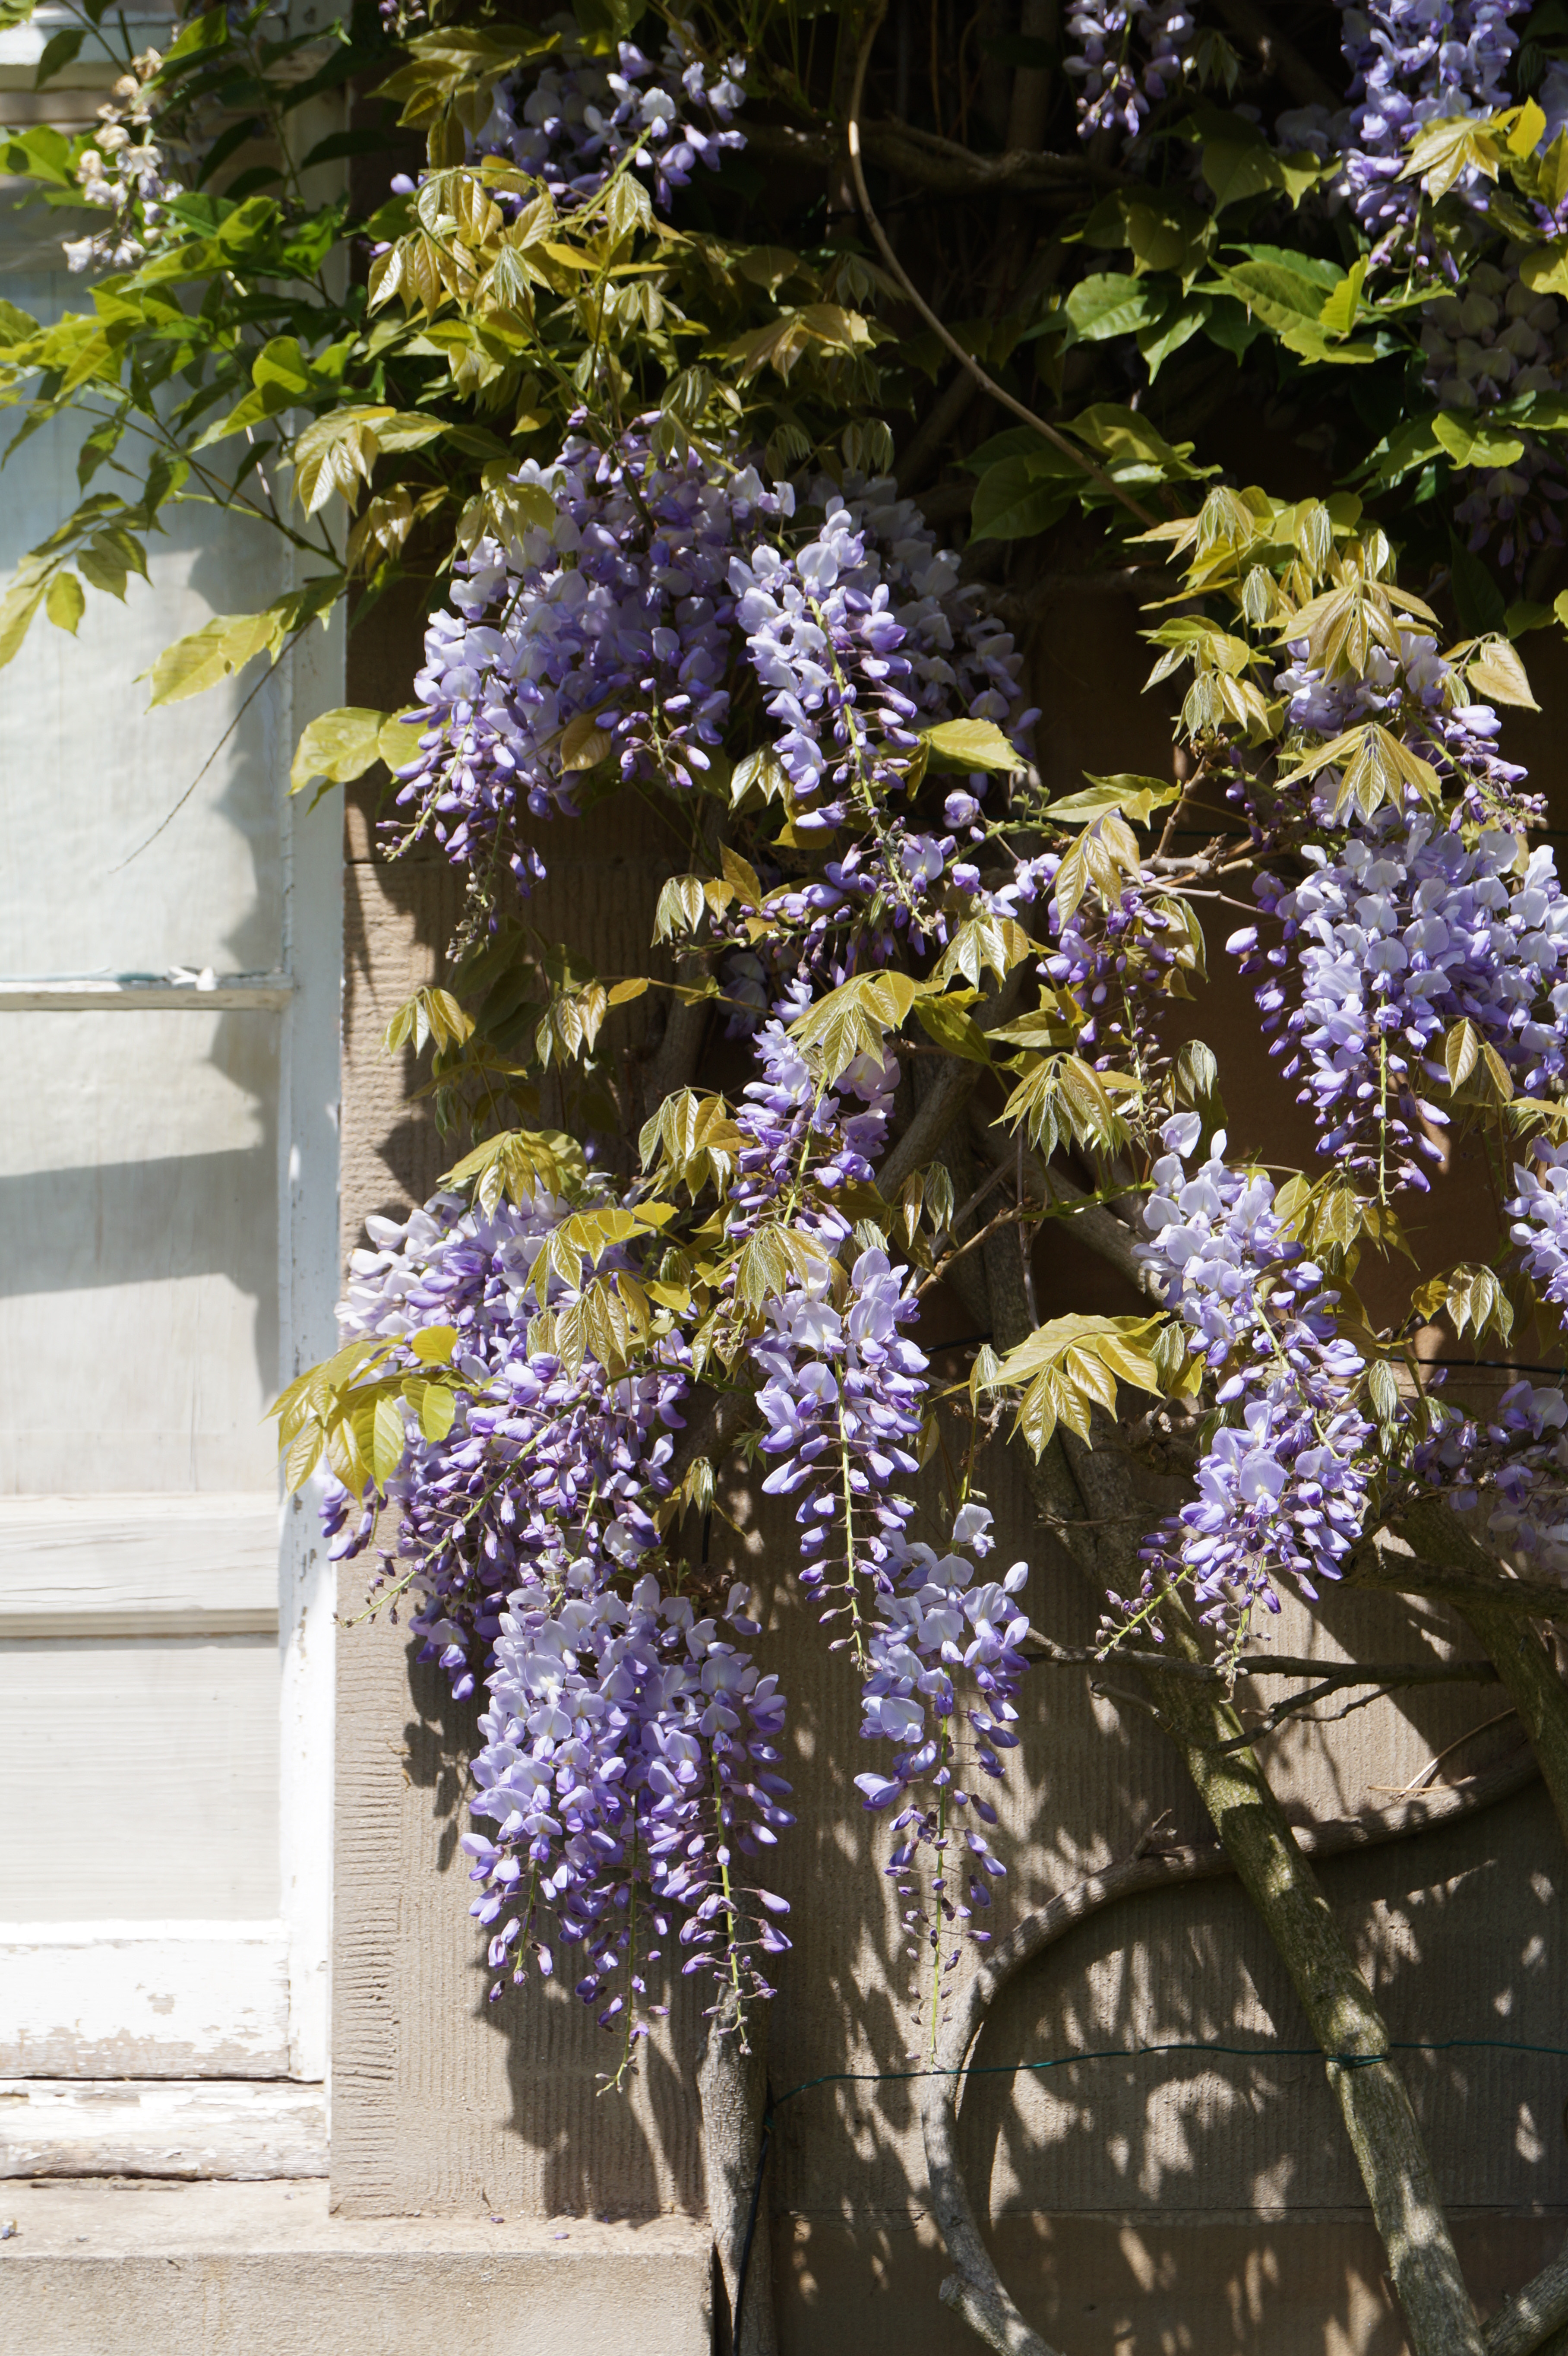
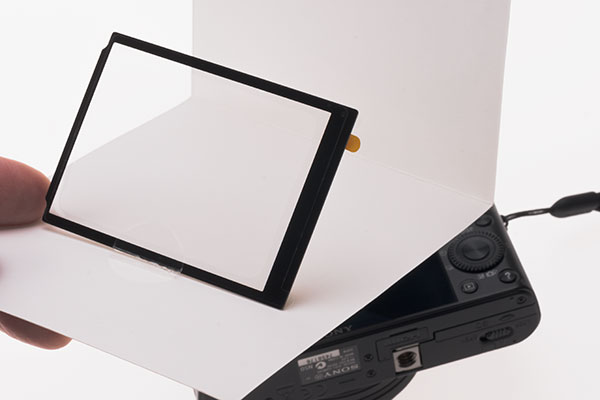
The A7R sensor microlens and coating structure produces not only a strong magenta-purple shading towards the frame ends with short rear focus wide angle rangefinder lenses, it also throws up a yellow-orange discolouration at the top of the (horizontal) frame. It shows some degree of this effect with nearly all lenses under 40mm focal length made for Leica M, screw, Contax G or similar mounts.

A month after releasing the camera, Sony issued a PlayMemories App which can be loaded up and invoked to record and re-use manually adjusted corrections for named lenses. These include distortion (barrel or pincushion), vignetting, and colour shading. The app does not allow the creation of a reference image or mapping mask. You can do this for Lightroom (shading only, saved as data) or Capture One Pro (shading and colour, dust and defects saved as an image). Consequently it actually won’t correct properly as it ignores the yellow-orange patch. Its limits are insufficient to correct full fisheye to normal (as found in the onboard correction which Nikon use for their 10.5mm lens) or handle typical shading from lenses like the Voigtlander 12mm, 15mm and 21mm.

sensorshading21mmCSf8a7r

This is typical of a non-retrofocus wide angle shading map produced from the A7R. The slightly magenta vignetting can be cured easily. The piss-yellow patch can not and it’s there, to one degree or another, with more lenses than you would imagine.

A different aspect of the sensor construction produces smearing. I noticed that this was minimal with the 15mm Voigtlander and strong with the 21mm. It seems to depend on the rear group geometry relative to the sensor. I ended up selling both these lenses.

Since then, I have given up on the idea of a super-compact Leica style outfit though I still have a 40mm f/1.4 Voigtlander and an 85mm f/4 Zeiss. Sony’s FE lenses are not very small and not all that attractive in specification. They do little more than return me to the kind of lens choices I had thirty years with the launch of the Minolta AF system – a slight step backwards at the time, losing the 17mm f/4 option, 24mm VFC, 35mm VFC Shift, Varisoft and many other unique bits of glass. I’m using a bunch of vintage Pentax, Minolta, Canon and other lenses in the 17mm to 85mm range. They don’t suffer from sensor shading or smearing problems and have generally proved far better than modern zooms.

My gripe with these solutions is that even if I enter a lens identity in the App, my images show no focal length data in the EXIF info, and certainly no aperture data. At the end of a long day, I have not made notes on every change of lenses. I have no idea what lens or settings may have produced a good or bad result. What I need is for every lens to be a properly dedicated FE mount one whether AF or manual focus. And I don’t want to pay Carl Zeiss a thousand pounds to get a sharp result from the type of lens and aperture specification which has been easy to make to an outstanding performance level, at modest cost, for the last half-century.

There are three lenses made by Sigma – 19mm, 30mm and 60mm f/2.8 designs in E-mount – which prove it is possible to make low cost, lightweight lenses which deliver results almost beyond criticism. Just making the direct translation of these lenses to 28mm, 45mm and 90mm f/2.8 for (say) 50% extra cost would give the A7R exactly the kind of glass it needed from the launch day. Sony’s Carl Zeiss 35mm f/2.8 and 55mm f/1.8 may be wonderful in their own right but they appeal to me as much as 35mm f/2.8 lenses and 55mm f/1.8 lenses did back in the 1970s. Not at all. They are the focal lengths and apertures you used to find on twin-lens film compacts and they’re what you still find in the scruffiest old bag of 1960s worn-out SLR kit at a junk sale. They are what my father’s Pentax kit had (plus the inevitable 135mm).

Fuji’s launch of the X-series with a fast 28mm pancake equivalent (18mm f/2), very fast 50mm equivalent (35mm f/1.4), and good 90mm equivalent macro (60mm f/2.4) paid off well and they followed up with a 14mm f/2.8 (21mm equivalent) and pro portrait 56mm f/1.2. Though not cheap, these lenses are all affordable and have been supplemented by further excellent kit, tele and wide-angle zooms. What the A7/R needs most is a direct counterpart to this Fuji system and it simply doesn’t have it.

As for the long end, I see almost no point in buying any lens made for the FE mount longer than something like 100mm. The 70-200mm f/4 may be attractive, but it’s forever limited to the FE mount while being as long as a regular Alpha lens. Had Sony made a clever two-part SSM lens for FE and Alpha, with a detachable rear tube like a dedicated LA-EA3, they would have had a winner. Instead they have the lens which Alpha A-mount owners have been waiting for – pressing for ever since the digital system arrived – made in the new mirrorless mount only. After seeing the final prices of the CZ 24-70mm f/4 and the Sony 70-200mm f/4 G, I’ve bought an LE-EA4 Alpha SLT adaptor as well as an LE-EA3 mirror-free adaptor.

But longer lenses are still much better on the Alpha mount, with its sensor based stabilisation and the larger bodies with true phase detection AF ideally suited to the wildlife, action, news and sports for which lenses over 200mm are destined. You can add an LA-EA4 SLT type adaptor to the A7/R, but these are still full-frame cameras one of which (the A7) has extremely low resolution for tele work compared to the ultimate telephoto capture machine, the neglected Alpha 77 (or its lesser spec 24 megapixel siblings).

From my point of view I’ve got an amazing camera body with a few limitations, but a menagerie of odd lenses all with even greater limitations or lack of connectivity. If someone came out with a Canon FD lens adaptor with a chip able to tell the camera I was using a 20mm and what aperture was set, that would be great.

What does work is any LA-EA adaptor with Alpha lenses. You get all the EXIF data, and aperture control from the body. What you don’t get is the smooth focusing of a manual lens, or contrast detect AF, though you do have AF calibration to fix the inevitable inaccuracy of phase detect systems. It’s just a pity the 20mm Minolta/Sony AF design isn’t as good as the 1980s Canon last version manual focus FDn.

Timing and shake

The A7R shutter is a full size mechanism. A shutter like this running at 1/8,000th maximum speed should be achieving flash synchronisation at 1/250th. The fact that this camera is restricted to 1/160th shows that the transit speed of the shutter blinds is slower than normal. There must be a reason, and the discovery (by me, and others, despite vehement denials in some quarters) that a shock-induced form of camera shake happens could be it. Sony has also disabled OSS support for many E-mount lenses. I believe this is connected to the typical shake pattern in the hands of the average user. Update: because it occurs less with unstabilised lenses, for example my 70-210mm f/4 Minolta AF used on LA-EA4 shows none of the typical patterns, I now think this is not a ‘shutter shock’ or ‘user shake’ issue but is due either to mistimed communication between the camera and most stabilised lenes, or more likely, to a brief loss of the power needed to maintain moving lens groups or elements in position whether stabilisation is active or not. A need to moderate the drain on the battery is indicated by the slow transit of the curtains (slow motor speed to operate the shutter). Otherwise the A7R would surely have had a full speed 1/8000th shutter with X at 1/250th.

I made recordings using video, audio and motion sensing methods and observed the typical results from repeated exposures with different lenses. I found that shutter speeds from 1/30th to 1/160th could be affected by a shake or double image which occurs 1/250th after the shutter has opened, looking like a reflected or transmitted shock. At speeds longer than 1/60th this jolt occupies less than a quarter of the overall exposure and is not so clearly visible as a double image. It can look worse at 1/160th than 1/80th, because at 1/160th about half the exposure can be in one position and half with the image shifted a tiny degree. A distinct double image is often shown and it’s always in the vertical direction when the camera is held horizontally.

2870-70f5p6-handheld-OSSon

FE 28-70mm handheld 1/80th, OSS switched on (100% detail click to enlarge). Pre-update firmware. It’s very hard to be sure, but I think the April firmware update has made the 28-70mm (originally NOT recommended for the A7R or sold with the body) perform better.

2870-70f5p6-handheld-OSSoff

FE 28-70mm handheld 1/80th, OSS switched off.

70300sigOS-70f5-handheld-OSon

Sigma 70-300mm OS switched on, on LA-EA3 adaptor. One problem with using any non-Sony lenses is that firmware updates have no effect on them at all. Sony don’t make a stabilised lens going as long as 300mm, yet.

70300sigOS-70f5-handheld-OSoff

Sigma 70-300mm OS switched off. All images at 70mm (many tests made, these are accurate representations of the results and tend to show that stabilisation is likely to produce no benefit).

Since some stabilised lenses including my Tamron 18-200mm Di III VC also produced this distinctive double exposure, I believe that Sony’s disabling of OSS in the 55-210mm E lens for example was done because their engineers identified the problem before the camera went on sale. I also think it can be fixed by firmware updates to Sony E lenses, but probably not for others. Update: they did not update the new black 55-210mm OSS. I think it just imposes too much battery load without an entirely redesigned OSS mechanism, or perhaps a combination of OSS and focus. Fuji has overcome this problem using very carefully balance triple linear motors in their new large lens for the X-system, the 50-140mm f/2.8 – it’s a stabilised, fast focusing lens with minimum power consumption.

In response to those who say oh, it’s a super-high resolution camera, your technique needs to be (bla bla bla!) it’s actually slightly lower resolution than my NEX-5n and far lower than my Alpha 77 or the NEX-7 I no longer have. It’s also lower than the A3000 I owned briefly, and the NEX-6 I have used as a second camera since early March. 36 megapixels full frame is 15 megapixels APS-C and that’s a lower resolution than any E-mount camera made except the original NEX-5 and NEX-3 14 megapixel bodies. I can enable mechanical first shutter curtain on any other NEX or Alpha SLT body and never see the same ‘jolted exposure’ effect with the same lenses. I can also shoot with our Alpha 700, 900 and 580 bodies and never see this shake fingerprint despite their mirror mechanism and mechanical first curtain combined.

Of course I may get shake with disabled or absent stabilisation, hand-held, with almost any digital body. I use many different cameras through the year and sometimes I get very poor stabilisation, as when using certain Nikon lenses with the earlier VR zooms on their 24 megapixel DX format bodies. This shake is random and variable, and reflects my own instability, body sway, wind chill and so on. It’s not one type of shake visible too often in shots which should not normally be affected.

Reviewers have been incredibly cautious to observe this effect. I don’t know why. I’d spotted it within a few hours of trying the camera out. Others have been fast to defend the A7R and suggest that you just need to avoid that critical shutter speed range of 1/60th-1/160th. If this was not such an extremely useful speed range that would be fine. It’s actually the precise range you most want to be perfectly stabilised and least want to have to avoid. It’s also favoured by Sony when program mode and auto ISO are used.

One way to minimise this shake seems to be to use manual focus, mechanical lenses and to favour short focal lengths. The A7R never feels or handles better than when you’ve got a rangefinder lens in the range from 12mm to 28mm fitted. It becomes like the Leica that never was, the eye-level camera which doesn’t need a separate viewfinder to handle a 12mm, 15mm, 18mm, 21mm or 24mm lens. Leica may have a good rear screen to help with this issue now but no EVF. So the next point has been a big issue for buyers.

For the latest firmware updates, and new Apps and software, see:

http://www.sony.co.uk/support/en/product/ILCE-7R

And for the rest…

While I do miss the dual card slots of most of the Alpha cameras I’m using, I know the NEX and E-mount models have never had this, and with a 32GB card installed I have adapted to using the USB cable to read off new images and let the A7R charge. I do not miss the separate battery charger as I have one, and spare batteries. Nearly all the time, the camera is kept fully charged by its time spent overnight attached to the Mac. Since my RX100, RX10 and NEX-6 all work the same way using the same cable life has been simplified.

My favourite designs remain the A55, A77 and A99 all of which have had GPS on board and rear screens which enable self-filming for video demonstrations, or folding away to face the camera (how I normaly use EVF cameras now). The shared battery across the A55, A7R, NEX and A3000 models and RX10 makes it likely I might travel using a combination of these. I don’t have much use yet for the WiFi functions but I understand their importance to others, and they will really come in useful for remote camera operation in future. That can include skypole or kite work, or having a camera tripod mounted 10 metres away from the main shooting position for a different viewpoint of an event, operated from a phone or tablet.

kerelanchurch-web

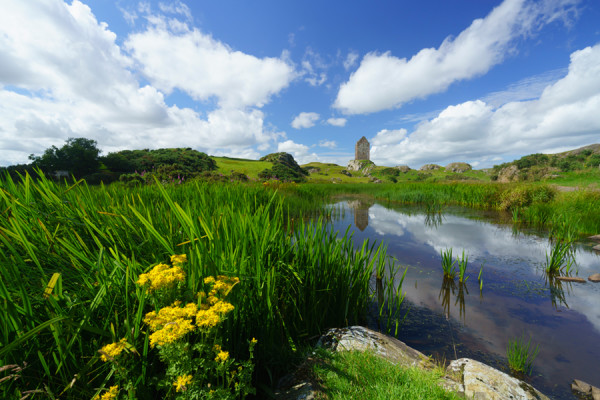
GPS identified this as a church at Mailadumpara on the highway to Munnar – the 10-18mm lens used on full frame enabled this uncropped 36 megapixel shot at 14mm, f/11 (the shading is due to natural sky polarisation and the vignetting of the lens which I have not corrected).

I found a solution to my GPS problems in the form of a £40 igotU device from Maplin. It’s tiny (I am tempted to put a hot shoe mount on it but so far have just popped it in my shirt pocket). Free igotU2gpx file reading and low-cost PhotoLinker (buggy and unreliable in the extreme with 36 megapixel raw files) let me write GPS data into full day shoots on all cameras used. It’s not as accurate as built-in GPS and the process is tedious; the GPS data also exists in sidecar files until MediaPro is used to embed it into finished JPEGs. I’ll still buy the GPS module for the multi function shoe just as soon as Sony release it.

Top quality files

The appeal for me of the A7R is the sheer quality of the image. Even at ISO 3200, it is completely acceptable when processed carefully with Adobe software from raw. The JPEGs are mediocre with the exception of multi-shot modes and I don’t use them except for panoramas and night shots. The raw file has been criticised but compared directly with competitors, I find it has what I need – excellent highlight recovery from normal exposure levels, very low noise across a wide range of ISO, an ISO 50 setting ideal for studio lit subjects, and extreme pixel level sharpness.

Lomography Petzval lens

The Lomography Petzval lens used on the A7R with Nikon adaptor. This reproduction lens from an 1840s design is a wonderful tool for portraits.

RTK-silverfex-faded-petzval

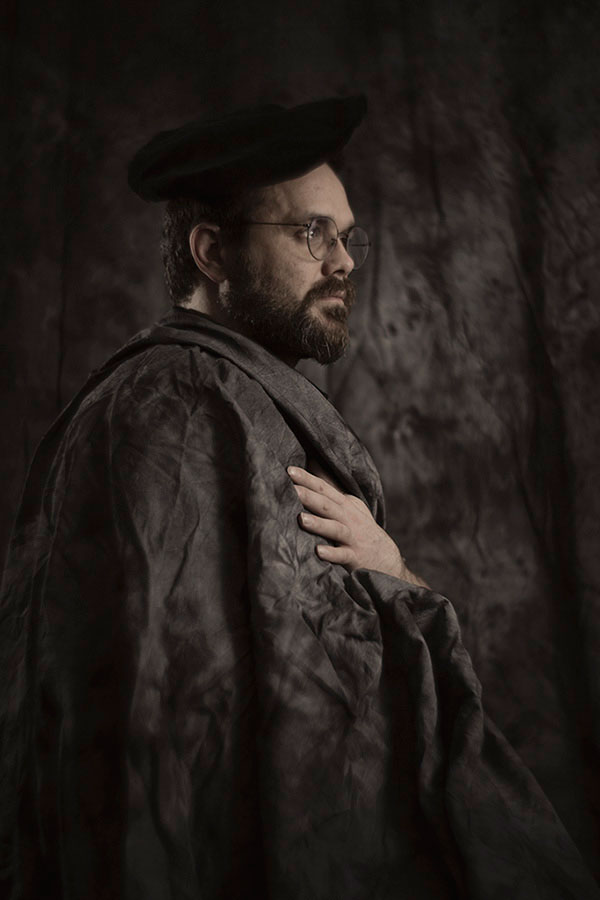
Richard Kilpatrick as a Victorian portrait subject with our Interfit background as a drape – A7R, ISO 50, Petzval lens at f/5.6 (Waterhouse stop) manually focused, Elinchrom Ranger Quadra RX flash.

Manual focusing with peaking and magnification combined tells you a lot about your lenses. Find a good lens, and the peaking will be present even at Low setting, with a very narrow band of activation. A poor lens (or aperture setting) usually fails to show a peaking line at Low setting, then shows one at Medium or High which has little discrimination. I’ve been able to identify my best manual and A-mount lenses by using the 14.4X magnification and the peaking function to examine targets.

Having done this, the extra performance squeezed out of almost lenses by super-accurate focusing makes AF seem inadequate. The contrast detection AF of the A7R is good, but just invoking magnified manual after it has locked on proves that it rarely hits the perfect mark. It gets to ‘good enough’. Like many new A7R owners, I find myself often using manual focusing without noticing that it is any slower than AF used to be. It’s a quantum leap ahead of any optical finder accuracy.

SONY DSC

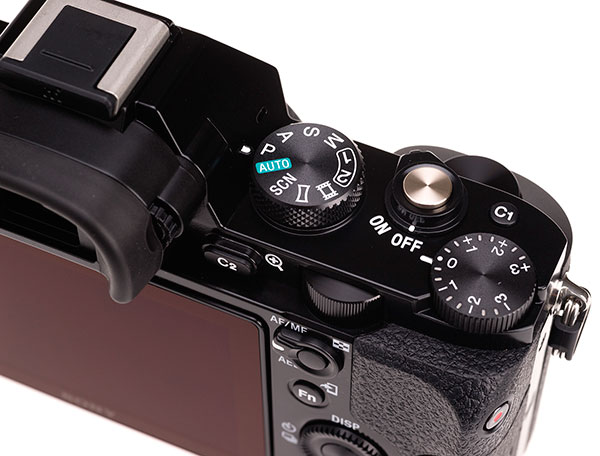
I find the body shape and size ideal, and have no complaints about the position of anything except the shutter release, which could have been 3mm or so further forward, and also would have been improved by the addition of a manual cable release thread (found on the RX10). I don’t plan to get a vertical grip, as the whole point of the A7R is small size and light weight. The external finish feels secure, the battery and other doors are adequately sealed and I don’t tend to overwork them.

The small body size causes a few problems with tripod mounting. Even the smallest monopod head can restrict the rear screen movement making it impossible to angle the screen down if you want to hold the camera above head height. It doesn’t angle down much to start with. The position of the Menu button, needed to access some adjustments like OSS and Finder Setting Effect, isn’t ideal as the only button on the left end of the camera. The exposure compensation dial is unusual as a solus function using up an entire large mechanical control, and has no lock, so it can be turned a little easily.

The A7/R is so customisable that after a couple of months getting used to it and changing things you’ll have a camera as far removed from its out of the box settings as a typical Canon ends up. Mine, for example, has the AF/MF and AE Lock button/switch control set up to act as Focus when set to AF/MF (with pre-Focus and tracking lock and eye-start focus all disabled), and to act as Focus Magnifier when set to AE; while the shutter release is set not to activate AF, but to lock AE on first pressure (when using the camera in a controlled environment – when travelling, I soon reverted to AF with shutter). This makes the camera anything but point and shoot, as out of focus shots are guaranteed without a separate focus action.

In practice

Like far too many A7R users, I’ve spent half my time testing and experimenting, and not enough time shooting. I’ve had the RX10 as a companion at the same time, and needed to shoot with new flash systems, where that camera’s exceptional high speed sync makes it more versatile – there’s not much point having flash heads which manage 1/5000th duration when your sync speed is 1/160th, unlike the RX10 which can manage between 1/1600th and 1/3200th depending on aperture. I had a concert venue opening to shoot, with video, and once again the silent RX10 with its superb video quality was the obvious choice.

Then, at Easter, we had a nine-day tour of Kerala, an exceptional offer from Citrus Holidays providing us with a private driver and a packed itinerary covering 1000km and five locations. This was our first visit to India for 28 years, and would provide the first library images of India apart from a few scanned transparencies of subjects which do not date. Equipment mattered. Shirley always uses her Alpha 580 with Sigma 18-250mm OS original version; it’s heavy and the lens has been through one factory service already, but it’s been very reliable and survived a short period where a Nikon D600 kit was tried as a replacement (and sold pretty sharply, in favour of returning to the more reliable AF, AE and clean sensor of 580).

Logically, my A77 and A55 would have come along. They share the same battery type, and my basic lens set 8-16mm, 16-80mm and 70-300mm gives both exceptional wide angle and a good tele performance (300mm plus APS-C plus 24 megapixels) for wildlife. It is however a very heavy kit and we wanted to travel light and work light, in high temperature and humidity.

So, the A7R had to be my choice. Apart from anything else, this camera at £1800 had not so far proved ‘better’ for any given job – it was barely used. In the studio our A900 and A700 optical finders just work far better than any EVF camera, and for general PR and social photography the last thing you need is 36 megapixel full frame. It just creates oversized files and tends to have too little depth of field. The A7R had been used for tests, for some winter landscapes, and some architectural shots. We had not travelled at all since early November.

This decision also led me to leave the RX10 behind, and this was a big mistake. I took the RX100 instead because the RX10 is fairly large. Its zoom range and silent operation would both have been valuable. With the A7R and its 28-70mm OSS lens I took the 10-18mm OSS, my Tamron 18-200mm VC DiIII, NEX-6 body and 16-50mm OSS collapsible kit lens. This was really a backup in case any fault developed. In practice the A7R makes a better APS-C camera. I only used the 28-70mm lens once, and used the wide zoom and the Tamron fairly often on the A7R with APS-C crop, occasionally with crop disabled. While it’s possible to get a bit more wide-angle from the 10-18mm by shooting full fame, the 15 megapixel crop is a 100% perfect frame every time with this lens.

Despite the phase-detect focus of the NEX-6, this camera proved less accurate and slower in all conditions. Its main benefit was better timing for shots once the finder image is focused and stable, along with quieter operation. It may be a smaller body nominally but there’s little practical difference. Also, I was wearing a baseball cap, the minimum headgear needed in the sun. The left-end viewfinder eye position prevented a right hand ‘on top’ vertical grip on the NEX-6 while the central eyepiece of the A7R allowed a choice of grip style without having to remove the peaked cap.

The most significant loss my choice involved was telephoto power. Shirley’s 250mm f/6.3 reach on APS-C would have demanded a huge lens, a true 375mm or in practice a 400mm, to get the full benefit of 36 megapixels on full frame. It would also have demanded at least one f-stop more stopping down to match the critical long lens depth of field. I didn’t have an E-mount 24 megapixel body, but if I had one my 18-200mm would have slightly outreached Shirley’s 250mm as used on 16 megapixels.

162mmf8-anhinga-nex6

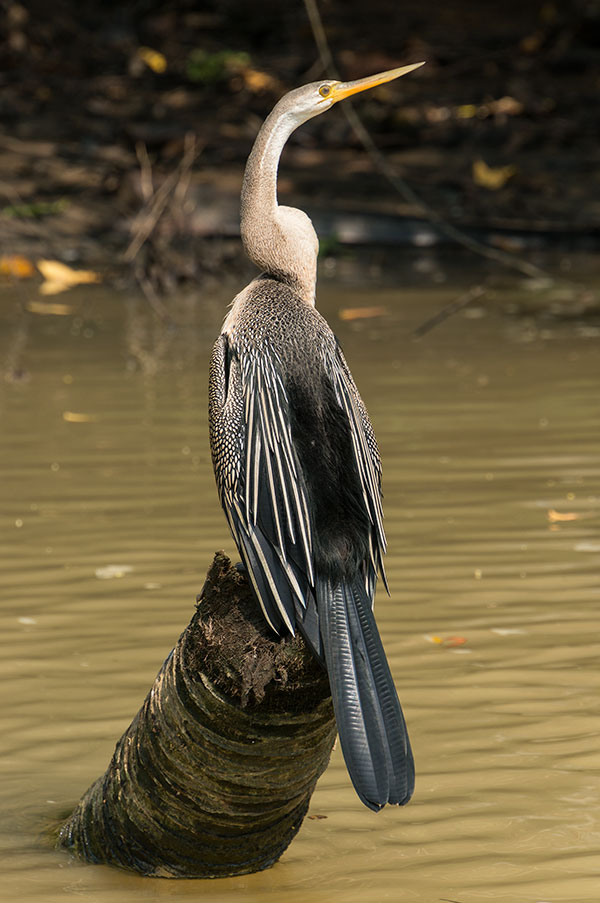
This snake bird (anhinga) was photographed using the NEX-6 and 18-200mm (162mm and f/8), from a moving boat. There is no trace of shake at 1/250th, indicating the VC stabilisation works on this body. I got excellent results from the NEX-6, which I picked up at The Photography Show on March 4th with its 16-50mm collapsible motorized zoom on a special deal. However that deal was not as good as the current B+H of $524 with free accessories.

There are no lenses yet made longer than 200mm for the FE mount. If there are any made other than an obligatory zoom to 300mm they will be expensive and limited to the E-mount system for ever. In contrast a Canon, Nikon or Alpha SSM long lens will always be usable on SLR-form bodies and also on mirrorless – possibly on various mirrorless systems. Canon EF lenses for example can be used on almost all mirrorless bodies, and Nikon teles have the possibility of fitting to their 1 system 2.7X factor bodies with totally successful functions and focusing. I’ve tried this and it works – an 800mm equivalent with outstanding image quality, from a 300mm.

It’s for these reasons I have succumbed to ordering an LA-EA4. I value the LA-EA3 because it allows me to use some lenses with contrast detect focus and a pure image path, but my favourite 70-300mm Sigma OS will not CD focus. Buy the EA4, and I can use all my screw drive Minolta and Sony glass.

This is why I sill feel the A7R can be described as the Swiss Army Knife! It can do APS-C as well as its 16 megapixel APS-C siblings, but switch to use full frame to squeeze extra angle from many lenses. My Tamron 18-200mm is only just compatible with the A7R – its VC stabilisation and general performance indicate that a firmware fix might be needed (see earlier comments) – but it can give me a 19 megapixel image sharp corner to corner with a range of image sizes from square to 35mm, at 18mm and f/11, making it as useful as a 16-200mm lens instead of an 18-200mm.

In March, I needed to write up the Samyang 24mm Tilt-Shift lens, which was only available for review in Nikon mount, and needed a full frame body. The A7R with a low-cost Nikon adaptor did the job perfectly and the magnified focusing function allowed full and successful use of the lens functions. I now have a wide range of lenses and adaptors, and there’s no manual lens I own which the A7R can not use.

SONY DSC

The Samyang 24mm Tilt-Shift f/3.5 manual lens has better control over movements (including 30° intervals for independent rotation) than the Canon or Nikon in the same focal length, though it lacks auto iris, EXIF data and focus confirmation. Here it is used with a low-cost manual Nikon adaptor.

24mmTSseriesmono

Using the 24mm Tilt-Shift – a lesson here in floor/ground and ceiling/roof relationships and camera position. First shot, a typical eye level architectural compromise in which a normal wide angle keeps the verticals straight. The trade-off is that you get a similarly generous view of both the floor and ceiling. Second shot, moving the camera close to ground level. Third shot, applying a full vertical shift; the floor is now seen from an angle giving it much less emphasis, while the vaulted roof is seen from below. For real estate shots, the camera is usually placed close to the ceiling on a tall tripod, and a drop front applied, to show the extent of room interiors better by emphasising their floor area. This is stuff I learned 40 years ago working with 5 x 4.

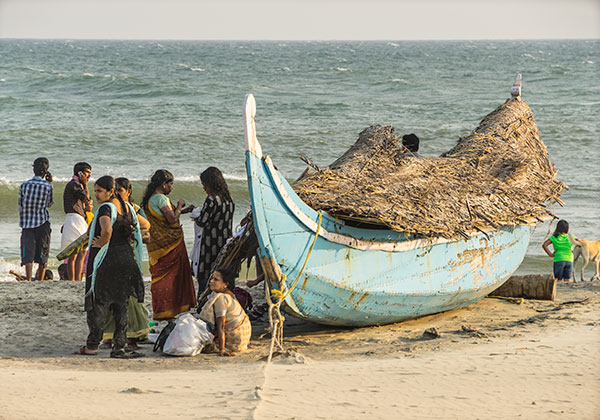
The A7R stabilisation incompatibilty issue with the Tamron 18-200mm was ‘tested’ at considerable cost in lost shots. During most of the Kerala trip, fortunately including a few chances to get close to wildlife like the anhinger shown above, I used the 18-200mm on the NEX-6 for the slightly higher resolution and faster response. I’m very glad I did this and put the A7R away. No shot shows any sign of stabilisation failure. Finding a dramatic sunset location with rocks and predictable spray from breaking waves, I used the same lens on the A7R, which I had taken to the beach to produce some tests showing full frame coverage.

175mmf9

One of my frame coverage tests of the 18-200mm on the A7R. 175mm, 1/200th at f/9 – conditions which with stabilisation should result in a perfectly sharp result almost every time. Instead, this combination produced a jerked slightly double imaged unsharp shot every single time. Even at 21mm focal length this degradation was visible.

All the images (full frame tests and rock sunset shots) showed the same characteristic stabilisation jerk even at 1/320th, which I had not considered possible as the peak vibration from the A7R shutter occurs 1/250th after the shutter opens. It may not be shutter shock which causes this shake effect, but a firmware incompatibility (in timing signals?) between the A7R body and certain lenses.

piccure-processed

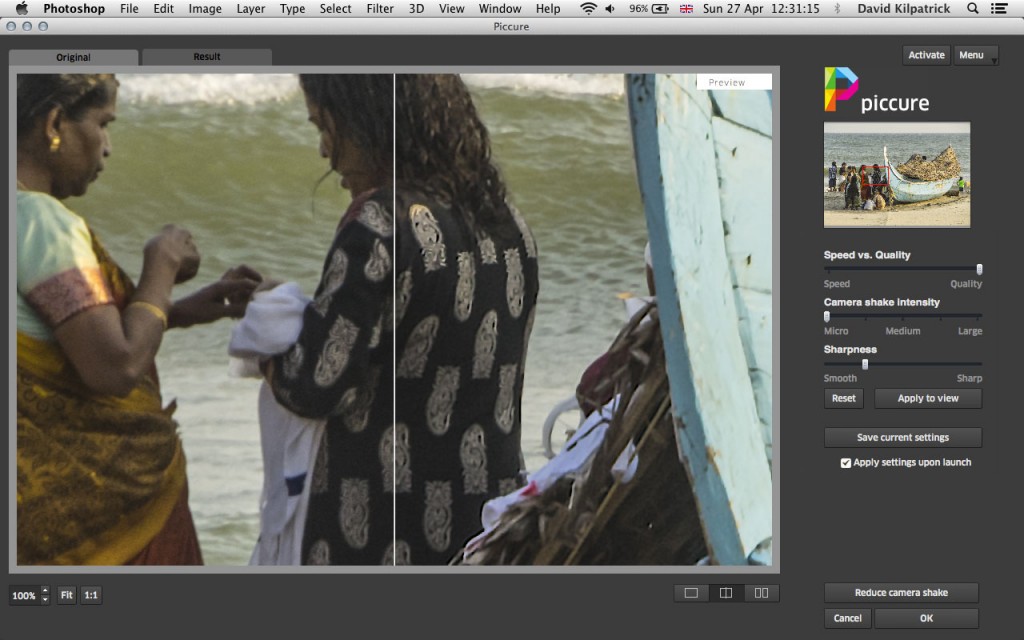
Here is my processed image put through the new software Piccure, which I can recommend as the first program to analyse and remove shake effectively – see http://intelligentimagingsolutions.com – and which has significantly improved some of my A7R ‘shaken up’ shots to the point that when reduced to 9 megapixels, they are as sharp as you would have expected from a KM Dimage A2 (ah, the irony… we do make progress, don’t we?). Click the above image for a full size screen shot.

kovalambeachfamily-web

This was my final crop and process from the shot involved, which was an 18.2 megapixel ‘more than APS-C’ crop from the full A7R frame, sharpened using Piccure and reduced to 24MB final image size.

200mmsunsetrocks

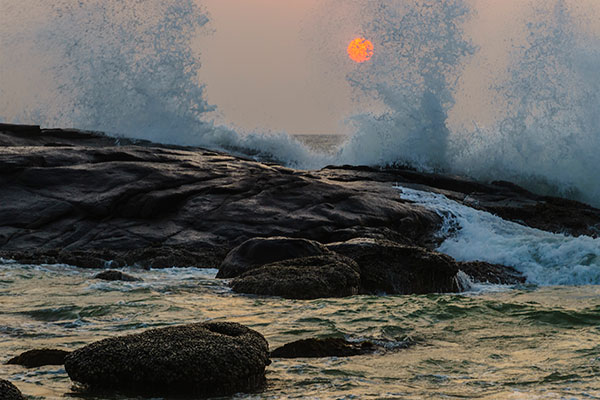
This sunset, and all the similar shots taken with the 18-200mm on the A7R, proved too badly affected by stabilisation malfunction to use at the desired full size.

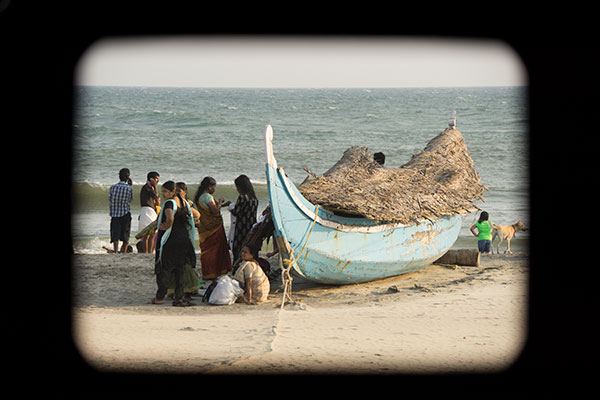
Again, Sony’s decision to disable OSS with many lenses on the A7R only, and to issue firmware updates to enable this, supports this theory. Whatever the case, I lost all my first night’s sunset shots for anything except web sized use (above – it’s not sharp for printing or library use). We returned two further nights at the right time and tried various combinations. It was a subject not helped by heat haze and blown salt spray (UV filters were fitted, of course, and needed cleaning frequently to avoid the whole picture being softened).

shakexample-rocks

It’s so bad it almost hurts your eyes, but this was the focus point of many shots, and the double image (always in the vertical direction when the A7R was held horizontally) from the 18-200mm Tamron consistently gave a result like this. You might also suspect inaccurate focus and poor lens performance, but plenty of other shots at similar apertures and settings on the NEX-6 were completely OK. Perhaps the only answer with the A7R will be the near-£1,000 70-200mm f/4 G and replacement of the 28-70mm with another £1,000-worth of 24-70mm f/4. All that to get me back to where I was thirty years ago in terms of aperture and focal length range!

shake2-rocks

Using Piccure had no useful effect on this shot. It created triple outlines of the shake in place of double.

Eventually I got what I wanted but only with the 70mm reach of the 28-70mm OSS lens. The final, third, visit had cloud cover as the sun reached the right position. But, if you want to try this for yourself, visit Light House Beach in Kovalam at around 6.00pm (get a beer and wait) around April 16th-22nd. Like all such sunsets, there are just two times each year where the sun will hit the right position over the horizon.

lighthousebeach-sunset1

The 28-70mm really didn’t have the power to give me the sun at the size I wanted, but at least with Photoshop processing this was a more or less acceptable result. For any shot like this, I would far prefer to have a true mirrorless camera – no SLT mirror either – and the A7R should be a perfect choice. Tripod use was not an option because of the crowds (which you can’t see) and combination of incoming tide and wave.

There was one lens which never let me down – the 10-18mm OSS. Whether on the NEX-6, A7R crop or A7R full frame this lens always turned in a perfectly focused and well stabilised result.

At the end of our Keralan tour, we were invited to have lunch and a short tour of a major ayurvedic resort hotel, Isola di Cocco. The tour only took twenty minutes, seeing some of the rooms, and was at mid-day when the light is not ideal. I took a few shots on the A7R including room interiors, and sent small versions to our hosts afterwards. The outcome was a request for commercial use of the image set in their next brochure. These were not exactly what we would do on a commission – for one thing, we’d normally remove towels from round the pool, pick the best time of day, make fine adjustments to room details and even use lighting.

Isola di Cocco Resort Poovar

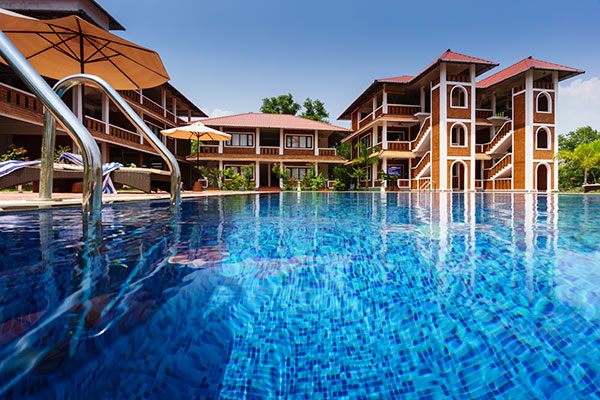
A pool needs to be very clean to handle a shot from three inches above the water surface (at 10mm).

This is what we we used to do in the 1980s producing brochure pictures for travel operators and it was never a casual thing, more a very long and full working day with many appointments and too much driving. These shots were quick snaps, even if professional snaps, and we agreed to use for a charity donation (all Indian businesses seem to support local charities as a matter of routine).

We’d be more than happy to go back and do it properly though!

Back in the 1980s we had nothing to approach the 15mm equivalent angle of the 10mm used on crop frame A7R, even though a few such lenses did exist for 35mm systems. 35mm was like using a 6 megapixel camera, and our shots had to stand full page to double page use. I used a Pentax 6 x 7 with its widest non-fisheye 45mm lens and that was equal to a 24mm, something you can now find at the wide end of many compacts. It had to go on a tripod, as the exposure times with Fujichrome RF 50 film (for shadow detail) with the f/16 or f/22 apertures needed for sharpness in depth were usually around 1/4 to 1 second. The tripod was one you couldn’t easily take by air today, and the camera kit with two bodies and three lenses was heavy and bulky. Then there was a matter of a hundred or so rolls of film to handle the five bracketed exposures for each frame, lead anti-X-ray bags, and a large Metz flash with an extension head… and our 35mm Minolta kit on top of it all. Each room could take an hour or more to photograph.

Isola di Cocco Resort Poovar

Raw conversion controls enable the rich teak wood interior to be shown clearly without losing the highlights of the wall and white sheets.

And here I am today, complaining about aspects of the A7R when I can walk into a room like the one above, without a tripod, find my viewpoint, observe the horizon level display while composing carefully, and make an exposure at ISO 1600 with quality equivalent to ISO 100 35mm film. With a lightweight carbon-fibre tripod, this almost Leica-sized camera can now outperform anything we might have expected from 6 x 7 film and at ISO 50 is good enough for wall-sized prints and poster reproduction.

We have some aspects of A7R technique and performance to ‘fix’ and you’ll realise that I do not approach using any new camera uncritically. But there’s nothing else on the market short of medium format which can match what it does.

I do not address, here, the demands of users wanting to switch from conventional heavy-duty SLR type cameras whose gear includes fast long apo telephotos and zooms, who work frequently with sequence bursts, require to track sports action, shoot news, capture wildlife or want to snap their kids and pets (which requires much the same camera performance as covering sports and news… they may move slower but they are much closer!).

My present thinking is that the new 12 megapixel A7S with its 4K motion picture capture and extreme low-light performance may not be what I want, but I’m considering adding an A7 or changing the NEX-6 for an A6000. I’m not quite ready to sell the A900 or the A77. I’ll see how the A7R performs over the summer and update in due course.

The A7 MkII with full-frame stabilisation, announced in November 2014, tends to put my theory about power drain and lenses into doubt, but only because I might assume the 5-axis sensor stabilisation also puts a heavy load on the battery. It does have the different shutter mechanism found on the A7, and of course, it does not have a 36 megapixel sensor to power.

– David Kilpatrick


Sony Alpha 3000 review by David Kilpatrick

SONY DSC


The A3000 is an E-mount camera which looks like an SLR but takes all your E-mount lenses and has a pretty good 20 megapixel sensor. It even has a metal lens mount. So what has been saved? You can now (2018) find these five-year old bodies for as little as £100. The saving is mainly in the expensive EVF innards – it uses a tiny 0.2″ display and a high power eyepiece, more like a consumer compact with a token EVF.

There’s not much really, in a difference of just three tenths of an inch. There’s even less when the inch isn’t a proper inch, but the sort of inch used to express the size of sensors or display chips. Except, that is, when the difference is between 0.5 inch and 0.2 inch and you’re comparing the electronic viewfinder of cameras like the A6000, NEX-6 or Alpha 77 with the EVF found in the entry-level Alpha 3000 (above and below, from both sides).

SONY DSC


Here’s our 2013 review:

I’ve had the Alpha 3000 (ILCE-3000, Sony model reference number) now for a few weeks (writing in 2013), and used it as much as my eyesight and patience would permit, given a wide choice of other cameras to use instead during the same period. I can now say without fear of being shot down in flames that it has the most inadequate electronic viewfinder I can remember using, including finders on various bridge cameras of the distant past.

The viewfinder of the vintage Konica Minolta Dimage A2 used a 0.44 inch 922,000 pixel display chip with a generous eyepiece size and accommodation latitude. That is, anyone able to focus their eyes comfortably between 1m and 3m, with or without specs, would rarely need to touch the dioptre control. The Alpha 55 used an 0.46 inch and the Alpha 77 (and accessory EVFs) 0.5 inch.

SONY DSC

The A3000 eyepiece has a hard plastic surround and small, only slightly recessed ocular. The accessory shoe is over the eyepiece unit not over the camera body, and the eyepiece assembly sticks out well clear of the screen.

The Sony A3000’s EVF has 201,600 pixels, not even equal to one-quarter of the 2004 Dimage A2 bridge camera’s display. Because it is such a small chip – a mere 2.88 x 2.15mm which compares to a match-head or a grain of rice – the viewfinder eyepiece has to be a low powered microscope. Like any cheap microscope, it only looks sharp if your eye is precisely centered and the slightest nudge to the focus (dioptre) blurs the image. I found that the click-stops of the dioptre control on the A3000 were so crude it was possible to have a sharp image between them, yet uncomfortably unsharp when set to the clicked position either side. I can’t put a graphic of the actual size of the display chip here, because different screen resolutions would change its size.

To make it worse, the quality of the ocular lens is very poor, with distortion and smeary blurring together with considerable flare from the brightly illuminated display chip; it does not have the level of multicoating or internal light baffles to present a crisp clear view. Since the main selling point of the A3000 over any comparable camera is that it has a built-in EVF, the extremely ‘stretched’ design parameters of this EVF will cost it sales in actual stores where it can be tried out.

SONY DSC

The A3000 kit box. This unit is made for more than one country’s market.

SONY DSC

Inside there’s no software CD, and that super fat looking manual is actually a minimal introduction to the camera printed in 12 languages. It is the Rosetta Stone for a future alien civilisation discovering the remains of Earth!

SONY DSC

The bonus for buying a multi-zone package is that you get stubby cable UK and European mains leads. There is no battery charger, instead you get a 5v USB transformer (as with the RX100 and RX1 models) and a USB cable to charge the battery in-camera. The neckstrap is Sony’s standard chafing and scratching type.

Children, young women and most people under 40 in bright weather will find they can accommodate just enough to use the finder comfortably, though the vague smudge which represents the scene is only to be considered as a composition guide. If you are male, over 40, have typical Western rather than Japanese eyesight age-related changes and try the camera out in a dimly-lit environment you’ll hand it back to the salesman and buy something else which is easy to view through and shows a clear sharp image.

That said, the entire camera and its 18-55mm SEL black metal skinned E-mount lens costs a bit less than the accessory EVF for the RX1/100II. And you read that right, this is an Alpha (so are all NEX cameras, as anyone able to see the Greek letter on them will realise) but it’s not an Alpha A-mount. And though it looks like a DSLR or a DSLT, it is neither.

Thick skinned

The A3000 is nothing more than a rather appealing sensor upgrade to the NEX range, accidentally fitted into a NEX-3 body, dressed in a hollow plastic sumo suit. In Spain you can see parades with impressive giants, twice life size, concealing a very strong young man who can make them dance. That’s rather what the A3000 is like.

SONY DSC

On an iMac 27″ screen you will see the NEX-5n and A3000 precisely life size. The front face of the mounts has been aligned.

My photograph doesn’t just show the relative sizes of the 5-series NEX body and the A3000 together. I have positioned the front face of the lens mounts to coincide. This enables you to see how much space is wasted BEHIND the sensor in the A3000. There should be no cooling problems for extended video shooting with so much air circulation! The A3000 has an focal plane index mark to show where the sensor actually sits inside the body (hard to see – right hand end above the strap fitting) but it’s ahead of the middle of the 38mm thick body, as the mount to sensor distance is 18mm leaving 20mm behind it.

SONY DSC

The whole body, though it can claim to be small by SLR standards and therefore get a ‘smallest lightest’ accolade, is just a big plastic skin inside which the intestines of a much smaller NEX have been concealed. You get the same 3-inch rear screen, though without any kind of articulation or touch function and only 230,000 pixels like much earlier generation cameras.

SONY DSC

You get a genuine metal lens bayonet mount not a cheap plastic version like the A-mount Alpha 58, presumably because the entire NEX system has always been of much higher overall precision than the A-mount range (just as the 1990s Vectis APS cameras were built to finer tolerances).

SONY DSC

You also get a metal tripod bush, though this is in an odd position for panorama fans, located close to the focal plane but well centered on the lens axis; a really well-shaped right hand grip taking advantage of the larger body size.

SONY DSC

It uses NEX-3 style controls lacking any front or rear wheels and just using the back mounted dial-rocker and unmarked soft-function buttons.

SONY DSC

There is a super-simple interface on the left end of the camera with a single SD/MSPro card slot and a versatile USB connector which is remote release compatible.

SONY DSC

The big bonus is on the camera’s fake prism top (which does have a GN4 flash, unable to control wireless flash, but giving excellent exposure and coverage with the 18-55mm). Here you find the Sony Multi Function Accessory Shoe, reassuringly metal and hiding an array of contacts under its forward edge. The A3000 has no HDMI port, no microphone input despite pretty good built-in stereo mics, no remote release socket, no wifi, no GPS, no wireless flash, no studio flash sync socket. It can or will have all of these through the Multi Function shoe. I have not been able to check whether it can also support one of the superior EVFs which would fit (I do know that the Alpha 99, for example, does not support an RX1 EVF mounted in its similar shoe). Perhaps Sony’s expectation is to sell barrowloads of these extremely cheap (£299/$399) entry level interchangeable lens cameras and see the new owners buy two or three lenses, flash, microphones and more.

It’s about time they actually launched the GPS module which this shoe is contact-pinned to accept.

See current price of A3000 kit at B&H

High resolution

Against all the minimal feature set and basic menu-driven user interface must be set one of the best sensors around, the 20 megapixel APS-C seen earlier in the Alpha 58. It is not a stunning sensor, in that some noise can be seen even at minimum ISO, but that may be because it’s got a very weak AA filter (helps with contrast detect focusing) and decent colour discrimination. Applying just a little raw conversion NR keeps the images clean up to 1600 and allows usable (professional, on-line library etc) ISO 3200. It can go beyond this right up to 16,000 but if you need this sensitivity, you’ll find the EVF so noisy and dark it’s hard to see anything at all.

jasper-55mm-5p6-iso800-flash

At ISO 800 (click these sample images for the full size file) you can see the general focus accuracy and sharpness of the 18-55mm used wide open, f/5.6 at 55mm, and also the quality of the flash for shots like this.

iso12800-incamerajpg

This is an ISO 12,800 in-camera JPEG at default settings.

iso12800-adobecamraw

This is the same shot carefully processed using Adobe Camera Raw Photoshop CC.

iso100-noSharpnoNR-noadj

Here’s a shot at f/8 and 18mm, at ISO 100 (minimum) processed without any NR or sharpening from raw. The sky blue does show some noise even at this low setting. The sharpness of the focused zone (to the left side) is excellent.

iso3200-adobecameraraw

Inside the Castle Restaurant, Edinburgh, the light is natural window-light, looking good but fairly low. This is 1/30th at f/9 with ISO 3200, processed from raw with some sharpening and some NR. I’d say nice colour and tones, a little soft because of limited depth of field, but sharp where it can be expected to be.

iso3200-NRinPS-reduced

This one is also ISO 3200, but it’s been put through Photoshop CC Noise Reduction filter (NIK Dfine 2.0 looked superficially better but created artificial looking tone breaks) and then downsized to 3600 x 2400 pixels.

There is no phase detect focus on this sensor, and the only focus method is contrast detection, as on earlier NEX models. It carries this out quickly and extremely accurately. Anyone used to the vague calibration of traditional DSLRs will be amazed by the lens quality the A3000 can reveal just through its pinpoint focus ability. No doubt this is helped by the rigid mounting of the sensor, which has no SteadyShot stabilisation and no vibration to clean off dust. The only self-cleaning is an anti static cover glass. A rigidly mounted sensor requires none of the complex carriage supports and adjustments found in Alpha DSLRs and DSLTs right from the Konica Minolta Dynax 7D onwards. It is probably more accurately parallel to the lens mount than an Alpha 900 or 99, let alone any of the lesser models.

Since the camera has an electronic first curtain focal plane shutter speeded 30 seconds to 1/4,000th and full PASM controls (with a little difficulty) with fully auto mode, scene modes and respectable plus-minus override and bracketing/HDR functions there is nothing an Alpha 99 or 77, NEX-7 or any other high end model can do to exceed its abilities except in some cases achieve a 1/8,000th top speed and shoot burst sequences faster and longer.

iso100cropnoadjustments

Contrast and dynamic range from raw as exposed without any adjustment in raw processing.

iso100cropadjustedfromraw

With adjustments for black, highlights, shadows, exposure the sensor shows that it has recorded plenty of detail in all zones.

Used for single exposures, it’s just as much a professional tool as a Nikon D4 even though it might not last a week in the hands of a pressman. For £299 perhaps that pressman might consider buying a couple of these just to get into the next urban war zone street demonstration, or to cover a Spanish tomato fight. The pictures will probably be just as good and if the camera gets kicked into touch, the light plastic half empty body skin could well survive better than a crackable alloy jam-packed top model NEX.

Without accurate focusing and exposure, the 20 megapixel sensor would be of little value. Since both focus and exposure are read directly from the sensor, they are about as accurate as you can get. The raw files also show a very good dynamic range and as expected it’s just a little better in ISO performance and DR than the Alpha 58, because there is no SLT mirror in the way.

User set-up

Again, despite being an entry-level camera probably designed for a huge Chinese and Indian potential market but sold worldwide to ensure it’s taken seriously, the A3000 has vital functions which Sony could have omitted in a purely consumer model.

It has a setting for shutter release without lens, which makes it suitable for use with the vast range adaptors and third party lenses for the E-mount (almost every lens ever made for any format larger than half-frame, whether rangefinder or SLR). Will A3000 buyers want to spend as much again on Novoflex, Kipon or Metabones adaptors and legacy lenses? Maybe not, but they can, and they will work well on this body.

It has a ‘Setting Effect Off’ option – that is for the LCD screen and the EVF, disabling the accurate simulation of exposure/contrast/colour, and permitting use with modelling lights and studio flash. It’s got AF Calibration, usable with the LA-EA2 phase detect Alpha lens adaptor, and the contrast-detect AF is compatible with many SSM and SAM focus motor lenses used on the LA-EA1.

It has focus peaking for manual focus, with magnification, but the low resolution of both the EVF and the rear screen render this less functional than it is in some other models.

A criticism has been made of a very faint click generated, apparently through the audio speaker, when the shutter is pressed. I thought this was a mechanical or electrical relay click connected to the operation of the E-mount aperture, but someone has determined that if the circuit to the speaker is cut (beep off does not work) the click disappears.

Actually, the click indicates the moment of capture for brief exposures and the start of exposure for longer ones (like 1/15th). The first shutter curtain on this camera makes no noise, so you would press the shutter and hear nothing at all. Even ‘silent’ cameras like the RX1 and RX100 do make some noise from leaf shutters. This click is similar in volume or less.

To me this indicates proper concern for the user in a camera where there may be no image displayed on the rear screen and the eye may be away from the viewfinder. You can tell when the exposure is made because the finder blacks out, but if you are not studying the finder, you would have no idea. The shutter button does not have a very obvious point of resistance after first pressure for focusing and you do not have to jab it down. Very gentle pressure will take the shot.

Electronic first curtain shutters are slightly confusing because all the mechanical shutter sound you hear happens AFTER the shot is taken. It is valuable to have this tiny audible clue, which no subject is likely to hear, that you have timed the shot as intended.

In use

The practical side of the A3000 includes a weight so minimal (281g body only) you can take it on a Thomson package deal flight and still carry your wallet and toothbrush as well. The bulk means you are unlikely to mistake it for your iPhone, and the shape means that some people will take your seriously as a photographer while others who would have ignored a NEX will shy away or physically assault you. However, if you hold it out and use the rear screen to compose, no-one will do either as they will assume you are a beginner and ignore you.

To do this, you must press a button on the top. The camera has no eye sensors (it does not even have a rubber eyepiece surround and its 21mm eyepoint just helps to avoid the regularly clattering on spectacle lenses against hard plastic). This means that you can lift the camera to do a rear screen frame-up and the screen is, of course, dead. You get used to it.

SONY DSC

The mode dial appears to be metallic and has raised markings. Note the Finder/LCD manual switching button and the safe position of the Movie button away from accidental pressure (it can also be disabled completely).

The camera lacks any kind of finger or thumb wheel so the adjustments are all made after the fashion of the most basic NEX (3 or 5 series models). This is only a bit of a nuisance when setting shutter speed and aperture manually. It does have a lockout for the movie button, a lesson learned from the notoriously free triggering of video shooting by the badly placed red button on countless previous Sony models. The button is actually placed where you wouldn’t hit it by mistake anyway – belt and braces.

SONY DSC

The 3 inch rear screen seems to have a very good quality finish – a better acrylic, or might it even be glass? Mine seems to be remaining unscratched to the same degree as Gorilla Glass protectors do.

The EVF is only just acceptable in bright sunshine, when it is also most useful as the rear screen may become unusable. It does not really show the tones of the scene (take a shot and play it back and the difference is obvious) and it shows very little detail. You can make out all the larger shapes in a composition. In some ways it probably encourages good composition. You can’t really tell if the focus is sharp but green confirmation rectangles or a wide zone will activate, with beep if requested, and the shutter release won’t operate until focus is OK. It has optional grid line display and 25 focus points so the little display can get pretty busy.

I have no interest in medium rate burst sequences personally as there’s hardly any action or subject where I do not prefer to time individual shots. A modest 2.5fps is no different to 3.5fps or even 5fps or 1.5fps for me. Really fast stuff like 8 or 10fps or Nikon’s incredible 60fps on the 1 V2 and AW1 has some appeal as this does give you a chance of optimum timing for sports and general action. The A3000 doesn’t. OK, photograph your toddler stumbling towards the camera, just don’t try to advertise the kid on Facebook. Try eBay instead, it’s a far surer way to get rid of them before they become too much trouble.

The worst experience I’ve had with the A3000 has been EVF use in extremely dim indoor conditions, with or without flash, regardless of ISO set and lens used. The rear screen performs much better so it is not just a matter of the sensor’s live view feed. However, in typical well-lit interiors its only failing is that Auto White Balance doesn’t seem to work even if Setting Effect is enabled – it will look brighter than an optical finder, and reasonably clean and clear, but often show a strong colour cast which is not present in the final shot.

I’ve shot a few video clips with acoustic performers and found the sound to be good but very prone to auto gain ducking and boosting. To make decent videos with sound, you have to buy the shoe fitting accessory microphone or audio preamp unit. This is no great surprise as to date only the Alpha 99 has the right functions to control levels and use a conventional plug-in condensor mic directly.

And back to those small differences

I started out by observing the miniscule size of the EVF display chip. I’m going to end with something unexpected. Snapsort.com’s camera comparer states that the A3000 has a larger than normal APS-C sensor, 25.1 x 16.7mm instead of the normal 23.5 x 15.6mm. If this was the case, the camera would gain a huge bonus point, as 1.6mm in 23.5mm would ‘turn’ your Sigma 8-16mm zoom into 7.5mm-15mm.

But the handbook clearly states the A3000 actually has a smaller than normal sensor, 23.2 x 15.4mm. The Sony website says that it has a 23.5 x 15.6mm sensor. Amazon incorrectly lists the size of the original APS-C film format.

The handbook also claims that the EVF is 0.7X when Snapsort comparison specifications gives 0.49X – without knowing where this figure comes from, I can only confirm that the EVF is visually a fraction smaller than a typical 0.72X APS-C like the Alpha 580 (this is easily established by holding two cameras, one to the left and one to the right eye, and seeing how the finder windows compare). So don’t believe everything you read about the A3000. The 0.70X is true. The specs also show an extreme dioptre range (-4.0 to +3.5) for the eyepiece, which is necessary given the critical viewing conditions produced by such a high powered ocular and small display chip.

Actually the Snapsort comparator is very badly written, as it also claims a normal Sony Alpha body is 3.5 inches deep (it’s actually 2.55, 65mm mount to back, compared to the A3000’s 38mm) and that the A3000 is 4.7X smaller than an Alpha 57. This is based on measuring the A57 including prism and grip, and the A3000 on mount to back body thickness only. The A3000 is volumetrically 1.35X smaller including all external air space – the ‘box’ it can fit in – and in linear terms it’s only about 4mm less tall and 102mm long as opposed to 132mm. It’s small but there is a fair amount of bad measurement and worse measurement floating around the net.

SONY DSC

Don’t tell me stabilisation would not be a bonus even for the 16mm. If not, why did they make the 10-18m an OSS lens? The 16mm chrome lens looks rather odd on this body.

Snapsort also lists the lack of in-body stabilisation as an advantage compared to the Alpha 57 because apparently in-lens stabilisation gives ‘less risk of blur’. In my experience the two methods are equally effective and our many Alpha bodies offer the choice between using IBIS and lens IS. The A3000 with IBIS (SS) would have been a great companion for the 16mm, new 20mm f/2.8, Zeiss 24mm f/1.8, SEL 30mm Macro, SEL 35mm f/1.8 and the Zeiss TOUIT 12mm f/2.8 and 32mm f/1.8 – not to mention the Sigma 19mm f/2.8, 30mm f/2.8 and 60mm f/2.8. All these excellent lenses currently must survive with no stabilisation other than pixel-shift electronic processing for video work on some cameras.

The A3000 is very small, but the saving is mostly on width left to right, and on the thickness of the body disregarding the ‘prism’ overhang and the right hand grip. The grip extends nearly as far as any other Alpha, meaning that you actually get a much deeper inside surface so your fingers wrap right round. It gives the A3000 the most secure right hand grip of any E-mount camera I know, almost 30mm of sculptured rubber-skinned moulding. Like the rear of the body, this appears to be completely empty. It’s just a moulded grip with a few connections in the top for the shutter button and on-off switch. It does not even house the battery (NEX type) which sits well behind it.

The lens

The cheapest kit for the camera includes a black 18-55mm f/3.5-5.6 SEL OSS. Well, I might as well admit I sold the black 18-55mm which came with my original NEX-7 for £200. Previous 18-55mms were chrome, I bought a Tamron VC DiIII 18-200mm, and the black lenses were in high demand. Now, I get one again, but in with an A300 body and the brand new price was only £349 – one month later, cut to £299. So does that mean I really only paid £99 for this body?

I was not over-impressed by the performance of the 18-55mm on NEX-7. Now I find this latest 18-55mm seems much better. It is made in Thailand, not Japan or China, just like the camera body. Sony must have opened a new plant or recovered the factory which was swamped by two metres of floodwater a couple of years ago. Whatever the case, the Thai contractors (whose story started with the Nikon Pronea APS SLR) have a highly skilled workforce now with almost two decades of experience.

SONY DSC

The A3000 looks great with the 18-200mm, whether Sony or Tamron branded.

This lens is so good it compares with the Fujinon 16-50mm I was using recently, and Fuji’s lenses are generally a level above Sony in quality as well as cost. I have found the A3000 body to be a great companion for my 18-200mm as well. It just looks much better on this body, handles better with the right-hand grip, and focuses better than on my NEX-5n. The EVF with the VC stabilisation is better to use than any rear LCD screen when a lens can be extended to 200mm on this format.

The final dilemma

As you will gather, I have big problems with the very poor EVF of this camera. I don’t really have any issue with the relatively low resolution rear LCD. The only other thing which causes me any problems is that I’ve been using Olympus OM-D E-M5 for a while alongside my Sony kit, and I have come to value its in-body stabilisation. I felt able to buy a Sigma 60mm f/2.8 for the Olympus – this is a truly wonderful lens, equivalent to a 120mm on the MicroFourThirds format. I don’t feel able to buy one for the NEX as I know the combination of a 90mm equivalent lens and no stabilisation at all will result in poor sharpness from a super-sharp optic, in many of the conditions I like to use such a lens.

SONY DSC

Had Sony decided to put SteadyShot into this body, I think it would have made a great difference. The NEX mount market is just waiting for a stabilised-sensor body able to guarantee the best results from the hundreds of adapted lenses around (Olympus, of course, has a menu to let you enter the focal length of any adapted lens and thus ensure correct IS). But the price point would then have been missed and the precision of the assembly might have been compromised without even greater expense in manufacturing.

I have been using the OM-D more often; its 12-50mm standard zoom is a very good lens, I have a 45mm f/1.8 portrait lens and now the Sigma 60mm which is semi-macro with a great working distance for flowers and fungi. The 5-axis stabilisation works well. I have a drawer full of legacy lenses, adaptors and accessories for NEX but all of them are let down by the lack in sensor stabilisation. The only thing stopping me from ditching NEX and shifting to MicroFourThirds is the lack of a decent wide-angle within that system. I have access to 12mm (16mm+ converter) or 8mm (Sigma zoom with LA-EA1) but for the Olympus I really would need a 6mm lens and no such thing is made.

So, do I sell the A3000? I like to buy rather than beg and borrow cameras for test purposes. Borrowed cameras are OK when it’s not possible – there’s a Canon EOS 70D kit about to land for a couple of weeks – but bought cameras don’t half focus the keyboard fingers. It is easy to be too kind to a camera lent to you for a couple of weeks. It is not so easy to be kind to one you have paid for, unless you are dishonest and think that writing it up favourably will make a camera you don’t like easier to sell on!

Take the Nikon D600. We couldn’t lie about the showers of stuff deposited on the sensor by the shutter. We had bought a full kit. My reviews didn’t hestitate to mention the shutter issue. Nikon replaced the shutter in the camera under warranty and we immediately sold it, the buyer getting a considerable bargain (effectively, a 28-300mm Nikon lens, a GPS unit and a Sigma 17-35mm of proven performance thrown in free with a body that included a transferrable warranty). The buyer also knew who was selling it and could read the reviews. Now we see the Nikon D610 launched with an entirely new shutter mechanism, though Nikon has never once admitted the problem with the original D600. Reviewers and critics and technicians, 1, Nikon 0. Reviewer’s bank balance, -1.

My inclination is to keep this camera despite no GPS and a poor EVF. It’s so cheap that it is really only a swap for the NEX-3 kit I sold this year. I’ve written one paid review which writes off part of the cost of the camera (we make nothing from this website now unless visitors decide to subscribe to Cameracraft magazine which is not all that directly related). I can use it alongside my NEX-5n which is so much better with the 16mm f/2.8 – that lens just looks silly on the A3000. I can maybe even fit my optical finder to the 5n for the 16mm now. I have recently bought some extension tubes.

SONY DSC

The A3000 has all the contacts – but are they all wired?

If only the A3000 had a tilting rear screen…or the NEX-6 had the 20 megapixel sensor… or the NEX-7 had the new hot shoe… if any one of the them had on-board GPS like my A55, A77 and A99… if the GPS module for the new hot shoe existed…

What a mess! Sony does not offer choice. It offers buyers’ dilemmas and buyers’ remorse, as in ‘did I buy the right model?’ or ‘did I pick the wrong system?’. Sony is doing just the same with the Alpha A-mount system. You have to pick a sensor you trust over a viewfinder which is great or a format and lens kit change or controllable audio input or having GPS or missing your built-in flash. No way can you have it all in one body.

(below – my conclusion written in October – we now know of course what was launched, and also that there will be an A5000)

Sony must surely follow this up with an A5000, or whatever, adding a few missing refinements to the camera and making it a £499 kit. That is what I would really like. But for the moment, the results from this cheap entry-level ILC are so good I have not touched the NEX-5n or the Alpha 77 since it arrived. And that is maybe the last word.

Except for the full-frame NEX or the interchangeable lens RX1 or the NEX fitted with Olympus-derived 5-axis IBIS – or whatever mid-October brings.

(added below – a comment at the end of 2013)

The A3000 is now sold for as little as £220 including in the UK (£185 before tax) and for $300 US. It is also sold with incentive deals for the 55-210mm E OSS lens, an excellent telephoto option, in addition to the 18-55mm. Am I upset that my camera’s value has been reduced? Well, I often sell cameras I buy to review, eventually. This one I decided to keep. It’s got the best imaging quality of ALL my APS-C cameras and so far, the 20 megapixel sensor responsible for this has not appeared in anything else except the plastic-bayonet A58. It’s a remarkable bargain now and it’s almost being given away.

(added below – a comment in September 2018)

I’m struck by how Canon’s way of making the new EOS R full frame mirrorless system look rather DSLR-like resembles what Sony did in the A3000!

– David Kilpatrick

20/20 vision – Sony Alpha 58 review

In the last year two cameras have been through my hands and impressed more than any others with the quality of their sensors. Those cameras were as different as they could be – the full frame Canon EOS 6D, and the pocketable Sony Cyber-shot DSC RX100. They have one thing in common, 20 megapixel sensors.

Of course there is no connection; a 24 x 36mm Canon sensor and a 8.8 x 13mm Sony sensor are very different. But if you shoot at ISO 125 on both cameras, and process from raw with a normally exposed scene, you will be hard pressed to tell the results apart.

SONY DSC

So, when Sony – proving a giant-killer with the 1.0” format RX100 sensor – creates a budget DSLT model with an APS-C 20 megapixel sensor it would be reasonable to expect that this would outperform the RX100 and in the process prove superior to the 24 megapixel Alpha 77, 65 and NEX-7. It might even match the Alpha 99.

The Alpha 58 was announced at the end of February 2013, and some major websites had still not reviewed it by June. This is the first new Sony APS-C silicon for two years. It’s not found in any other body. Why the lack of urgent interest?

Perhaps, like me, the entry-level grade of the A58 has been responsible. It’s by far the worst Alpha body ever manufactured, and the first to have a plastic lens mount where machined metal is normally used. The whole physical feel of this Thai-made camera is inferior; it even has a slightly rough external texture which picks up handling marks the moment a store customer (or cynical on-line orderer intending to try, but return for a refund) so much as touches it.

SONY DSC
It has a relatively low-resolution, small rear screen (2.7 inches and 460,800 pixels) which is in the simplest and most restricted kind of up/down angle hinged mount. Against this economy, though, you need to balance a better OLED electronic viewfinder based on a one-inch 1,440,000 pixel display and a change to the new Sony Multi Function Accessory Shoe (without a protective cap, and without the adaptor for the Minolta/Sony Auto Lock shoe). It also uses the larger FM-500H battery common to all other current Alpha models, not the smaller FM-50H used by the NEX and also by some previous Alphas like the A55.

What is really new about the A58 is the price. I was not interested in the camera, though curious about the new sensor, because it was $600 US or £499 UK with the most basic lens , a new 18-5mm f/3.5-5.6 SAM II with quieter and improved internal focus motor (delivered, like Canon kit 18-55mms, without a lens hood). Then while helping a professional friend decide how to replace an A350 used for some unique underwater photography where the Quick Live View AF function has no equivalent in other makes, I looked into the A58.

SONY DSC
It was on sale, in Britain, including VAT and properly sourced from Sony, for under £350. The actual price of the kit was only £291 before added VAT sales tax. This was £100 cheaper than the lowest price of the RX100, less than any other DSLR on the market with anything like the same specification. Bear in mind what a replacement Sony battery costs (around £50) and what an 18-55mm fetches (officially more, but in practice around £100 new) and this body was coming in at about £150. That’s a point and shoot compact price.
So I bought one.

First impressions

SONY DSC

The packaging for the A58 cuts down on many things – recent Alphas have been festooned with stickers, this one has a single swingtag and a sticker on the rear LCD promoting connection to Sony’s webserver to obtain PlayMemories Home, the kiddy-friendly name for what is probably quite functional software, if you happen to use a Windows PC.

SONY DSC

When you have charged the battery and loaded it, the first time you turn on a similar message fills the rear screen. Everything works as you expect from an Alpha, though some mysterious glitch stepped the entered date back by two days. You can only set to complete minutes, not seconds. Some defaults are set to ‘on’ including Smile Shutter and Auto Object Framing, and for my use these were disabled and the recording mode set to shoot RAW+JPEG, sRGB.

SONY DSC

The supplied lens is a cheap product glitzed up by the addition of a metal microskin on the front bezel, behind the rotating rubber rimmed zoom and focus tube, 55mm filter thread. The SAM focus is quieter than the original version. The plastic-on-plastic mounting action is smooth enough, but when changing between the 30mm SAM macro (very noisy and jerky motor in comparison) engagement of the contact array was not always positive and the lens had to be twisted back and forth once with the lock pressed to enable AF.

SONY DSC

The A58 is set to use electronic first curtain and SteadyShot Inside sensor-based stabilisation, both switched via the main menus. The Function button, which can access most regularly used settings does not reach these directly (a second menu screen is involved, very easy to use). There are also direct access button-positions round the rear controller for the important Drive, Picture Effect and White Balance settings, and a dedicated ISO button close to the shutter release. These can be customised to a degree, like the stop-down/intelligent preview button on the camera front which can be changed to work as a focus magnifier.

SONY DSC

What’s initially surprising is that the shutter sound is noisier than many cameras with flipping mirrors. It’s not a pleasant sound either, mechanical in a clockwork-motor way. It all happens after the shot has been captured, as you can tell if you make a long exposure. Maybe the lightweight mostly plastic construction of the body, with its minimal metal skeleton, fails to damp the sound.

The viewfinder has the same contrast and dark detail failings as the A77, and in some ways the old A55 finder provides a more useful view. The rear screen is not very bright, and there is no auto brightness setting, just a 5-step manual control. In return, whether you use the LCD or the EVF makes on a tiny 10 shot difference to the 700 frames expected from one battery using the former. This stamina is double that of an EVF camera using the smaller battery type and restores a more than acceptable battery life per charge to Sony’s consumer entry level.

SONY DSC

What is excellent about the finder is the ocular. It has been designed to give extreme eye relief – 26.5mm from the eyepiece glass, 23mm from the rubber frame surround. This compares to 19mm/18mm for the same data on the A55 (eyepiece glass not well protected from dust and light ingress, but eye needs to be close) and 27mm/22mm for the A77 (very deeply recessed and shaded ocular, reasonable eye distance). Part of this is down to display module sizes: 1.0 inch for the A58, 1.2 inch for the A55, 1.3 inch for the A77. Matters are further confused by the A55 failing to use all its EVF for the image, so the eye also sees a large near-black surround except when using menus which then expand to fill it.

Overall, the EVF looks like a view which is A55 size but A77 quality, like using a cropped section of the A77/99 2.4 megapixel EVF module. Sony has made this much easier to use with spectacles, or with the camera held an inch away from your eye. So although it’s not the best finder ever, it may be one of the best choices for anyone who has trouble with eyepoint. I found the EVF very blue at its neutral point, and set two notches of warming up to match the eye’s view.

SONY DSC

The controls are no different from any other Alpha, they don’t feel rough or weak, and every button push got a response as expected.

SONY DSC

The cover for the single dual purpose SD/MSDuoPro card slot is not a tight seal, and does not need firm action to open. The synthetic rubber single seal door over the microphone jack (no manual level control), Micro USB matching the RX100, and Micro HDMI ports is a good flush fit. There is also a Minolta/Sony unique DC in socket with similar cover.

SONY DSC

What’s missing is the old Minolta and later on Sony remote control socket. Instead there’s a pretty clunky wired remote which works via the micro USB port. It looks like a version of a Chinese generic. This connection offers the only way to get wireless remote control, with a suitable device, as the camera lacks the IR receiver and has no Drive Mode for it.

SONY DSC

The body shape in the hand is just a little more cramped than the A55, far more so than the A580, both cameras we have and both ‘replaced’ in the Alpha line up by this one model. I’d say it was less of a good fit to my hand than the classic Minolta Dimage series bridge cameras, or the Nikon 1 V2. Both of these were around to compare directly.

The critical bit

Then after getting acquainted with the camera, comes the question of the sensor performance. Here, the viewfinder gave the first clue that unlike the ‘sweet sixteen’ CMOS this 20MP newcomer was not going to move any goalposts. In domestic lighting, the level of noise in the EVF is higher than the old A55 and comparable to the A77.

However, I chose to compare the A58 with the RX100, because of the great advances made in the RX100’s very small 2.7X sensor. The results show an interesting divergence from minimum (100 for A58, 125 native for RX100) ISO to maximum. There is almost no advantage to the A58 up to ISO 400. Both cameras, with similarly adjusted raw conversion, yield clean images and it’s not even easy to tell ISO 400 from 200 or 100. If you click the images below, you’ll access a full size original conversion from raw (ACR).

A58, ISO 100, full sun, shadow to highlight from raw

RX, ISO 100, deep shadow to full sun on white, from raw

A58, ISO 400, full sun on wide tone range, from raw

RX100, ISO 400, wide tone range in full sun, from raw

As you increase the speed, the 58 rapidly shows its advantage and by ISO 1600 has both a structure which looks finer in terms of granularity, and with far less chroma noise. Where a carefully processed ISO 800 from the RX100 might match a carelessly handled 800 from the Alpha, at 1600 it’s very difficult indeed to close the gap. By 6400 the RX100 is not really useful but the 58 can still deliver a fairly normal looking shot – it does begin to look like a desperate measure. Then you have 12,800 and the absolutely pointless 160,000 top setting which seems to be there for advertising purposes.

Taking into account differences in colour rendering, the advantage of the larger sensor is levelled if the RX100 file is reduced to 4500 x 3000 pixels and moderate chroma noise reduction applied. In relative terms, the small sensor is better, because it’s actually only a little over one quarter of the size of APS-C.

Compared to the 16 megapixel Sony sensor (NEX-5n, A55 and many later models as well as Pentax and Nikon variants) the 20 also fares pretty well. It has higher levels of luminance noise but minimal chroma noise. It’s not easy to reduce the luminance NR without softening detail, when using Adobe Camera Raw or Lightroom. It does not harm sharp detail much if left alone; if this sensor actually has an AA filter, it’s very weak.

Macbeth_ColorChecker_RGB

This a MacBeth ColorChecker rendered using the official sRGB values.

iso200colourchecker

This is an ISO 200 shot on the A58 with the greyscale white balanced to match the above, Iridient Raw Developer conversion using Iridient’s A58 profile. See later comments on colour and reds.

As for dynamic range, it falls off as the ISO in increased. At ISO 100 or 400 a typical high contrast sunlit scene is perfectly recorded, with only bright specular highlights clipping to 255-255-255. It can handle everything from shadows on dark areas to direct light on white. A few practical comparison shots show that the RX100 can do exactly the same things – indeed, precisely the same areas clip at the highlight end.

This simply indicates to me that Sony has matched the processes used in the two cameras against a common exposure and contrast standard. I’d have the rate the JPEG engine of the RX100 a little better than the Alpha, and images seem to need less work. Against the Alpha 99, the 58 gains some significant processing speed in raw converters as it’s producing 20 megapixel 12-bit files compared to 24 megapixel 14-bit.

Click this for the full size to see detail.

Compare this RX100 shot. It’s interesting.

A hidden benefit of the 20 megapixel sensor is that if you use Adobe Camera Raw, this program offers a range of preset optimised output sizes converted directly from raw, which can be previewed at 100% of their actual pixel size before conversion. All 24 megapixel cameras have this as their largest output size, all you can do is downsample. 20 megapixel cameras offer a 25 megapixel output option, as do 16 or 18 megapixel models. The RX100 has already proved to me that it can make a 25 megapixel image that’s hard to tell from a native A77/99 image. The same goes for the Alpha 58. It can be set to export to this larger size, and if you use a top grade lens and low ISO, the result will be better than a native 24 megapixel at higher ISOs with a medium-quality lens.

Overall, I find it hard to rate the new 20 megapixel sensor as better than either the classic 16 megapixel ‘sweet spot’ sensor or the maximum 24 megapixel APS-C, but it is as competent as either of these in its own right. I guess the truth is that at all these resolutions, superb image quality is possible.

Other aspects of performance

Since the A58 uses the 15-point, 3-cross AF sensor which has been proven ever since it first appeared in the A580 and A55 it has identical performance; fast, very accurate AF down to EV -1 (50mm f/1.4). The exposure metering is, again, the familiar 1200-zone Sony system and works down to -2EV.

The actual focusing mechanism works no better with SAM or SSM lenses than with screw drive. It’s not the best ‘old’ mechanism in there and it lacks fast/slow AF setting, but it’s fast for certain. In low light although AF will lock, it needs a good target. Throughout my use of the camera I found the focus the least accurate and consistent of any Alpha body I’ve used, leading me to question whether I had accidentally set the lens to MF, so many pictures were clearly focused on some other plane than the subject, nearly always a definite back focus. The AF module is officially the same as the A55, A580 and so on. I can’t help thinking it is the same design but perhaps, like the rest of the camera, built to a budget.

The A58 couldn’t really back focus this shot at f/8 but it took three shots to get one sharp.

Click the RX100 (f/5.6) example too, to see the real difference.

Switching between rear screen and EVF using the eye sensors, or if you have the rear screen off just turning on the EVF, is good on this camera. Its balance tends to prevent the eyepiece sitting against your chest, and thus avoids accidental activation, but it’s always brought the EVF into action by the time your eye is close enough to use the finder.

Regrettably the EVF and rear screen both lack the instantly visible high resolution needed to know whether your image is pin-sharp. Even the far superior finders and screens of the A77 and A99 do not give you the same awareness of this as an optical finder. The good news is that Focus Peaking can be turned on. This really isn’t sensitive or accurate enough unless you magnify the image, and much of the time, you simply don’t have time to do this.

So, the A58 is capable of pin-sharp images and you can be sure under the right conditions with the right technique that you won’t be short changed out the 20 megapixels you expected. But a lot of the time for everyday shooting it’s not very good at getting AF pin-sharp, and those same 20 megapixels do their best to show any error clearly.
In practical situations, ISO 400 is as noise-free as ISO 100 and gives you the chance to use a smaller aperture for more depth of field. The 18-55mm SAM II lens is not very sharp at 55mm wide open, and it proved optimistic to expect f/6.3 or f/7.2 to be much better. The old ‘one stop down for zooms’ rule works well enough. The 20 megapixel sensor shows signs of slightly softening at f/11 so the sweet spot for me has to be around f/9 or f/10.

The A58 has slightly warm tones overall and pinkish flesh colour

The RX100 on the same scene is more neutral or cool

You can click the images above for full size versions (same applies to all those shown in link frames like this).

As for colour, you’ll be happy if you have always like Canon DSLRs. not so happy if you were either a Sony (sunny!) or Minolta (full spectrum) sensor colour fan. This sensor shows every sign of having relatively weak RGB colour filters and a non-linear response, with underexposed shadows on higher ISOs in daylight tending towards magenta. It’s rather too easy to get putty-pink skin tones and a certain lack of subtelty in sky gradations, though blues and greens are not bad. Subjects like red flowers test the colour discrimination of the sensor to the limit.

Holyrood gardens

It’s truly intense – but is it realistic? Camera profiles for raw conversion may tame this.

Let’s just say that every other current Sony Alpha model, and many past ones, will yield more visible difference between close hues. This is what you might expect from the more densely populated 20 megapixel sensor but, as ever, I’m left wondering why the little RX100 seems able to yield better colour (whatever DxOMark.com may say – but they also put the low light ability of the RX100 way below its actual performance).

At present there are no camera profiles available when converting files using Adobe Camera Raw, and the Adobe Standard colour seems to handle reds from the A58 badly (this is why I refer to Canon – the reds look much the same as problem Canon reds of the past). I don’t believe that red paint, red clothes, red street signs and red flowers are all are one type of red and when clipping warning is turned on, almost all the reds clip.

Shutter and flash

The shutter of the A58 is able to synchronise short-duration fast triggered flash, such as a thyristor camera top gun, up to 1/250th on manual without any shutter curtain clipping; at 1/320th, a shadow intrudes slightly on the frame. This is a better performance than indicated in the specifications, but for studio flash (mains powered) I would recommend working at 1/125th and for Sony/Minolta dedicated flash at 1/160th.

The shutter itself does not operate or make any noise whatsoever until AFTER the picture is captured when you use ‘Electronic First Curtain ON’ setting. The capping shutter blind has a cycle (close and return) of approximately 230ms overall in single frame mode resetting the camera ready for the next shot, or 115ms for continuous shooting which fits in with 8 frames a second fastest (cropped) frame rate. If you use the mechanical first shutter curtain, this adds exactly 50ms or 1/20th of a second to your release lag, which is not as easy to measure but seems to be in the order of only 20ms (1/50th).

Overall, this makes the A58 one of the most hair-trigger responsive cameras you can possibly own for capturing action – or would if the AF were faster and more reliable. Pre-set focus, use manual exposure, and you can trigger exposures with this camera as fast as you can think – just like the A99.

With its built-in flash or dedicated Sony flash, there’s the usual small delay caused by preflash. You may think the shot is being delayed more, because the shutter operates after the exposure, and then as the finder returns to life you get about 1/30th of a second of ‘review’ of the shot taken even with the 2s or 5s (etc) image review disabled. This happens all the time with the camera, the first frame or two of the finder refresh is a fleeting glimpse of your captured shot, and it’s useful. With flash you may be viewing a dark scene, the finder itself is blacked out when your flash fires, but this sudden bright image looks almost like a delayed flash through the eyepiece. Of course it is not, this is just an impression.

The built-in pop up flash becomes a rather aggressive AF illuminator when flash is active and the camera has trouble finding enough light for an AF lock. You certainly do see the effect of this through the finder, a surprisingly long and bright burst of light. It must drain the battery fast.

Flash exposure, long a problem with Alphas, seems predictable. A pile of black camera bags produces a full exposure (histogram hitting the buffers at the right hand end) while a white paper document in the middle of the frame results in one stop under. No doubt users will find specific flashguns or situations which produce wildcard exposure. That’s why you should always enable DRO+ Automatic or something like level 3 when shooting with flash. This dynamic range contrast optimisation process can produce great flash pictures out of the camera but remember it only works well at lower ISO settings, do not go over 800 and expect DRO+ to keep you smooth noise-free image.

The A58 appears to allow DRO to be used at higher ISOs, which earlier cameras often lock out because of its effect on shadow noise. However, both the printed manual and the downloadable handbook contain many inaccuracies and ambiguities; even Sony’s specification for the camera on-line has problems, listing standard and magnified views in the finder instead of eyepiece glass and surround against the two eye-point figures.

Wireless flash operates in the usual way, with the pop-up flash acting as a commander once paired by first fitting the remote flash, turning on, selecting WL Flash mode, and removing the remote. This is now a 20-year old Minolta technology updated – something which took Canon fifteen years to catch up with, after which they progressed further. The Alpha wireless flash works but it’s frozen in time. At least, with the optional adaptor, you can use earlier Minolta and Sony flashguns of the HS(D) generation and later.

HS is the high speed burst mode (long duration resembling continuous light) and the A58 can use HS flash at all shutter speeds up to 1/4,000th. The A58 has a useful Slow Sync function which delivers and automatic dragged shutter setting according to the available light, and a Rear Curtain sync as well. The camera may, with the built-in flash, switch to a slow longer recycling time even if you load a fresh battery when shooting flash intensively. This is to prevent the camera (not the flash) from overheating.

Studio compatibility

One reason I obtained an A58 to look at was because Ian Cartwright, a friend of mine who shoots models and babies underwater, had obtained an Alpha 580 on my advice to replace an A350 only to find that this camera forces a strange blackout delay of almost half a second when using any dedicated flash. The A350’s otherwise similar Quick Live View does not have this peculiar firmware fault. I can confirm that the A58 fires in real time, and unlike either of the other two models, can be used with PocketWizard or an infrared trigger. That’s because the finder view can be switched to ‘Setting Effect OFF’ which defeats exposure simulation and gives you a bright view even in manual with setting like 1/125 and f/11 under dim modelling or ambient light. The A58 can be used in the studio as easily as the A99, because of its ISO hot shot compatibility and this feature.

Dried roses

For this studio shot I chose not to use flash, it was lit by my Interfit 3200 tungsten outfit (great for video) instead. The colour rendering matters little because the image is adjusted in processing to give this look.

As to whether you would ever want to use an EVF camera for studio work, that’s another matter. I have bought a replacement Alpha 900 after three months trying to use EVF for studio set-ups and temporarily reverting to my A700. It’s not just the quality of what you see when composing and adjusting your studio shot (stray hairs over a face or a clothing fibre landing on your still life are just not visible with EVF) it’s the need to have power saving permanently turned off to keep the screen or finder awake as you do all the lighting and reflectors, background and subject adjustments. Nothing is more annoying than having to half-press the shutter to wake up your camera every time you go back to check – and with the A58, the shutter release is so light it’s easy to take a shot instead of waking the finder view.

The A99 can be used tethered and plugged in to AC, with a USB cable to a remote capture Mac or PC, and a live feed to an HDTV monitor. Do that and the business of setting up and adjusting a studio shoot becomes far easier with live view. I just don’t do enough work of any kind to justify that, it’s quicker to keep using the old familiar glass prism. It looks as if the A58 can be used the same way, joining the A77 and A99 by having PC Remote capability and HDMI previewing, while the A900/850/700 are the only other choices in Alpha history able to use PC Remote.
This does open the door to using a netbook, for example, as an intervalometer timer or remote release. There is no App for iOS or Android but the PC Remote control panel is well designed to fit a smartphone. There is no Wifi in the camera (it has good compatibility with EyeFi cards, invoking special display icons).

Video

Due to the softness and lack of AF sensitivity of the 18-55mm SAM II lens, my couple of quick test videos in real situations were not stunning but also not too bad. The sound quality is reasonable without plugging in my Rode Video Mic, stabilisation of video is very good indeed, and by using the dedicated video setting I was able to set my own shutter and aperture. You can also lock out the movie button except when the mode dial is set to video, preventing accidental video clips.

If you want the camera for video, either the 18-135mm SAM lens or even better the 16-50mm f/2.8 SSM (quiet fast focus) will do much better than the 18-55mm. The A58 lacks the highest quality video encoding of the A77 and A99, but you can get the vital requirement of 25/30fps at 1080p, the second highest level found on other Alphas. The clip above is at best quality with the 18-55mm; it took some fairly extreme action (the car driving right towards the lens) to persuade the AF to bother to try to track, most of the time it was telling me, hey, that’s good enough, no need to refocus… or even focus to start with.

Special functions

Although the A58 has been trimmed down in some ways, other aspects have been improved, compared to past entry-level cameras. There is no wireless remote drive mode, and no 2sec self-timer, so unless you buy the unusual Micro USB wired release you have to use a 10sec timer for shake-free tripod work.

Bracketing is only three frames, but the range is now large – 0.3EV, 0.7EV, 1EV, 2EV or 3EV steps. HDR Auto can also use a 6EV span (±3EV). You can not control the auto ISO range, but it’s a reasonable 100-3200. If you shoot JPEG and choose multishot noise reduction, an auto 6400 may be selected, and some of the Scene modes may also enter this range. But if you shoot raw, you have to select ISOs from 4000 to 160,000 manually which makes them harder to get by mistake.

There are many picture effects, both single and multi-shot, in the A58. One of the more interesting is Rich Tone Black and White, which uses three shots to build a gradation resembling a traditional darkroom print.
The sensor does not appear to support sub-frames, or cropped raw files, in the same way the A99 or Nikon D600 can do. The maximum frame rate for continuous shooting is 5fps for full size raws, but the buffer is minimal and the best I could get was four frames in a burst before a major pause and intermittent resumption, never at 5fps. On raw you get click-click-click, off to make coffee, click, take a walk round the block, click, remember to turn the lights off before going to bed. It’s that bad. JPEG Fine, which delivers 4 frames at 5fps, then becomes intermittent and variable in capture speed but a little faster than raw.

To get anything better, you must convert the camera into a 5 megapixel 3X factor (2X crop of the 1.5X sensor) by setting it to T8 (Tele 8fps) continuous mode on the main control dial. This delivers about 8.1fps for 24 frames on a 95MB/s SanDisk card, then slows to capture around 5-6fps in a regular pattern of two frames at 8fps, hesitation, two more and so on. On a slower card, Transcend SDHC, I got 12 frames continuous and a slower more regular tail. Memory card speed is clearly critical for getting the best from the A58.

Since you can’t get a 5MB cropped raw, exactly how this mode functions is a bit of a mystery as JPEG images are produced via an intermediate raw file – that’s how things work. So inside the camera, 24 frames can be processed and cropped in 2 seconds – but it can’t even manage one second of unprocessed raws at 5fps. This indicates the processor is fast and the input buffer big enough, it’s the output buffer and card interface which causes the bottleneck. Card interfaces and drive assemblies are third party products normally bought in by the camera maker, while the main processor is their own (or a dedicated design based on a Fujitsu module or other OEM).

This camera is extremely low cost and I think this is simply one area where cost savings ended up reducing what could have been a great specifiction and performance.

Digital and Clear Image Zoom

The A58 has a Zoom button, like a Cyber-shot DSC RX100’s zoom control that goes beyond the mechanical range of the zoom. Since you can’t go beyond the zoom on the lens itself, you go to the tele extreme, press the zoom button and a bar appears on the displays. Up to 1.4X magnification, you get a cropped shot (JPEG only) but this crop fills the EVF/screen and is enlarged by interpolation to 20MP. Up to 2X, you get Clear Image Zoom which is profiled or custom interpolation, similar to software packages which can enlarge JPEGs better if they have a profile for the camera used. Up to 4X, the rest is ordinary Digital Zoom which means the resulting 20MP image has really been created from a 1.25MP area of the sensor, and it shows.

Fine JPEG, normal shot

Interpolated Zoom 1.4X. 18-55mm at 55mm.

Clear Image at 1.9X (all at f/8)

Digital zoom to 4X.

I made some tests with the 18-55mm and its vague focusing and overall modest quality lowered the bar for the digitally zoomed range. Then I tried with my extremely sharp Sigma 70mm macro. I think the 1.4X range is acceptable for all normal uses, the 2X range is almost acceptable, beyond this the softness overpowers any possible reason to want a 20MP output file. There is a mark on the zoom bar showing the change from resized and Clear Image (1.0-2X) to Digital Zoom (2.0-4.0X) but I was unable to get the zoom to fix on 2.0X, instead it insisted on using 1.9X or 2.1X but placed the 2.1X on the ‘safe’ side of the mark.

70mm macro, raw shot at f/10

Fine JPEG of same ISO 200 shot.

1.4X interpolated zoom.

2X Clear Image zoom

4X Digital Zoom. Still 20MP…

As expected, the A58 has Sony’s excellent sweep panorama mode, and just about every other Sony original technology around from face recognition and smile shutter through to auto framing (an intelligent crop which keeps a copy of your uncropped JPEG too) and AF object tracking. Its Intelligent Auto and Super Auto modes will serve the beginner and general family photographer well.

The A58 has sensor cleaning and does vibrate the sensor on shutdown, not on switch on; this is not listed in the specification, which just mentions the anti-static coating. Manual cleaning is possible and Sony make two notes of interest – they advise blower cleaning the back of the mirror before lowering it (so clean both this and the sensor in one step) and they say that you can not shoot with the mirror raised. My camera had no sensor spots on delivery.

Future expansion

The A58 shares with the NEX-6 and Cyber-shot DSC RX1 the new Multi Function Shoe, and some of the accessories for this shoe are futureware. All these cameras lack the GPS found in the A99. The Multi Function Shoe’s interface includes pins to connect a GPS device and record location data as you shoot.

alpha99-shoe

Despite my affection for the robust qualities of the little Alpha 55, the Alpha 58 does more and when armed with my 16-80mm CZ lens makes a good travel camera. For that, I want to have GPS. So of all the possible future accessories for the shoe, this is the one I hope Sony will produce soon. Other possible accessories are a Wifi remote shooting module (the interface could allow image preview remotely) and a PocketWizard or similar wireless flash trigger. The shoe interface might even enable uncompressed video streaming to external recording devices, or back up between the camera and an external SD card or USB stick. It can also feed an external larger video monitor or a mic/headphone module which might have auto gain over-ride for sound recording – or perhaps these functions may be combined one day in a video/audio adaptor.

These are the prospects which this one change in the Alpha system brings, yet there is no sign that Sony is rolling out MFAS accessories. It’s also true that each camera’s own MFAS may have missing pins, or differently assigned pins (that would be seriously bad planning). You can not, for example, use the EVF of the RX1 on the A99 shoe, though both cameras have 24 megapixel sensors and the same EVF display resolution. The camera does not recognise it.

SONY DSC

Made in Thailand – not a bad thing, and Thailand has a big camera industry with Nikon, Sony and others. But this does feel like the lowest cost, most pared-down offering ever in the Sony DSLR/SLT lineage.

Changing the market

It is a pity that a camera with a brand new sensor and many advanced features and functions should ever have been designed down to the lowest price-level by reducing the specification of far too many components, from the lens mount and body itself to the displays and the buffer and card interface.

Sony’s manual and general approach to the camera menus and built-in help indicate that it’s targeted at what Americans would call a ‘soccer mom’ market. Well, your own kids are always beautiful even if the rest of the internet community groans inwardly every time another snapshot of infant overfeeding is posted to support how wonderful dad’s new camera is. They are always polite and agree.

Same goes for this camera – for those who acquire it as a new addition to the family, it will be the best thing ever made. And in some ways they will be right, nothing else comes close for the money. Unlike the sprogs, the Alpha 58 has inherited many desirable genes but suffered from malnutrition during its gestation. It could have been a robust, capable semi-pro camera in the tradition of the A580, the last Sony Alpha to have an optical finder.
Perhaps the 20 megapixel sensor will appear in a higher level body. How about an A68? For me that would be close to home (look it up on a UK road map!).

– David Kilpatrick

Lensmate custom kit for RX100

Lensmate produce an ultra lightweight filter adapter for the Sony Cyber-shot RX100, as well as selling some related accessories. We ordered from them a filter adapter kit including the 49mm threaded filter ring ($32.95) and to this order added Richard Franiec’s beautiful CNC machined aluminium custom body grip ($34.95) and a JJC Polycarbonate screen protector ($5.95).

lensmateorder

The filter holder was the main purchase, but in the end least likely to be used – the grip, on the other hand (the right hand…) will be used for ever. Here’s the content of the filter package:

lensmatekitcontents

From the left: 49mm lens cap with retaining lanyard; white box for whole kit; thread for use if the adaptor needs to be removed, together with alcohol wipe for cleaning before fixing; the 49mm adaptor; the lens-mounted adaptor ring (with yellow tape); a circular template, used to position this perfectly. As an alternative or an extra, you can choose a 52mm filter ring.

lensmateattach

To do it perfectly the tape should actually be parallel to the camera body. It’s not that important but looks a little neater when fixed. The adhesive is uncovered on the back of the adaptor, it is placed in the centre of the positioning guide, and pressed home. To extend the lens and keep it firm, the camera is switched on, and the battery removed; this leaves the lens in this position. Only light pressure is needed. The yellow tape and the positioning ring are then removed.

lensmateattached

The marks visible on the lens were left by the alcohol wipe, and cleaned off afterwards with a lens cleaning wipe. In this shot, the 49mm filter ring is bayonet fitted into place (a little less than a half-turn). The fit is very positive and the action is light but firm. The whole item weighs such a small amount it adds no strain and can be left fitted permanently.

filters49mm

Here are two filters – a 49mm Minolta polariser and a 49mm No 1 Minolta close-up (not a 1 dioptre, but stronger, and a double element achromat with coating – one of the best close-up lenses you can still find around on the used market).

polfilterattached

The polariser is flared to allow wide-angle coverage. This makes it ideal for lenses like the NEX SEL 16mm f/2.8. But you can’t fit a lens cap of standard size (it widens out to accept a 57mm push-on, similar to a 55mm screw-in in size).

capstring

Lensmate provide a centre pinch fit lens cap with a retaining lanyard. It is not needed as the camera has its own lens cover shutter, but if you fit a filter, you may want to add the cap to protect the filter.

minhood

This is a Minolta lens hood for the old MC 45mm f/2 Rokkor. It’s very light and is ideal for the RX1 (we’ve sold a good few of these on eBay for exactly that purpose). There’s no great benefit on the RX100, as the lens flare this camera suffers from is rarely to do with stray light, nearly always with light sources within the frame.

The overall thickness of the adapter for filters is less than 3mm. It does not affect operation. Once fitted you forget it, and it becomes part of the camera, but it must also add some protection.

closeupno1min

Here is the closest at wide-angle using the Minolta CU lens.

closeuplongest

And this is at the longest focal length (where close focusing is most restricted with the RX100). More powerful close up lenses – this one is about 1.5 dioptre – will produce a more dramatic result.

In the photos above, you’ll see the body shape is rather enhanced. The workout to add this muscle is brief and easy.

plainrx100

Start with a cleaned RX100 body.

gripstick

Take the Franiec precision grip, and remove the two 3M permanent adhesive release papers.

grip1

Position on the camera and firmly press into place. It isn’t going to shift after you do this.

grip2

And that’s it. A great product, a perfect finish, and it really does make the RX100 much easier to hold securely. It also tends to position your thumb correctly on the back and your index finger over the shutter. It is perfectly designed and manufactured.

Finally, here is the JJC Polycarbonate (not Gorilla Glass) LCD screen protector.

jjcpolycarbonate

This is simple enough to fit and one fitted is invisible. The tab for the release paper didn’t work all that well and nor did the tab to remove the protective layer, but a bit of fingernail prising helped peel both off. The adhesive is only round the edge, and the protector can be removed easily.

The website for Lensmate products is: http://www.lensmateonline.com

1 2 3 4 8