Sharp vintage glass – and subject

Twenty years ago I was operating one of the first full service digital photo studios in the world. I had already published, back in 1986, the world’s first desktop published commercial periodicals and won the UK Printing Industries Research Association inaugural DTP Awards, in 1987, for this. We’d bought the first Apple laser printer in provincial Britain and when Letraset’s ReadySetGo layout package failed to produce usable output for our first such magazine, Aldus stepped in and provide a pre-release beta of PageMaker. In 48 hours, I had to re-create the entire magazine – and it worked.

From then on we progressed, through having the first separation-capable film imagesetting in Scotland to reproducing the first magazine cover from Kodak Photo-CD and soon after the first full colour page from a Kodak DCS camera. By the beginning of 1995 we had Photon, the first major photo-mag style website, in by the end of that year we had a Leaf Lumina based studio with Scandles lighting. There’s an article about this in our repository of past articles, https://cameracraft.online/2007/08/06/the-leaf-lumina-scanning-camera-1995/

That year, Shirley had planted an entire bed of flowers specifically for drying. They make good photographic subjects. The (now relocated) university college of St Margaret’s in Edinburgh asked me to give a lecture about the new technology – and so the Leaf Lumina (a scanner on a tripod with a  Micro Nikkor up front, and an Apple Mac Powerbook on the end of a SCSI-2 cable) went along with the fluorescent studio light heads and a tray of the dried flowers. We also took our Kodak dye-sub printer, which had made hundreds of prints alongside other printers during that year, when Shirley completed her M.Sc.Colour Science and created pre-ICC colour tables to reproduce fabric colours accurately. With this carload of gear, we were able to shoot and produce a print on the spot.

The picture remained on file – a 25MB TIFF, roughly 8 megapixels, but equal to 8 megapixels in the Sigma Foveon sense as every pixel was true RGB with no Bayer filter involved. The exposures took over a minute, limiting it to still life, but the quality was not exceeded until 12 megapixel Bayer cameras like the Sony A700 appeared. And a few months later, we were producing Paterson’s catalogues and price lists and needed a cover. One list covered black and white and colour chemicals, the former mostly from Paterson and the latter from Photo Technology. Photoshop offered an easy way to take the image, and divide it accordingly. So that’s what we proposed, and what was used for the cover.

Paterson1996-web

It was intended to show the gamut from plain monochrome through toning to colour and it did look very good in print, because relatively low overall contrast combined with high detail contrast is easily handled by litho.

Now, forward two decades, and I’m looking for subjects to test out the latest Elinchrom ELB400 portable li-ion powered two head flash kit. This has LED modelling lights over twice as bright as its predecessor and they now really show how the light is falling even when using light shapers. I wanted to show texture using my optical Mini Spot attachment, which works very well with these new heads and their cool-running LEDs.

On top of a wardrobe, in a basket, were the dried flowers. They are called everlasting and apart from gathering loads of dust, they are. The most difficult job was holding each flower against the nozzle of a handheld vacuum cleaner to remove 19 years of dust.

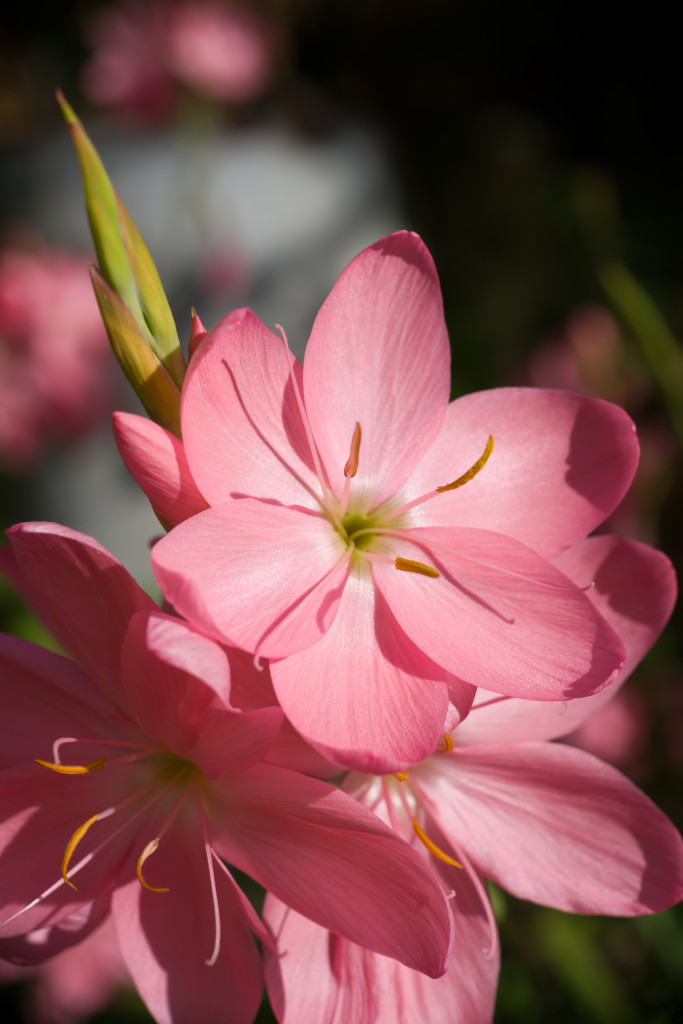
The first shot I took was with the Sony A7II, 24 megapixels, using my Pentax SMC Macro Takumar 50mm f/4. Like the flowers, this is also everlasting. It’s not yet 50 years old even though the lens design, a simple Tessar-type corrected for magnifications from 1:2 (50%) to 1:10, is well over 100 years old. It’s also a tolerable lens for general scenes, though the extreme resolution it achieves centrally only covers the full frame when you focus close. With Pentax’s original multicoating in every way a match for the latest Zeiss T* as found on new Sony Zeiss lenses, and a deeply recessed very small optical unit, it has a contrast and colour saturation you just don’t find from lenses using hybrid or moulded aspherics or many more air to glass surfaces.

This picture appears, fairly small, in my review of the ELB40 in f2 Freelance Photographer magazine July/August 2015. When editing it, I was struck by the extreme resolution. Within the planes of sharp focus, it was exceptional.

So, I decided I’d shoot a new shot, and improve on the use of the spotlight attachment on the Quadra head to cast the shadows and create a sunlight-like effect – and this time, use the A7R with its 36 megapixel resolution. Although the A7R has no AA filter and is sharper in theory, the larger pixel count calls for a smaller aperture to secure a little more depth of field for the larger viewing scale, and this when using any macro lens always risks diffraction limits on fine detail contrast. For example, at half life size a setting of f/12.5 (between f/11 and f/16) which I found desirable for best sharpness distribution gives an actual f-stop of c.f/19 and this does cause some sharpness loss. If the lens was extended on a tube to give 1:1, a setting of f/16 as nearly always needed for depth of field is really a true f/32 for diffraction calculations and light readings alike.

Fortunately, our brains are sensitive to perceived scale, and we ‘see’ close ups as sharper than distant subjects even when they are not. The A7R and the Pentax macro lens also combine to produce an extreme level of textural detail, the information our eyes and brains use to see 3D solidness, shape and form in a flat photograph. So in practice you can shoot macro and use whatever aperture the subject depth demands, without resorting to focus stacking techniques.

And here, anyway, is the result. You can click on this image and it will take you to a pBase hosted full size, JPEG compression level 12 version (this is over 24MB of image data, and it is not compressed like Facebook or indeed a WordPress image – though it’s still not ‘virgin’ data).

driedflowermacro-cleaned-srgb-web600

In a couple of days, I have another SMC Takumar of the same era arriving. It’s a 35mm f/3.5, which was the cheapest of the line back in 1970 when Shirley bought me my very first brand new, marque brand lens for Christmas! We were both only 18 and that represented an entire month of her basic salary working behind the counter at Dixons in Sheffield… helped by a staff discount. It was my first Super-Multi-Coated lens and I can remember still how the high contrast and bright colours could even be seen through the viewfinder – and how amazing the first box of slides looked, midwinter close-ups of fallen leaves rimmed by frost and frozen puddles.

These lenses have never lost the edge they had, if they have been looked after, but the truth is we never knew how good they really were. We can now focus them within a fraction of a millimetre. I’ll probably never compare the 50mm f/4 SMC Macro Takumar with the 55mm f/1.8 CZ (I’ve used it, but only for low light high ISO tests on the A7S) or the 35mm f/3.5 with the CZ 35mm f/2.8 because it’s unlikely I’ll ever buy the new lenses with their inflated prices and reliance, however marginal, on software correction to be ‘good’.

I know I have not written much about the A7R, or the A7II I’m using, or about any of the new lenses I can not manage to borrow from Sony and can’t afford to buy. I have an amazing set of lenses from 12mm to 500mm for full frame, including tilt-shift, wide aperture and mirror but just one single Sony FE lens for convenience (the 28-70mm FE kit lens). In contrast, my A6000 kit is all Sony plus the Samyang 12mm f/2 because it is just so good it had to have a place.

So, please do take a look at the full size file. The critical plane for focus crosses the smooth surfaces of the two poppy seed heads and it’s in this relatively low contrast zone that the quality of the lens shows up. Elsewhere in the image the defocused quality is very pleasant (there was no CA to correct and there’s no bad colour bokeh) and the plane of sharpness passes through a few other more interesting flower details.

Finally, a word for A7II users. If you use a manual macro lens, as I do, remember that when you program in the focal length for Steady Shot you should only enter the actual focal length for distant views. For my 1:2 macro Pentax, most often used in the range from quarter to half life size, I program in 70mm as the focal length because this represents the view angle. Using a macro at 1:1, you should enter double the focal length to get the correct Steady Shot compensation. Sony and Minolta macro lenses with the D chip (eight contacts) convey accurate extension information, so the auto Steady Shot works perfectly with them. But manual, or Canon lenses on adaptors which may or may or not pass the right information through, are best used with the Steady Shot focal length entered via the menu screen and adjusted to allow for the actual lens extension.

– David Kilpatrick

Check out B&H prices for all full frame lenses for the Sony FE (A7) system here

Check out B&H Secondhand Department for all ‘film camera’ manual and vintage lenses

Check out B&H Secondhand for Sony E-mount adaptors to allow you to fit your vintage/legacy lenses

Check out the huge list of new adaptors for almost every lens ever made!

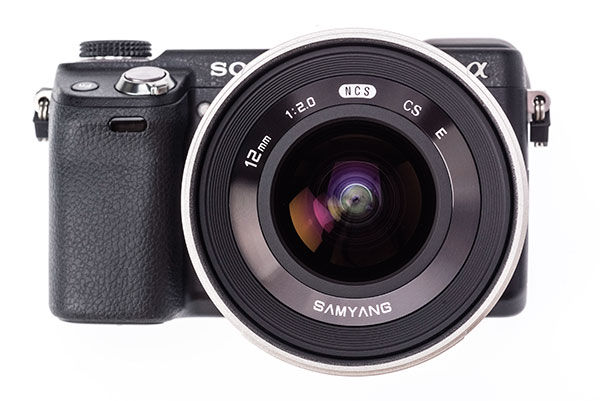
Samyang 12mm f/2 NCS CS lens

samyang12-front-web

Sometimes you find a chunk of glass which just works. One of the problems with lenses is that you can never have too many. They overlap, they duplicate each other, and yet they can be so different that you need every single one. The new Samyang 12mm f/2 for mirrorless APS-C systems is one of these. It’s the budget alternative the Carl Zeiss Touit Distagon 12mm f/2.8 T*, and so far everyone I’ve found who has used both lenses – including me – rates it as better optically. This isn’t what you expect from a lens with twice the maximum aperture at half the price.

samyangfromtop-web

I have good reasons for not owning a Touit 12mm. I already have a Sony 10-18mm f/4 OSS E, and rather like the Fujinon XR OIS 10-24mm f/4 this lens offers nearly perfect performance as a working ultra-wide zoom and adds the benefit of stabilisation for video or tripod-free interior shots.

The Sony appears to have very fine detail sharpness wide open, little sign of fall off in illumination or sharpness, and good geometry.

wideopen-archdig-fullweb

Click this image for a full size, f/2 available light shot taken in a covered archaelogical dig

However, the Samyang when used on the same Sony NEX-6 16 megapixel camera forced a reappraisal. It offers sharpness on a different level and manages to do so even at f/2, with corners far more detailed and clean than any lens with a 99° angle of view should manage.

samyangwithbag-web

It is equivalent to an 18mm on full frame, and this is around my favourite angle for an architectural, street and general lens. Where the 24mm angle is a common feature of consumer zooms and easy enough to use, lenses in the 17-21mm equivalent range produce a distinctive result but need careful composition and an understanding of perspective and lens geometric projection. Lenses like this separate the experienced user from the unskilled masses.

f16-deeplandscape-12mm-webfull

Stopping down to f/16 secures great depth of field (the Canarian cacti are not huge, bush sized and very close not tree size!) with just a hint of sharpness loss. Click image for a full 16 megapixel file

Weighing only 245g, it’s not a big lens though it has a generous 67mm filter thread round a much smaller front element which does not protrude. The bayonet lens hood is removable and reversible for storage, with a soft pouch supplied to hold everything. You can use circular filters without cut-off provided they are reasonably slim-line, and filter systems from 75mm rectangular upwards. Our sample was in a matt silver finish, with conventional black as an alternative. The focusing down to 20cm is very smooth, with a travel of 135°, and the aperture is click stopped gently but positively in half steps all the way to f/22. The mount is metal, as is the barrel skin, though plastic components are used internally. It is an advanced design with 14 elements in 10 groups using both low dispersion and compound aspheric glass, nano-coated with Samyang’s water and dirt resistant hard NCS multiple layers.

abbey12mmf11-1018mmhoriz-web

Above: Auto White Balance and auto exposure with the Sony 10-18mm at 12mm, on NEX-6

abbey12mmSamyangf11-uncorrhoriz-web


Above: AWB and AE with the Samyang 12mm set to f/11 like the Sony (darker, and much colder colour)

abbey12mmSamyang-corrected-web

Above: Samyang raw shot after colour correction to taste

Though this lens had to be manually focused and lacks any electronic connections, it rapidly proved to be a reliable companion. Auto exposure tended to be slightly under, and auto white balance was nearly always too cold. On the NEX-6 manual exposure and a fixed daylight or custom set white balance proved better than relying on auto setting.

abbey12mmSamyangf11-fullweb

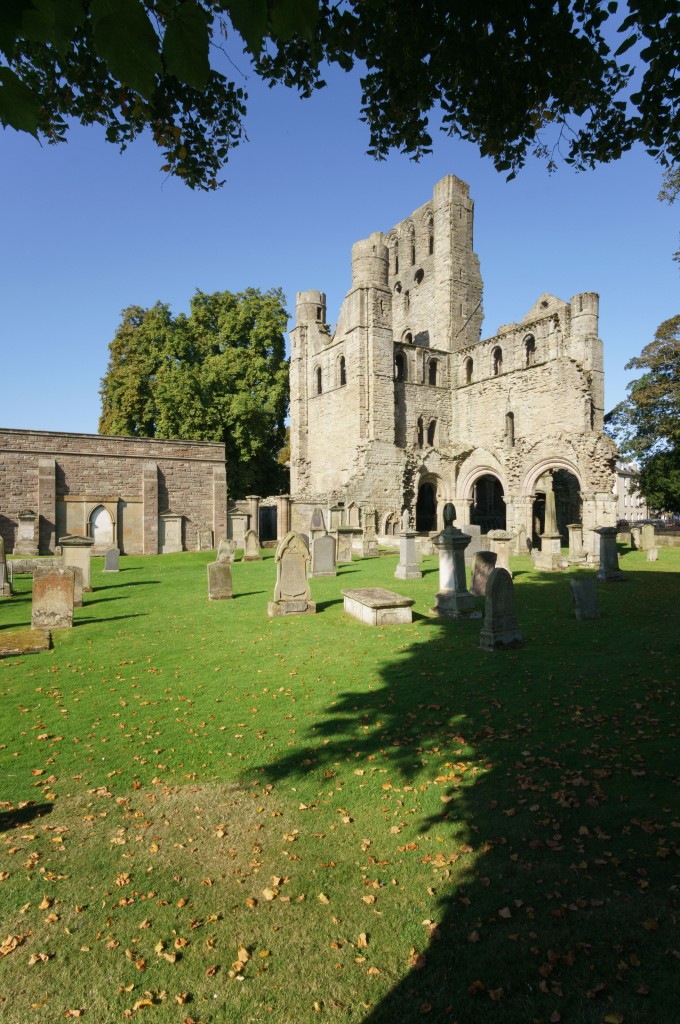
The results are the reward. For its aperture and angle, it defies the laws of trade-off. The geometry, even without creating a profile or applying the slight barrel correction sometimes needed, is so good that uncorrected raw conversions worked perfectly. The example above is a full frame, with no correction at all (you can click the image to open the full size file, though remember it has strong compression for storage and display here).

abbey12mm-1018OSSf11-web

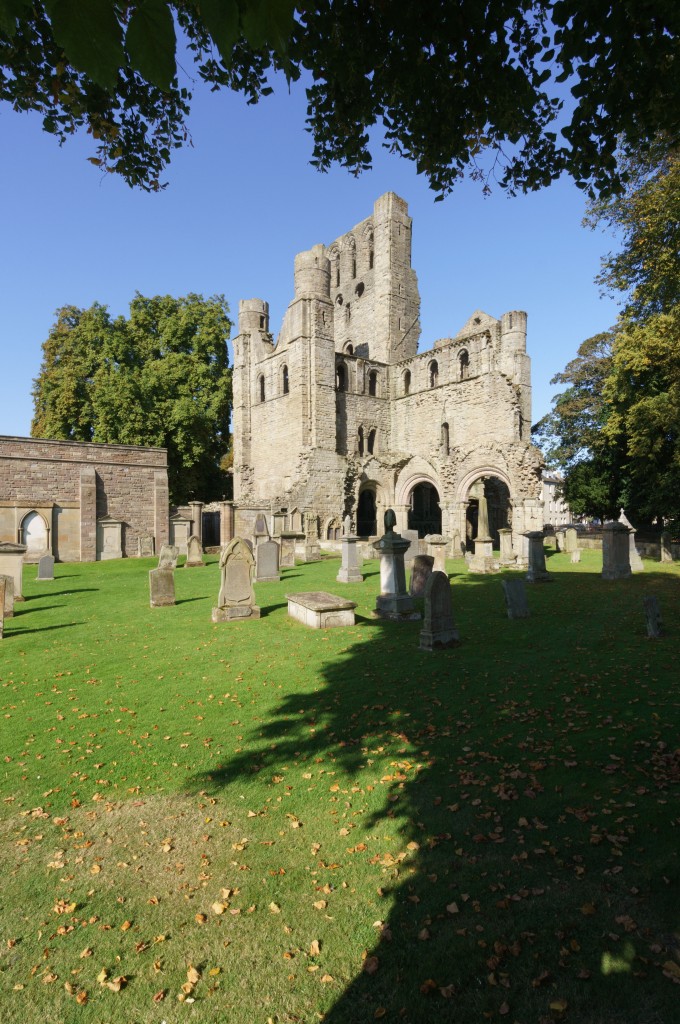
Here is the same view taken with the Sony 10-18mm, at 12mm, and at f/11, exactly the same compression

For some subjects, a two-pixel blue chromatic aberration correction removed a barely visible tendency to purple fringes, more likely to affect high contrast patterns than high contrast edges. The lens has such high resolution that moiré patterns appear from many subjects.

Compared to the Sony 16mm f/2.8 fitted with a 12mm ultra-wide converter – the original Sony solution from 2010 – it’s like moving from small to medium format.

melrosebridge-f11-fullweb

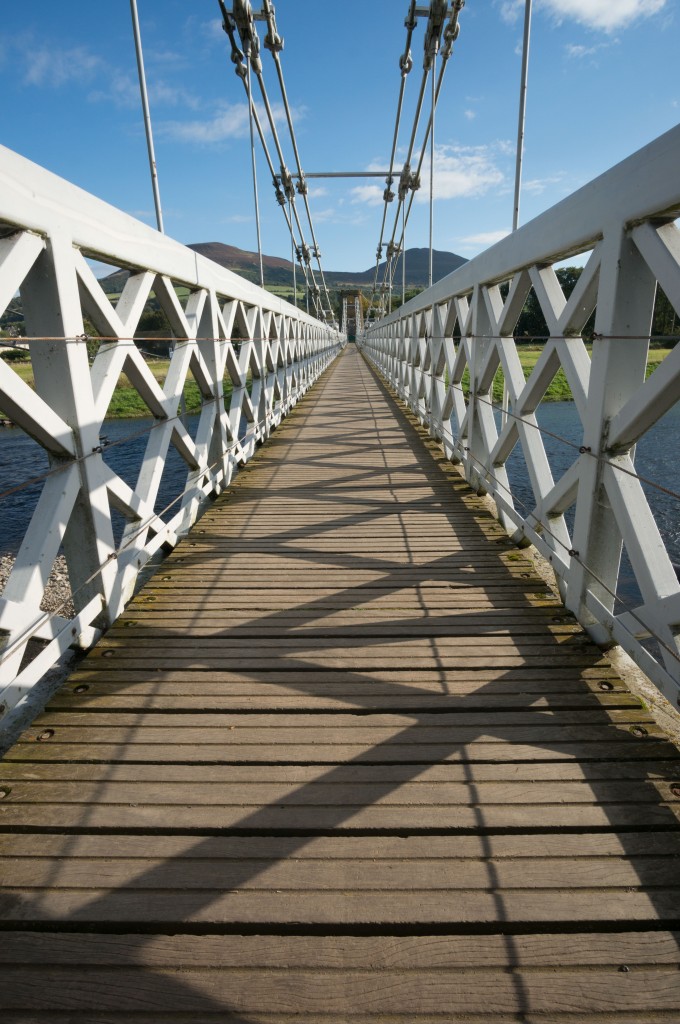
Here’s an example which shows the geometry of the lens pretty well (click for full size)

bridgeentry-web

And here’s the same historic suspensioon bridge, again at f/11 to get the necessary depth of field. But the sharpness is not destroyed and a 100% clip shows the spiders have been busy (compression almost loses the strands of the webs which are easily seen in the original file):

notice-detail100percent

It does not have enough circle of coverage in reserve to make it valuable on full frame, but a near-24mm square can be cropped on the A7 series.

This lens would be a dream to use if it incorporated a chip to convey EXIF data including the aperture. AF really doesn’t matter, after a few days I learned to preset the focus manually and only check the most critical wide-open subjects using magnified manual focus view. At under £300, it’s so tempting just to have it for the sheer sharpness right into the extreme corners and the straight-line rendering. Much though I like my £700 10-18mm it has had less use since the Samyang arrived – and that says it all. My main reason for sticking with the 10-18mm is its ability to work well on the A7R for 15mm shots, and its full recording of EXIF data along with full control from the body. Much though I like my boxful of manual lenses, after a year and more using them, I am missing the vital data – as going back a year to look at original files shows. Unless I made a special note at the time, I often have no idea what lens was used let alone what aperture. For these shots, of course, I noted the details.

This article original appeared in a slightly shorter form in f2 Freelance Photographer, our six times a year super-quality professional and enthusiast magazine, Nov/Dec 2014 issue published in early October 2014. In 2017, f2 was merged with Cameracraft and we now use the Cameracraft name. You can subscribe to this magazine, which supports my work here, at www.iconpublications.com

You can find the Rokinon (Samyang rebranded) at B&H for worldwide sales – //www.bhphotovideo.com or at Amazon (UK) – //amzn.to/2oySu1b
or in the UK, the Samyang at WEX Photographic (these links benefit Photoclubalpha if you buy there, without costing you anything)
– David Kilpatrick

The Fotodiox Tough E-Mount

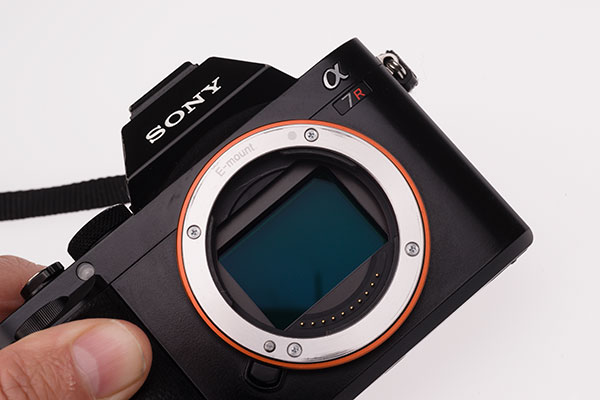
Machined from brass and chrome-plated, in the tradition of lens mounts from 50 years ago and not necessarily the best solution for precision or lifetime wear, Fotodiox’s TOUGH E-mount is a replacement body mount bayonet which you can fit to your existing A7R, A7, NEX-7, A6000 or any other metal-mount E-mount body in a few minutes. You need a clean well lit work table, a small engineer’s or large jeweller’s crosshead screwdriver, and a similar flathead screwdriver or old credit card.

The NEX/A bodies are fitted with a three-part lens mount. Here’s what a bonded, single piece, original Alpha lens mount looks like when removed from an old Minolta 7000 –

originalminoltaamount

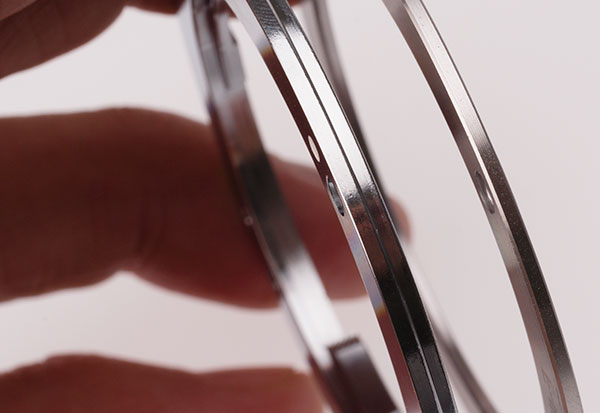
This mount is stainless steel, which would be prohibitively expensive for a small shop engineering replacement on the E-mount. It’s in two parts, a front surface and the inside with a bonded bayonet spring pressure action, a thin shim with bent ‘arms’ forming three pressure points to hold the lens tight to the mount.

From Fotodiox comes this neat box taking 10 days to the UK from USA –

fotodioxpackage

Since I also ordered a focusing Leica M to E adaptor, my overall value was marked as $80 and I had an £8 admin charge and a little over £7 in VAT to pay.

Inside, the TOUGH E-Mount is boxed and bagged without instructions. For these, you visit the Fotodiox site and watch a video:

http://www.fotodioxpro.com/tough-emount-from-fotodiox-pro-replacement-lens-mount-for-sony-nex-emount-camera.html

Here’s the rear face of the Fotodiox mount, which does not have any second layer of spring metal to grip the lens:

toughemount

However, as we will see, this component (fixed to the mount for the A-mount design) is a separate loose item which sits in the camera body mount recess on the E-mount, and performs exactly the same function. You could probably remove it and bond it to the new mount.

So, why replace the E-mount on a £1200+ camera body like the A7R, which has a magnesium body casting into which the lens mount is anchored by four screws? The reason given by Fotodiox is that an intermediate plastic moulding is used behind a simple unprofiled mount face, so two parts make up the overall thickness. The tensioning ring sits behind the plastic ring, forming a three-part sandwich to make up the mount. The front mount is a relatively soft, crudely CNC lathed alloy.

oneyearemount

Here’s my camera after 10 months of use. This camera has shown signs of light leaks, and has not been sent back for a fix. The mount flange is a completely flat item, relatively thin, and the leaks may be partly down to slight distortion of the front plane face, as shown by uneven wear from lens mounting.

emountwear-closeup

Here’s a detail. You can see the lathe circles on the mount face, and you can see where the metal has abraded and either collected plastic from a plastic lens mount (most likely my MEIKE extension tubes) or paint from a cheap adaptor (my Novoflex and Fotodiox adaptors don’t use paint, they are anodised).

The mount is very simple indeed. It can be removed from all the cameras without disturbing the electronic contacts or the lens release mechanism.

removingmount

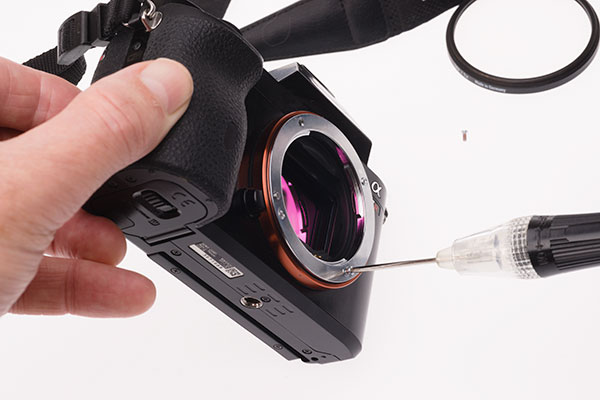
Fotodiox video shows the camera on its back and warns about dropped screws etc. I just prefer to unscrew each screw in turn with the camera held vertically on my table, so that if the screw drops it won’t go inside the camera. Care is taken not to allow the spring loaded lens changing pin to disassemble itself, but that’s really very easy.

toughtversusoriginal

One removed, you can compare the Sony ‘washer’ (which is really more or less is!) with the Fotodiox mount – a much thicker unit, stepped to fit the recess on the camera body. A point worth noting is that the original mount has no recesses at all to fit over the four threaded posts on the camera body. Its position is maintained by two pins (at 9 and 3 o’clock) which engage in two holes on the otherwise plain flat rear face of the mount. The Fotodiox mount not only engages with these pins, as it replaces the plastic secondary mount shown below, but also has holes into which the threaded posts fit. It is better proofed against rotation.

plasticnbayonet

You now see the plastic middle part of the sandwich. This is secured by a very thin double-sided tape in places. A flat blade screwdriver or a suitable cut piece of old credit card (or indeed a guitar pick!) pushed gently under the plastic at various point all round will free it. It lifts out easily. Unless you are amazingly clumsy you are not going to go anywhere near the sensor but if you have a clean 40.5mm filter or lens cap around, you can pop it in to cover the sensor safely. I used a 62mm filter to place over the whole mount when checking instructions and looking at the parts, as I don’t want to risk hairs and dust covering the upturned unit.

plasticremoved

Underneath the plastic component you’ll find the third part of the mount, the thin flexible stainless steel tensioning ring which acts to pull the lens tight against the front face of the mount. You may note that if your lenses ever begin to seem slack, it would be easy to re-tension this ring by a gentle bend to the three arms. The four screw holes are in metal posts mounted directly into the magnesium body. The plastic ring can be argued to have no effect on precision, as the original mount rests on these posts, leaving the plastic and the stainless tension ring more as a ‘lubricated’ assembly with a little ‘give’, affecting only the tightness of the lens to the body. The plastic has no sacrificial role, as it does in many lenses (Sigma, Tamron, Nikon, and Canon all use plastic to create weak points where the lens will break on hard impact rather than having it shear the body mount off the camera – not sure about Sony).

fittingnewmount

The final step is to place the new mount, aligned with its white dot and cut-outs and screw holes, in the only position it will fit. Please note that the TOUGH wording goes inside and is not shown on the camera front! Again, I don’t place the camera on its back, and prefer the control given by holding both the camera and the screwdriver (which if properly chosen will support the screw). No pressure is needed to locate the screws for a few turns. I rotated the camera so that the screw hole being worked on was always below the sensor. Finally, when tightening up each screw in turn to a firm fit, the camera was laid on its back and my 62mm filter was placed to cover the mount opening, held firmly. You can also just place a finger against the screwdriver on the ‘inside’ while tightening up, so that if for any reason it slips, you block it from entering camera.

mountfitted

Once fitted, there’s little more to say. It looks a touch classier than the cheaply machined soft metal Sony original, it is a snug and perfect fit, and lens mounting has a slightly more solid feel without resistance or any scraping sensation. Fotodiox may be taking the mickey by suggeting you give the old mount to the cat to play with, of course you should keep it carefully. While doing this I discovered that the original old Minolta SR bayonet shares the screwhole locations and almost perfectly matches the overall size of the E-mount. I could actually take a Minolta SR bayonet off the front of some old extension tubes and fit an E-mount in place. This would serve no purpose but it’s a fascinating hint at the pedigree of the new system – it has a three-flange bayonet so similar to the SR mount, introduced 52 years after Minolta’s SLR debut!

Everything worked perfectly as expected once fitted (see notes below). Cost – $39.95 plus shipping. I consider it a good upgrade.

Notes on infinity focus, fit, and light leak issues

While Sony native E mount lenses seem fine, some of my third party adaptors are not fitting well, and very short focal length lenses show that the infinity focus may be affected. If you use lenses 12mm to 20mm on adaptors, proceed with caution. I am not able to get the Kipon tilt shift adaptor to mount without a forceful twist, though a similar age Kipon shift-only adaptor is happy enough (just no longer able to hit infinity with my chosen 20mm lens).

Infinity collimation after tests and measurements – I’ve now checked infinity focus using stars. I’m just OK on all but one lens and adaptor combination, and all Sony E or FE lenses are fine, as they have loads of spare adjustment (no hard infinity stop – they will all focus way beyond infinity and can handle big differences in camera assembly accuracy). Same with LA-EA3 and LA-EA4 adaptors and Min/Sony A lenses, the worst case lenses hit infinity at exactly infinity, most focus just past.

Kipon Nikon Tilt-Shift – extremely tight fit, so tight it has to pulled off the camera physically. Here I’m thinking that some very gently polishing or ultra fine emery (the sort I use for polishing guitar frets) might ease the adaptor.

Novoflex Leica M adaptor – will not bayonet-lock with the new mount, can’t work out if the flanges are obstructing the full turn or the locking pin hole is slightly off position. Fotodiox helical M adaptor locks perfectly. All other adaptors fit and lock comfortably.

Checked my Kipon shift adaptor for Canon and it’s 21.34mm from rear to front flange, and the lens won’t focus on infinity. My plain cheap Canon FD adaptor is 21.16mm and the lens will hit infinity perfectly. On the original mount, the shift adaptor was just OK to infinity – not for stars, but for landscape. So maybe 0.1mm actual difference in front face register to sensor on the Fotodiox Tough mount, compared to the Sony original.

Light leak issue – a day later I had bright full sunshine and was able to position the camera with the mount getting direct sun, and give exposures of 30 seconds to 1 minute with the lens completely stopped down and blocked off, and the ISO set to 1600. The results proved that it’s not the camera mount assembly which has most effect –

40mmon2875mm

The pure black exposure above is from the 28-70mm kit zoom set to 40mm, at f/25, with the lens cap on.

40mmonLeicaadaptor

This result is from a Voigtlander 40mm f/1.4 mounted using a Novoflex Leica M adaptor, at f/22, with the lens cap on. Simply swapping the Voigtlander adaptor for a Fotodiox helical focusing Leica M adaptor, which has a far wider flange and double the ‘bearing surface’ on the mount and it also a much firmer overall fit, produced the same solid black as the 28-70mm. The 10-18mm also produced a solid black though it was clear that the lens cap lets in a bit of light at the spring clip positions.

To double check, I fitted a disc of Rosco Black Cinéfoil (totally lightproof heavy metal foil you can cut with scissors) into another mount so it sat behind the back of a 50mm lens. This was a Ukrainian shift mount and Zenitar lens. This mount also has a large, black anodised rear surface. No light was admitted. I found that most of my third party adaptors let in light, usually the small angled line/crescent top right, and so did the Sony LA-EA3 and 4. The Novoflex has me surprised and baffled as it let light in over a wider pattern, and it seems to be the best engineered adaptor I have, but the well for the bayonet locking pin is shallow and perhaps too precise as the pin does now not engage (you can feel it just begin to hit the lock position).

(don’t read beyond this point if you don’t like seeing measurements…)

This adaptor works perfectly on other NEX/E bodies and worked perfectly before changing the mount. Relaxing and re-tightening the mount fitting screws, to be doubly sure of correct seating, did not solve the problem. The pin recess in the Novoflex adaptor is 2.30mm wide, and in all the other adaptors measured and also on Sony lenses, from 2.36mm to 2.5mm. The slight wiggle present on Sony lenses when fitted seems to be down to approx 0.07mm tolerance allowed for the locking pin to engage, as this is the part of the mount which limits or fixed the position of the mounted lens. Lenses and adaptors tested, when mounted with the locking pin depressed, can move around 0.5 to 1mm beyond the optimal mounting position.

It looks as if the locking pin mechanism is one area identified as a source of light leaks, and that if the pin is not allowed to engage fully (recess too shallow or not accepting the pin) more light will be admitted. All my manual adaptors varied in the depth and exact design of the locking pin well – 1.1mm deep on Kipon, 0.69mm deep on Fotodiox, 1.23mm on Novoflex, 1.1mm on Sony G 10-18mm, 1.18mm on Sony 16-50mm PZ. The 28-70mm which had perfect light sealing also has an unusual locking pin hole, almost perfectly circular not an elongated oval like all the other lenses. This was 1.2mm deep and with a 2.5mm radius. It is obviously perfectly placed and very precise despite this being a non-G, non-CZ, cheap Sony kit lens.

Anyway, 10 seconds with a Dremel and the Novoflex adaptor is now a perfect locking fit ready for another test if the sun comes out again this year.

Sony did say, back in 2010, they would make the E-mount specifications public for all to use. If anyone has information on what tolerances were specified, please let us know!

Update 30/10/14: using a high intensity single LED torch, the Novoflex adaptor problem was eventually narrowed down to light leaking through the mount between high-grade Leica mounts (Cosina Voigtlander, and Carl Zeiss) and the adaptor. Tightening the flange pressure did not cure the fault. No leak is present when using a low-cost Chinese M adaptor on a screw thread lens, which is a firmer fit. The Nokton and Tele-Tessar lenses also show no leak with the Fotodiox adaptor. It’s just an issue with these mounts – probably from the same source, as Cosina assembles CZ Leica mount lenses – and the Novoflex.

Absolutely no light leak can be identified on the A7R body with the new mount fitted. All leaks turn out to have been down to third party adaptors. The LA-EA3 and LA-EA4 give no light leaks, same for all E/FE mount Sony lenses. The Kipon Tilt-Shift (Nikon, $200+) has so many light leaks I can’t map them – every stage of the unit from the lens mount to the body mount, and all the moving parts, admit light; unit dangerously tight on Tought-E mount. Kipon Shift adaptor (Canon FD) admits light freely, especially when shifted. Canon FD plain adaptor, low cost – leaks at body mount. Cheap Minolta MD adaptor – no leaks. Cheap Nikon adaptor – OK at the body mount, lens release catch admits light freely (repaired using black putty compound but ineffective, still leaks light). Cheap tilt MD to Nex adaptor – one strong light leak in mount between some lenses (chrome flanges) and the adaptor, but otherwise light-tight to the body and in its tilt mechanism. Low-cost L39 to NEX adaptor – no problems at all. Ukraine/Kiev/Zenitar 50mm tilt combo – perfect, no leaks in any position. Samyang 12mm f/2 – small local leak at mount (top right crescent issue). 28-70mm FE – absolutely light-tight, no issues. 10-18mm Sony G – ditto, no light leak at all. 16-50mm Sony PZ – no light leak. Tamron 18-200mm – top right crescent issue. Fotodiox Leica M helical, with any lens, no problems. Focus brand Canon EF to FE mount AF adaptor – no leaks. Original 1st gen Kipon 42mm tilt device – no leaks at all.

– David Kilpatrick

B&H double Zeiss Touit lens deal for NEX

I guess that Zeiss must be working right now on full frame Touit lenses, because this is unprecedented value for those able to buy in dollars without steep shipping charges, duties or taxes – however, the links they emailed out today led to a wrong page on their USED section, and after a lot of digging to get the right URL, the offer is needless to say on back order – and B&H are taking a Jewish holiday from June 3rd to 5th so you’d better jump in quickly before close of biz on June 2nd.

touit2lenses

BOTH the Carl Zeoss Touit 12mm f/2.8 and 32mm f/1.8 lenses for the E-mount for only $919 from B&H with free US expedited shipping (they do not cover full frame and I’ve tested them and found a fairly tight image circle). They are stunningly good for NEX-7, NEX-6, A6000, A3000,  A5000.

http://www.bhphotovideo.com/c/buy/0/Ntt/Zeiss+Touit+Lens

Here are the actual image circles of the three Touit lenses (12mm, 32mm and 50mm f/2.8 macro which is not in this deal) on A7R, without applying any distortion or vignetting correction. All the lenses have an Adobe profile and in the case of the 12mm this enlarges the image circle substantially. Normally, this means the lens is a true 12mm equivalent with the profile applied and the actual focal lenth could be closer to 10.5mm.

touit12mmf2p8-imagecircleonFF

First, the Touit 12mm without lens profile

touit12mmf2p8-imagecircleLensProfiled

Now, the Touit same shot but converted from raw applying the built-in lens profile (conclusion – the profile applies to an APS-C frame and does little good to the outer field on full frame – you are better off using the lens without the profile, including on APS-C, if you want maximum wide-angle coverage)

touit32mmf1p8-imagecircleonFF

Then the 32mm f/1.8 on the A7R (like the shot above, at full aperture – image circles generally do not get larger when you stop down, if the edge is as well-defined as these Zeiss lenses)

touit50mmf2p8-imagecircleonFF

Finally, the 50mm f/2.8 macro to complete the reference. All pictures taken from behind the counter of the Carl Zeiss stand at The Photography Show – hence the great lighting and subject-matter…

– DK

Lensmate custom kit for RX100

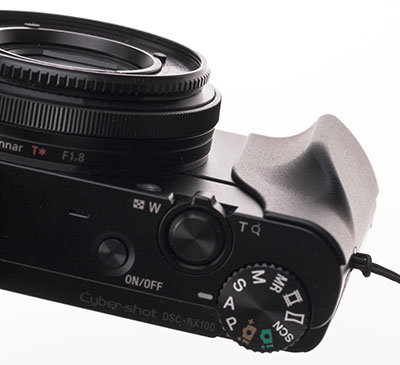
Lensmate produce an ultra lightweight filter adapter for the Sony Cyber-shot RX100, as well as selling some related accessories. We ordered from them a filter adapter kit including the 49mm threaded filter ring ($32.95) and to this order added Richard Franiec’s beautiful CNC machined aluminium custom body grip ($34.95) and a JJC Polycarbonate screen protector ($5.95).

lensmateorder

The filter holder was the main purchase, but in the end least likely to be used – the grip, on the other hand (the right hand…) will be used for ever. Here’s the content of the filter package:

lensmatekitcontents

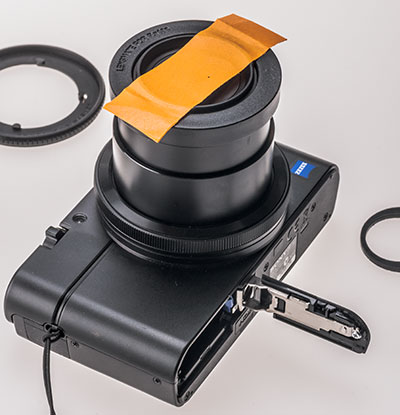
From the left: 49mm lens cap with retaining lanyard; white box for whole kit; thread for use if the adaptor needs to be removed, together with alcohol wipe for cleaning before fixing; the 49mm adaptor; the lens-mounted adaptor ring (with yellow tape); a circular template, used to position this perfectly. As an alternative or an extra, you can choose a 52mm filter ring.

lensmateattach

To do it perfectly the tape should actually be parallel to the camera body. It’s not that important but looks a little neater when fixed. The adhesive is uncovered on the back of the adaptor, it is placed in the centre of the positioning guide, and pressed home. To extend the lens and keep it firm, the camera is switched on, and the battery removed; this leaves the lens in this position. Only light pressure is needed. The yellow tape and the positioning ring are then removed.

lensmateattached

The marks visible on the lens were left by the alcohol wipe, and cleaned off afterwards with a lens cleaning wipe. In this shot, the 49mm filter ring is bayonet fitted into place (a little less than a half-turn). The fit is very positive and the action is light but firm. The whole item weighs such a small amount it adds no strain and can be left fitted permanently.

filters49mm

Here are two filters – a 49mm Minolta polariser and a 49mm No 1 Minolta close-up (not a 1 dioptre, but stronger, and a double element achromat with coating – one of the best close-up lenses you can still find around on the used market).

polfilterattached

The polariser is flared to allow wide-angle coverage. This makes it ideal for lenses like the NEX SEL 16mm f/2.8. But you can’t fit a lens cap of standard size (it widens out to accept a 57mm push-on, similar to a 55mm screw-in in size).

capstring

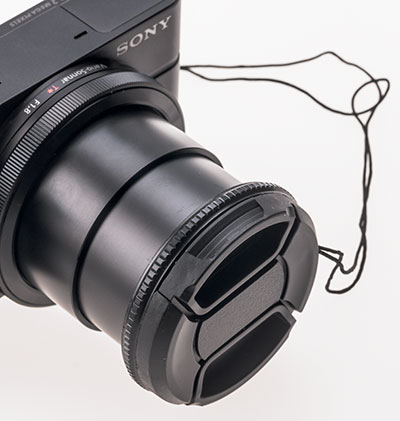
Lensmate provide a centre pinch fit lens cap with a retaining lanyard. It is not needed as the camera has its own lens cover shutter, but if you fit a filter, you may want to add the cap to protect the filter.

minhood

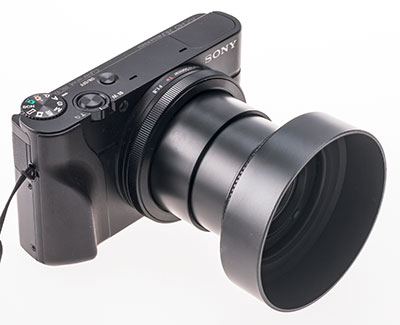
This is a Minolta lens hood for the old MC 45mm f/2 Rokkor. It’s very light and is ideal for the RX1 (we’ve sold a good few of these on eBay for exactly that purpose). There’s no great benefit on the RX100, as the lens flare this camera suffers from is rarely to do with stray light, nearly always with light sources within the frame.

The overall thickness of the adapter for filters is less than 3mm. It does not affect operation. Once fitted you forget it, and it becomes part of the camera, but it must also add some protection.

closeupno1min

Here is the closest at wide-angle using the Minolta CU lens.

closeuplongest

And this is at the longest focal length (where close focusing is most restricted with the RX100). More powerful close up lenses – this one is about 1.5 dioptre – will produce a more dramatic result.

In the photos above, you’ll see the body shape is rather enhanced. The workout to add this muscle is brief and easy.

plainrx100

Start with a cleaned RX100 body.

gripstick

Take the Franiec precision grip, and remove the two 3M permanent adhesive release papers.

grip1

Position on the camera and firmly press into place. It isn’t going to shift after you do this.

grip2

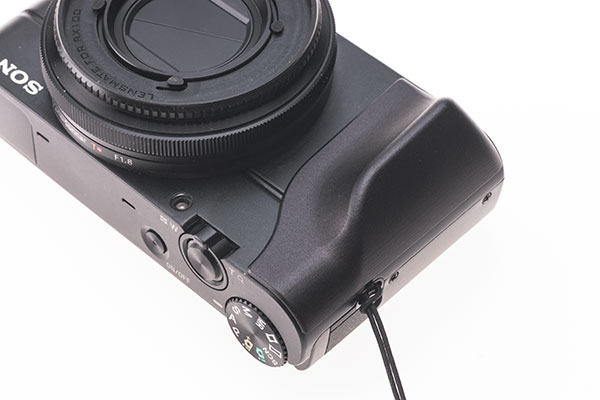
And that’s it. A great product, a perfect finish, and it really does make the RX100 much easier to hold securely. It also tends to position your thumb correctly on the back and your index finger over the shutter. It is perfectly designed and manufactured.

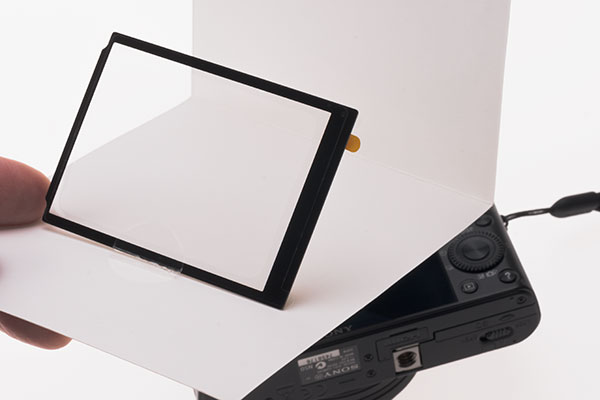
Finally, here is the JJC Polycarbonate (not Gorilla Glass) LCD screen protector.

jjcpolycarbonate

This is simple enough to fit and one fitted is invisible. The tab for the release paper didn’t work all that well and nor did the tab to remove the protective layer, but a bit of fingernail prising helped peel both off. The adhesive is only round the edge, and the protector can be removed easily.

The website for Lensmate products is: http://www.lensmateonline.com

An amazing bag bargain

We thought that these bags at a low price would disappear, so since buying some last month, I’ve told a few friends but not publicised it. A Facebook posting or so.

manfrottobag1

What is the bag and why is it so good?

It’s a Manfrotto Stile Unica VII, the largest size made in these Chinese-fabbed courier or messenger style shoulder bags. There are a few smaller sizes but this big one can fit a MacBook Pro 15″ or a typical Windows laptop 17″ in the back of the main compartment, behind the insert. That is not unique, my ancient 1987 Tenba Messenger will also fit my MacBook and even take a couple of cameras. What it will not do it take my favourite tripod, the Gitzo Traveller 6X carbon fibre travel pod, in its base compartment.

The Gitzo is designed to be shorter than the airline/airport rule on dangerous items, the same sub-14″ length as a large collapsible umbrella. This did not stop the customs guy at Bari Airport, in 2011, seizing the tripod and telling me it was not allowed and would be confiscated. I don’t speak Italian, but I do know Italians! I became very agitated and waved my arms a lot, explaining that this tripod was an Italian product, specially made for airline travel, and cost over 500 euros… and was a gift from my wife (who at this moment was clearly about to burst into tears). I could not believe that I would lose this wonderful Italian product when trying to fly back from Italy.

The customs man and his female colleague turned away to confer. A second later he just handed the tripod back and motioned us through.

Even so, despite its value, the Gitzo now goes in our hold baggage and not in the camera bag. It simply isn’t worth the risk of confiscation versus the risk of loss – and loss is insured, where confiscation is an untried situation with my insurance company. We have not, yet, had to ask.

Once arrived, the new Stile Unica VII bag will fit the pod perfectly and it weights the bag just right. The Stile is relatively slim front to back but large, like a satchel, so it tucks under the arm in busy crowded places. It’s easy to swing round to the front, and with the document compartment zipped up and under the flap with velcro and a huge metal webbing clip, camera access is possible through a top zip. Yes, that’s not so secure if you stand on a Barcelona street corner and swing the bag behind you. That’s where backpacks fail too. It looks slightly less like a camera bag than some, too. And you can do a padlock tie on the twin top zip and document compartment zip too. The laptop slot has a velcro tab to secure it. The camera load bay had one divider and a sort of lens-cradle thing which is not enough, but who does not have a cupboard full of spare dividers? What’s lacking is velcro fur all round to allow free layout. We use pouches or cloths to keep stuff apart. Big microfibre cleaning cloths are great, you can use them to clean the gear as well as wrap it.

The actual dimensions are 16 inches clear in the base compartment, by a variable 3.5-4 inches squareish. It will not quite fit the Sony 70-400mm G lens in its pouch; this would strain the zip. It easily fits this lens ‘bare’, and the height of the top compartment is also enough for the 70-400mm standing vertically. It is a surprisingly large bag for this type of design.

manfrottobag3

So, it’s not got a huge capacity or clever compartments. What is the rest of the appeal? The weight. I opened my copy of Practical Photography and found a guide to camera bags for travel. Are they nuts? All the bags I saw were really for working out of the back of your car or roller-ing along when shooting a wedding. People who fly do not start out with a bag weight over 6 kilos before loading gear.

The Stile Unica VII weighs just a few grammes over 1 kilo, leaving you almost 4 kilos of payload before you hit the maximum allowed on board many smaller flights. I’ve only ever been caught once and had load up my pocket, on Croatian Airlines. In theory plenty of other carriers limit you to 5kg. BA and Easyjet allow anything you can safely lift into the overhead, some others allow 10kg. But even in 10kg, the less dead weight the bag takes up, the better. The Unica VII is even lighter than our single-layer traditional canvas photo bags, and unlike them, it has a tiny amount of padding.

The next thing is the price we paid. This is an £80-90 bag officially. But at the time I post this page, you can get the unpopular mud-coloured ‘Bungee Cord’ (colour) fabric version for £32 in the UK from Amazon. That’s including VAT, not some grey import deal.

manfrottobag2

This is the white version – that’s right, how impractical! A white camera bag. Nearly as impractical as a white lens… it cost more, a touch under £50, still almost down to half price. We wanted white for travel and walking in hot, sunny conditions. Black cameras are bad enough, and can quickly rise to 40-50°C if you leave them in the sun. Dark colours, especially black, bags are poor when it comes to keeping gear cool, and it is the temperature of your DSLR which determines whether you get the best possible dynamic range and noise levels from your sensor. The Alpha 99 is a bit of an exception. These cameras are built to work with the sensor HOT, that’s what live view EVF does for you. You still get the very best performance from a cool camera and shots you take before the sensor has warmed up – and you can still get the camera do a thermal cutout on you in very hot conditions, or if you shoot long video takes. Tip: move the rear screen away from the back a bit to allow ventilation.

The white Stile Unica VII is not just a fashionable dirt magnet, it is a practical camera carryall for tropical, desert and the occasional perfectly sunny day in Scotland. The muddy bungee-cord colour is less conspicuous and will take muddy marks happily.

I’m not keen on the sort of half-union-jack pattern of the bag flap and I hope they never make one in red, white and blue. The fixed shoulder strap is a decent length with an adjuster on both sides and a fixed non-removable, non-sliding shoulder pad. That’s perhaps one way the price has been kept down. But the strap supplied with the Pro bag I tried was so bulky and heavy it weighed about the same as the entire Stile Unica VII and occupied most of its bag’s interior when delivered! I’m all for stuff which can be squished up, rolled, flattened and packed if need be. This bag qualifies.

Here’s the Amazon link for the mud-coloured version at £32 – everyone who has bought one reckons this is a great price for a very functional if slightly depressing bag!

Manfrotto Stile Unica VII Messenger Bungee Cord

And here are other links – the prices are £47.64 for black (as you’ll realise, I just do not recommend black at all) and £53.29 for white (eccentric but useful colour). But ‘Bungee Cord’ rules at £32!

Manfrotto Stile Unica VII Messenger Bag – Black

Manfrotto Stile Unica VII Messenger Bag Star – White

And here is a link to the Gitzo Traveller tripod (latest version) which will explain why I learned quickly to act like an Italian and get emotional – £660, over 800 euros. I think I may just put mine in a safe as buy a cheap Giottos version to actually use… and I do not need a free ‘carrying solution’ either.

Traveller GK2580QTR – get a carrying solution for free!*

– David Kilpatrick

Sigma’s system revolution

Sigma Imaging, already one of our favourite lens makers, has announced upgrades and new functions for their entire system which will transform the way it works with all the major camera systems.

The new DC 17-70mm f/2.8-4 – DC (APS-C format) lenses have never been given the EX designation, even when they clearly matched the EX specifications. Now the EX name and its exterior finish are both going, replaced by one standard for all formats, and one finish.

The entire Sigma range is being restyled, with a new finish, and the old distinctions between EX DG and other lens ‘grades’ are disappearing. “All our lenses have become what we once called EX”, said Graham Armitage of Sigma UK, at photokina. “The demands made by digital systems with higher resolutions mean we have to produce perfect lenses for all the formats from MicroFourThirds to APS-C and full frame.

“Our greatest breakthrough is in MTF testing. We have designed new MTF equipment, which will be used on the production of new lenses from now on. The MTF testing system we use for development is too slow to be used in production, and we have had our own Bayer sensor based system for this purpose. But it was not proving high enough resolution for new camera sensors like the D800.

“Now we have built our own MTF testing system, based on the 46 megapixel Foveon Merrill sensor used in the latest cameras. This allows a much better MTF tests. It will be used to test the sharpness of every new lens that Sigma manufacturers.”

We asked Graham if this would only apply to expensive professional teles, zooms and specialist lenses. “No, it will apply to all lens types”, he said. “We have been able to use the data from the Foveon sensor based tests to improve the performance of all our lenses.” Because the sensor is true RGB not Bayer much better information about chromatic aberration has been gathered and Sigma is feeding this back into the design and manufacture process.

The new lenses have a robust feel, with machined metal barrel and mount components (a current trend for many lens makers) and a slightly soft-looking matt or silk finish. All Sigma lenses are assembled by hand, in Japan, using traditional construction methods.

But the most exceptional advance has been made inside the new lenses – sadly, it can’t be retro fitted to older ones.

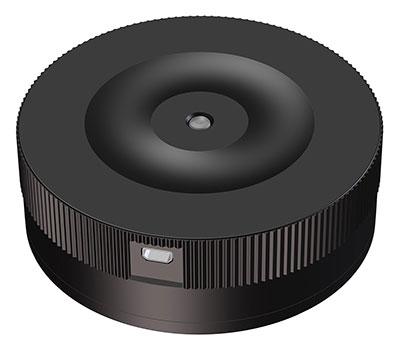
The USB ‘dock in a cap’ has an LED activity indicator and we handled the real thing. This photo looks a bit over-retouched.

All new Sigma lenses will be compatible with a USB-connected dock allowing firmware updates to be made by the user. Sigma has honoured its relationship with users for decades by upgrading the chips inside lenses free of charge whenever the protocols used by camera makers created an incompatibility. Now they have developed a way in which users can do this themselves without the lens having to be returned or ‘operated on’ in a workshop.

“The USB dock will cost about the same as a filter”, Graham told us. I suggested this could mean £50. He indicated I was on the high side. This dock device, which resembles a thick rear lens cap, might be £30 or so.

“It does more than just upgrade the chip”, he continued. “With a PC program, you will be able to change the focusing speed of the lens. All AF systems are a compromise, a balance between speed and accuracy. You will be able to set the lens to suit your working style, increasing the focus speed if you shoot action or improving accuracy if you take subjects like landscapes and portraits.

“All DSLRs have problems with front and back focus. Some cameras offer AF calibration, but not all allow you to have different corrections for each focal length of the zoom lens and for different focusing distances. Using our program, you will be able to calibrate new Sigma lenses for the full range of settings so you don’t get front or back focus at any distance or focal length.

“Not only that, with new telephoto and macro lenses you will also be able to change the distance ranges used by focus limiter switches.”

The new-style 120-300mm f/2.8 – one of the first lenses compatible with the USB programming system, allowing perfect tuning of front and back focus corrections across the zoom and focus distance range.

This function sounds familiar, indeed it’s almost what the new Sony Alpha 99 offers with a restricted range of Sony lenses – on-camera setting of focus range limits. The difference with the Sigma option is that future lenses with a range setting switch can each have their individual far, middle and near limits set and there will be no need to go into camera menus to change the setting when shooting.

Along with Sigma’s recently introduction of nano-type hard coatings which resist water and dirt, their improvements in environmental and dust sealing of lenses, we look forward to testing Sigma products in future and finding them close to the blueprint for the optical design. These innovations draw a line between existing generations of Sigma lenses and the future, as they can’t be fitted to older models. They also take Sigma yet one more step ahead of the camera makers’ own aspirations.

Sigma has always shown the industry what can be done in terms of advanced optical design – often unmatched for many years, with such specifications as the 8-16mm and 12-24mm zooms, the 300mm-800mm and many others remaining unchallenged even by Nikon and Canon. Now they have set out to show what can be done by harnessing a simple standard interface and allowing communication to the lens IC through the contact-pin array.

Finally, Graham showed us the new 35mm f/1.4. “Nikon has done really well with their 35mm f/1.4”, he said. “We thought we would try to beat them with this one. We are hoping it turns out to be the best 35m f/1.4 on the market”. The new MTF testing may yet be proved! I mentioned that Samyang had also done pretty well with a 35mm f/1.4. To that there was no comment…

And then there’s the obligatory picture from any trade show – the man who can’t resist trying to find out what the butler saw, courtesy of the Sigmonster!

– David Kilpatrick

This post has been edited with Sigma’s help on October 3rd. The original reference to Zeiss MTF equipment was incorrect; this is used in design and prototype development, and will continue to be used. Sigma’s own production-line testing system is what’s been updated with new high speed Foveon-based MTF bench.

Hood-cap for NEX with 16mm

At photokina 2012, the Taiwanese company Hoocap (www.hoocap.com) showed a neat device for many different lenses and cameras, still in development for a wider range. It’s a combined lens-hood and lens-cap, which can be pushed or pulled to seal off or use your lens. They have models for lenses such as the Nikon 24-70mm f/2.8 – but their neatest model is dedicated to the NEX 16mm f/2.8.

One of the best and most original lens designs ever made, reducing the number of elements to fewer than EVER used before for an 83° angle of view, while maintaining an exceptional standard of resolution and geometric projection – and anyone who claims otherwise either just doesn’t understand what makes a 24mm equivalent lens, has a bad example*, or doesn’t realise just how BAD a typical 24mm Nikkor, Rokkor or Canon is in comparison.

Rant over! *Sony’s QC has been less than flattering to the skills of their optical design team.

Now this is an efficient lens shade for video, and not all that bad for the majority of still images taken in horizontal, landscape composition mode. You can, of course, fit the 18-55mm lens hood to the 16mm lens and it does help prevent the very rare instance of lens flare from a design which is highly resistent to flare.

Unboxing, only they didn’t have a box, just a prototype plastic pack. It was disappointing how few firms at photokina were willing to give us samples of relatively small items. We did not have time to spare, just a day. Hoocap immediately understood what we were doing and offered a sample. They were the ONLY company to do so. In past years, we’ve come back with loads of small accessories and items to write about, but this 2012 photokina has been an impoverished one in more ways than just the lack of square metres of stands.

This is how the Hoocap closes. It does add some bulk to an otherwise tiny camera and lens. You pull the unit from the rear to open the hood. It tends to need two actions unless you are lucky enough to get the pulling action exactly at 90°. It does not risk accidental opening, or closing. The action is firm and positive and exerts no strain on the lens or camera.

In case you think we do not question product design, here’s fault no 1 – if you have the small flash fitted to a 3/5 series camera, it won’t stow down fully. But it does turn off. It simply impedes the closing action of the Hoocap. By the way – we tested the cap with a 49mm UV filter fitted to the camera. It allows space for this.

The second flaw connected with flash is this. Look at the geometry – without the Sony flash extender.

It’s not awful, but this f/16 test shows exactly the area of shadow the hood will cast for a typical party or group shot at home. You really need to remove the hood for flash shooting.

Much will depend on the price, but we like this product. It closes the camera off in a very fast action – clunk! – and opens it almost as quickly. It can also be used on the 18-55mm lens but it’s super-neat on the 16mm.

Don’t forget we have a new photo quarterly magazine – Cameracraft. Please support us by subscribing, Cameracraft directly finances the Photoclubalpha website.

– DK


Gary Friedman publishes NEX-7 ‘beyond the guide’ book

As Gary says, his e-books do not replace the camera manual and also don’t replace Camera Controls 101 – he writes for the user who already knows which end of the lens fits a screw filter and which end goes on the camera body. His new NEX-7 book fast-tracks into many key features of the camera before backtracking into depth and detail, a great way to introduce owners to making better use of the advanced functions they have bought.

http://friedmanarchives.com/NEX-7

NEX-7 book cover


The only downside to the book is the cover, which features a new addition to the long line of bald heads Gary has used for his cover shots (always in the same style) – a penalty for visiting Gary just before the book was going to e-press!

The $26.45 download (PDF, full colour, with additional resources for Kindle and other bw reader platforms) now strikes me as even better value after the last week of wandering through California by car in search of images. The USA is now fairly expensive compared to much of Europe, not affordable as it used to be – and this comes as a surprise, because things like the camera prices at B&H do not give much clue, they are still generally lower. In California at least things like motels (except the most basic), beer, coffee, snacks, entry or parking fees are maybe 50% more than UK costs – so to all our US readers, be assured, now is a very good time to use your NEX-7 skills and take a trip across the pond. You can find an award-winning b&b with one of the best full breakfasts in Scotland for under $75 (£=$1.60) in our home town with a pretty good photographer running it!

– David Kilpatrick

Amazon – possible SanDisk UHS-1 card bargain

Yesterday we received two SanDisk 30MB/s 16GB SDHC cards from Amazon UK – £15.99 each, a couple of pounds more than regular Class 10 cards like the Transcends we normally use on all current Alpha and NEX models. You must have faster than 15MB/s for cameras such as the A55, A580 or NEX-5n not because of video issues, or even because you want to shoot raw bursts – you need it to be sure that shooting sweep panoramas or 3D panoramas will not a) fail b) corrupt your card and lock you out of shooting in the process.

This is what happened to us when using a SanDisk Ultra 15MB/s card which had been fine for all other work. Fortunately we had a spare card, the corrupted card was removed and its file contents recovered using SanDisk’s free program.

The SanDisk 30MB/s card labelled for ‘HD video’ is of course not limited to video and is ideal for any similar use which includes sweep pans, multishot noise reduction, HDR and 12fps bursts (etc). It is labelled slightly differently:

At £15.99 in the offer linked to here (click the image of card or this link) it’s a very good value fast reliable card from a premium maker. Admittedly, we are now seeing the Transcend brand falling to £12-13 for Class 10 which despite their info saying Class 6 or faster (etc) is the minimum you should aim for with Alpha and NEX current generation models. SEE COMMENTS – Amazon changed this offer a couple of days later to the less desirable 20MB/s but there was still a good price on 32GB 30MB/s.

We ordered two of the 16GBs and what actually arrived the next day was a pair of these:

These cards – 300X, 45MB/s, UHS-1 Class 10 – are not listed for sale under the Extreme branding but can be found as the last generation of Extreme Pro, priced at £43.50. Clearly SanDisk is repositioning the prices and labelling of the card range. So, we were apparently sent the latest version of something they’ve still got on sale for £43.50 but we paid £15.99.

March 24th update: can’t vouch for the vendor, the above were from Amazon themselves, but there’s one seller with the 45MB/s cards genuinely offered at under £20.

It gets more interesting as the real speed demon – the 95MB/s 16GB Extreme Pro which was selling for £80 or so recently – has dropped in price to be BELOW the price of the 45MB/s version which is now marked as having a ‘newer’ version. You can buy the 95MB/s card for only £38.10. We’ve ordered and received one of these, no errors or substitutions.

There is no guarantee that if you order the bargain HD Video 30MB/s card you will get the same switched product as we did with a March 18th order, delivered March 20th, UK. Even if you don’t it is a great price for a card which should guarantee the correct operation of NEX-7, Alpha 77, Alpha 65. The 95MB/s version is one of the fastest SD cards yet made, and will go beyond correct operation to ensure the fastest clearing of the camera’s buffer, fastest image playback or review, and the highest number of consecutive shots when shooting continuous sequences.

Disclaimer: Amazon prices can change on a daily basis, and Amazon USA or other regions may differ.

– DK

1 2 3 4 5