This is expanded from the feature which appears in the July/August issue of f2 Cameracraft magazine. We’ve been using the Elinchrom EL-Skyport Plus HS for Sony Multi-Function Accessory shoe since its arrival on May 28th as the first test unit released by Elinchrom. If you wonder why I don’t immediately do a clickbait blog post, it’s because Elinchrom were already concerned by synchronisation/shutter release timing delay issues – being unfamiliar with the very slow AF-AE-shutter cycle of the Sony mirrorless full frame models. My feedback was needed along with others. I can safely say that any practical difficulties encountered with hi-sync (hypersync) using the new Sony Skyport are entirely down to Sony.
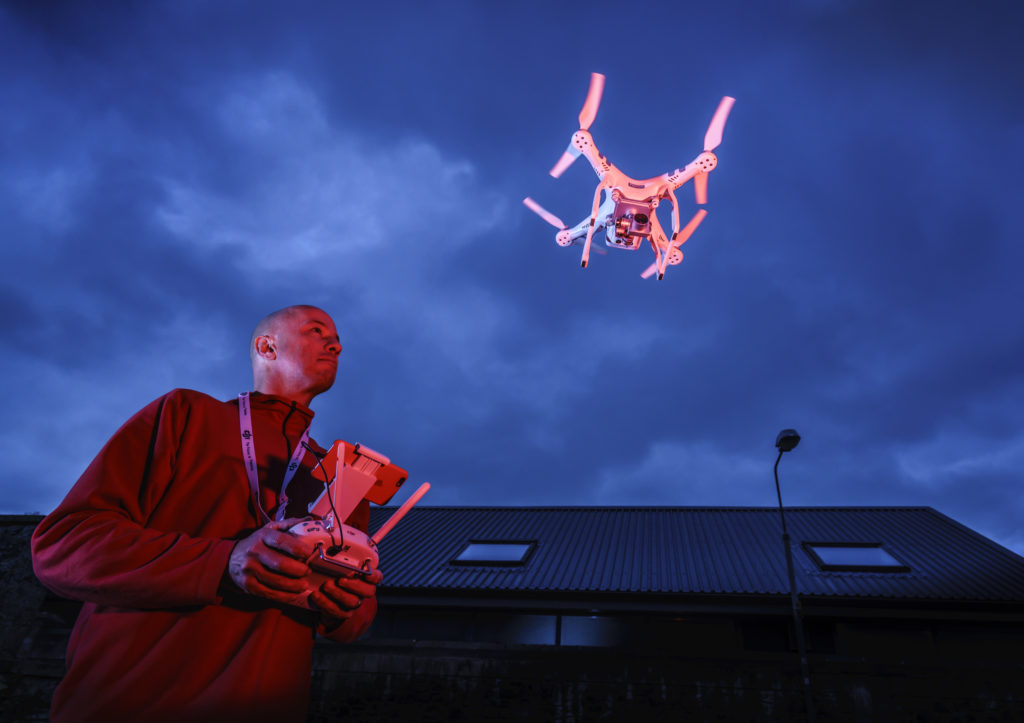
It’s not advisable to work too close to a DJI Phantom drone as the rotor tips whizz by at a touch less than 100 miles an hour. With a 16-35mm CZ zoom used at 16mm to get the low viewpoint it did feel a bit like being buzzed at times but Ali Graham kept it well within the target zone. Click this image to open a full sized 42 megapixel original where you can see the exact extent of 1/8000s blur…
The idea here was to test, and show off, the 1/8,000s synchronisation with the focal plane shutter of the Sony A7R II which the Elinchrom dedicated high speed sync trigger EL-Skport HS Plus Sony makes possible. It actually makes it effortless, as this studio flash trigger is properly set up to provide the camera with the right signals. It’s the first studio flash wireless trigger ever designed to do this for any Sony or previous Minolta camera across three different generations of flash shoe, and that is important as electronic viewfinders really need a trigger which emulates a native dedicated flash.

The variable pre-sync timing (ODS) of the Skyport HS Plus uses HSS, originally intended for burst mode camera top strobe flash, to fire the studio or location professional flash milliseconds before the usually ‘hey, the shutter is fully open – fire!’ moment we call X-sync. The shutter then opens during the flash illumination, instead of the flash firing during the shutter opening. The white gap in the diagram above represents the shutter opening. The grey bar to the left against the vertical axis shows the ODS, which can move the start of the shutter opening to a different point on the flash output curve. This is done by changing the shutter release timing not the flash! Think about it – you press the shutter button, and that is the earliest moment anything can happen, either shutter firing or flash firing. Since the flash must be triggered before the shutter opens when using HSS, it is the shutter action which is delayed (it’s very easy to think of this as the flash being fired early!).
The big selling point for Elinchrom is Hi-Sync. They have even made special slow-burn flash heads for their Quadra ELB battery location kit, which have a T=0.5 flash duration longer than 1/550s compared to as short as 1/5700s with a Type A head. In practice you can fine tune shutter speeds between 1/1000s and 1/8000s to catch a fairly level plateau of high level output (the flash is used on full power for this). But at £199 this trigger, with its full visual display and adjustment of multiple head flash control, is actually worth getting even if you never used Hi-Sync at all.
The EVF issue
With a plain hot-shoe trigger, using an adaptor or not, no Flash Powered On signal is sent to the camera. It will remain in whatever P/A/S/M mode is already set, and if this results in a virtually blacked out EVF or screen because the modelling or ambient light is low it becomes necessary to turn off exposure or effect previewing (Setting Effect On, the normal setting which links the finder brightness to the exposure set). When you fit a dedicated flash, non-HSS modes set the camera to a standard flash sync speed typically between 1/60s and 1/160s and switch the finder to an auto gain mode (Setting Effect Off) without any menu diving required. HSS modes retain the same finder setting but allow any shutter speed down to the shortest 1/8000s time.
Normally, any remote trigger or commander fitting the Sony body will do this if it’s part of a wireless remote flash set up using the camera maker’s own battery flash protocols (and a camera-mounted flash like the Nissin i40 can do the same). You can make a crude studio flash trigger using a small dedicated flashgun and masking it with an infra-red filter but it’s not simple as automatic pre-flash sequences or operating delays need to be disabled, though Elinchrom’s current heads can be programmed to allow for pre-flash bursts.
Pro flash triggers which are not part of the dedicated system won’t turn Setting Effect to OFF, and did not for the earlier locking flash Minolta-Sony shoe of the A77, A55 and other electronic viewfinder SLR-style models. It was apparently just a matter of applying a simple signal voltage across a pair of the contacts when the trigger was switched on – but not a single manufacturer could be bothered to find a solution. Not PocketWizard, not Skyport, nor anything else until the arrival of Phottix, Pixel King and a few other Chinese-made innovative brands which added a PC-X-sync socket to modules mainly intended for camera-top strobe guns.
Now, with the rise in popularity of the Sony A7 series, Elinchrom has invested in a fully dedicated version of their EL-Skyport Plus HS which behaves just as if you had a Sony native flashgun mounted. To do so, they worked with Phottix and Sekonic. There’s no TTL, as the Elinchrom studio and location flash units are all high powered with manually controlled output. For normal use, the Plus HS offers a greater operating range to 290m (instead of 100m), LCD menus, and remote control of the power and modelling settings of all RX heads with the setting displayed on the trigger for the latest generation. Because it switches the EVF camera instantly into a studio-friendly mode and can act as a complete wireless remote control it’s worth the £199 cost for anyone using Elinchrom RX wireless triggered flash with Canon, Nikon and now Sony.
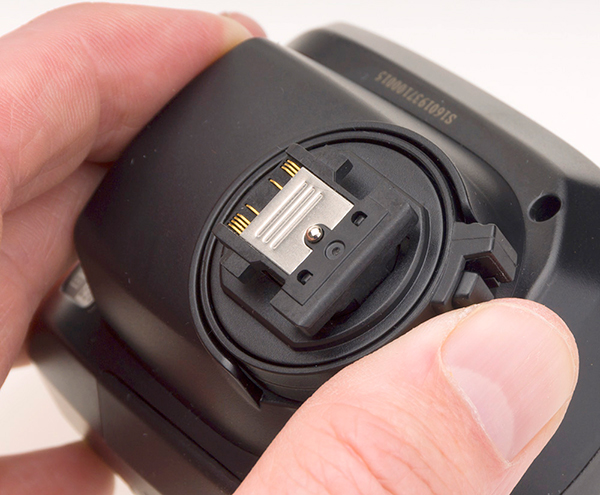
It is a very well made unit with a near locking shoe function (above). However, it’s also a bit of a monster (below) compared to the tiny original Skyport. That lens, by the way, is a Canon 40mm STM on a Commlite, with a 49mm filter thread adaptor and a Minolta 45mm f/2 lens hood. It’s actually one of the fastest-actuating lenses as its aperture mechanism makes up in speed of operation anything you might lose on AF speed.

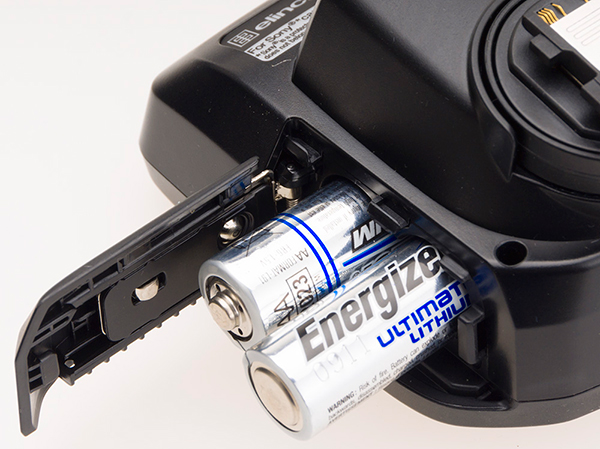
The size of this trigger is not only used for the informative top LCD display, it also houses two AA cells, which gives it the extra power for the 290m wireless reach and its advanced electronic functions.
So for my money, this new trigger becomes my regular trigger. With any other trigger, I have to remember to change the Setting Effect and White Balance when working in the studio, and of course change it back. Sony, in their wisdom, have excluded Setting Effect on or off from the parameters you can remember in a user setting memory. With my A900 (optical finder) Sony all I had to do in the studio was turn the mode dial to 1 (Memory 1) and my camera was instantly set to ISO 100, Daylight, 1/200s, and f/13 as my startpoints for studio work. With my A99, the missing Setting Effect meant the 1, 2, 3 memory positions did not enable instant set-up or instant return to regular operation and it’s been the same with every SLT or mirrorless yet made by Sony.
Hi-Sync
The Hi-Sync feature – ability to emulate Nikon FP, Canon and Sony HSS – is compatible with all Canon DSLRs but not all Nikon, so check before ordering (example – no Hi-Sync with D5500 or D610, but fine with D750 or D300S). It’s also not compatible with all Elinchrom heads. My Ranger Quadra RX AS kit was bought with Type A (short flash duration heads) and my studio BRX500i heads are similar. They gave me high speed flash at normal flash sync speeds (up to 1/250s with most of my cameras) but the short, sharply peaking flash output can’t be used for Hi-Sync. I would need to buy Type S heads for the Quadra kit, or trade in and get the latest ELB 400 with Type HS heads – which is what I tested the unit with successfully before trying all my other flash. The lowest cost Hi-Sync studio head is the budget D-Lite 4 in IT (no remote setting) or RX (full remote) versions. In fact, the 400Ws D-Lite 4RX at under £250 per head, with its 5-stop output range down to 25Ws and constant 1/800s duration, is actually the most compatible of all current Elinchrom heads even though not really intended for intensive professional use.
Like PocketWizard and other triggers with hypersync, the EL-Skyport Plus HS offers a programmable delay in microsecond intervals from 0 to 5 milliseconds. This can be used with the Elinchrom RX Universal Receiver connected to almost any make of flash head. You then need to experiment with the power setting, as some have long durations at lower power with more even output level and for others a peak is followed by a relatively flat long tail decay at full power. There are some IBGT controlled flash units which cut off the peak and tail leaving a plateau of output. The ODS (delay) and camera shutter speed in HSS mode can be experimented with and you may get lucky.
However, the two certain ways to get maximum relative power and ease of Hi-Sync use are the ELB 400 with HS heads and the D-Lite 4RX. Mounting the very firm locking hot shoe on my Sony A7RII and switching the trigger on automatically set the camera to Wireless Flash and EVF Setting Effect Off, Auto WB to Flash. In Standard mode on the Plus HS, the shutter speed was set to 1/250s; just turning the Plus HS dial to set HS mode, my faster shutter speed set via the M mode on the camera was instantly restored and access to the full range from 30s to 1/8000s enabled. In fact it was impossible to create a mismatch, other than by entering an extreme ODS delay.
At all speeds faster than 1/250s, using Hi-Sync, the A7RII should be used with mechanical first shutter curtain. Silent electronic-only shutter mode simply doesn’t fire flash of any kind, and first curtain electronic mode may produce unevenly exposed or partial frames (I’ve since found that such problems really don’t happen often and you can risk using first curtain electronic to help overcome the really laggy shutter timing). Even used correctly, there’s some shading with the ELB 400 at full power, about a stop of fall-off smoothly grading to the bottom of the frame at 1/8000s. Moderating the shutter speed and adjusting the flash power and ODS can fine tune this but I wanted maximum output and my landscape format test shot benefited from the shading. Vertical shots are not as forgiving and the lighting may need feathering to suit. Be careful with some very fast lenses used wide open as these can also produce a shutter/scan related grad filter effect at the fastest shutter speeds.
To do the drone shot, we wanted to work fast so I did a simple manual adjustment of ISO and aperture in the studio first at the right distance. The main flash (2/3rd power, Outlet A on the Elinchrom ELB pack) had a red gel fitted, and the second head (1/3rd power, Outlet B) had no gel. I placed in the same relative positions I planned to use outside, and used my paper ceiling lantern to check settings.

I then repeated the test on the sky outside without changing the settings, and got pretty much what was expected.
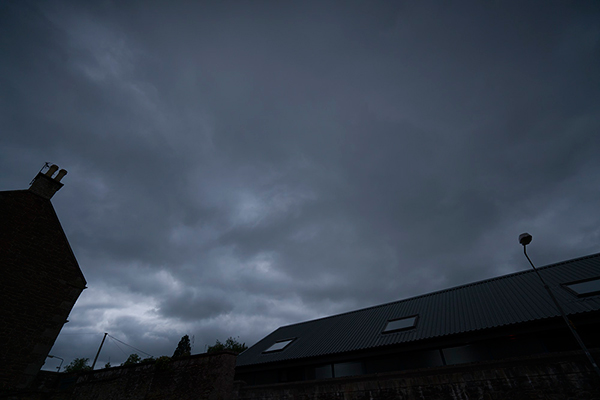
So when Ali arrive with the drone at 4.30pm we just brought the portable flash pack and two heads on stands outside, already adjusted, and flew the drone in the right area of the shot working with the 16-35mm f/4 CZ zoom fitted to A7RII. The actual exposure was 1/8000s at f/5.6 and ISO 400, manually set. One small problem is that you can not judge ambient exposure unless you turn the Skyport off… because when it’s switched on, Setting Effect OFF immediately takes over and makes the sky look correctly exposed even when it will not be. I didn’t get this into the magazine report because I knew what was happening and only noticed, a few days later, someone complaining about this problem when using HSS fill-in flash on the Sony A7.
Such is the latitude of the A7RII raw file that lots of overshooting was not needed. I’m not a machine gun shooter. Even on top corporate assignments I’d often travel thousands of miles and then takes just a dozen frames of a CEO-in-office shot. I used to do whole newspaper features on a single roll of film. Digital has never changed my approach, but being able to check the shots as you take them is a great boon. It meant that with each shot, I could see how the rotor blades were aligned (the drone position was chance – slight buffeting wind kept it dodging around all over my designated shooting space). I could also check the light on Ali’s face and the drone controller. I took just nine frames before getting exactly what I wanted, and Ali was able to leave at 4.45pm.

Troubleshooting
The HSS mode of the Sony A7 series involves a considerable delay between pressing the shutter and getting the shot. There’s no solution to this and as a result I found timing some action shots almost impossible. I had to manage to fire about 1/2-1/4s before the subject reached the required position. Bridal portraits? Fine. Synchro-sun action? Not so!
It’s not all down the HSS either. In my review of the A99, I found the 1/50s hair-trigger response of the electronic first curtain shutter was negated by a complete AE-AF-stopdown cycle giving the camera a reaction time about the same as any regular DSLR, and a rather long overall 300ms ‘cycle’ in AF-S/continuos sequence mode, extended to 400ms in 14-bit capture AF-S single frame. The A7R was found to have an actual capture delay of up to a third of a second, and in fact the A7RII despite its option for electronic first curtain is not that much better.
If you want to get the 0.20-22s response time, with the shutter firing a mere 1/50s after you press the button, you will have to disable AF With Shutter and use manual focus or centre back AF on demand. With native Sony lenses, you must also work wide open as the aperture can take 1/15s to close down; with adapted lenses, for example on the Sigma MC-11, this can be 1/8s or more. If you use Auto exposure (A for example with a manual lens) the camera will briefly reset the sensor in a short interruption of live view and if you use A-mount or Canon EF lenses which have an instant aperture closing action, it can allow about 1/15s following this happening to recalibrate.
I don’t have the time in the world to check all the delays and complexities of A7RII timing, but when HSS flash control is added, it’s as bad as it gets (remember, HSS delays shutter release). So you can press when the subject is approaching the centre of the picture, and the flash will fire when the subject has left… so you pan a bit, and anticipate the way you might have had to do with a focal plane VN Press Camera 70 years ago.

And, if you are lucky, your Hi-Sync daylight and flash will work and your subject will still be in shot!
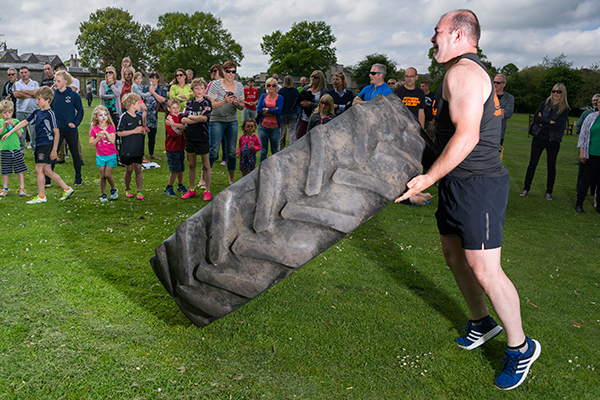
Even a relatively slow-moving sport like turning the tractor tyre was not easy to frame up and time (no, you don’t wheel it along, this is Scotland – you lift it and turn it over repeatedly to complete the course).
I continued with experiments with the trigger and my A7 as well as my A7RII, and also using the RX10 (on Speed mode but not HSS). Actually, the RX10 offers about the fastest response and easiest daylight sync up to 1/3200s shutter speed and no need for this or any other hypersync trigger.
During tests, I found that the A7RII completely locks out HSS mode when you fit a dumb manual lens, with or without the Lens App in use to tell the camera what plain-mount, uncoupled manual lens is fitted. Put a manual lens on, with no electronic aperture control, and it won’t let you select a speed faster than 1/250s even if both flash and camera confirm HSS operation. Perhaps it may do so with some other brand or type of flash. To check, exactly the same set-ups were repeated on the A7 – this body has no such problems. You can use HSS with manual lenses.

The 28mm f/2 OSS lens on A7RII proved a good choice above, taken at 1/1000s and f/8, but during my attempts to actually get our kitten in the frame at all this was a rare semi-success. The camera was rarely as fast as the cat.
The worst scenario proved to be that a shot could actually be captured about two-thirds of a second after your shutter press with the A7RII. This delay must be a concern to Elinchrom and should be a concern to Sony (their own firmware updates to handle the new GM lenses have slowed down the operational cycle, and their HSS defaults to allowing for a pre-flash sequence even when there is no pre-flash involved). Just a point, ADI flash is not an option on mirrorless bodies and does not apply to bounce, wireless or HSS anyway so suggestions that setting his may improve timing are not relevant. The Skyport Plus HS tells the camera it is indirect or off-camera flash, and these always use Pre-Flash TTL. Perhaps Elinchrom can cut some of the lag time out but it’s really down to Sony to provide firmware (or even hardware) which permits much faster real-time shutter actuation. Without this, all the claims for fast AF are pretty meaningless; the best AF in the world can’t allow for the distance travelled by your subject in a third of a second or more.
Despite this…
Though this EL-Skyport Plus HS is not like the tiny original Skyport, I want one now just for its proper control of the camera in routine studio work despite not one of my existing Elinchrom units (Quadra Hybrid AS, BX500ri) providing the Hi-Sync function.
Please also note that Hi-Sync does not work with the new ELC heads (gated fast durations), with Type A or S pack heads, and with pretty much anything except the ELB 400 with HS head/s, and in a surprisingly welcome drop to the lower end of the cost scale, the higher powered entry level D-Lite4RX.
It’s been a long time coming but this unit is, I think, the sign that Sony has arrived as a professional camera system. – David Kilpatrick
www.elinchrom.com/skyport.html
