AI cuts reflections in glasses

This is a follow-up to our last post about PortraitPro. Using a self-portrait taken for the purpose with bad reflections in uncoated reading specs, I went through the options of the reflection removal process. Mid-May a 15% discount was authorised for code CC524 at www.anthropics.com which applies to all 50% discounted program downloads.

It was taken on the Sony A7IV with 85mm f/1.8, tripod, ISO 400, lens at to f/8 and control through iPhone 15 Pro Max using Sony Creators’ App remote viewing and control. The screen on the A7IV was vertical and facing me, so I could also look at the camera and see the reflections move as I changed my head angle. Setting this up showed me some problems with the A7IV articulated screen design I had not realised – it can only face the self-portrait subject when folded out at the left-hand end of the camera, which with a Arca-Swiss L-plate means hanging down… obscured by the tripod head! So no L-plate but standard Arca small plate, and camera upside down compared to normal hand holding.

This is the result using PortraitPro V24. Read on to learn more, and don’t forget if you decide to get this program use Cameracraft’s additional 10% discount code, CCV245.

PortraitPro has come a long way in a few years. At the top end, the Studio Max version is a £308 program which costs £154 with the 50% download discount that Anthropics have offered ever since the days of CDs in packaging. Since no-one now buys a CD, the real price is £154 (with 10% off for Cameracraft’s code, CV245 in the latest May/June issue).

You may not need Studio Max with its 48-bit file capability, workflow from raw to exported finals, multiple image batch processing intended to auto retouch complete portrait sessions, handling of wedding groups and granular control fine-tuning its effects. The basic V24 includes this function and costs £99 less 50% download only less our 10% – so £44.55.

It is now very fast indeed on Apple Silicon and integrates with Adobe’s photo programs. Under the hood it uses some of Adobe’s functions, without venturing into Generative Fill AI to change a digital capture beyond the scope of many competitions. It uses AI, but does not rely on on stolen images or ones licensed for almost nothing in bulk from the big picture libraries. Anthropics built their platform on measurements of the human face and body, research into what people like or dislike, and many years of coding. When it uses image-based AI it draws that from your photo and its bank of facial features modelling data.

The Reflections in Glasses problem

Recently we came across a question in a professional photo organisation Facebook group asking how it was possible to remove reflections from glasses. It’s very difficult, and when it happens in a set of pictures where the photographer is unable to prevent it, it can ruin groups and presentation shots. Many battery studio-location flash heads now have very low power modelling and it’s all too easy to light your subject and fail to spot that your octa-box is reflecting in specs.

PortraitPro’s specimen example might just be good luck, so I decided to test Version 24. My studio room has shutters when blackout is needed. Two pure white plain blinds 110 x 220cm cover the tall south facing windows to prevent furniture, fabrics, art and photographs fading or warping in direct heat. They make a wonderful giant dual light source in daytime sun even in midwinter but reflect in glasses when the camera angle is not just right.

Removing reflections from specs does not come under the Eye menu – it’s under the “Inpainting menu” along with Mouth & Teeth and Remove Stray Hairs.

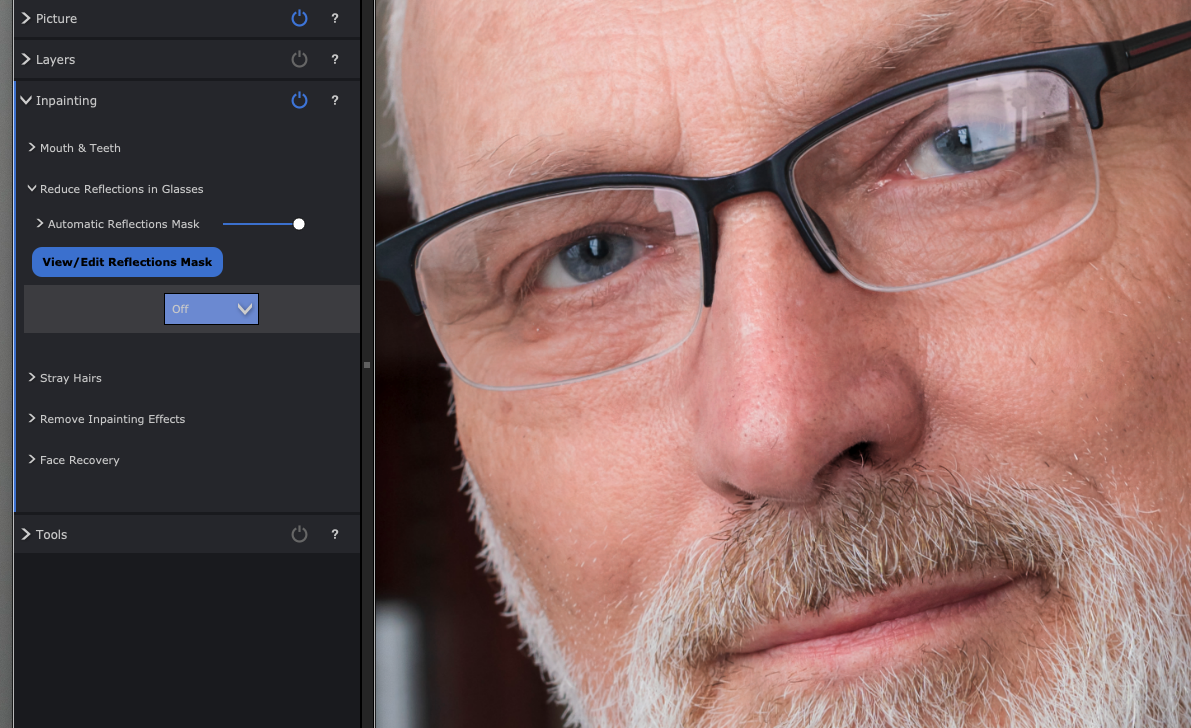
This is a crop from the original file.

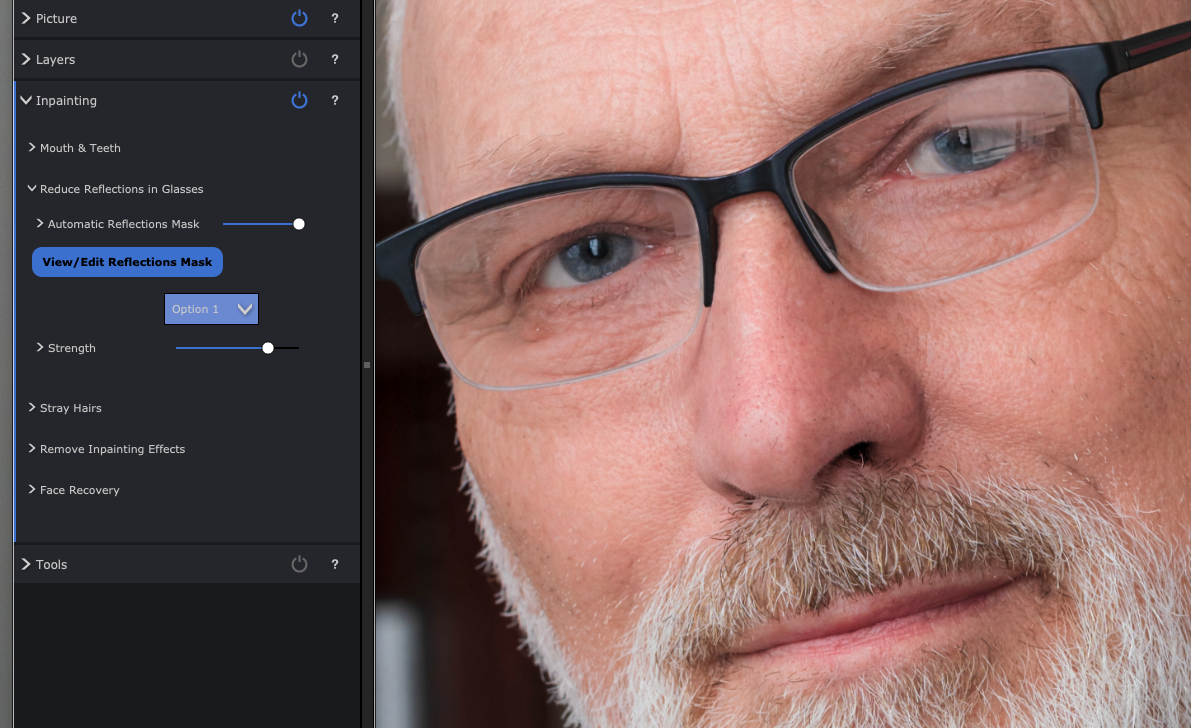
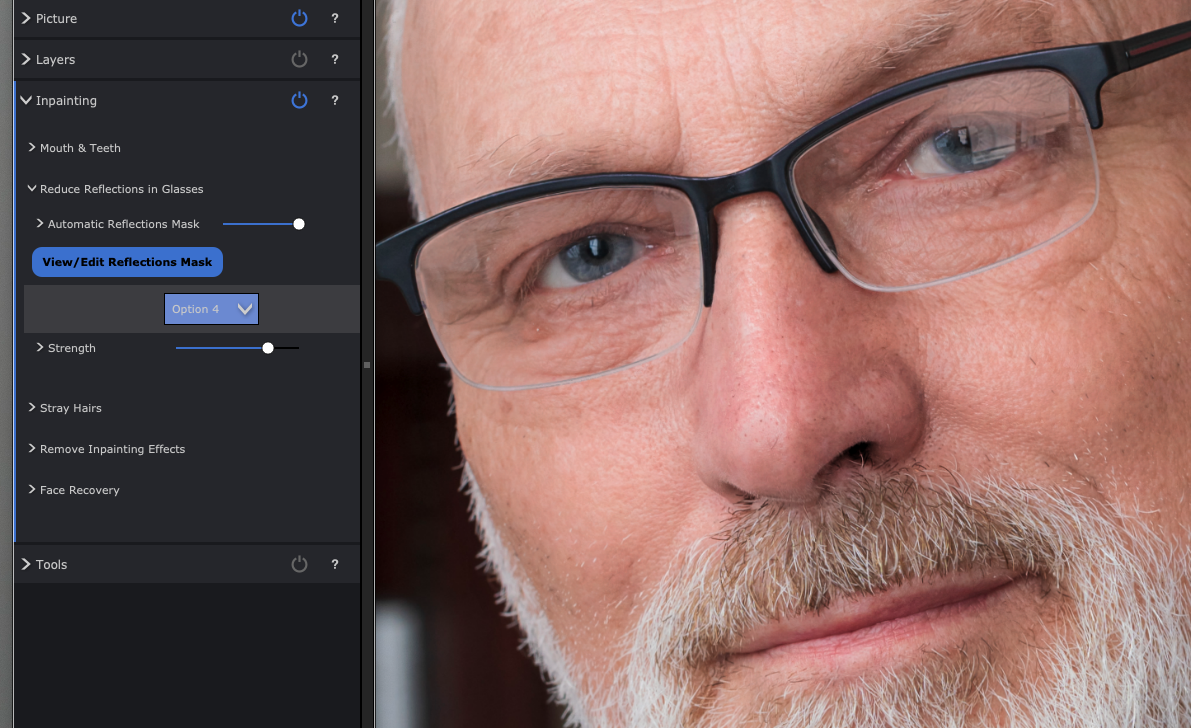
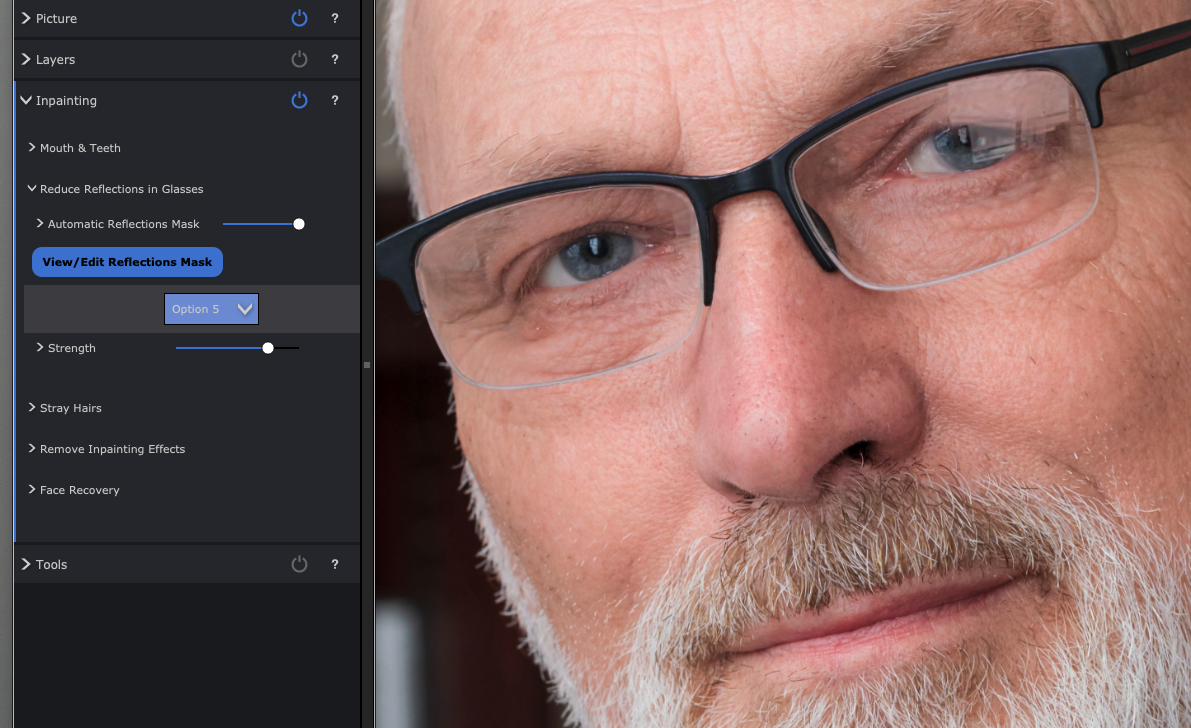
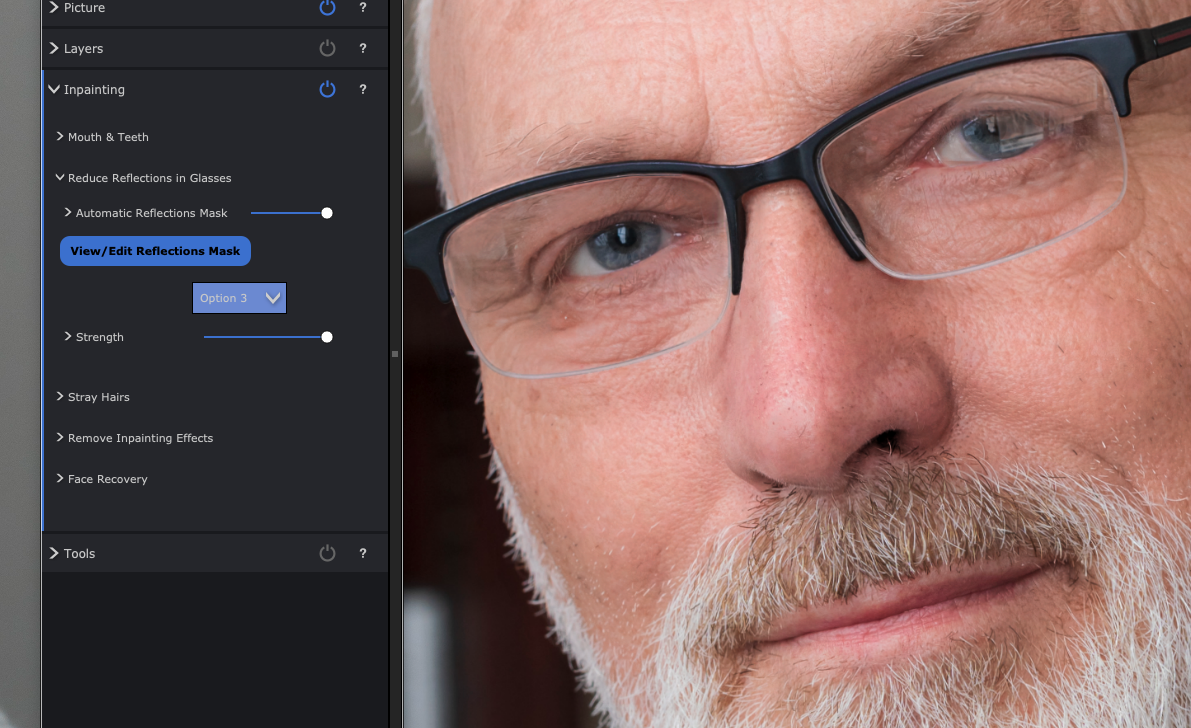
The Reduce Reflections in Glasses view above shows other retouching functions too (notice some reductions in skin blemishes and wrinkles) but has the reflections reduction set to Off. When you select Remove Reflections in Glasses, you see choices for Off (the start position) then Options 1 to 5. Each is a different AI generated restructuring of what should be visible through the reduced reflection. My eyes are old enough to be slightly difficult and it was interesting to see the five choices.

Option 1

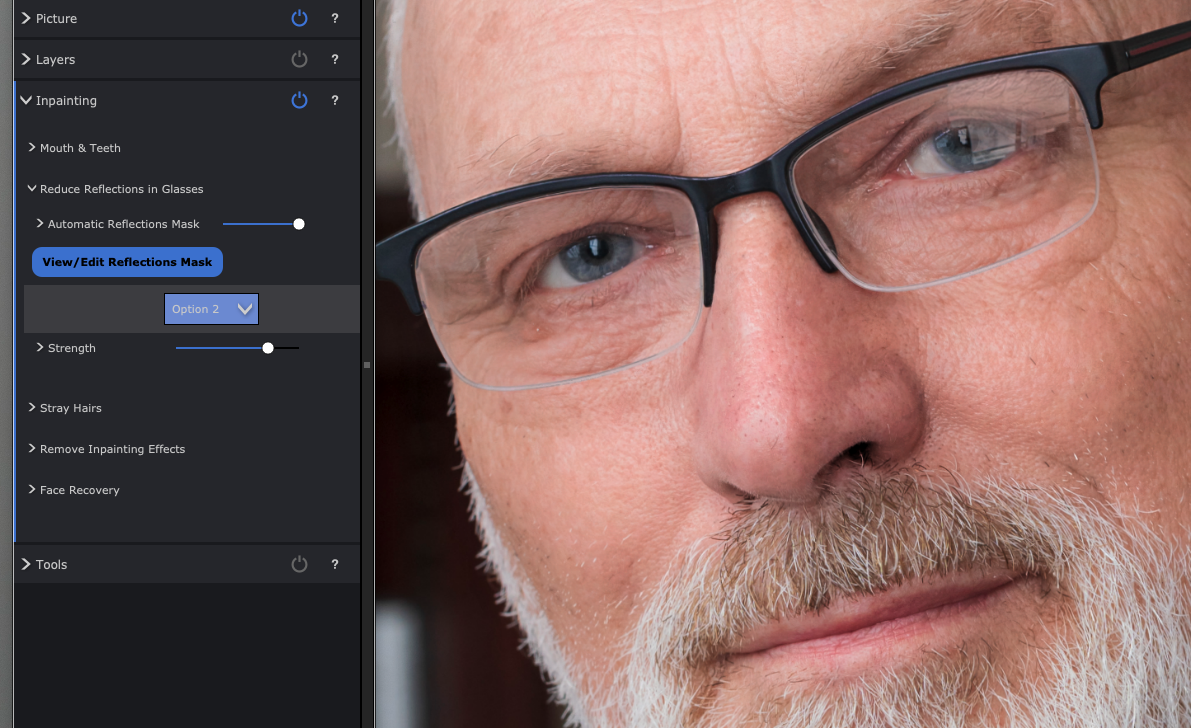
Option 2 (note the left eye eyelid in all these and how it changes).

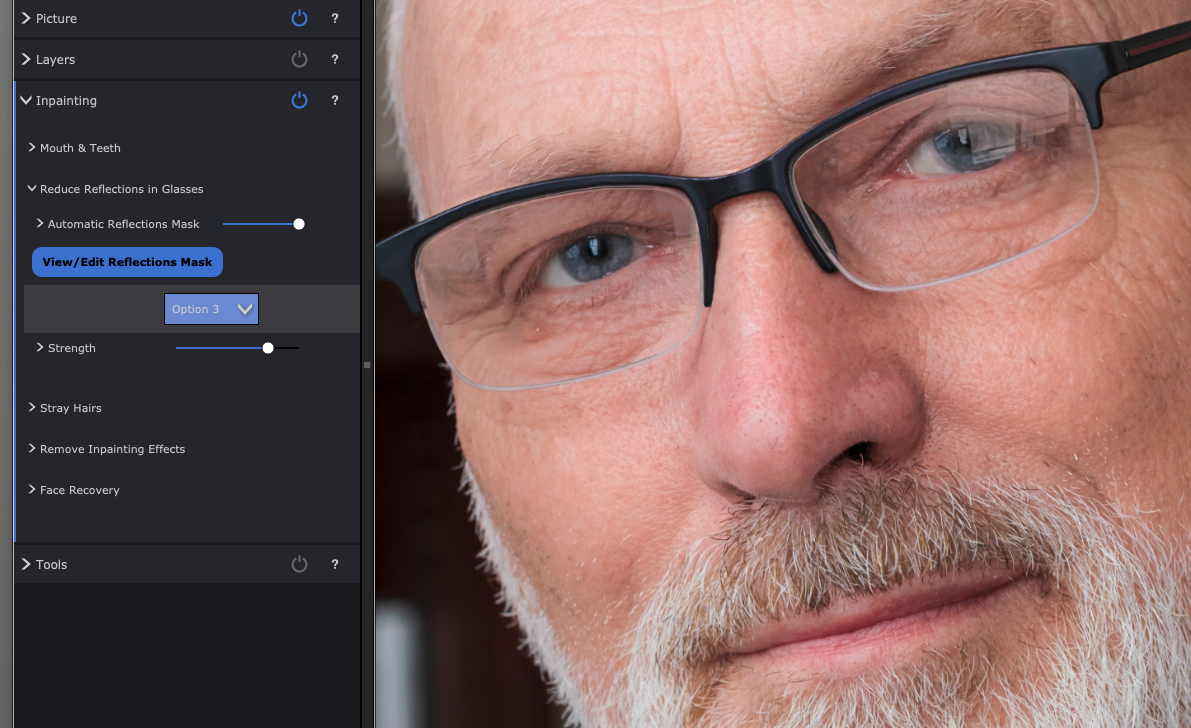
Option 3 which I felt got the eye almost right, though further retouching would be needed for a portrait. It would be good enough for a PR or informal shot.

Option 4 rather odd mismatched detail.

Option 5 eyelid droop…

Option 3 got the upper eyelid almost perfect (not quite but acceptable) and the Strength slider did allow the reflection to be eliminated to the degree shown above. However, it looked better with 85% effect or even the 50% of the earlier example, a faint reflection remaining without obscuring the eye.

The time taken on my Mac M2 Studio Max was next to nothing, I didn’t bother to time it as everything happens in real time include the export from the starting 33MP JPEG to a same size with all PortraitPro’s very subtle modification of the portrait. The defaults were just right but I increased fine wrinkle reduction out of vanity!

After saving a copy of processed result I also saved a .ppx file (the Project) which is a bit like an Adobe .XML sidecar file, and re-opens your original with all the edits at the point you saved this snapshot, reversible and adjustable as needed.

A tougher test

Here’s a worse example than anything you should end up with, so I set maximum strength on this. Option 4 worked best, and despite my eyes being almost entirely obscured by double reflections in my computer reading specs, it was not a bad fix at all. My ‘proper’ specs are coated of course and don’t reflect as badly.

I’m sure I could ask Adobe AI to do something the Generative Fill after masking the reflection area, but in the time it would take me to brush a mask in place, the entire PortraitPro glasses reflection removal would be done and dusted. Is it worth £139 (after our code CCV245 discount)? That depends on what your time is valued at and whether you ever encounter an error in shooting which leaves reflections ruining a shot.

– David Kilpatrick
To see Anthropics PortraitPro Studio Max, and the other versions which start from £49.95 (right now there’s a 15% CC524 discount, update May 23rd 2024) – all include this reflection removal function alongside stacks of other tools – go to https://www.anthropics.com/portraitpro/

AI makes latest PortraitPro deal worth having

We’ve been testing, reviewing and occasionally using this software for years now – occasionally because portraits are not mainstream for your editor, most faces are in editorial contexts where no modification is acceptable (even when it’s just a royal jumper). But for those who must keep family or paying clients happy, in this era of completely modified selfies and altered perceptions of what a portrait should be, the latest AI version has real value.

You can get maximum download discount of 50% plus an extra 10% by using Cameracraft‘s code CCV245

If badly out of focus faces within a group can be recovered, reflections removed from glasses, and smiles improved without the £10k my dentist suggests is necessary to replace teeth you can’t even see… take a look at this full info. – David Kilpatrick
  • Key New Features
  • Mouth Inpainting & Teeth Replacer
  • Glasses Reflection Remover
  • Face Recovery
  • Skin and Hair masks
  • Improved workflow
  • New gender and age detector

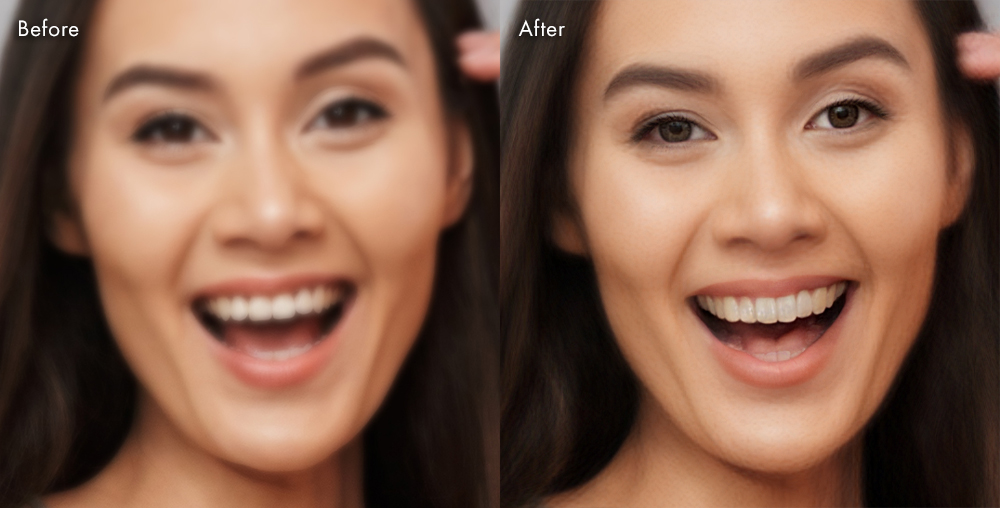
This is Face Recovery, though the lass has become a bit long in the tooth – the AI teeth are more realistic than any amount of focus retrieval and sharpening plus retouching could achieve in a few minutes.

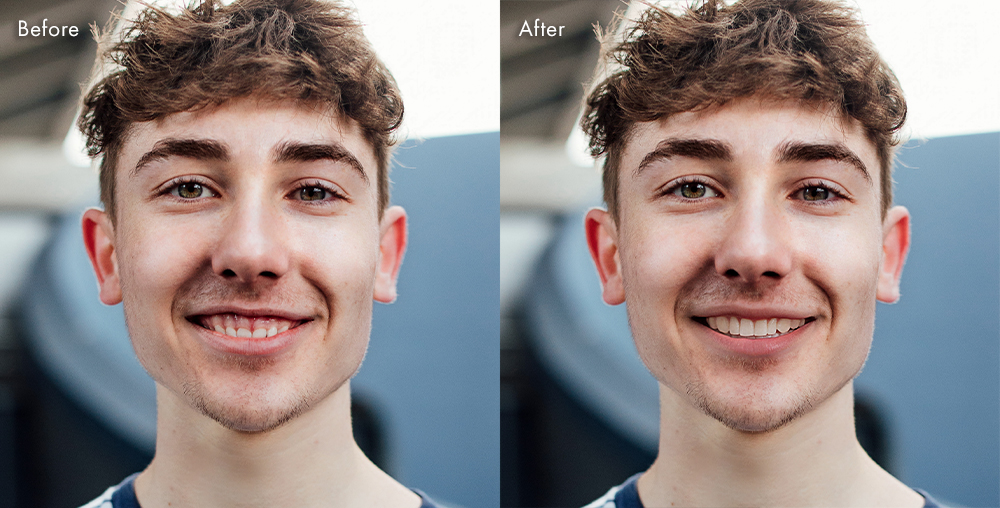
This is Mouth Inpainting.

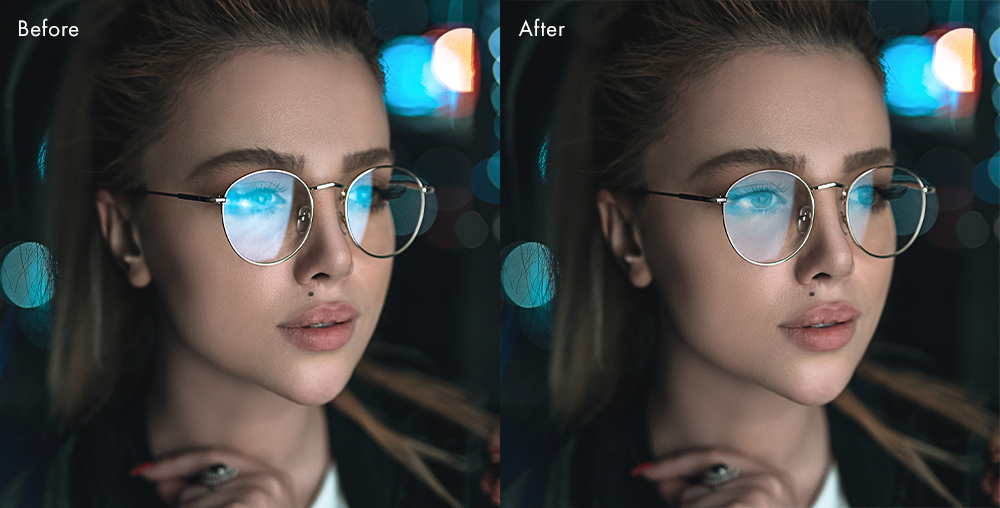
And this is Glasses Reflection removal, which again is a task not to be relished in Photoshop, and the top end version of PortraitPro (Studio Max) can handle in groups, in a series of shots where it’s having a similar effect.

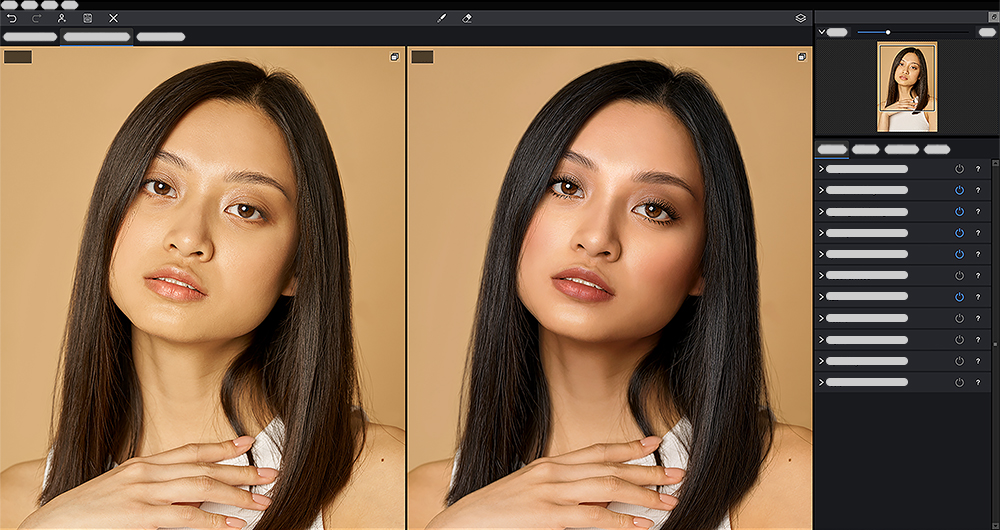
This pair shows a cumulative but very subtle effect from the improved workflow, and it clearly compensates for failings in the colour management and lighting. It’s impressive to note that PortraitPro started life being a very obvious process, and our advice was always to turn the default sliders down rather than up. It has matured considerably. The new workflow has improved gender and age detection, and Studio Max is well-tuned to Apple Silicon to make optimum use of CPU, GPU and RAM.

PortraitPro 24 Editions

PortraitPro Standard is standalone software for photographers working with JPG or 24-bit TIFF files.

PortraitPro Studio is for photographers who work directly with RAW files or want the higher quality of 48-bit colour files, supports conversion between different color spaces, and provides JPEG/TIFF embedded color profile support. Offers Batch Dialog.  

PortraitPro Studio Max For professional photographers or those working with a large number of images. Full Batch Mode to speed workflow greatly.

Compare the different editions: anthropics.com/portraitpro/editions

Availability and Pricing

PortraitPro 24 editions are available from: anthropics.com/portraitpro

Remember to use Cameracraft’s code CCV245 for maximum discount! This can also be used for PortraitPro Body, Landscape Pro and the user-recipe Smart Photo Editor.

Luminar Neo’s new portrait background removal

Luminar Neo has gained a new tool – Portrait Background Removal, enabling the background behind a subject to be made transparent in one click. Careful hair-by-hair selections are done by trained neural networks.

Portrait Background Removal tool can be found in the Luminar Neo Layer masking options. 

It offfers:

  • Remove Background without Layering. Just open Luminar Neo, load an image, and select Portrait Background Removal.
  • Get clean assets for composing. Any portrait you edit can be exported as a PNG with a transparent background, a great base for seamless photo composing.
  • Create realistic portraits with AI that’s precisely trained on people. AI scans the image to find and select human figures as accurately as possible. Luminar Neo has an option to edit several images in a click with custom saved Presets, so editing event portraits becomes faster.
  • Achieve precise selections without extreme effort. The portrait and the background are highlighted in different colours. A Transition Brush refines the edges by removing unnecessary elements where the portrait and background touch. The Object Brush revives portrait details that may have been eliminated by the neural network, while the Background Brush helps to additionally remove parts that aren’t detected by the AI. 

Luminar Neo is available as a one-time purchase or as a subscription. The new architecture is flexible, so it can be easily updated in the future. Luminar Neo is available in both the Microsoft Store and the macOS App Store. Luminar Neo works as a plugin, so you can keep your images in your preferred photo editor while still benefiting from its powerful AI tools.

Additionally, the brand-new Luminar Share mobile app allows you to quickly and seamlessly transfer images from your phone to your computer. Take a photo, edit it, and post it to social media without third-party programs that reduce quality. Luminar Share is available on the Google Play Store and the macOS App Store.​​

To learn more about Luminar Neo and sign up for updates, visit http://skylum.com/luminar-neo

Goodbye white sky…

With cloud covering much of Britain and our own home territory in near the North Sea coast shrouded in featureless white for days, remember that post-processing can transform landscapes

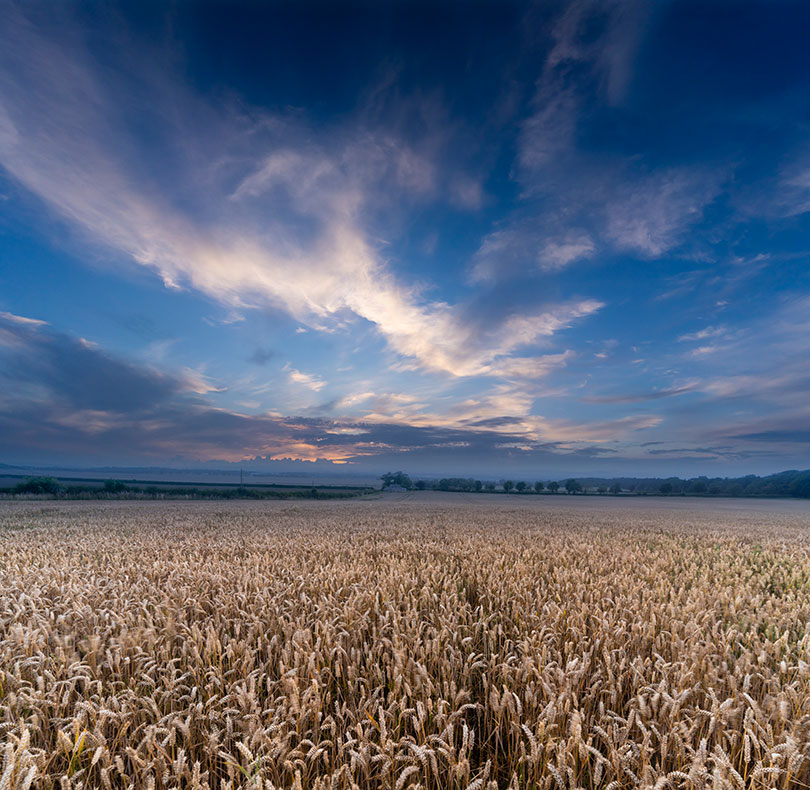
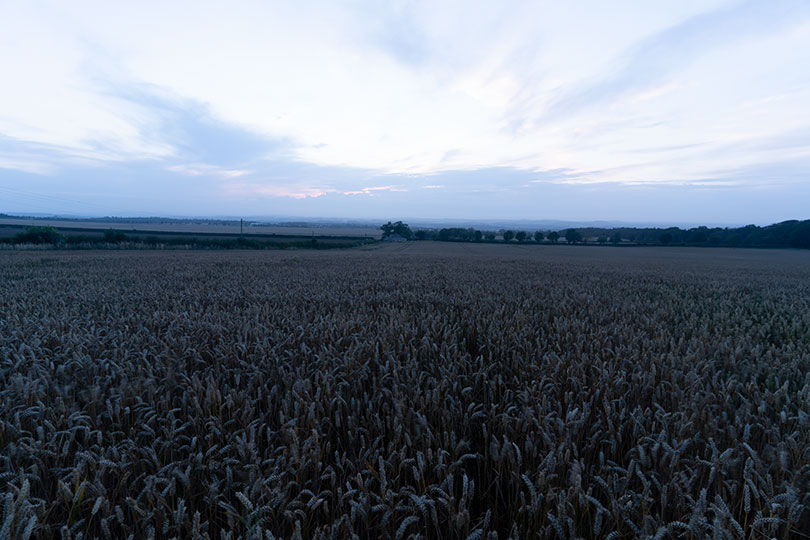
This was just a few days ago when the promise of a sunset disappeared. The sky was taken ten minutes before I expected the best sunset, and shot without any ground – it had potential for use as a stock sky to compose into other shots. The ground, a field of wheat taken from the highest point looking north-west a short distance from our office, was shot hand-held with a 1/5th exposure, stabilisation providing a sharp image from the 17-28mm Tamron FE Sony lens – but the wind blowing the crop selectively, so some ears show contrasting movement.

And that, above, is what a straight conversion from the raw capture looked like (you can also see how the sky had not morphed into a lovely sunset but instead lost any colour and became a neutral dusk). The point is that even a shot like this, in conditions like this, can be turned round by adjustment from raw and combining two frames. The almost square result is also a 170MB file, big enough for an acceptable print the size of some living room walls.

Landscape Pro as a solution when the weather lets you down

We used Photoshop for this but if you don’t have a full Mac or PC editing program, Anthropics’ Landscape Pro is purpose-designed for even more complex fixing-up and comes with its own library of royalty-free sky images (you can add your own). Here’s an example from Anthropics:

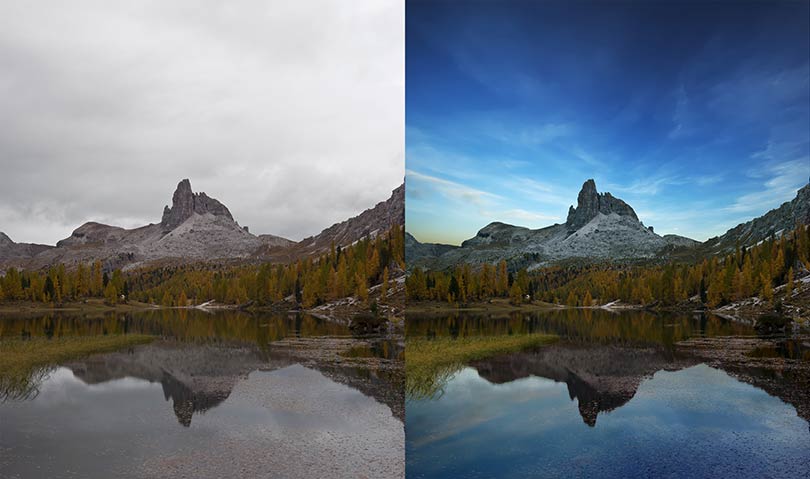
This one uses the masking functions of Landscape Pro to fit the sky to the shape of the rocks, and its controls to define water, mountain and trees as separately adjustable zones. There is also an intelligent function to create reflections in water with a realistic density. Notice that the water-weed in the foreground remains intact in the processed image and the sky reflection has been very accurately masked at the left hand side.

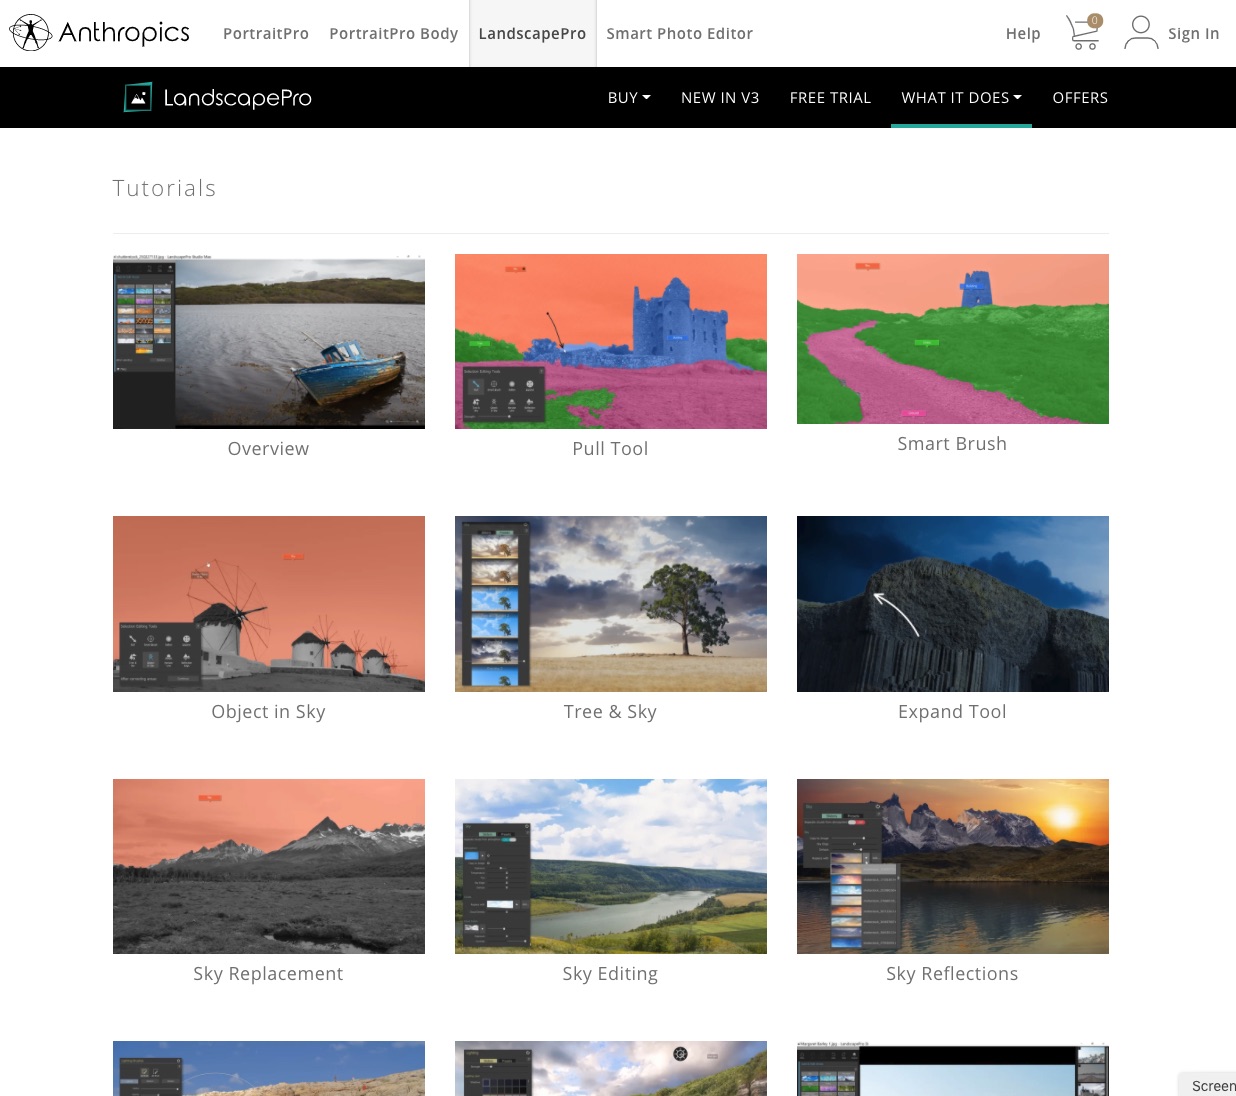
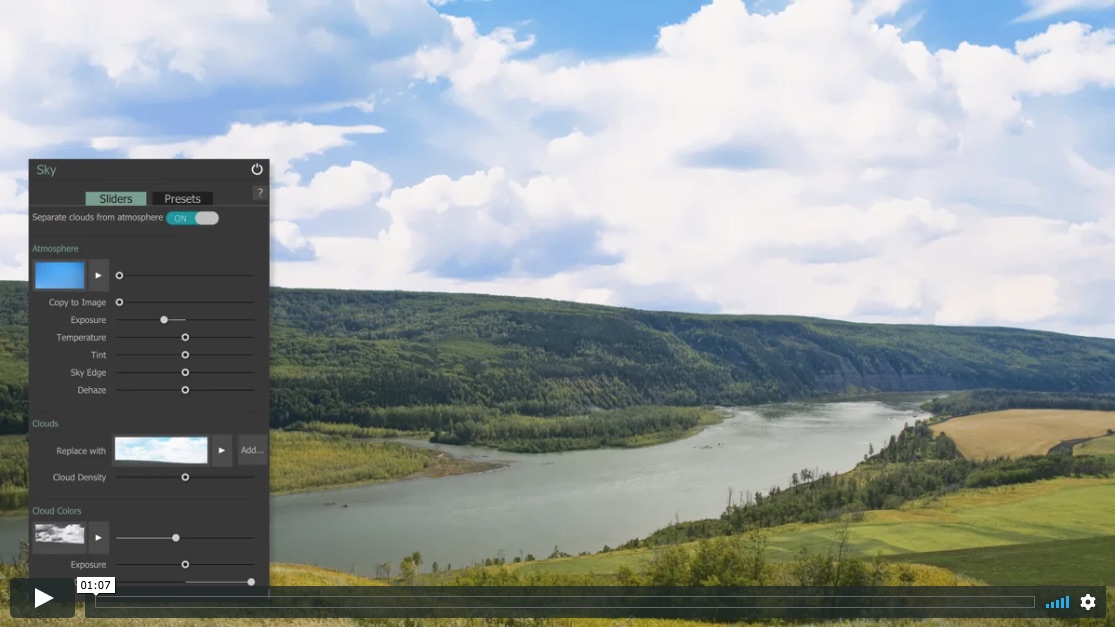
Using the program is well explained in a series of short videos on the Landscape Pro website. These are not the tedious kind of how-to vids you tend to find on YouTube which seem to aim to take several minutes to get to the point, maybe to enable advertising to appear. They are short and very clear in their message, and there’s a good selection (screen shot below).

There is a discount offer of 50% at the moment and an additional 20% off with our code CC8L – this code was not working when this post went out on August 16th due to a technical glitch, it is now working and can be used up to Sunday August 23rd.

Save on Landscape Pro & Portrait Pro using Cameracraft code CC8L

Code valid on any Anthropics software (PortraitPro, PortraitPro Body, LandscapePro or Smart Photo Editor), new editions, upgrades, or bundles. Download your free trial today! 50% OFF sale now on + for an EXTRA 20% OFF use the code CC8L.

Portrait perfection is just a few clicks away

PortraitPro 19’s Artificial Intelligence cuts retouching time – and right now it’s at 50%+20% off!

It’s the season for outdoor portraits and you want to make them studio-perfect. There’s never been a better time to invest in PortraitPro, used by professionals everywhere for the best looking skin, eyes, mouth, hair and more.

Outdoor light can be great but may not be kind to complexions. PortraitPro 19 auto retouches without needing complicated layers, frequency separation or cloning whether as a plug-in or stand alone. It’s fast, not memory or disk space hungry, and runs on Windows or Mac OS without needing the latest updates.

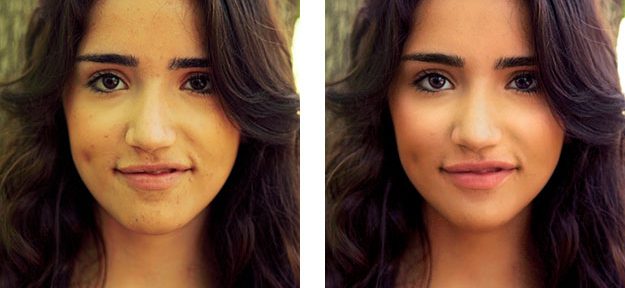
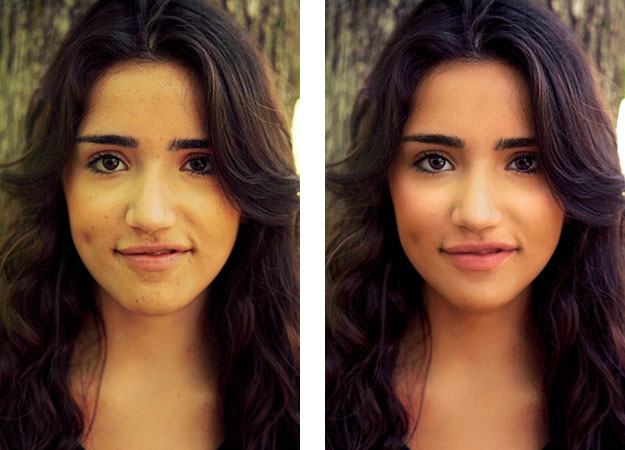
In parks and gardens sunshine on grass and light through trees can put a green cast on to skin tones. It’s hard to fix – but see how PortraitPro 19 does it effortlessly.

“Thanks to AI face detection, PortraitPro 19 is quicker and easier to use than previous versions and makes it possible to apply realistic effects in a matter of minutes, which which would otherwise take hours to do manually. For the portrait photographer who enjoys shooting more than editing, this could be essential software.” – DSLR Photography 

SPONSORED WEB CONTENT – SAVE USING CAMERACRAFT’S CODE:
Code valid on any Anthropics software (PortraitPro, PortraitPro Body, LandscapePro or Smart Photo Editor), new editions, upgrades, or bundles. Download your free trial today! 50% OFF sale now on + for an EXTRA 20% OFF use the code CC8B (ends Monday, August 17, 2020).

READ Cameracraft’s original November/December 2019 review of PortraitPro 19 on ISSUU –
https://issuu.com/iconpublications/docs/ccnovdec2019/10

Perfect Layers – free trial download

onOne Software are announcing that a Public Preview of Perfect Layers is now available to download and try out, free of charge.

Perfect Layers is a standalone application that works on its own allowing you to create and edit layered Photoshop files. If you use Lightroom or Aperture and you’ve ever wanted to or wished you had the ability to create a layered file, then this is definitely for you.

Being able to take two or more files and combining them into a single layered file or taking a single image and duplicating it to create multiple layers and use blending modes to enhance them is very powerful and opens up all kinds of creative things you can do.

onOne have been working closely with Scott Kelby from the National Association of Photoshop Professionals on Perfect Layers to refine the feature set and get great ideas in general on Lightroom users need. Scott has been playing with early development builds of Perfect Layers and he (and the rest of his team including Matt Kloskowski and RC Concepcion) are very excited about the possibilities that Perfect Layers will bring to Lightroom users.

The Perfect Layers Public Preview will expire on June 30th, 2011. The final version, 1.0, will be available for purchase in mid-2011. At that time, Perfect Photo Suite 5.5 owners will receive a free product update that will include Perfect Layers 1.0. Suite owners and anyone interested in Perfect Layers can download the free public preview now.

Canon release new Final Cut Pro converter

Canon today announces the latest update for EOS Movie Plug-in-E1 for Final Cut Pro – the company’s custom-developed software application that provides quicker and easier editing of EOS Movie footage in Apple’s Final Cut Pro software suite.

Launching to coincide with the start of the 2011 National Association of Broadcasters (NAB) Show in Las Vegas, EOS Movie Plug-in-E1 for Final Cut Pro version 1.2 will make the importing of EOS Movie files even easier, allowing users to transfer files from any folder, without needing to mirror the folder structure on the camera itself.

The update also enables smoother importing from Canon’s EOS 7D, EOS 5D Mark II and EOS-1D Mark IV models, allowing users to import footage without requiring the THM file generated by the camera.

Originally launched in February 2010, EOS Movie Plug-in-E1 for Final Cut Pro is designed to quickly and seamlessly convert EOS Movie footage from Canon’s leading range of EOS DSLR cameras to Apple’s high-quality ProRes 422 codec. The plug-in allows users to convert footage at approximately twice the speed of Apple’s standard conversion, creating a smoother workflow for the rapidly growing number of videographers shooting HD video content on DSLR cameras.

EOS Movie Plug-in-E1 for Final Cut Pro version 1.2 will be available to download for free from 25th April 2011.

Adobe ACR6.2/LR3.2 Lens Profile – Nikkor AF-S 85mm f/1.4G

I have been using the new Nikkor AF-s 85mm f/1.4G lens, arrived yesterday. I have produced both raw and JPEG profiles for the lens on the D3X – these can also be used on the D3, D3S and D700 (profiles tend to be fairly portable between bodies, if done on the highest resolution option).

Download link:

http://www.dphotoexpert.com/Resources/NikkorAFS85mmprofiles.zip

Submitted to Adobe. This profile was made at 4m distance, and maps the lens at f/1.4, f/2.8, f/5.6 and f/11.

Very little correction is applied as the lens is already very good, but there is a small adjustment to distortion and vignetting, and some cleaning up of visible CA. It is still a good idea to enable de-fringe as well.

– DK

Adobe Camera Raw 5.7/LR 2.7 released

Adobe today announced the Lightroom 2.7, Photoshop Camera Raw 5.7 and DNG Converter 5.7 Release Candidates, available for immediate download on Adobe Labs. The updates add raw file support for: Canon EOS 550D (Digital Rebel T2i/ EOS Kiss X4 Digital), Kodak Z981, Leaf Aptus-II 8, Leaf Aptus-II 10R, Mamiya DM40, Olympus E-PL1, Panasonic G2, Panasonic G10, Sony A450.

Adobe encourages photographers to try out the newly added raw file support in this update and provide the product team with feedback on the Adobe User to User forum (http://forums.adobe.com).

In addition, photographers can also participate in the Lightroom 3 beta program and try out the new features in Lightroom 3 beta 2 for free. To learn more and download Lightroom 3 beta 2 visit: http://labs.adobe.com/technologies/lightroom3/.

Lightroom 3 Beta 2 – the high ISO wunderkind

I’m not going to bore you with countless 100% clips. Just open this one file. It is a 100% screen shot of a tiled view of the same raw file from a Canon EOS 550D (aka Rebel T2i), taken at ISO 6400.

On the left, you see what Adobe Camera Raw 5.6 does with this file using no sharpening, 25 Luminance NR, 50 colour NR. On the right, you see what LR 3 Beta 2 does using the same settings (LR noise reduction has some further options – these are not adjusted).

When exporting the LR image to Photoshop, a dialog box appears saying you may need to install Adobe Camera Raw version 5.7! At the time of writing, version 5.7 is not yet available. But LR3 Beta 2 knows it exists… I used LR Rendering for this sample.

Click the image, open the full size screen shot. Or view it at
http://www.pbase.com/davidkilpatrick/image/123036282

The 12,800 shot is by no means bad either. You could compare it with ISO 1600 shots from the first 10 megapixel CCDs.

Trust me, the LR 3 Beta2 result is superior both to the Canon in-camera JPEG and the Canon DPP processed result. Had I the time I’d post examples of every ISO from 100 to 12,800 and you would see something very special – the increase in size of ‘grain’ with each speed step, but nothing more. NOTHING more than a proprotional increase in grain size, just like film  used to be.

No oatmeal. No porridge. No hot pixels, no smeary watercolours. No colour blurring and luminance smoothing. Just neat, tight, virginal grain. Hmm. I should not have said that. Even so…

And another things – it works on everything. It works on old files, new files. RAW files from before the Ark got stuck on Ararat. Night shots taken when night shots could only make 7 x 5 inch prints. Nikon, Canon, Sony, old Minolta, Pentax, Olympus – download this beta, and you just discovered great pictures in the stuff you thought was rubbish because you accidentally used ISO 800 when that meant shaking the pepperpot over your soup!

Go download! http://labs.adobe.com/technologies/lightroom3/

Tip: to use Lightroom use a front end, just set Photoshop as your editor, and after adjusting the pic hit Command-E – same as hitting the Open button in Adobe Camera Raw. Go straight to Photoshop, Do Not Pass Go, and do not (yet!) spend £200!

– DK

1 2