My new Sony 85mm…

With extremely expensive Sony-fit 85mm lenses in abundance and beyond my (economically sensible) reach, I’ve done good commercial work last year on the Canon 85mm f/1.8 USM and later the Sony 85mm f/2.8 SAM on A7RII. Some of my work relies on showing close-up details with strong differential focus, and hardly any lenses are free from ‘colour bokeh’ issues, so it’s needed some care to process the files and avoid that typical magenta tinge to the background and greenish hue to foreground blur.

detailshot6

This is a typical example. It’s on the Canon 85mm f/1.8, and although this is a fairly clean lens, the background at f/4 needed some post-process work to avoid a magenta colour shift.

longwhitecloud-glass

In contrast, absolutely no work is ever needed on my Sigma 70mm f/2.8 macro. It shows no chromatic effects in defocused areas. But this is a studio shot at f/10 – and, like many commercial shots, the extreme f/1.4 or f/2 apertures which are so highly valued by the bloggerati simply don’t enter the equation. Differential focus here is precisely balanced against the legibility of the bottle wording at web size (these shots are for a 1440 pixel wide template).

I like to have a choice of wider aperture and macro lenses for this kind of work as they all produce different effects. My 70-210mm f/4 Minolta AF classic, for example, has about the cleanest foreground blur wide open on 0.25X scale 210mm close ups. My 85mm SAM is ‘dirty’ by comparison (but its 60cm 0.20X minimum focus distance still makes it the best 85mm for close work unless you use a macro or a zoom with good close range). Then, we get the Zeiss Batis 85mm f/1.8 popping up followed now by the costly Sony G-Master 85mm f/1.4 FE. In both cases you get 80cm minimum focus and around 0.12X image scale (rather like the 70-200mm f/4 Sony G FE lens used at 190mm and 1m focus).

I really like, on a full-frame camera, to reach one quarter life size on the sensor. One-eighth, the 0.12-0.125X type of scale, means a full A4 magazine page fills the frame. One-quarter, 0.25X, means a quarter of that page or a postcard size fills the frame. There are so many things in the world, from a kitten’s face to a lily in bloom or a perfect cup cake, which are about this size. When I photograph food I often want to avoid including the edges of the plate completely. Those lenses which push me back too far prevent that. I know many users will be puzzled by my preference and see no reason to want to get any closer. Well, that’s just me. I have always done well creatively and commercially from surprisingly tightly cropped, close-up work.

And, being more critical of these new hyper-expensive lenses, we’ve had 80cm focus 85mm lenses for SLR focusing for 70 years now. Really, any new lens in this focal length should focus to 60cm or ideally 50cm without calling itself a macro. That suits the way we live, in our cars, at desks, at home, at tables, in small spaces, giving other people space. I really like to be able to place an item in front of me, or even hold it in my hand, and focus on it. I can’t do that at all with 1m minimum focus (the old rangefinder Leica standard!) and only just with 60cm.

Then I started seeing some work taken on an interesting old lens. It’s small, taking 49mm filters. It is fast, at f/2. It was originally designed by Carl Zeiss and if you were really lucky you might find an 85mm f/2 Sonnar. But for around £100/$150 or a little more for guaranteed condition you can buy the Russian Jupiter 9 85mm f/2 manual preset lens in M42 screw (Pentax/Praktica). And since it’s a screw mount SLR lens, you can add an extra layer of focus extension for very low cost between the E-mount body and the lens.

SONY DSC

Above: my Jupiter-9 with Camdiox helical Pentax screw E-mount adaptor fully extended and with a vital lens hood fitted; top, the mount and lens set for infinity focus, lens hood removed.

So last week I assembled a relatively low-cost eBay rig to enable even closer focus than the 60cm of the SAM . This is partly just experimental, our of curiosity to see how well a 1930s Sonnar type design made in 1980s Russia with 1950s technology and coatings can peform. The 85mm f/2 Jupiter-9 is often used to get an attractive f/2 soft-focus with core sharpness, gradually cleaning up until around f/3.5 the softness is gone. It is also used to get neat circular bubbles from strongly out of focus light sources beyond the subject, or a generally very attractive focus transition at any aperture since the 19-blade mechanical iris forms an almost perfect circle at all settings. It focuses slightly closer than 80cm.

With the well-made Camdiox helical adaptor costing under £28 delivered, this is extended in a continuous range to 35cm from the film plane and 0.51X. Obvously, it takes up no more space than my plain M42 adaptor as it is exactly the same thickness at infinity setting – and it does allow true infinity focus. Being solid metal, the combination is not all that light, a dense 490g in its 88mm long by 63mm maximum diameter, 20g more than the Batis. But it feels good. The aperture mechanism is crude and difficult to see and use, but would normally be set first to a chosen aperture such as f/2.8 for the best sharpness with a shallow depth of field, or f/8 for landscapes. It would not be much fun for anyone who likes taking a range of shots from f/2 to f/16, or for anyone wanting accurate half or third stops.

First of all, is this lens even remotely sharp, and can the Sony A7? bodies use it well? Both answers must be yes. Just set the focal length for normal distances to 85mm and the in-body SSS of the A7SII, A7II and A7RII will give amazingly effective stabilisation. Work between f/4 and f/11 and this simple old lens design outresolves the A7R. I was just checking the focus on some calendar text in very dim room light, using ISO 1600 on my A7RII, when I pressed the shutter with 1/40th hand-held –

85mmJ9-f4-1600-40thA7RII

This was never intended to be seen, just a casual target. These pictures open out to Facebook size, by the way, when clicked – 2048 pixels. Here’s a 100% pixel friendly section from this. I was surprised. The lens was at f/4 and focus was done at max magnification, at the taking aperture.

85mmJ9-f4-1600-40thA7RII-100%

You need to check this JPEG out by clicking to open/view at 100%. It’s like this right across the frame, corner to corner. There’s a pleasant dimensional quality to the rendering this old lens gives, but it has one massive failing – it flares up dramatically if any light at all reaches the front glass. The only solution is a very deep lens hood indeed.

Making more considered tests, I headed for a target I had set up to explore colour bokeh, that unpleasant magenta to green shift in defocused areas. With this set-up, my 85mm SAM is not bad at all and does benefit from a proper lens profile. As you can see, the music doesn’t seem to change much in colour from front to back though in the full size 42 megapixel file, especially without lens CA corrections, some funky colours do appear.

85mmSAMf2p8-corrected

Here’s how the Jupiter-9 worked out – first of all, it’s one of a number of shots at different distances and angles, not identical to the SAM shots, and this one takes advantage of the closer focus combination of adaptor and lens:

fiddlemusicJ9f2p8close-facebook

The colour shifts are different, with a bit of a rainbow including red and cyan fringes as well as magenta and green, and the contrast is lower. However, the detail in the very limited f/2.8 focus zone is very fine and over a range of tests the blurring (from the circular aperture) just looks better. No doubt I need to take many more shots with this lens (once the deep 200mm lens hood I’ve found arrives…) but it seems like a worthwhile creative option alongside a number of older manual lenses.

What really interests me is that this same design, with a few refinements of modern manufacture, would surely be worth having. Tamron’s forthcoming 85mm f/1.8 will focus close – it is the special feature of this new lens series – and maybe along with the 35mm and 45mm f/1.8 designs will one day appear in native E-mount. I’d love to see a half-price Batis, a Sonnar f/2 variant instead of f/1.8, with a decent close focus limit around 50cm. Until then I’ll use the SAM on LA-EA3 or LA-EA4 (works well with either) and my assortment of manual set-ups including this Jupiter-9.

Here’s a revision to the post, got some sunshine this morning (day after writing the original post) and with focus peaking and f/5.6 even a little moving target comes out whisker-sharp!

theexplorer-fb

– David Kilpatrick

Capturing Autumn colour better

nopolariser-vs-polariserandprofile-web

Upper: unprofiled (Standard) raw conversion. Lower: using a tunsgten-light generated custom camera profile, combined with a polarising filter, gives a more vivid impression.

Most Alpha system users know that some – not all – cameras have a special JPEG mode for Autumn Colours. They’ll also know that if you shoot raw, with no JPEG in camera, only Sony software replicates this. The choice of picture looks or camera profiles in Lightroom and other programs ranges from none (one default) to good (a full basic range similar to Canon settings). However, you can go way beyond the default look your camera will produce from the Autumn colours we are seeing right now (UK) if you profile your camera using the X-Rite Color Checker Passport and the free downloadable software which goes with it. You can also use this software with any standard MacBeth Color Checker card.

You still need to create a .dng file from your original raw, as you also do for Adobe’s free camera profile generator. The X-Rite software creates much smaller profile files but they are no less effective.

Here’s my tip – normally, you calibrate by daylight and the Adobe Camera Profile (.dcp) includes automatic adjustment for tungsten. You can also take two test shots, one under each lighting condition. Experimenting with the X-Rite software, I found that if you only use tungsten to create your profile, all the daylight ‘landscape’ colours (especially green foliage and the sky) really pop out. The greatest change is in the sky blue, which can be very disappointing if you use Adobe Standard as your camera profile for raw conversion.

A7RIIprofiles

The zip file you can download from above contains some .dcp profiles for the A7R II which I’ve produced (the names are more or less self-explanatory). They should be unzipped and placed in the CameraProfiles folder of Camera Raw in Application Support>Adobe. You can find the software, instructions for PC and Mac, at:

http://xritephoto.com/ph_product_overview.aspx?ID=1257&Action=Support&SoftwareID=986

Using the stock Lightroom/ACR A7RII camera profiles you’ll find that the Landscape flavour tends, if anything, to make sky blue lighter. My tungsten-generated profile has most of the overall ‘snap’ of Landscape plus very much richer sky tones.

The second tip with Autumn/Fall colours is, of course, to use a polariser. I’d say this makes the single greatest difference to all Autumn colours even if you can’t see it clearly when composing. The individual leaves reflect light, and the polariser cuts through this to reveal the full colour. Because it also darkens the sky, the often fairly dark colours of Autumn trees come to life better. You don’t need to study the trees, just set the polariser for the best results with the sky. The leaves are at such random angles all positions tend to work equally well. It can however be worth trying a few different rotated positions of the polariser especially if there is also water in the shot. What deepens the sky may also reduce the strength of reflections in water. Experiment!

– David Kilpatrick

If you are considering buying a Color Checker, Color Checker Passport on Amazon can benefit this site.


B&H has Hasselblad HV offer again

Hasselblad HV from B&H

I feel slightly sick… I’ve spent so much on buying and replacing successive Sony A7 series cameras and their lenses that I can’t just buy this outright, which I would love to do. I sold my A99 to get the A7R (subsequently replaced by A7II, and now by A7R II) and have regretted it in so many ways, the whole optical concept of the mirrorless system being built down to a price by using innovative construction… unlike the A99 lenses which are designed even to be usable on film, let alone on a DSLR body. And then there’s GPS. I really miss GPS-in-camera and it can take me many extra hours without its benefit, to caption a 500 to 1000 final edit from one or two weeks of travel shooting to the degree of detail my work requires. And dual memory card slots… and just the whole feel of the camera.

B&H have this today for only $3,495 with the 24-70mm f/2.8 Carl Zeiss lens, two batteries, and case.

And this is actually cheaper than an A99 and pretty much hand rebuilt by Hasselblad into a new body, with a hand-picked lens (you can be sure) all fitted in a Pelican-style hard case. It’s not vacant bling on a camera which does not deserve it – it’s a thorough upgrade to one of the best system cameras ever made, to make it even better.

They ship to the UK and rest of the world very reliably and honestly, if I had the spare cash, there would one on the way to me now. If you do buy from this link (anything from B&H, even if you navigate away from this offer) we do make some small commission to help support the site. Buy a hundred of ’em and I can maybe get mine!

– David Kilpatrick

Canon’s 250 megapixel sensor – the reality

canonbigsensor Canonbigsensorcamera

Here’s this morning’s news:

United Kingdom, Republic of Ireland, 7 September 2015 – Canon Europe, a leader in imaging solutions, today announces that its parent company, Canon Inc., is developing an APS-H-size (approx. 29.2 x 20.2 mm) CMOS sensor incorporating approximately 250 million pixels (19,580 x 12,600 pixels), the world’s highest number of pixels for a CMOS sensor smaller than the size of a 35 mm full-frame sensor.

When installed in a camera, the newly developed sensor was able to capture images enabling the distinguishing of lettering on the side of an airplane flying at a distance of approximately 18 km from the shooting location

Well, this is great for the Guinness Book of Records, but you need to put it in context. Sony’s little HX60 – like many other 1/2.3 inch sensor compacts offering 20 megapixel resolution – records 705,000 pixels per square millimetre, 840 pixels per linear millimetre. And where Canon shows a 35mm f/1.4 lens on their prototype camera, the wee Sony goes to 129mm…

The new Canon sensor records about 450,000 pixels per square millimetre, or 670 pixels per linear millimetre. It’s actually just a little bit higher in resolution than the Sony one-inch sensor used in the Cyber-Shot DSC RX10 and RX100 series (414,000 pixels per square millimetre).

sonyHX60

In theory, given the same lens and the ability to aim the camera, a pocket Sony Cyber-shot with backside illuminated CMOS 20.2 megapixel 1/2.3″ sensor can distinguish the lettering on that airplane (or if you’re in Britain, aircraft or aeroplane…) from 22.5 kilometres – and if the Sony G zoom on that HX60 is sharp enough, make that 82km. Unless of course Canon was actually testing with a 600mm f/4 attached. Saying what focal length of lens is used gets rather important when chucking around statistic-examples like this.

It is very easy to use facts and figures without reference or benchmarks for comparison.

This is no reason to rain on Canon’s parade, as the video achievement is a major one. Here’s the rest of their tech info, and the important bit is in the last paragraph – Big Brother is droning you… and across that city square, he’ll be able to recognise your eyes and put a bullet in your head with surgical precision.

With CMOS sensors, increases in pixel counts result in increased signal volume, which can cause such problems as signal delays and slight discrepancies in timing. The new Canon-developed CMOS sensor, however, despite its exceptionally high pixel count, achieves an ultra-high signal readout speed of 1.25 billion pixels per second, made possible through such advancements as circuit miniaturisation and enhanced signal-processing technology. Accordingly, the sensor enables the capture of ultra-high-pixel-count video at a speed of five frames per second. Additionally, despite the exceptionally high pixel count, Canon applied its sensor technologies cultivated over many years to realise an architecture adapted for miniaturised pixels that delivers high-sensitivity, low-noise imaging performance.

Video footage captured by the camera outfitted with the approximately 250-megapixel CMOS sensor achieved a level of resolution that was approximately 125 times that of Full HD (1,920 x 1,080 pixels) video and approximately 30 times that of 4K (3,840 x 2,160 pixels) video. The exceptionally high definition made possible by the sensor lets users crop and magnify video images without sacrificing image resolution and clarity.

Canon is considering the application of this technology in specialised surveillance and crime prevention tools, ultra-high-resolution measuring instruments and other industrial equipment, and the field of visual expression.

Actually, I see a better use. With the camera set up to cover an entire playing field, licenced from Sony the latest ‘Ball-AF’ ball recognition technology will keep focus on the ball and Minolta’s auto zoom framing patent will compose the crop. TV crews will no longer be needed and Rupert Murdoch will be able to install a full system in every stadium!

– David Kilpatrick

A7RII versus Pentax 645Z

At a workshop given by John Denton for The Flash Centre, with Elinchrom lighting and Pentax 645Z demonstration. model Laura posed for a comparison pair of shots using the Pentax with 90mm macro lens and the A7RII equipped I regret to say with a much inferior lens, the basic 28-70mm.

To compare the quality bear in mind that the Pentax was ISO 200 at f/5.6 and the Sony was ISO 400 at f/8 as I felt it necessary to stop down – I should not have, as I had forgotten than the 28-70mm is sharper at f/5.6 than f/8, which introduces local unsharpness to the left hand end of the image (landscape) and did with all three samples I have used. This means the model’s face is smeared on the Sony shot, because this lens can’t produce a sharp image under these conditions in that part of the frame. Yes, I’ve had some OK results, but this was the first time I used the 28-70mm on the A7RII. It is OK on the A7II and A7S, as the blur is not so visible at those magnifications. It’s really not good on the A7R or A7RII.

So, please examine everything except the face…

This is the Pentax shot. Despite the matched for theoretical exposure, it is much darker and the ISO 200 is only equal to ISO 100 in Sony terms. Daylight balance set for the flash, Adobe Camera Standard profile since no other is available.

Here is the full resolution link to 146MB (if opened or downloaded) original:

http://www.pbase.com/davidkilpatrick/image/160895282

This is the Sony shot. The Camera Portrait profile in ACR gave much improved skin tones, so I’ve used this. The pBase link appears to have scaled the images proprotionally, so the 42Mp image is correctly smaller than the 50Mp.

Here is the link to the 120MB original:

http://www.pbase.com/davidkilpatrick/image/160895292

Enjoy – John teaches retouching and has set up deliberately harsh lighting to create over-sharp skin and too much detail, which he then expertly ‘fixes’. My shots are un-fixed. His workshops are worth every penny as he delivers an entire set of notes and his Photoshop actions to all delegates.

– David Kilpatrick

A7R II – universal solution, lens challenge

I’m under pressure to take endless pictures with the A7R II which arrived from WEX (Warehouse Express) on Thursday superbly packed. I am also finishing off f2 Freelance Photographer magazine to go to print over the weekend and have many hours of work to do – and despite having the camera, I won’t be removing some other article to rush a scoop into print.

It’s actually pointless to attempt to review any camera until you have used it for a few days at the minimum, with deliberate testing in mind, or several weeks with normal unplanned uses to confront it. Nothing tests a camera (and photographer) quite like real world pictures which are not hunted down as test subjects.

But of course I have gone out and taken a few shots during a brief period of sunshine which has returned after days of rain, and replicated a set-up I shot few weeks ago on the A7R, also to test a new type of combined LED and flash lighting head (Bowens IC12).

First of all, the £2695 UK price has to be compared against the A7S, A7II, or A7R with due accounting for its useful bonus – this camera body comes with the usual USB charger block and a battery, and then a further Sony external battery charger (remember them?) and a second battery. At Sony RRP this is £76 (battery) and unavailable (charger) but surprisingly expensive when it was. It’s definitely £100-worth of extras. There is also a screw in, not clip in, screw clamp grip twin USB/HDMI tethering lock device which could also securely grip mic and headphone leads.

Unboxing should hold no surprises now, but firing up the A7R II was a familiar experience as so many of setting customisations turned out to be factory preset to my own preferences. It still needed the image size and filetype setting up, AdobeRGB, Date Form folders and a few other things I used. And then, at last, the entry of copyright and byline information to be embedded into every image!

The A7R II takes the same GGS screen protector as the A7II and the RX100 series, not the same as the A7. First job was to stick a temporary protector on, and order one of these. All my cameras have GGS glass on them from day 1.

kelsotownhousejul30-16-web

I used the CZ 16-35mm f/4 lens for a few outdoor shots and also for a test or two I will not release (too many tripods, cat trays and empty boxes in shot!) indoors at up to ISO 6400. Basically… you can use Auto 100 to 6400 and as long as you set Luminance NR to 25 from 400 up and increase it gradually to 50 at 6400 (LR/ACR) the images will be smooth and noise free as well as sharp. I also enter NR 10 even at 100, because it helps keep sky blues smooth.

You can view or download and examine, as you wish, a full size 120 megapixel from this from my pBase library – http://www.pbase.com/davidkilpatrick/image/160888201

You can view at ‘large’ which is really small… select ‘Original’ to see the original, of course. Or a tiny corner of it! If you think the 16-35mm is at the edge of its performance at f/9 in this shot, you are right. Anything wider and the corners and ends of the shot become visibly soft at 16mm. This test shows me that where f/9 was fine for 24 megapixels, I’m probably going to go for f/11 or even f/13 as a standard setting with the A7R II.

driedflowers-A7RII-web

This is not a fair test even yet, but it says a few things. It’s taken on a late 1960s Asahi Pentax SMC Macro Takumar 50mm lens (I enter 75mm in the App data on the camera to ensure correct SSS) set to f/11, which is actually around f/14 at this working distance/extension. The camera is hand-held, with a Sony mini flashgun on top bounced to trigger two Bowens IC12 heads set to flash mode, after first doing the lighting and subject adjustments in LED Video mode. With these unique heads, the flash and the video modes are 100% identical in terms of how they cast shadows. The flash was set to 1/1 power at 1/1000th for a bare fresnel spot on the left, and 1/2 power at 1/1000th in a small Apollo softbox above and to the right. Focusing was done using the magnify function by moving the camera (or head and hands, in effect) over the subject.

Again, you can view a 100% 120 megapixel version of this: http://www.pbase.com/davidkilpatrick/image/160888192

Because this is very low power LED burst flash I need to set the ISO to 800, which would never be chosen for detail. NR is at Luminance 25 in Adobe Camera Raw (adjusting only that top slider). There is a full dynamic range with deep shadows and brightly caught surfaces. No adjustments have been made to the raw file in conversion for contrast, colour or exposure. I think it represents a very highly quality for ISO 800 and to see the level of microcontrast and detail, you need to examine the lowest contrast surfaces – the rounded bodies of the poppy heads. Throughout the image you will find areas of sharp focus and softer focus and it’s easy to tell the maximum sharpness zones. I also made an exposure at f/16 and this is significant softened by diffraction as you would expect. At f/8 this macro lens is likely to be sharper but with a file size like this, depth of field rules go out of the window. You need to use the same technique as would be employed when planning to make a 20 x 30″ print from a 35mm negative!

I will have more images soon enough. My initial impression is that the A7II really fixed the ergonomics of this camera type, the A7R II is identical; its functions cover all the functions found on every different A7 series body sufficiently well to make it one camera for all purposes.

– David Kilpatrick

The link to Warehouse Express is an affiliate link and purchases made through this link benefit the publisher


Victorian Photography in Edinburgh

victorianphotosmodel1-web

Today I visited the press preview of Photography: A Victorian Sensation at the National Museum of Scotland in Edinburgh.  It’s a major exhibition which actually goes beyond the wonderful huge collection of mint condition Daguerreotypes and other early examples, ending with a Nikon D5500 as an example of today’s tech.

You can visit this entirely free if you are member of National Museums of Scotland. For non-members, it’s £10 (adults) £8 (concession), or £6.50 (children 12-15) and free for under 12s, until November 22nd. The museum itself is free entry, and if only one person in your family wants to see this (Exhibition Gallery 1, Level 3) there’s plenty for others to see and do.

lonleyd5500

I wanted to see the Nikon – I had helped the curator with this, putting her directly in touch with the right individual at Nikon, after a mutual friend in Edinburgh asked for assistance. Why not Sony? Well, the museum acquires representative technology for the permanent collection, and specifically wanted a DSLR not a DSLT or mirrorless – and the Nikon fitted well with a 1990 first generation digital camera displayed close to it, another Nikon. No doubt at some future date, mirrorless will be so much the flavour of the era that they acquire a Sony.

exploringtheexhibit

It’s a superb show, with wall-high prints blown up from unexpectedly early originals. Although it is not a huge exhibition area, I would recommend sparing half an hour for the casually disinterested family member, an hour to two hours for this who actually look at the exhibits, and half a day for anyone who wants to access the touch screens, study the work and really learn something. The good thing about the museum is that if you DO have family members who want to do something else, there’s plenty to see and much of it is rather fun, whether Dolly the Sheep or the kids’ painting and crafts corner. It also has a café which is not overpriced and Edinburgh’s Old Town tourist attractions are a five minute walk from the door. Parking cost me £2.60 for one hour on a nearby meter, paid by mobile phone, and there are cheaper options.

zoomingindaguerreotype

One of the best bits must be the use of touch screens (above) which replicate a cabinet (as below) of small original works. Tap the corresponding thumbnail, and it fills the screen. Do an ‘expand’ gesture with two fingers (or hands) and the super-high-res copy of the Victorian work – often only a few centimetres wide – expands to show microscopic resolution. Daguerreotypes, in particular, are almost grain-free and reveal as much detail as Sony A7R II… who needs 42 megapixels when you have countless megamolecules?

daguerreotypecabinet

The exhibition includes National Museums Scotland’s extensive early photographic collections, including Hill and Adamson’s images of Victorian Edinburgh, and the Howarth-Loomes collection, much of which has never been publicly displayed. The cartes-de-visite and cabinet photographs below emphasise the huge volume of these portraits produced 150 years ago.

cartesandcabinets

Highlights include an early daguerreotype camera once owned by William Henry Fox Talbot; an 1869 photograph of Alfred, Lord Tennyson by Julia Margaret Cameron; a carte-de-visite depicting Queen Victoria and Prince Albert as a middle-class couple and an early daguerreotype of the Niagara Falls. There’s a special niche for Eastman and his Kodak.

eastmanshow

You are also be able to visit a ‘stylised recreation of a Victorian photographer’s studio’ – er, not exactly a re-creation, as stylised is certainly the word! Victorian props and costume details can be used, and you can take a photograph, which will be displayed in a photomontage at the end of the exhibition. The lighting, however, appears to be Godox Witstro or a similar battery flash mounted into a big Elinchrom Octa.

At the press day, model Bronwyn Mackay was dressed in Victorian costume. My photo of her (top), not in the studio setting but holding a stereoscope with part of the display behind her, was taken using my Sony A6000 with 16-50mm OSS lens. Bronwyn is lit by the new ICE Light 2, which I’m holding in my left hand. The camera is at ISO 3200 and the lens at f/5.6, but it’s still a marginal 1/13th exposure, as the lights are low in the room and the ICE light is at minimum power to balance the shot and prevent distress to the model.

I am told there is a book and a smaller catalogue (neither available when I visited) and we’ll be looking at the book, for certain, in Cameracraft magazine.

For further information on the exhibition please visit www.nms.ac.ukphotography

– David Kilpatrick


Sony A7R II, RX10 II, RX100 IV – making everything else obsolete

(Updated June 15th after press conference)

sonyjune1528

The new Sony A7R II is the camera I’ve been waiting for, which everyone has predicted, and which seems to tick every box without having a huge price label on its own. I find the $3,200 (UK coinfirmed £2,600) matches its stated specifications well. Others may disagree, but they’re probably influenced by the price collapse of the original A7R, now occasionally found for under £1k.

sonyjune1526

Even so, at $3,200 the A7R II commands a $1,500 premium over the A7 II and much of that must be what you pay the new sensor – which does not seem to be licensed or sold to any other brand. Not even to Nikon, yet. The A7S remains the most expensive model despite the minimal 12 megapixel capture and lack of in-body stabilisation (SS in Sony terms, or IBIS generically).

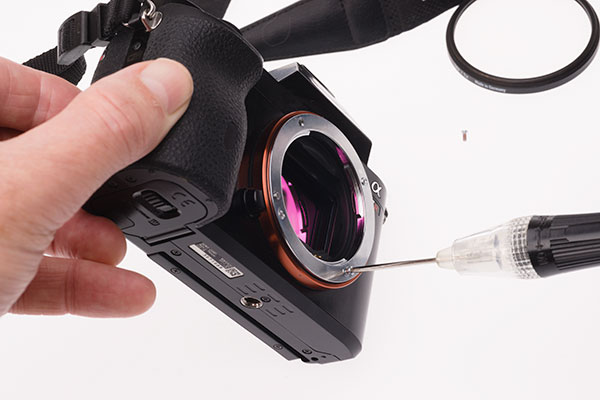
On Monday June 15th I flew to London to have a look at the A7R II and the new RX10 II (£1,200) and RX100 IV (£850). This was a bit like a motoring journalist going to a car launch and being told, you can sit in the seat, waggle the gearstick but don’t start the engine as no photography was allowed with any of the demonstraton cameras. I was surprised to find it was a European conference, as this normally means journalists from across the Channel have a facility trip to be present, and that seems very extravagant just to look at cameras which can not be tried out. I wish I lived in France not Scotland – it might not have cost me almost £300 to be there, eight miles from Heathrow (but an eight miles which might as well be a fifty Scots miles!).

Don’t expect to get one on June 17th, as B&H’s information and too many bloggers have repeated. We are told by B&H it won’t arrive until August even though pre-orders open on June 17th in the USA. It may be later arriving in some regions. Demand is going to be so high that if you want one, you’ll need to crash into that queue…

But you can snag a Canon EOS 5DS – 50 megapixels – for only $3,699 right now

A7R II – or A7 II R?

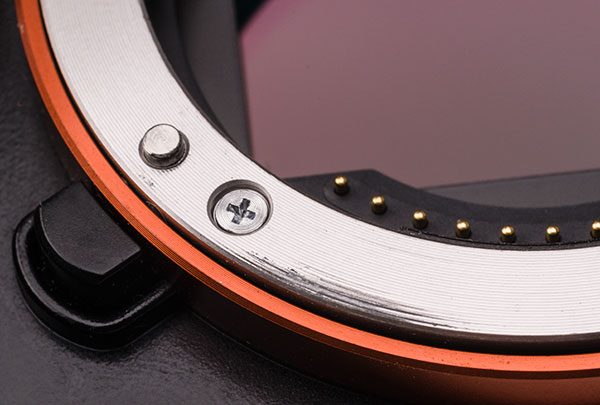
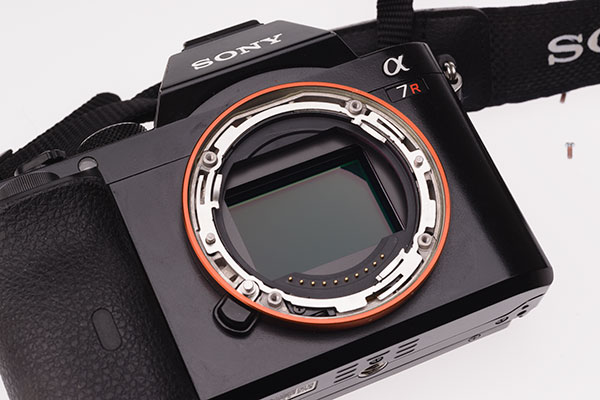
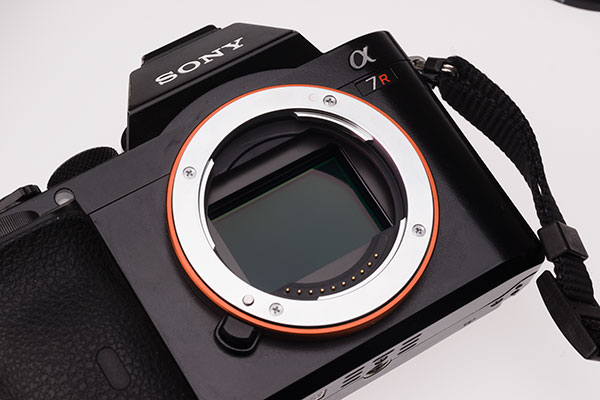
In brief, the A7R II consists of an A7 II body with a new 42.4 megapixel backside-illuminated CMOS sensor, same Bionz X processor allowing 5fps at full resolution, new 399-point Phase Detection AF on the sensor covering most of the field (up from 117 points), a similar EVF with improved eyepiece giving a genuinely impressive 0.78X instead of 0.71X virtual magnification, the same rearRGBW bright LCD, plus silent shutter and HD 4K movie functions improving on the offering of the A7S. The new shutter mechanism is claimed to have a 500,000 actuation life expectancy which puts it ahead of almost every pro DSLR yet made. The back of the camera body is magnesium, where it’s solid composite plastic in the A7II. And it has, unlike the A7R, five-axis sensor stabilisation which talks to Sony OSS lenses for the best blend of anti-shake methods ever devised.

kelsokelpiesgirl12mm-evf78

The new EVF size, to the eye – compared with the old (A7II, A7R, A7) 0.71X view below (A7R, Sigma 12-24mm at 12mm, Canon EF fit, on Commlite EF-FE adaptor).

kelsokelpiesgirl12mm-evf71

You will read in the specifications and promo blurb that it has a new LCD double the brightness, new tough body and strengthened mount, new shutter release and controls but all these ‘improvements’ are listed by Sony over the A7R and already existed in the A7 II. Instead of making comparisons with the A7 II – which this is really a development from – Sony has listed many advances made relative to the A7R. It is not an A7R II. It’s really an A7 II R.

sonyjune1527

The eyepiece surround is much improved, wider and softer still than the A7II which in turn is softer on specs then the earlier models. Eyepoint and position flexibility both improve and there are no unsharp zones at all even if you shift your eye around.

It’s important to understand that many of the improvements already exist in the A7 II partly as a result of criticisms of the original A7R made by objective reviewers, not Sony artisans or staff or sponsored bloggers. You don’t owe this camera to the success of its predecessors or the daily Facebook sermons of awestruck evangelists – you owe its features to corrections made to the shortcomings of the models so far. And to those who have had no vested interest (other than ownership) persuading them to weaken critical appraisal. The further improvements in the A7R II are either extremely technical – serious core improvements in the sensor and focusing – or minor refinements and carries-over from the A7II.

42.4 versus 36 point anything

If you really think 42.4 megapixels is going to take you to realms far beyond your 36 megapixel sensor, think again. It is the same step up as from 18 megapixels to 21 megapixels, a move Canon made without absolutely transforming the images created, or about the same as from 10mp to 12mp. There’s one big difference – it does not make the jump to any larger common print or repro size. Remember going from 6 to 8? That was from sub-full-page to a decent full page resolution, for US or A-size documents at a touch under 300dpi. 24 megapixels took us to a really sharp A2, 36 megapixels takes us to a acceptable A1, and all that 42 does is to make a slightly better A1 but not 300dpi.

icelight-cherries-36mpsize

icelight-cherries-42mpsize

Above you can see the actual, real size difference (in proportion) between a 36 megapixel shot and a 42 megapixel shot. If you click on the bigger version, it will take you to my pBase page with a full A7R II sized version of this A7R shot. Zeiss? No – a 45 year old Asahi Pentax Super-Multi-Coated Macro Takumar 50mm f/4, used at f/11, and a 30 second exposure at ISO 50 lit using the ICE Light 2 moved round the subject in horseshoe shaped path for 15 seconds, laid flat, and then moved under the perspex for the remaining 15.

In practical terms, it’s 7980 x 5320 pixels (or very close – Sony has been extremely coy about releasing full specifications, even at the conference I could not find this out) versus 7360 x 4912 for the A7R. In perspective, make a big print from the A7R and it’s 24.5 inches long at optimum resolution; use the A7R II and you get one inch extra each end on the long side, 2/3rds of a inch extra top and bottom. The A7R makes a 16.3 x 24.5 inch print to perfection; the A7R II makes a 17.7 x 26.6 inch print.

Anything smaller than A4 printed, it’s got no great advantage over the 12 megapixel A7S – but you are getting close to enabling a 2X crop (one quarter of the frame) to look as good as the A7S full frame. Sony showed A3 prints. They could, honestly, all have been shot on the Sony A100 from 2006 and no-one would have been any the wiser. One enlarged section was the only real test of the camera. I’m sure the model’s dermatologist loves it.

a7RII-prints

Where it does count most is when using crop frame mode. In APS-C crop mode, the A7R II file is large enough for a 300dpi double page fine art magazine spread, just under 18 megapixels. I’d say that where 42.4mp is not a critical size, 18mp actually is. You can get away with 16, and for Nikon, Panasonic, and Olympus this had been an important baseline. Cropped frame FF from Sony now rises above that baseline instead of sitting just below it.

portlandgardens-showerroom1-11mm

What I’d like to see would be 1:1, 4:3, 5:4 ratios implemented with the EVF and LCD screens cropped to match – and ideally the raw files reduced in size the same way. A square 1:1 would be 28 megapixels and that crop allows so many APS-C lenses (like the Zeiss Touit 12mm) to be used without vignetting or limits of coverage distortion issues. The example above is from the A7R and it’s a square crop 24 x 24mm from a frame taken with the 10-18mm f/4 Sony OSS, at 11mm; the lens would have allowed a 4:5 crop equally well.

Important edit: just read another ‘Sony artisan’ blog post asking the (redundant) question as to whether Sony lenses will be up to this new resolution. Anyone who owns an A6000, NEX-7, or A77 is already shooting at well above this resolution (full frame will need to match the Canon 5DS 50 megapixels to beat them). The resolution of the A7R II is slightly lower than that of the base level entry A3000. Don’t panic. Plenty of old legacy lenses will match it well, let alone any new Sony FE and A-mount designs.

I checked out the 20mm f/2.8 SEL lens with the new version 2 wide and fisheye black converters on full frame at the Sony event. Really, this lens comes so close to doing a good full frame and the converters even leave much of the area intact for a much bigger crop than APS-C.

20mm-on-FF  20mm-wide-FF  20mm-fisheye-FF

And that’s all without removing rear baffles or doctoring the built-in lens hoods of the converters!

Detailed points

When we get a chance to use the camera, the following points will be of interest:

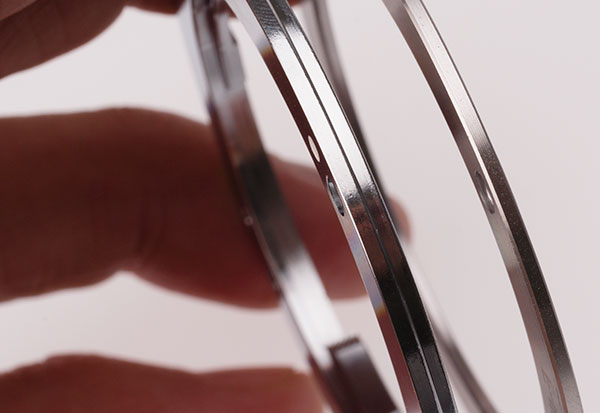
Has the mount been upgraded again? It still has only four attachment screws, compared to Fujfilm X system’s six screws (and the A-mount uses six too). My two camera bodies and two changes of mount on the A7R, to Tough E mount and then 2nd generation Tough E mount, all produce unpredictable degrees of slop, smoothness or jam-on tightness from various adaptors showing that no matter what, tolerances are broad. Comment: can’t tell from changing lenses at the event, it feels much the same as the A7 II.

Has the Memory position, 1 and 2 on the mode dial, been improved to remember MORE of the important settings – notable, Setting Effect ON and OFF, for saving a studio flash preset mode with the EVF/LCD setting effect disabled? Answer: No.

Is the hot shoe part of the Multi Function Accessory Shoe hampered by paint, or tolerances in fit, or does it readily accept all standard ISO hot shoe simple flash devices and triggers? Looks clear.

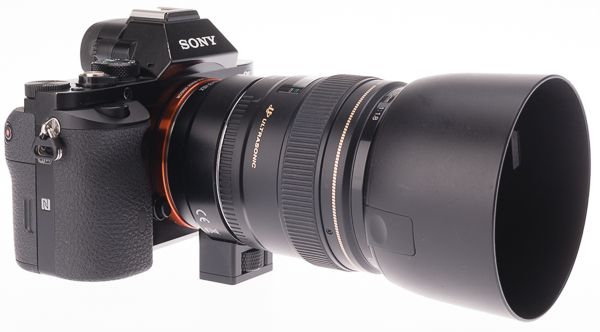
Canon 85mm f/1.8 USM on Focus EF-FE adaptor (also works perfectly with Commlite) on A7R. The 40mm f/2.8, and Sigma 12-24mm in EF mount work well on my A7R with these two sub-Metabones price adaptors. At the press event we found the 85mm just didn’t focus at all with any adaptor on any of the pre-production A7R II bodies, but the 40mm was fine.

Will the promised ability to use PD-on-sensor AF with Canon and other lenses rely on Metabones as the only adaptor, or is it generic? The microlenses on a backside illuminated sensor have a large effective aperture than traditional design, and this means the PD-lenses (a special variant of the microlenses used on sensel pairs) will be similarly improved. This may make some difference, but it’s actually the focus motor control via lens to body data communication which will enable fast and sure operation with Sony SSM on LA-EA3, Canon USM on EF-adaptor, and so on. Remember, this does not make screw drive or SAM, or micromotor Canon AF pre-USM lenses, function any better. It will only apply to ultrasonic, piezo, linear motor and similar finely controllable AF mechanisms with close to zero play and accurate (8 contacts, not 5) distance and ‘state’ reporting. Note, too, that Sony’s revised lenses (SSM II) are not just optical and weatherproofing reworks – the new SSM is designed to work with contrast detection, as found on the A7R, much better.

Comment: we found that the Canon 85mm f/1.8 USMdidn’t work on any adaptor on the A7R II, while the 40mm f/2.8 activated the PDAF points and focused very rapidly, and a 24mm f/2.8 USMf/2.8 focused fast – and that various different demo A7R II bodies responded differently and one malfunctioned a lot of the time even with Metabones. Sony said this was known and the final retail stock should at least work OK with Metabones IV and probable firmware updates, but other cheaper adaptors will not be tested.

The new camera’s mode dial has a central lock button, and a slightly lighter click action without risk of being turned by mistake. We’d had liked to have seen a lock on the +/- EV compensation dial too, but this just has slightly strengthened clicks.

Wish list

The same small battery has been used yet again despite the II body design having what looks like enough room for a full sized Alpha battery (see below – carefully positioned batteries with A7 II body). Let’s hope for upgraded batteries from Sony.

Please, Sony, you provided a GPS pinout in the new shoe – you have never rolled out a GPS module or firmware. It’s three years now and no news. Hell, I nearly bought a brand new boxed A99 at Dixons Heathrow Terminal 2 shop for £1075 inc VAT maanger’s special, I miss GPS so much!

Please let the Lens Data entered into the menu for SS of manual lenses, without data communication, be embedded into EXIF so if I enter 50mm, my files say so. And ideally, please make it possible to enter the focused distance (this would improve stabilisation) and the aperture in use (just to complete the EXIF data).

Sony pointed out that the latest version of the lens correction App will record the focal length and aperture as you enter them, in EXIF. It has its own SS on/off setting and automatically recognises whatever focal length you have entered. You can name and recall each different lens, and if for example you normally use your 24mm f/3.5 Samyang shift lens at f/16 for architecture, you can enter f/16 as the lens’s aperture and that will be corrected embedded in your EXIF. But to get this you must run the app, not just shoot with a manually set focal length for SS.

Please change the Memory 1 and 2 registers to save and recall ALL the camera settings and not just those in the first bank of the menu system (but see the vital point above about Setting Effect On/Off). Until I test the camera, no more to say – but Sony does not usually keep quiet about changes, and has not mentioned this aspect.

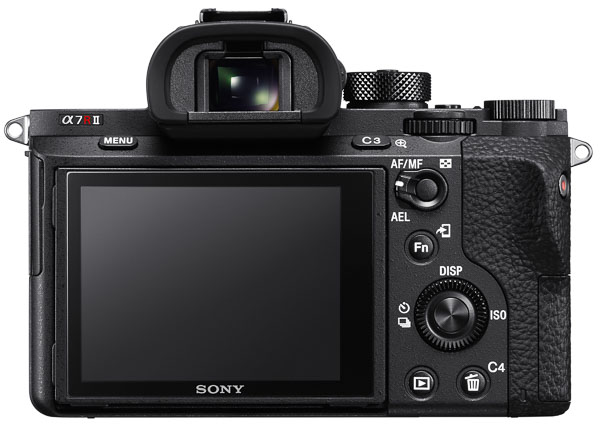
The existing rear screen – the II design, left, improves on the original A7R but this is still a basic, amateur level screen to be working with and a fully articulated design would be better.

Though you’ve missed the boat with this camera, the crudely hinged and angled rear screen needs to be replaced with a fully articulated screen that can be reversed to the camera for protection and to prevent distracting light when working in the dark.

Out of the loop

I’ve been out of reviewing new Sony gear for some time, as it has not proved possible to get hold of it early enough or for long enough to give any meaningful assessment which Joe Photographer anywhere in the world couldn’t appear to do themselves. For six or seven years I have bought and sold new Alpha gear to fill the gaps between the occasional availability of review kit, but recently that has become so expensive it exceeds any margins available from the three magazines I publish, or any fees I can obtain from other media. Like politicians, people who write about gear either need an independent mind or independent means – without one of these, you’re always in someone’s corporate pocket or feeding from crumbs under the main table.

The result, as we see all the time, is that many early users or reviewers of Sony kit are no longer all that independent and much of the first wave of information now comes through the channel of ‘artisans’ (as it does with ‘ambassadors’ for all makes). And we see plenty of others who are clearly of independent means, whose main purpose in life is to be the first to post pictures taken with new item X regardless of the cost.

So maybe I don’t need to push to get hold of an A7R II for the too-short two week period of any review loan, after a six month wait while other consumer-orientated magazines and blogs take priority – or indeed rush to buy one.

But… like the RX10 which I use all the time… like the A6000 kit which is co affordable and compact it’s essential… like the RX100 MkIII which goes where even the RX10 is not welcome… like my A7 II with stabilisation which has transformed a box of assorted lenses into a solid outfit… this one’s possibly something to buy because I actually need it and will use it.

I may not even cosy anything as it will make both the A7R and A7II redundant, because it does both jobs and also covers the A7S I did manage to borrow but never bought. And it does more.

So, thinking whether or not to bother with this upgrade is a bit irrelevant. Even if it was still ‘just’ 36mp the other improvements would mean it still replaced the need for a handful of A7 models, all in one.

sonyjune1534

Small miracles

My one doubt is that the A7R II may be beaten in practical terms by the RX10 II. Please note that so many incorrect snippets of info have gone around about the ‘stacked’ sensor design, I thought it referred to RGB stacking. It does not, the sensor is a conventional Bayer pattern, and what is stacked is the electronic substructure. This does not affect the top side of the sensor and the performance in image quality should be similar to the existing models. What it does is greatly speed data transfer and enables over 1000 (lower resolution) frames per second to be clocked through from photon received to movie frame recorded.

The RX10 and 100 new versions offer ridiculous levels of high speed slow motion capture, clean 4K video and other technical benefits which come with a very small chance of dust on sensor, unlike the A7R II which is almost guaranteed to be a dust devil. Why do I say that? Because a backside illuminated sensor renders dust on its cover glass even more sharply than a conventional one! We know the RX models are not dustproof and if you are unlucky enough to get a spot on the sensor it’s a service visit to get it removed, but in my experience with five or them so far I have never had a single dust spot.

sonyjune1531

So what? Just retouch? Not when making movies! Admittedly most movie makers will open up the lenses to max or only a stop down on these 1″ sensor cameras, and would open up lenses just the same on the A7R II and never see dust even if it was there. But what about the time you want that ‘American take’ – f/22 at 20mm? Traditionally they were taken in dusty settings for the spaghetti westerns!

All I can say is that the RX10 has come very close indeed to removing the need for any other camera and it’s been a pleasure to work with the raw files. The RX10 MkII might be so much better that I forget about DSLRs or mirrorless systems and just get on with capturing great images. Or then again…

– David Kilpatrick

Sharp vintage glass – and subject

Twenty years ago I was operating one of the first full service digital photo studios in the world. I had already published, back in 1986, the world’s first desktop published commercial periodicals and won the UK Printing Industries Research Association inaugural DTP Awards, in 1987, for this. We’d bought the first Apple laser printer in provincial Britain and when Letraset’s ReadySetGo layout package failed to produce usable output for our first such magazine, Aldus stepped in and provide a pre-release beta of PageMaker. In 48 hours, I had to re-create the entire magazine – and it worked.

From then on we progressed, through having the first separation-capable film imagesetting in Scotland to reproducing the first magazine cover from Kodak Photo-CD and soon after the first full colour page from a Kodak DCS camera. By the beginning of 1995 we had Photon, the first major photo-mag style website, in by the end of that year we had a Leaf Lumina based studio with Scandles lighting. There’s an article about this in our repository of past articles, https://cameracraft.online/2007/08/06/the-leaf-lumina-scanning-camera-1995/

That year, Shirley had planted an entire bed of flowers specifically for drying. They make good photographic subjects. The (now relocated) university college of St Margaret’s in Edinburgh asked me to give a lecture about the new technology – and so the Leaf Lumina (a scanner on a tripod with a  Micro Nikkor up front, and an Apple Mac Powerbook on the end of a SCSI-2 cable) went along with the fluorescent studio light heads and a tray of the dried flowers. We also took our Kodak dye-sub printer, which had made hundreds of prints alongside other printers during that year, when Shirley completed her M.Sc.Colour Science and created pre-ICC colour tables to reproduce fabric colours accurately. With this carload of gear, we were able to shoot and produce a print on the spot.

The picture remained on file – a 25MB TIFF, roughly 8 megapixels, but equal to 8 megapixels in the Sigma Foveon sense as every pixel was true RGB with no Bayer filter involved. The exposures took over a minute, limiting it to still life, but the quality was not exceeded until 12 megapixel Bayer cameras like the Sony A700 appeared. And a few months later, we were producing Paterson’s catalogues and price lists and needed a cover. One list covered black and white and colour chemicals, the former mostly from Paterson and the latter from Photo Technology. Photoshop offered an easy way to take the image, and divide it accordingly. So that’s what we proposed, and what was used for the cover.

Paterson1996-web

It was intended to show the gamut from plain monochrome through toning to colour and it did look very good in print, because relatively low overall contrast combined with high detail contrast is easily handled by litho.

Now, forward two decades, and I’m looking for subjects to test out the latest Elinchrom ELB400 portable li-ion powered two head flash kit. This has LED modelling lights over twice as bright as its predecessor and they now really show how the light is falling even when using light shapers. I wanted to show texture using my optical Mini Spot attachment, which works very well with these new heads and their cool-running LEDs.

On top of a wardrobe, in a basket, were the dried flowers. They are called everlasting and apart from gathering loads of dust, they are. The most difficult job was holding each flower against the nozzle of a handheld vacuum cleaner to remove 19 years of dust.

The first shot I took was with the Sony A7II, 24 megapixels, using my Pentax SMC Macro Takumar 50mm f/4. Like the flowers, this is also everlasting. It’s not yet 50 years old even though the lens design, a simple Tessar-type corrected for magnifications from 1:2 (50%) to 1:10, is well over 100 years old. It’s also a tolerable lens for general scenes, though the extreme resolution it achieves centrally only covers the full frame when you focus close. With Pentax’s original multicoating in every way a match for the latest Zeiss T* as found on new Sony Zeiss lenses, and a deeply recessed very small optical unit, it has a contrast and colour saturation you just don’t find from lenses using hybrid or moulded aspherics or many more air to glass surfaces.

This picture appears, fairly small, in my review of the ELB40 in f2 Freelance Photographer magazine July/August 2015. When editing it, I was struck by the extreme resolution. Within the planes of sharp focus, it was exceptional.

So, I decided I’d shoot a new shot, and improve on the use of the spotlight attachment on the Quadra head to cast the shadows and create a sunlight-like effect – and this time, use the A7R with its 36 megapixel resolution. Although the A7R has no AA filter and is sharper in theory, the larger pixel count calls for a smaller aperture to secure a little more depth of field for the larger viewing scale, and this when using any macro lens always risks diffraction limits on fine detail contrast. For example, at half life size a setting of f/12.5 (between f/11 and f/16) which I found desirable for best sharpness distribution gives an actual f-stop of c.f/19 and this does cause some sharpness loss. If the lens was extended on a tube to give 1:1, a setting of f/16 as nearly always needed for depth of field is really a true f/32 for diffraction calculations and light readings alike.

Fortunately, our brains are sensitive to perceived scale, and we ‘see’ close ups as sharper than distant subjects even when they are not. The A7R and the Pentax macro lens also combine to produce an extreme level of textural detail, the information our eyes and brains use to see 3D solidness, shape and form in a flat photograph. So in practice you can shoot macro and use whatever aperture the subject depth demands, without resorting to focus stacking techniques.

And here, anyway, is the result. You can click on this image and it will take you to a pBase hosted full size, JPEG compression level 12 version (this is over 24MB of image data, and it is not compressed like Facebook or indeed a WordPress image – though it’s still not ‘virgin’ data).

driedflowermacro-cleaned-srgb-web600

In a couple of days, I have another SMC Takumar of the same era arriving. It’s a 35mm f/3.5, which was the cheapest of the line back in 1970 when Shirley bought me my very first brand new, marque brand lens for Christmas! We were both only 18 and that represented an entire month of her basic salary working behind the counter at Dixons in Sheffield… helped by a staff discount. It was my first Super-Multi-Coated lens and I can remember still how the high contrast and bright colours could even be seen through the viewfinder – and how amazing the first box of slides looked, midwinter close-ups of fallen leaves rimmed by frost and frozen puddles.

These lenses have never lost the edge they had, if they have been looked after, but the truth is we never knew how good they really were. We can now focus them within a fraction of a millimetre. I’ll probably never compare the 50mm f/4 SMC Macro Takumar with the 55mm f/1.8 CZ (I’ve used it, but only for low light high ISO tests on the A7S) or the 35mm f/3.5 with the CZ 35mm f/2.8 because it’s unlikely I’ll ever buy the new lenses with their inflated prices and reliance, however marginal, on software correction to be ‘good’.

I know I have not written much about the A7R, or the A7II I’m using, or about any of the new lenses I can not manage to borrow from Sony and can’t afford to buy. I have an amazing set of lenses from 12mm to 500mm for full frame, including tilt-shift, wide aperture and mirror but just one single Sony FE lens for convenience (the 28-70mm FE kit lens). In contrast, my A6000 kit is all Sony plus the Samyang 12mm f/2 because it is just so good it had to have a place.

So, please do take a look at the full size file. The critical plane for focus crosses the smooth surfaces of the two poppy seed heads and it’s in this relatively low contrast zone that the quality of the lens shows up. Elsewhere in the image the defocused quality is very pleasant (there was no CA to correct and there’s no bad colour bokeh) and the plane of sharpness passes through a few other more interesting flower details.

Finally, a word for A7II users. If you use a manual macro lens, as I do, remember that when you program in the focal length for Steady Shot you should only enter the actual focal length for distant views. For my 1:2 macro Pentax, most often used in the range from quarter to half life size, I program in 70mm as the focal length because this represents the view angle. Using a macro at 1:1, you should enter double the focal length to get the correct Steady Shot compensation. Sony and Minolta macro lenses with the D chip (eight contacts) convey accurate extension information, so the auto Steady Shot works perfectly with them. But manual, or Canon lenses on adaptors which may or may or not pass the right information through, are best used with the Steady Shot focal length entered via the menu screen and adjusted to allow for the actual lens extension.

– David Kilpatrick

Check out B&H prices for all full frame lenses for the Sony FE (A7) system here

Check out B&H Secondhand Department for all ‘film camera’ manual and vintage lenses

Check out B&H Secondhand for Sony E-mount adaptors to allow you to fit your vintage/legacy lenses

Check out the huge list of new adaptors for almost every lens ever made!

The Fotodiox Tough E-Mount

Machined from brass and chrome-plated, in the tradition of lens mounts from 50 years ago and not necessarily the best solution for precision or lifetime wear, Fotodiox’s TOUGH E-mount is a replacement body mount bayonet which you can fit to your existing A7R, A7, NEX-7, A6000 or any other metal-mount E-mount body in a few minutes. You need a clean well lit work table, a small engineer’s or large jeweller’s crosshead screwdriver, and a similar flathead screwdriver or old credit card.

The NEX/A bodies are fitted with a three-part lens mount. Here’s what a bonded, single piece, original Alpha lens mount looks like when removed from an old Minolta 7000 –

originalminoltaamount

This mount is stainless steel, which would be prohibitively expensive for a small shop engineering replacement on the E-mount. It’s in two parts, a front surface and the inside with a bonded bayonet spring pressure action, a thin shim with bent ‘arms’ forming three pressure points to hold the lens tight to the mount.

From Fotodiox comes this neat box taking 10 days to the UK from USA –

fotodioxpackage

Since I also ordered a focusing Leica M to E adaptor, my overall value was marked as $80 and I had an £8 admin charge and a little over £7 in VAT to pay.

Inside, the TOUGH E-Mount is boxed and bagged without instructions. For these, you visit the Fotodiox site and watch a video:

http://www.fotodioxpro.com/tough-emount-from-fotodiox-pro-replacement-lens-mount-for-sony-nex-emount-camera.html

Here’s the rear face of the Fotodiox mount, which does not have any second layer of spring metal to grip the lens:

toughemount

However, as we will see, this component (fixed to the mount for the A-mount design) is a separate loose item which sits in the camera body mount recess on the E-mount, and performs exactly the same function. You could probably remove it and bond it to the new mount.

So, why replace the E-mount on a £1200+ camera body like the A7R, which has a magnesium body casting into which the lens mount is anchored by four screws? The reason given by Fotodiox is that an intermediate plastic moulding is used behind a simple unprofiled mount face, so two parts make up the overall thickness. The tensioning ring sits behind the plastic ring, forming a three-part sandwich to make up the mount. The front mount is a relatively soft, crudely CNC lathed alloy.

oneyearemount

Here’s my camera after 10 months of use. This camera has shown signs of light leaks, and has not been sent back for a fix. The mount flange is a completely flat item, relatively thin, and the leaks may be partly down to slight distortion of the front plane face, as shown by uneven wear from lens mounting.

emountwear-closeup

Here’s a detail. You can see the lathe circles on the mount face, and you can see where the metal has abraded and either collected plastic from a plastic lens mount (most likely my MEIKE extension tubes) or paint from a cheap adaptor (my Novoflex and Fotodiox adaptors don’t use paint, they are anodised).

The mount is very simple indeed. It can be removed from all the cameras without disturbing the electronic contacts or the lens release mechanism.

removingmount

Fotodiox video shows the camera on its back and warns about dropped screws etc. I just prefer to unscrew each screw in turn with the camera held vertically on my table, so that if the screw drops it won’t go inside the camera. Care is taken not to allow the spring loaded lens changing pin to disassemble itself, but that’s really very easy.

toughtversusoriginal

One removed, you can compare the Sony ‘washer’ (which is really more or less is!) with the Fotodiox mount – a much thicker unit, stepped to fit the recess on the camera body. A point worth noting is that the original mount has no recesses at all to fit over the four threaded posts on the camera body. Its position is maintained by two pins (at 9 and 3 o’clock) which engage in two holes on the otherwise plain flat rear face of the mount. The Fotodiox mount not only engages with these pins, as it replaces the plastic secondary mount shown below, but also has holes into which the threaded posts fit. It is better proofed against rotation.

plasticnbayonet

You now see the plastic middle part of the sandwich. This is secured by a very thin double-sided tape in places. A flat blade screwdriver or a suitable cut piece of old credit card (or indeed a guitar pick!) pushed gently under the plastic at various point all round will free it. It lifts out easily. Unless you are amazingly clumsy you are not going to go anywhere near the sensor but if you have a clean 40.5mm filter or lens cap around, you can pop it in to cover the sensor safely. I used a 62mm filter to place over the whole mount when checking instructions and looking at the parts, as I don’t want to risk hairs and dust covering the upturned unit.

plasticremoved

Underneath the plastic component you’ll find the third part of the mount, the thin flexible stainless steel tensioning ring which acts to pull the lens tight against the front face of the mount. You may note that if your lenses ever begin to seem slack, it would be easy to re-tension this ring by a gentle bend to the three arms. The four screw holes are in metal posts mounted directly into the magnesium body. The plastic ring can be argued to have no effect on precision, as the original mount rests on these posts, leaving the plastic and the stainless tension ring more as a ‘lubricated’ assembly with a little ‘give’, affecting only the tightness of the lens to the body. The plastic has no sacrificial role, as it does in many lenses (Sigma, Tamron, Nikon, and Canon all use plastic to create weak points where the lens will break on hard impact rather than having it shear the body mount off the camera – not sure about Sony).

fittingnewmount

The final step is to place the new mount, aligned with its white dot and cut-outs and screw holes, in the only position it will fit. Please note that the TOUGH wording goes inside and is not shown on the camera front! Again, I don’t place the camera on its back, and prefer the control given by holding both the camera and the screwdriver (which if properly chosen will support the screw). No pressure is needed to locate the screws for a few turns. I rotated the camera so that the screw hole being worked on was always below the sensor. Finally, when tightening up each screw in turn to a firm fit, the camera was laid on its back and my 62mm filter was placed to cover the mount opening, held firmly. You can also just place a finger against the screwdriver on the ‘inside’ while tightening up, so that if for any reason it slips, you block it from entering camera.

mountfitted

Once fitted, there’s little more to say. It looks a touch classier than the cheaply machined soft metal Sony original, it is a snug and perfect fit, and lens mounting has a slightly more solid feel without resistance or any scraping sensation. Fotodiox may be taking the mickey by suggeting you give the old mount to the cat to play with, of course you should keep it carefully. While doing this I discovered that the original old Minolta SR bayonet shares the screwhole locations and almost perfectly matches the overall size of the E-mount. I could actually take a Minolta SR bayonet off the front of some old extension tubes and fit an E-mount in place. This would serve no purpose but it’s a fascinating hint at the pedigree of the new system – it has a three-flange bayonet so similar to the SR mount, introduced 52 years after Minolta’s SLR debut!

Everything worked perfectly as expected once fitted (see notes below). Cost – $39.95 plus shipping. I consider it a good upgrade.

Notes on infinity focus, fit, and light leak issues

While Sony native E mount lenses seem fine, some of my third party adaptors are not fitting well, and very short focal length lenses show that the infinity focus may be affected. If you use lenses 12mm to 20mm on adaptors, proceed with caution. I am not able to get the Kipon tilt shift adaptor to mount without a forceful twist, though a similar age Kipon shift-only adaptor is happy enough (just no longer able to hit infinity with my chosen 20mm lens).

Infinity collimation after tests and measurements – I’ve now checked infinity focus using stars. I’m just OK on all but one lens and adaptor combination, and all Sony E or FE lenses are fine, as they have loads of spare adjustment (no hard infinity stop – they will all focus way beyond infinity and can handle big differences in camera assembly accuracy). Same with LA-EA3 and LA-EA4 adaptors and Min/Sony A lenses, the worst case lenses hit infinity at exactly infinity, most focus just past.

Kipon Nikon Tilt-Shift – extremely tight fit, so tight it has to pulled off the camera physically. Here I’m thinking that some very gently polishing or ultra fine emery (the sort I use for polishing guitar frets) might ease the adaptor.

Novoflex Leica M adaptor – will not bayonet-lock with the new mount, can’t work out if the flanges are obstructing the full turn or the locking pin hole is slightly off position. Fotodiox helical M adaptor locks perfectly. All other adaptors fit and lock comfortably.

Checked my Kipon shift adaptor for Canon and it’s 21.34mm from rear to front flange, and the lens won’t focus on infinity. My plain cheap Canon FD adaptor is 21.16mm and the lens will hit infinity perfectly. On the original mount, the shift adaptor was just OK to infinity – not for stars, but for landscape. So maybe 0.1mm actual difference in front face register to sensor on the Fotodiox Tough mount, compared to the Sony original.

Light leak issue – a day later I had bright full sunshine and was able to position the camera with the mount getting direct sun, and give exposures of 30 seconds to 1 minute with the lens completely stopped down and blocked off, and the ISO set to 1600. The results proved that it’s not the camera mount assembly which has most effect –

40mmon2875mm

The pure black exposure above is from the 28-70mm kit zoom set to 40mm, at f/25, with the lens cap on.

40mmonLeicaadaptor

This result is from a Voigtlander 40mm f/1.4 mounted using a Novoflex Leica M adaptor, at f/22, with the lens cap on. Simply swapping the Voigtlander adaptor for a Fotodiox helical focusing Leica M adaptor, which has a far wider flange and double the ‘bearing surface’ on the mount and it also a much firmer overall fit, produced the same solid black as the 28-70mm. The 10-18mm also produced a solid black though it was clear that the lens cap lets in a bit of light at the spring clip positions.

To double check, I fitted a disc of Rosco Black Cinéfoil (totally lightproof heavy metal foil you can cut with scissors) into another mount so it sat behind the back of a 50mm lens. This was a Ukrainian shift mount and Zenitar lens. This mount also has a large, black anodised rear surface. No light was admitted. I found that most of my third party adaptors let in light, usually the small angled line/crescent top right, and so did the Sony LA-EA3 and 4. The Novoflex has me surprised and baffled as it let light in over a wider pattern, and it seems to be the best engineered adaptor I have, but the well for the bayonet locking pin is shallow and perhaps too precise as the pin does now not engage (you can feel it just begin to hit the lock position).

(don’t read beyond this point if you don’t like seeing measurements…)

This adaptor works perfectly on other NEX/E bodies and worked perfectly before changing the mount. Relaxing and re-tightening the mount fitting screws, to be doubly sure of correct seating, did not solve the problem. The pin recess in the Novoflex adaptor is 2.30mm wide, and in all the other adaptors measured and also on Sony lenses, from 2.36mm to 2.5mm. The slight wiggle present on Sony lenses when fitted seems to be down to approx 0.07mm tolerance allowed for the locking pin to engage, as this is the part of the mount which limits or fixed the position of the mounted lens. Lenses and adaptors tested, when mounted with the locking pin depressed, can move around 0.5 to 1mm beyond the optimal mounting position.

It looks as if the locking pin mechanism is one area identified as a source of light leaks, and that if the pin is not allowed to engage fully (recess too shallow or not accepting the pin) more light will be admitted. All my manual adaptors varied in the depth and exact design of the locking pin well – 1.1mm deep on Kipon, 0.69mm deep on Fotodiox, 1.23mm on Novoflex, 1.1mm on Sony G 10-18mm, 1.18mm on Sony 16-50mm PZ. The 28-70mm which had perfect light sealing also has an unusual locking pin hole, almost perfectly circular not an elongated oval like all the other lenses. This was 1.2mm deep and with a 2.5mm radius. It is obviously perfectly placed and very precise despite this being a non-G, non-CZ, cheap Sony kit lens.

Anyway, 10 seconds with a Dremel and the Novoflex adaptor is now a perfect locking fit ready for another test if the sun comes out again this year.

Sony did say, back in 2010, they would make the E-mount specifications public for all to use. If anyone has information on what tolerances were specified, please let us know!

Update 30/10/14: using a high intensity single LED torch, the Novoflex adaptor problem was eventually narrowed down to light leaking through the mount between high-grade Leica mounts (Cosina Voigtlander, and Carl Zeiss) and the adaptor. Tightening the flange pressure did not cure the fault. No leak is present when using a low-cost Chinese M adaptor on a screw thread lens, which is a firmer fit. The Nokton and Tele-Tessar lenses also show no leak with the Fotodiox adaptor. It’s just an issue with these mounts – probably from the same source, as Cosina assembles CZ Leica mount lenses – and the Novoflex.

Absolutely no light leak can be identified on the A7R body with the new mount fitted. All leaks turn out to have been down to third party adaptors. The LA-EA3 and LA-EA4 give no light leaks, same for all E/FE mount Sony lenses. The Kipon Tilt-Shift (Nikon, $200+) has so many light leaks I can’t map them – every stage of the unit from the lens mount to the body mount, and all the moving parts, admit light; unit dangerously tight on Tought-E mount. Kipon Shift adaptor (Canon FD) admits light freely, especially when shifted. Canon FD plain adaptor, low cost – leaks at body mount. Cheap Minolta MD adaptor – no leaks. Cheap Nikon adaptor – OK at the body mount, lens release catch admits light freely (repaired using black putty compound but ineffective, still leaks light). Cheap tilt MD to Nex adaptor – one strong light leak in mount between some lenses (chrome flanges) and the adaptor, but otherwise light-tight to the body and in its tilt mechanism. Low-cost L39 to NEX adaptor – no problems at all. Ukraine/Kiev/Zenitar 50mm tilt combo – perfect, no leaks in any position. Samyang 12mm f/2 – small local leak at mount (top right crescent issue). 28-70mm FE – absolutely light-tight, no issues. 10-18mm Sony G – ditto, no light leak at all. 16-50mm Sony PZ – no light leak. Tamron 18-200mm – top right crescent issue. Fotodiox Leica M helical, with any lens, no problems. Focus brand Canon EF to FE mount AF adaptor – no leaks. Original 1st gen Kipon 42mm tilt device – no leaks at all.

– David Kilpatrick

1 2 3 4 18