
Colour modes and conversions (5D)
THE Konica Minolta Maxxum/Dynax 5D colour modes and conversions are like a whole box of film choices in one roll. This article was written using the 5D in 2005. The modes of the Sony Alpha 100 are similar, but the colour palettes will vary from these results.
Like using different films and processes, the effects available on Konica Minolta and Sony digital cameras allow you to set your own preference of contrast, saturation, and colour balance.
The Dynax 5D and the Sony Alpha 100 (like the KM Dimage A2 and A200) both make these choices much simpler by providing ready-made colour modes in addition to the steps of manual adjustment.
There are two ‘AdobeRGB’ choices, and you can only set these using the Fn (Function) button menu when the camera is set to P/A/S/M exposure modes. Normal AdobeRGB is a preset balance; Embed AdobeRGB allows you to also set your own Contrast, Saturation and Sharpness settings for the resulting .JPE file, which the camera will remember permanently until changed.
You should only use AdobeRGB settings if you intend to print using a six to eight ink inkjet printer or do work on the file using Photoshop (etc). You should not use the AdobeRGB options if you intend to use a card-slot printer or PictBridge connection from camera to printer, or give files directly to a photo lab, or post them on web pages. For all these purposes, sRGB is used.
PictBridge, EXIF Print or Print Image Management II compatible devices do not even ‘see’ AdobeRGB JPEGs; some photo labs can print them but may print incorrect colours. You can force a device like this to ‘see’ your AdobeRGB files by changing the extension from .JPE to .JPG, or the filename from _ICT0000.JPG to PICT0000.JPG. Both these filename/extension based identifiers are used by KM and Sony cameras to tag AdobeRGB files and make them invisible to sRGB printing systems.
The sRGB colour space holds slightly less range of colour than AdobeRGB, but it more closely matches normal printers and screens and because the gamut is smaller, the gradations are finer and colours may be smoother, and appear more satured. sRGB files have the extension .JPG and are correctly seen by card-slot printers, PictBridge, and web page browsers.
Raw conversion options
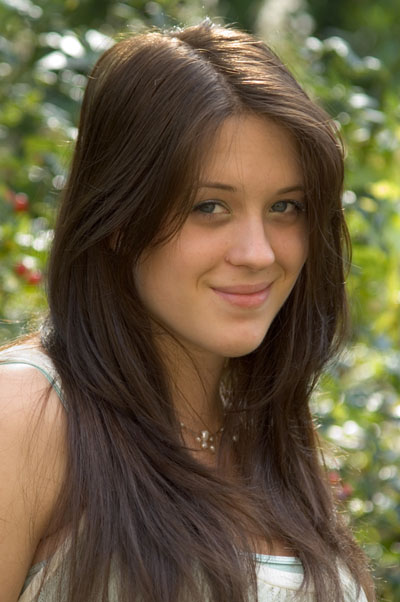
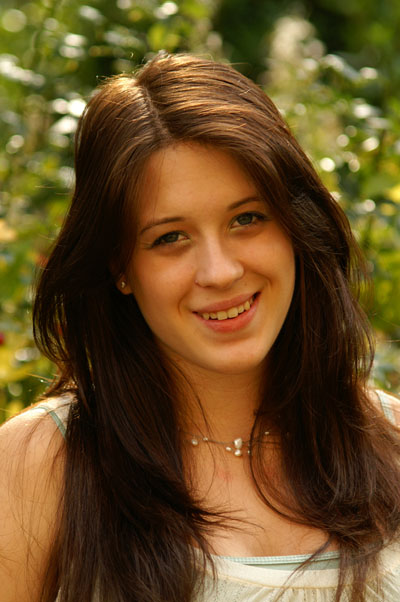
If you shoot raw .MRW or .ARW files, you can convert to AdobeRGB or sRGB, and make extensive adjustments to colour. Skin tones are important. You can see how RAW+JPEG shooting for this portrait has produced a .MRW raw file which can be given many different ‘looks’ and remain – like a negative – unaffected itself. You can always do a different conversion later on.
JPEG files are not so easily adjusted later without problems (colour shifts or loss of detail) so the Dynax 5D and Alpha 100 offer a whole set of JPEG sRGB direct shooting modes, shown on this page with the exception of ‘Night’ and ‘Night Portrait’ which are not appropriate for the subject. The latest Photoshop/Bridge CS3 allows raw-style adjustment to JPEGs but you are really just doing the same as you would in Photoshop, using the raw converter’s borrowed controls.
Here, I have done a series of raw conversions, with the in-camera AdobeRGB JPEG first as a reference. This is converted to sRGB for web viewing, otherwise you would get a very flat looking reference:

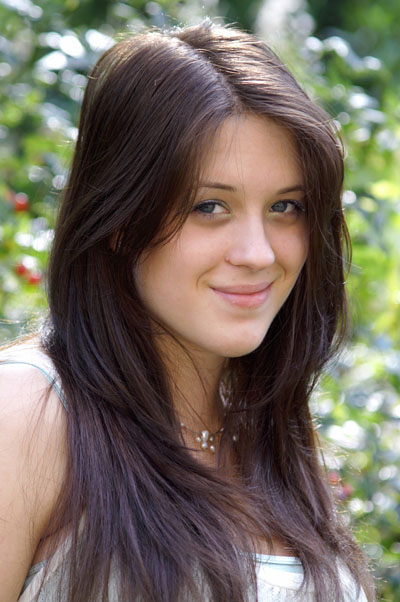
Adobe RGB in-camera JPEG (converted to unprofile embedded sRGB for webviewing).
If you want to view the original AdobeRGB, click on the image to open a copy of this to see a full size (quarter page magazine reproduction, pre-press ready) file 700 x 1053 pixels size.
A normal unadjusted exposure, auto WB, Program exposure, AdobeRGB.
Dimage Master default: Dimage Master was/is the official Konica Minolta file converter utility.
The .MRW raw file from the same shot, opened in Dimage Master without any adjusted settings.
Photoshop CS2 CR auto default (Medium Contrast curve).
The .MRW opened using Adobe Photoshop CS2 Camera Raw (Bridge) with all ‘Autos’ ticked.
Dimage Master adjusted.
Green skin casts from foliage removed using +5R +10M -0.2 stops and -20 Contrast.
Photoshop CS2 CR camera WB.
Auto turned off, manual adjustments made by eye, White Balance ‘As Shot’ (4650K +25).
Photoshop CS2 CR ‘Daylight’.
As last example, but White Balance changed to Daylight (5500K +10) to imitate slide film result.
These raw conversions are changed slightly by Photoshop CS3, and by other converters, but the essential differences remain present. Now let’s look at the in-camera options – the JPEG colour modes.
JPEG Menu-set in camera sRGB colour modes
You can set the individual sRGB JPEG rendering using the Function Fn button menu, when in P/A/S/M modes. The choices are ‘Natural’ (closest to AdobeRGB), ‘Natural+’ with extra sharpness and contrast, ‘Portrait’ with the reverse, ‘Landscape’ with increased contrast and saturation, ‘Sunset’ with a strong warming filter effect, and ‘BW’ for direct black and white. It is very quick to select Portrait before shooting a set of portraits, and the effect is not so extreme that it will ruin other shots. This applies to all the settings except Sunset and BW; you need to be careful not to leave these set by mistake.
The Picture or Scene modes on the main control dial, alternatives to P/A/S/M or fully Auto (Green), automatically select the best sRGB rendering for that type of scene. Just switching to the portrait symbol automatically produces Portrait rendered sRGB JPEGs with .JPG extension, even if your main default for P/A/S/M has been set to AdobeRGB.
As you can see below, these settings should not be ignored and do make a real difference to the colour and contrast of the final print.
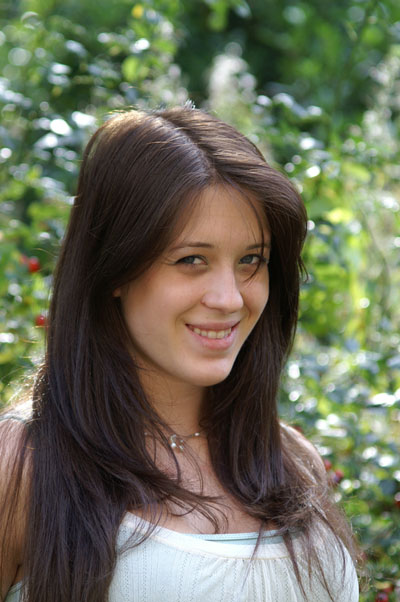
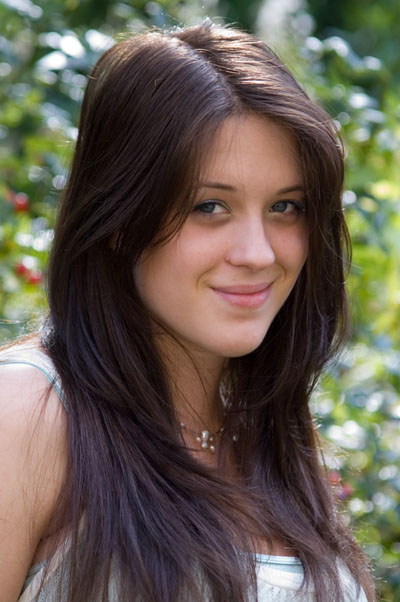
Natural sRGB JPEG.
Similar in feel to a good negative print, this rendering is ideal for direct printing and web pages.

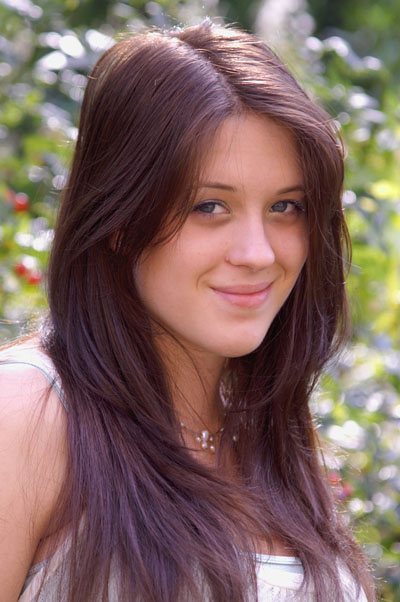
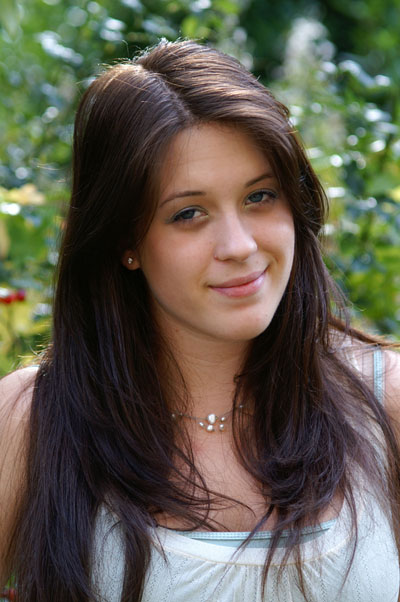
Natural+ sRGB.
More neutral in colour and higher in contrast, this setting resembles Konica Centuria Chrome slide film.
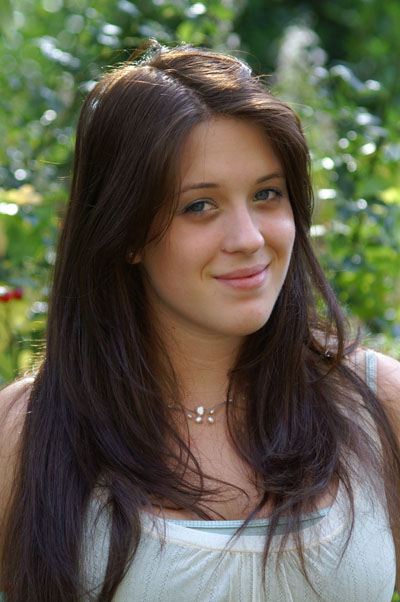
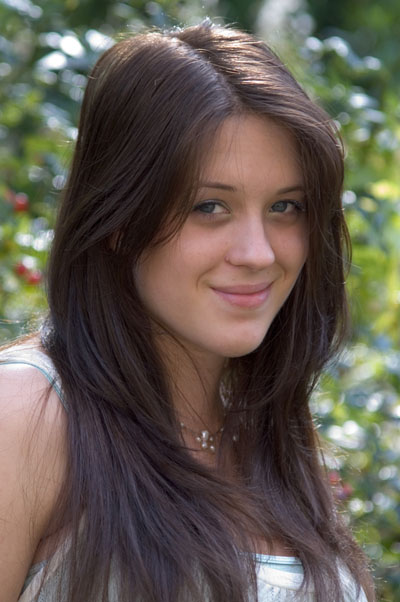
Portrait sRGB.
Lower contrast shows extra detail in the fabric and smooth skin tones – also ideal for weddings.
Landscape sRGB.
While greens are of course good, this setting is just a little brighter and crisper than Natural.
Sunset sRGB.
A very warm cast and high contrast are added to shots – keep this for its intended purpose!
BW sRGB.
The BW mode produces a colour (RGB) file not greyscale. It is very neutral with good contrast.
You may ask why use a portrait to test these modes. Surely it is better to test Landscape on a Landscape, Sunset on a real Sunset, and Portrait on a Portrait? Not really so if you want a comparison. An outdoor portrait (thanks to daughter Ailsa for putting up with this tediously long shoot-out!) has all the natural and skin and neutral tones needed to assess the colour rendering and contrast.
If you shoot highly coloured, high contrast test subjects the differences do not show up. The more pastel and neutral colours your test target has, the more differences will be shown.
Testing these colour modes using a test checker (Macbeth) and studio flash does not work, as the camera will disable some colour modes (Sunset is one) if it detects that flash is being used. We did not test Night Portrait and Night Shot modes here as they are not properly usable in these conditions.
As with all my articles here, this is not a definitive or scientific test. It is a reasonably controlled experiment intended to show everyday camera users what the practical side of setting these colour modes is all about.
I may get round to repeating all this with a Sony camera body, but I may also wait for the next generation before doing so. The modes of the A100 are clearly based on the 5D although its colour palette is by no means identical.
– David Kilpatrick