Go wider than wide with Photomerge
In the latest incarnation of Photoshop, CS6, the Photomerge function is faster than ever before and leverages all the context-aware, pixel matching math of the previous versions enhanced to a degree you’ll find hard to believe.
Sony NEX and Alpha cameras have the same technology built-in for their sweep panorama mode, but anyone who’s used this frequently will know that failures happen, like stepped sea horizons and double imaged or squished-flat people.
Photoshop has the menu item Photomerge under ‘Automate’ in the File Menu. It is a panoramic stitching function, but it does not need you to shoot with a tripod or even shoot with care. You can stick a wide angle lens on your camera, take two pictures with radically different vanishing points, and still end up with a neatly stitched perspective.
What you need to know is how to NAME your images or what order to shoot them in. Contrary to what you might expect, Photomerge inherits its geometry from the LAST image in your sequence. So, if you have these three images:
This is the order you need to name them. I shot these with the bottom one first, of course – my level horizon straight-on shot. Then I aimed up, and then up again, overlapping three shots. If I then select these for Photomerge, Photoshop will correctly realise I want a vertical panorama stitch but it will not use the straight-on shot to set the image angle and geometry. It always picks the LAST shot, so I must rename my JPEG conversions 1, 2 and 3 as they appear above.
If your open tabs, or the stacked order of open windows, does not place the target perspective LAST you’ll get the wrong result. Here is what happens if the first shot (the bottom one above) is placed as the first tab in a multi-tab PS window, or the top window in a stack of separate windows, before adding OPEN FILES to the Photomerge window:
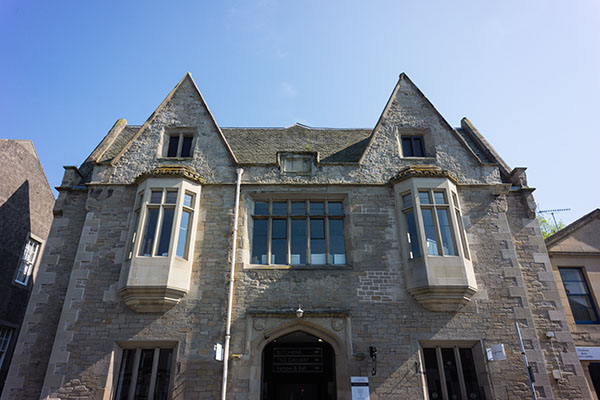
I used the NEX-7 with the 16mm f/2.8 SEL wide angle for these three shots. The composite, before cropping, measures a substantial 130MB. This technique enables you to use almost any wide-angle lens to create impossible wide views.
Here is the result when you stack the shots in the right order, so the program takes its perspective cues from the vertically-correct frame (the last one shown at the top):
You have no manual control over the perspective rendering. It’s all down to feeding Photomerge the right images, in the right order. Here is the fine tuned and cropped result:
This is an unretouched merge of the three frames. I’ve been trying this on various subjects, some rather silly, and Photoshop CS6 simply nails the merging even with focus, exposure or tilted camera errors. There are much lower cost programs which stitch images and do it well, but this takes a matter of a few seconds to create a final image equal to 40 or more megapixels. Not bad for a tiny 16mm lens!
Tip: instead of adding Open Images, browse and add one at a time, making sure the perspective-key shot is the last one added.
If you shoot architectural or landscape images, this function’s enhanced performance allows you to leave behind your 8mm. Except, of course, you don’t have one. If you do have an 8mm, welcome to the world of 5mm…
Added example – the next day…
I returned to the building (the other end of it) the day after posting this article because I wanted to add something far more complex, still shot by hand, using the NEX-7 and 16mm, showing just how amazing Photomerge has become. I wanted foreground and background elements, complex geometry and a matrix of shots not just a row of them.
Here is my matrix of shots – every one of these is an 85° diagonal view, 16mm on APS-C:
Here is the result of the Photomerge window before final adjustment and cropping:
This is a 400MB+ Photoshop document and over 200MB in flattened data size. Below is the final crop, with a small rotation and correction of vertical perspective:

This is a 119MB JPEG 6919 x 6013 pixels in size, no retouching has been used and the raw conversions are default with the 16mm E lens profile. Some fringes remain visible, the image could be downsized and corrected further. Remember.. this is the often-criticised 16mm which I find to be an excellent little lens. You can download the full size sRGB JPEG saved to Level 10 quality (14MB file) from the link below if you are Photoclubalpha subscriber. It will not appear if you are not a subscriber.
[private]
[/private]
– David Kilpatrick


