You can order the A9 here – any of these links to order will help photoclubalpha pay our way.
WEX in the UK (also Calumet)
Amazon (co.uk)

The front view below of the Sony Alpha A9 body, introduced today, gives a subtle clue about changes under the hood. For some time we’ve been nagging Sony about the weak, potentially tilting, 4-screw mount on the mirrorless bodies. Now they have at least added two more screws, to match Fujifilm X or the A-mount, even if the distribution is a bit odd with all the extra strength concentrated at the sides not the top and bottom where heavy lenses normally cause most stress.
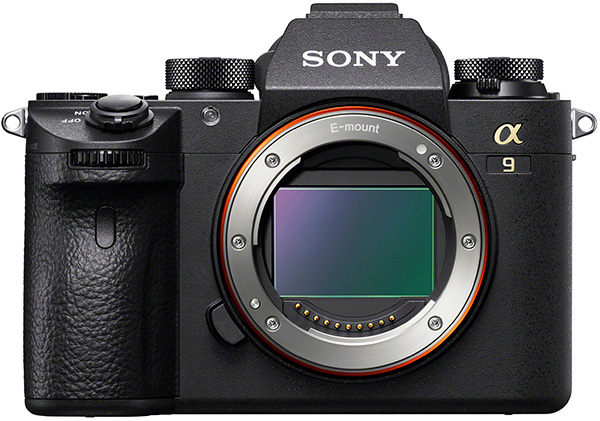
It’s a clue to a different internal construction, probably stronger all round, to make it possible to support the new 100-400mm G Master lens, a native E-mount new design which should come as a relief to those struggling with the A-mount 70-400mm varieties on adaptors:
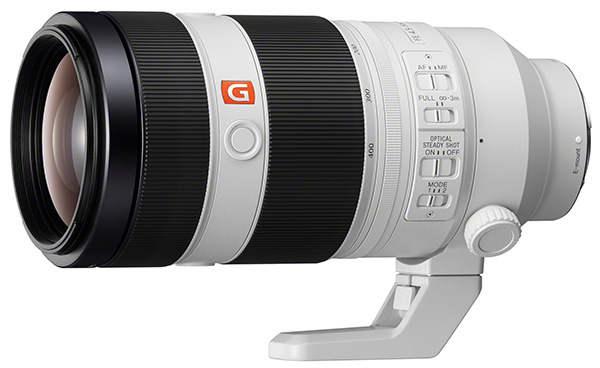
But the lenses still have four-screw mount fitting (as do most A-mount lenses), and fairly weak sacrificial assemblies to prevent damage to the camera if knocked. See this video (it’s a bit long but makes a point): //www.youtube.com/watch?v=qGvlX9BtiTQ
The EVF of the A9 is around twice as bright as the A7RII and also runs at twice the refresh rate, while offering 50% more pixels. Part of this is down to the new stacked-CMOS 24.2 megapixel full frame sensor, which has a readout some twenty times faster than the A7II and previous generation 24 megapixel models. That, of course, is linked to the 6K native live feed from the full frame (used to create very high quality 4K video as well as an excellent live view) which in turn enables a distortion-free purely electronic silent shutter running to 1/32,000s plus 20 frames per second sequence shooting.
AF is claimed to be 25% faster than the A7RII and when the shutter speed is faster than 1/125s there is no visible blackout in the finder when shooting. Personally, a single frame (1/120s or 1/60s) blip would never be unwelcome as it helps tell you when you’ve shot. As for the low-light capability, not too much is being said; it’s in the usual up to 56,200 range with extension of two more stops. (Edit: April 20, we have noticed that at least one ‘reviewer’ – Sony Artisan paid to promote – completely wrongly claims 2,048,000 ISO not the actual 204,800, when comparing the A9 with the Nikon D5’s listed 3,276,800). The high speed sequences, movie frame rate and EVF refresh all tend to limit ultimate low-light clean imaging and we would guess that the A7SII and A7RII will not be made redundant.

That can not be said for the old weeny weedy weaky batteries of the E-mount range. The stripling NP-FW50 used in all the NEX to A7 series models gets kicked aside by a slightly larger variant with 2.2X the capacity. Frankly, it’s overdue but it creates a split system. I’m happy to travel with my A6000, RX10, and A7RII all sharing a pool of batteries even if those do run down alarmingly fast.

If it means carrying a new dual charger too, to get the necessary 2.5 hour recharge time instead of a leisurely overnight in-camera top up, I can only hope the charger (cum mains adaptor with clumsy dummy battery connection) also accepts the older batteries. It’s carrying multiple chargers that increases my travel bag weight not carrying extra batteries.
But… I see that the charger ‘cradle’ can mount four of the new cells, and charge the lot in 480 minutes. This cradle has a dummy battery on a lead, and 1/4″ tripod thread mounting points to add it to a video rig (which this camera is not specially made for, indicating an A9S is on the way with S-Log and direct 4K top quality encoding). The dummy battery then powers the camera for roughly 10X the life of the current A7 series batteries. So what if you have an A7 model? Easy – the outer shell of the battery simply slides off, revealing a SMALLER dummy inside, which fits the entire NEX/A7 mirrorless range or indeed the RX10 series. So your existing Sony mirrorless kit can be powered using this ‘battery bank’.

The top plate reveals that some input has been listen to. As a regular M1-M2-M3 user on my A99, the drop to only two memory registers on the A7RII is unwelcome but survivable. A return to three, plus a a custom button memory recall function, will make the a9 better. Having the drive modes on a physical control is good too. But I’ll leave any verdict on all this until the actual operation is better known – whether, for example, the memory registers now cover more than just the primary camera settings and thus enable one-step tripod setup.

I’ll have to say that after using the Olympus OM-D E-M1 MkII, which offers many of the advantages being claimed by the A9 as major selling points, the non-reversible simple tilt rear screen remains a negative compared to a fully articulated reversible screen. Sony does now offer a real glass protector, but I like the A55 to A99 style screen which can be turned to face the wall permanently if you want (and has never arrived on the E-mount models).
The new joystick controller takes something from the A99/II controls and adds it to the wheel of the A7 series, while the upper thumb button becomes a native back-button AF. In addition to being able to move the focus points faster (it’s a pain with the A7RII design) there is a memory for AF point selection and a horizontal-vertical switch function. Combined with a larger number of AF points covering 93% of the sensor, the action/sports performance of the A9 should be a long way ahead of any earlier mirrorless (though the A6500 is pretty good).

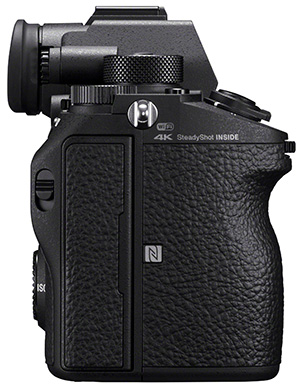
Though not visible here, there are two SDXC (one UHS-II) card slots with the usual recording options similar to the A99/II, and also an Ethernet port which is almost a requirement for some major sports events. You will notice that the Drive control has a Focus control below it, giving direct access to the kind of AF/MF/DMF choices found on the dedicated controller of A-mount bodies – no more need for menu or Function/Custom button operations.
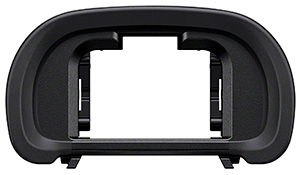
The eyepiece, shown here, may perhaps be a little less prone to detachment and we are promised the least squiffy finder view with new optics.
There is one minor fly in the ointment, a price-tag of £4,500 (UK) body only; the 100-400mm will be £2,500. While the team of assembled ambassadors made much of praising the silent shutter mode and small size of the camera at Sony’s vidcast press conference, none of this is new and pretty much anything the A9 can do is also within the reach of the A7RII and A7SII even if it does it faster and perhaps better. There was some praise for the durability of the system – what? I don’t know about others, but I find the Sony/Zeiss lenses are the worst I’ve ever owned for showing almost immediate signs of wear from the lightest contact with clothing and bags. Silver appears through the molecule-thin black coating instantly and neither the regular lenses nor the bodies have ever struck me as being suitable to knock around in a busy press kit or travel bag. Where old Leicas survived years of abuse elegantly, gradually brassing at the edges, my Sony kit generally just looks a bit scruffy and used despite minimal handling. The A9 looks about the same in this respect as the mark II lesser models.
Full official press information and specifications can be seen here:
And for the lens:
- David Kilpatrick